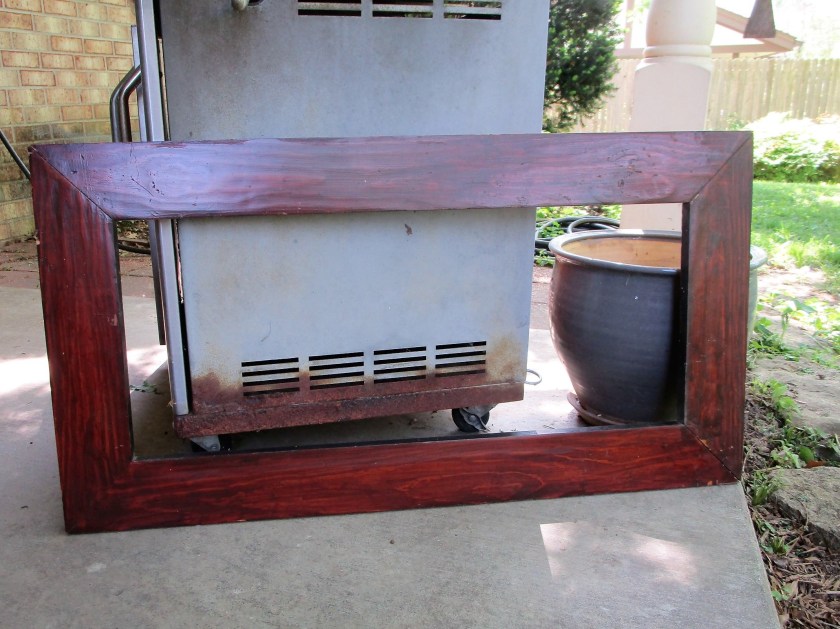
While rooting through the garage this week, I found this frame.
I decided that I could make a decor item for my patio, which also could hold various gardening implements on a row of hooks. But what I really wanted was to fill the opening with an abstract painting of geraniums. Something like this:
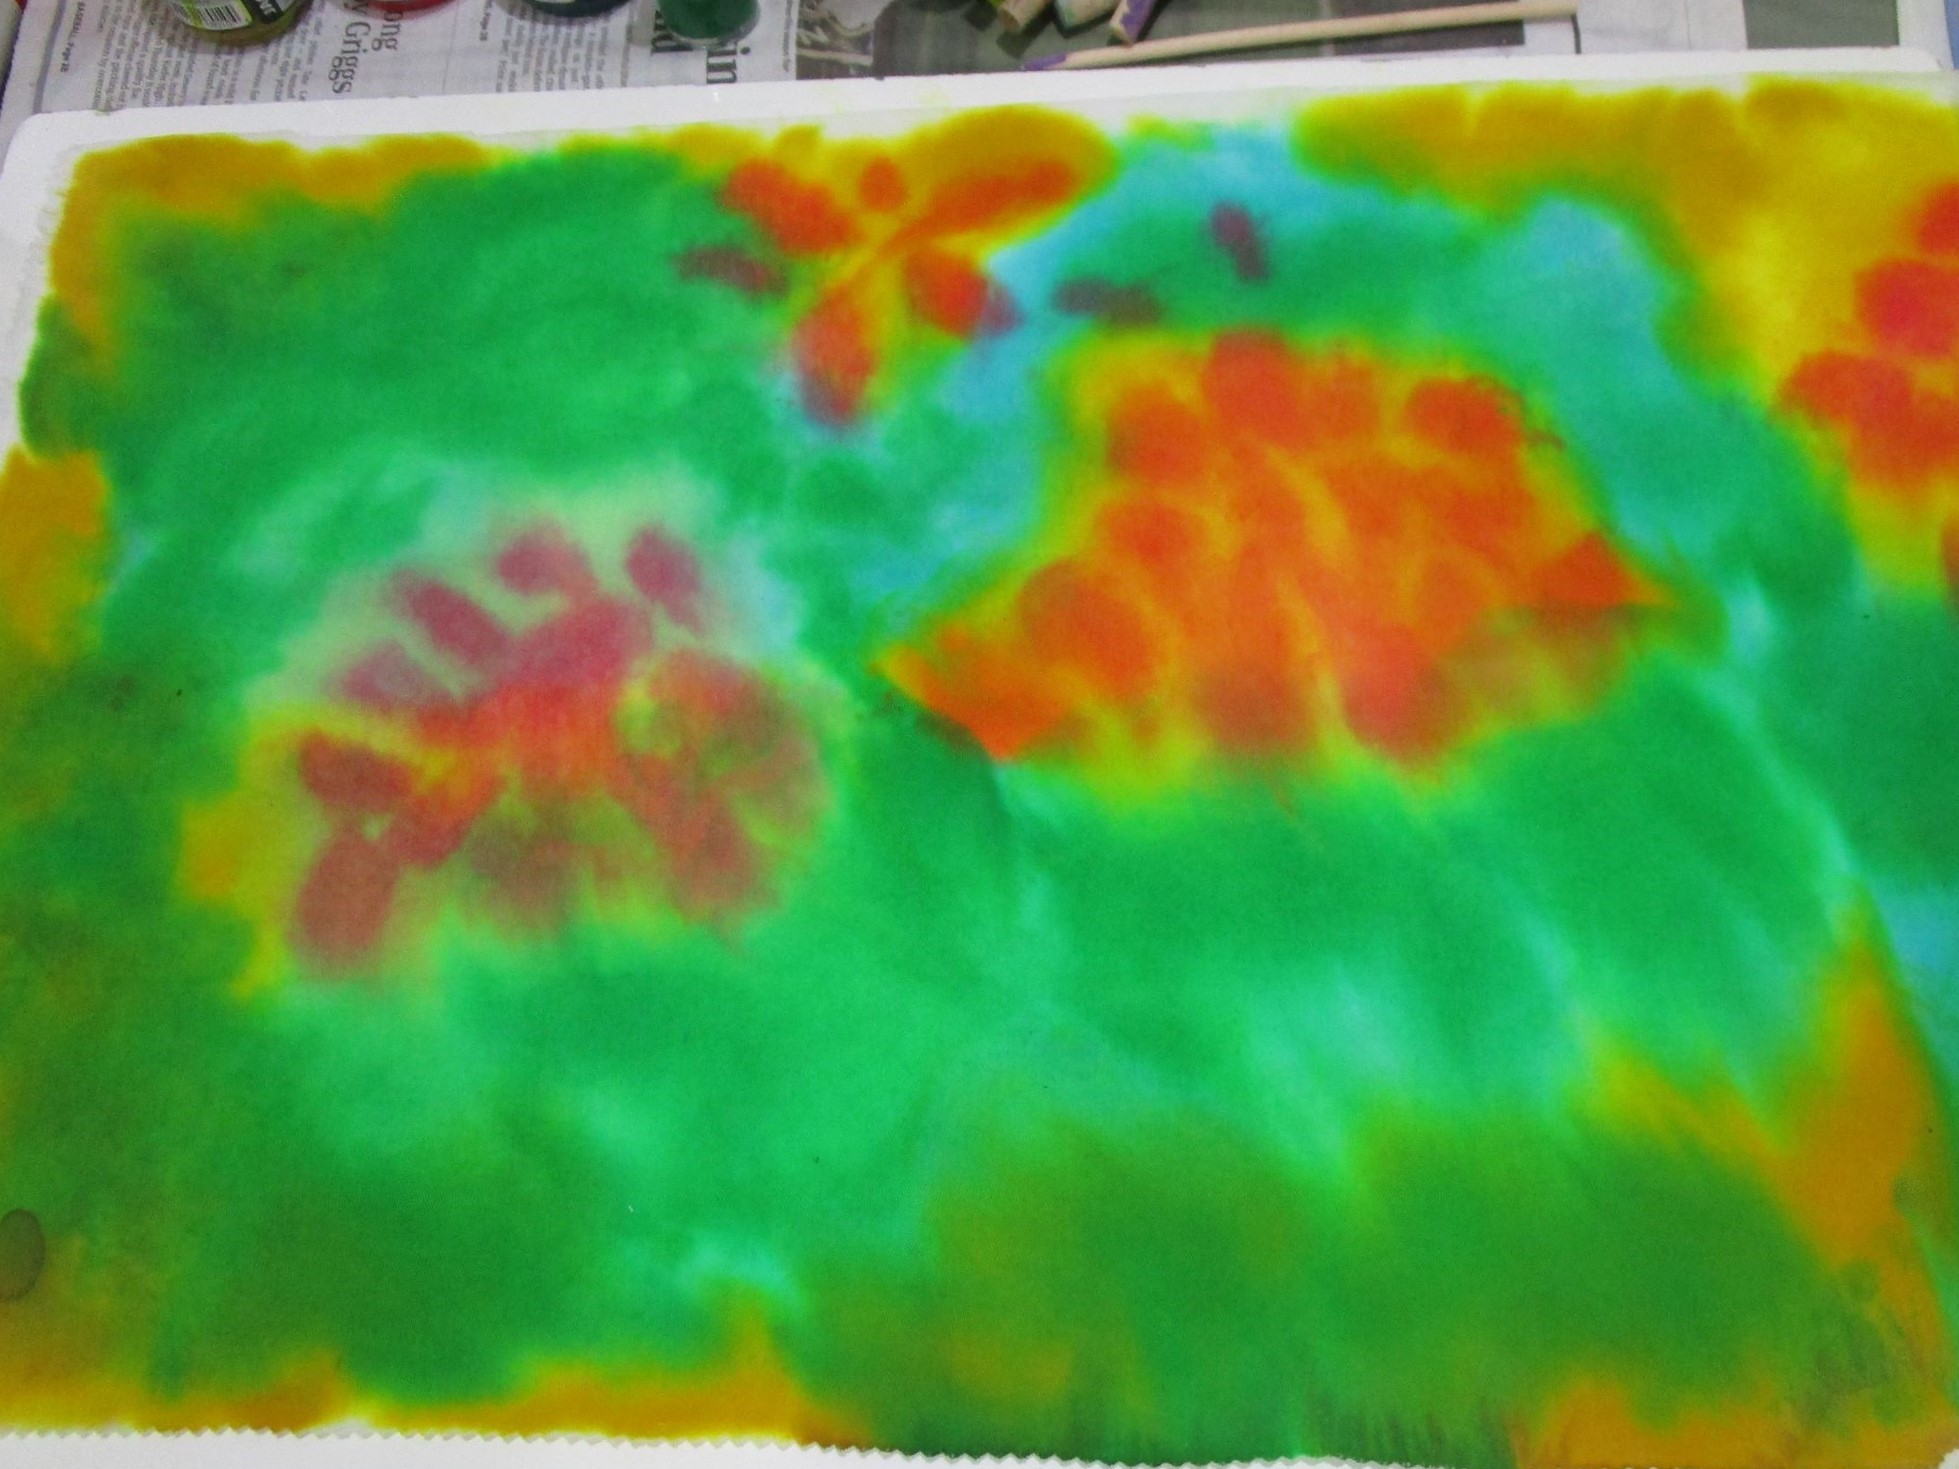
I picked up a remnant of solid white cotton twill. It seemed to be sturdy enough to stand up to outside conditions. After I washed and dried the fabric, I cut a piece approximately 3 inches wider and longer than the frame opening. Now the fun starts.
My fabric paint choices included green, emerald, red, and yellow. I mixed some violet into the yellow to make a gold color. After about twenty minutes of messing around I had a nice background painted.
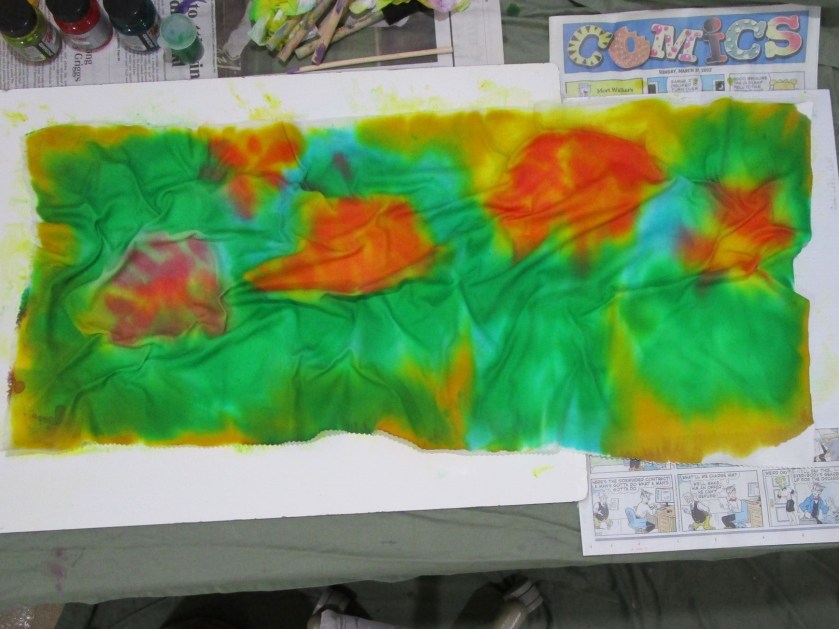
To give a little variety to the patches of color, I scrunched up the fabric.
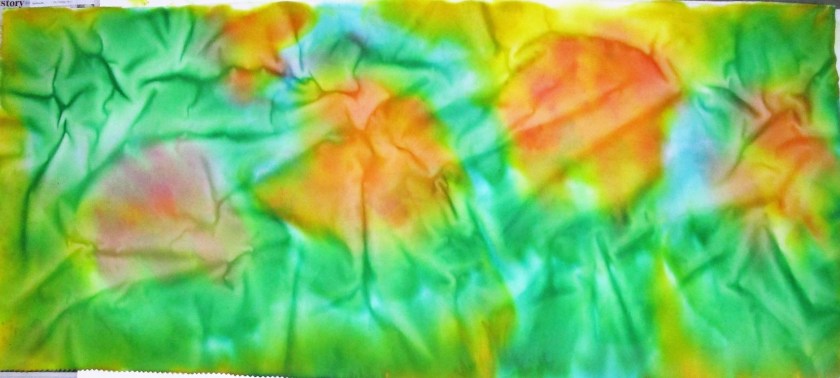
And here is my panel, fully dry and ready for further paint layers.
I’m excited by this result, and keen to work on this fiber object some more.
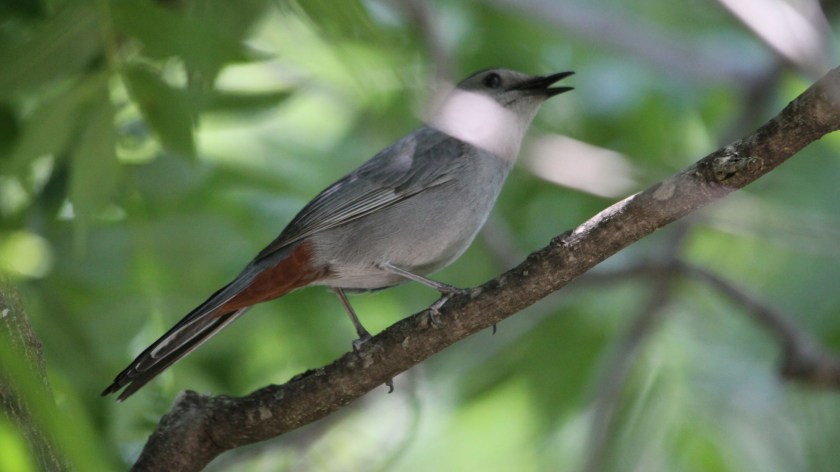
In his Guide to Birds, David Sibley describes the gray catbird’s song thusly:
” …a rambling, halting warble with slow tempo…low hoarse notes with high sharp chips and squeaks interspersed….little repetition and little mimicry.”
…..which is, while accurate, a rather dry and technical explanation for what I heard that day:
Catbird Sings
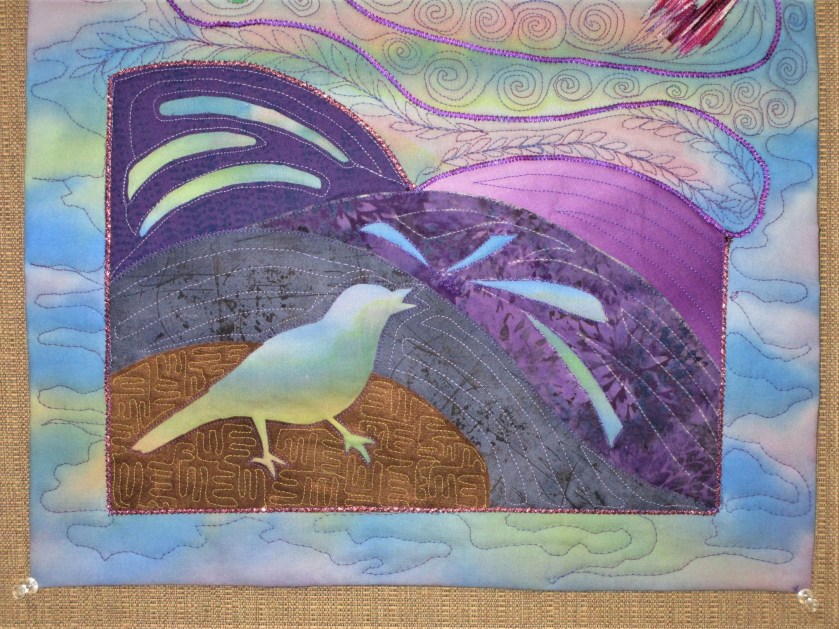
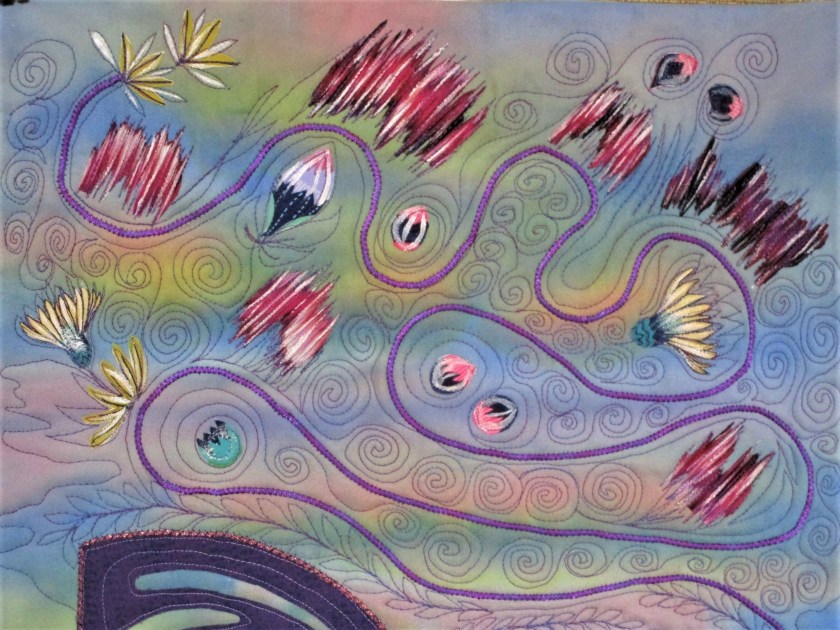
In my final arrangement of this fiber object, I ditched the blue fabric which I was going to use as a framework for the “notes and chips.” Instead, I let the purple satin cord act as a highway for the eye to travel to each vocal outburst. I also unified the color of the lower section by overpainting the batik print using violet.
Close up of bird hidden in purple shrubbery
The free motion stitching wasn’t overly planned. I mostly just followed the clues given by the appliques and the color changes in the background.
Upper section finished with closely spaced stitching and pearlescent paint
I hope you enjoy “seeing” this catbird’s song, as much as I enjoyed listening to it.
The idea for this fiber object came to me one morning while porch-sitting with a book. It was a gorgeous day, but I was poring intently, with all my focus, on the book in hand. Surprisingly, I no longer remember what I was reading. The probable cause of this memory lapse was the very thing that intruded upon my thoughts. A catbird had begun an insistent and virtuosic song. The sound tore my mind from my book and into the present moment. Looking about, I failed to spot him. So instead of continuing to search with my eyes, I closed them and sat back in my chair.
Pretending that I possessed synesthesia, I imagined what that birdsong might look like, if it were visible. There were deep chortles and murmurs, but also squeaks, shrieks and ascending melodies. It went on and on. And on. Eventually the catbird flew off.
Here’s what I wrote in my journal: “Sky-inspired painted background. Reverse applique to suggest an unseen bird. Throaty -chortling purples, warm tones high pitch trills – bright white squeaks. dashed gestural lines to suggest direction of pitch. Parallel wavy lines for a musical staff.”
All very poetic. But I want to make a piece of visual art, and as such it must have form.
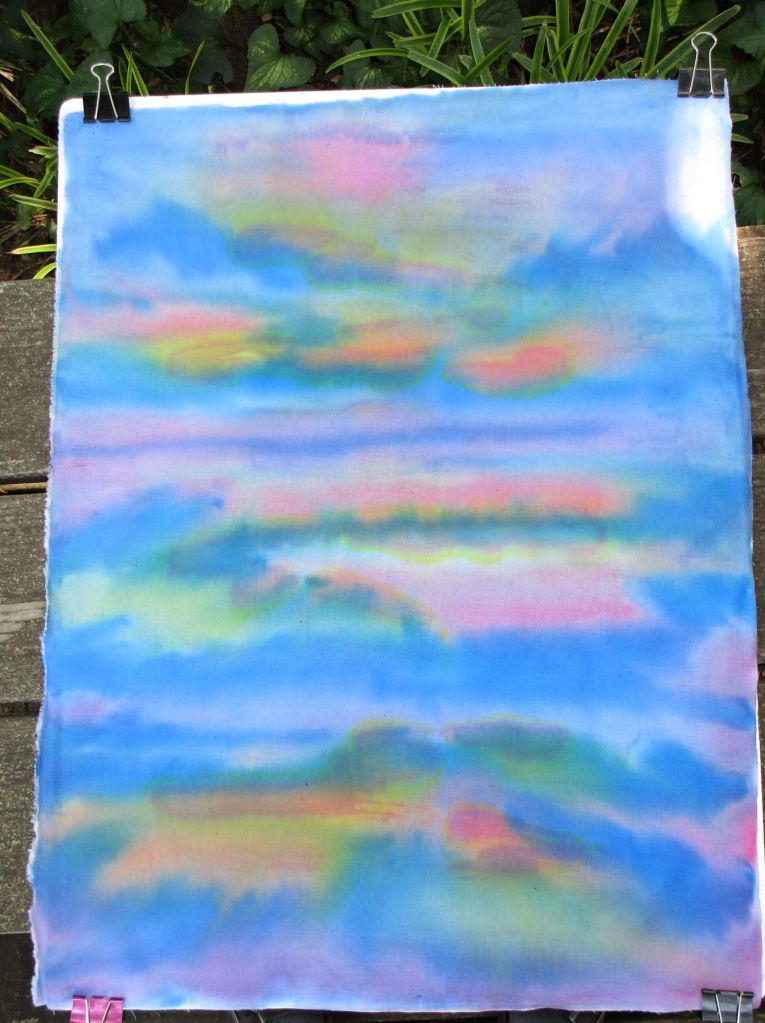
This week I got underway. Since my fabric paints were out, I started with the background. On a piece of white quilting cotton I stroked colors that I thought would make a good sky at daybreak – pale blue, violet, peach and gold. I achieved this rather startling canvas:
Paint is still wet here
What sort of a sky has leaf and dark green in it? None I’d ever seen. I was prepared to set it aside and start again. But on second thought, I chose to continue with this background. The unconventional sky colors can represent the effect of birdsong on the air. Here is my bright background after it dried.
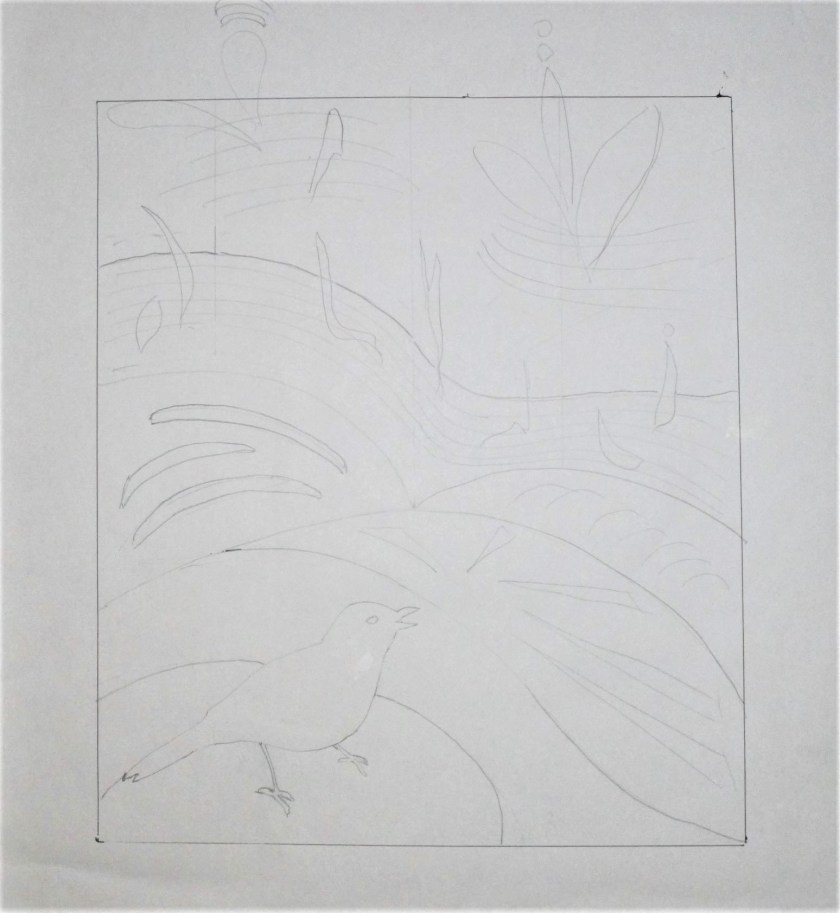
Next comes the sketch. I put the catbird’s silhouette in the lower left.
Now the hard part. Searching my fabrics for the colors mentioned in the journal, I found some purples and some brassy bright scraps. Also a few interesting prints. Most of yesterday was occupied with choosing, cutting and attaching fusible to the back of my chosen fabrics. Here is what this applique quilt looked like at the end of the day.
“Catbird Sings” stage oneClose up
While I am keen to get on with this work, I need some supplies. So I will have to pause pending a visit to the craft store.
While perusing Bethan Ash’s book on quilt collages, I suddenly realized something.
I have been experimenting with fabric paint on quilt cotton for the past two years. And yet I have never used the most basic of all paint techniques: Spatter!
I decided to remedy that omission today. First, I went to my fabric stash and picked up some muslin.
This most basic of all fabrics is lightweight and inexpensive. I cut a width of fabric piece, dividing into three rectangles to match the size of my work surface.
I decided on three color schemes: primary colors, secondary colors and artist’s choice option. For my spatter tools, I chose a 2 inch brush, 1 inch foam brushes and a toothbrush.
After pressing the muslin, I laid the first piece on my white board. Then I spritzed it lightly with water. Working from lightest to darkest shade, I dipped the brush into the paint and then shook, jiggled, and tapped it over the muslin until the drops reached all areas of the fabric.
Yellow, Red and Blue
Since it was a sunny day, I took the first one outside so it could dry quickly right on the board. Once dried, I moved on to the secondary colors.
Orange, Green, Violet
This is a very pretty combination.
For my last combination of colors, I chose magenta as the first color. I had purchased this paint recently and hadn’t even opened the jar. To accompany the magenta, I mixed the left-over violet with the left-over blue to get a cool purple. The third color will be black.
I like this sample the best.
You may be wondering how I plan to used these samples. Well…….I’m not exactly sure. But since I am pondering improvisational collage quilts today, odds are good that they will get fusible adhesive attached to them and cut up into smallish pieces.
In this post I am following up on the next steps for Spring Green.
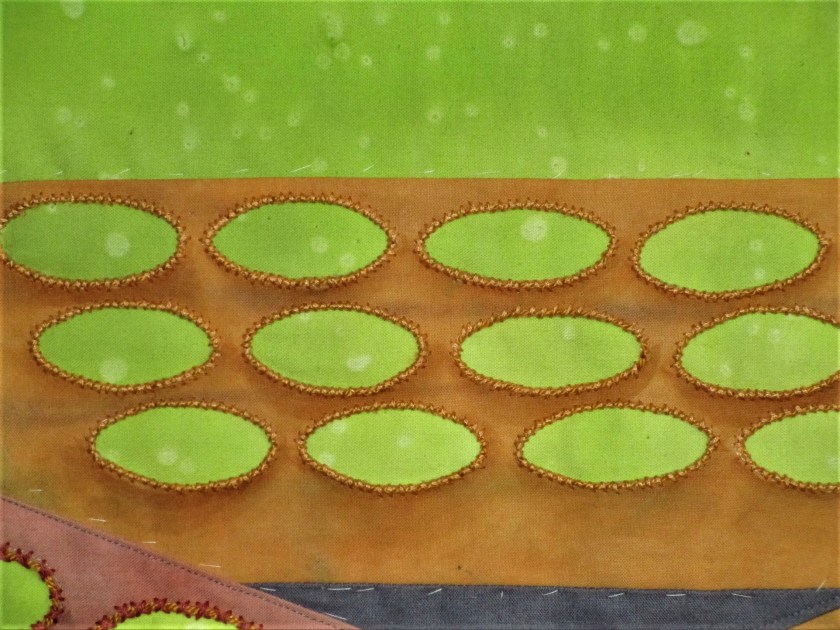
Here is how the foreground looked after I finished piecing it.
With textile paint, I created shadows and deepened existing shadows.
It’s finally time to begin sewing. To start with, I added a layer of batting. So that the batting doesn’t shift, I hand-basted the two layers together, adding a few safety pins for good measure. Next came the embroidery. Using cotton twist and cotton floss, I outlined the rims of the pots with couching.
The two groups of pots nearest to the viewer got two strands of gold cotton twist couched with four strands of embroidery floss in a cross-stitch pattern. I matched the floss color to the fabric color.
For the flat of pots further from the viewer, I couched only one strand of cord, using three strands of floss and the whip stitch. This will create a bit of perspective.
I’m loving the texture that the thick stitches create. Now that I have finished couching, I will add the backing.
After that, I will throw on a bit of machine quilting, just to anchor the edges and define further the parts of the image. It will give me more time to consider exactly what I will do next.