Posted in collage, quilting

Wednesday WIP – Art Quilt

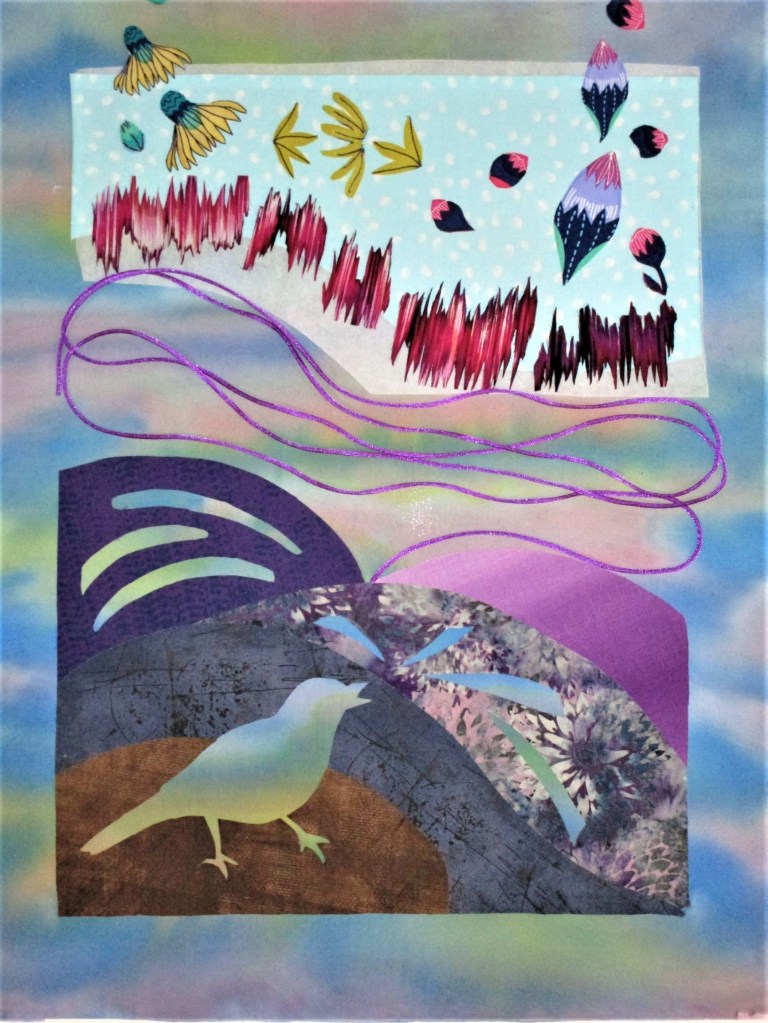
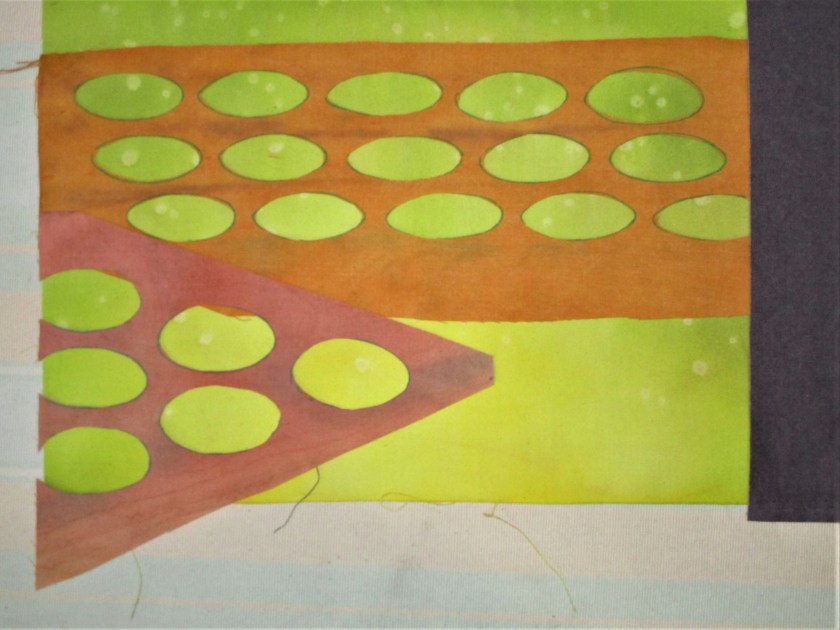
Yesterday I spent some time working through the design and material choices still facing me with regard to “Catbird Sings.” I settled on the arrangement for the lower half of the work, tacking it into place. The violet satin cord will serve as a transition device linking the lower to the upper half of the piece.

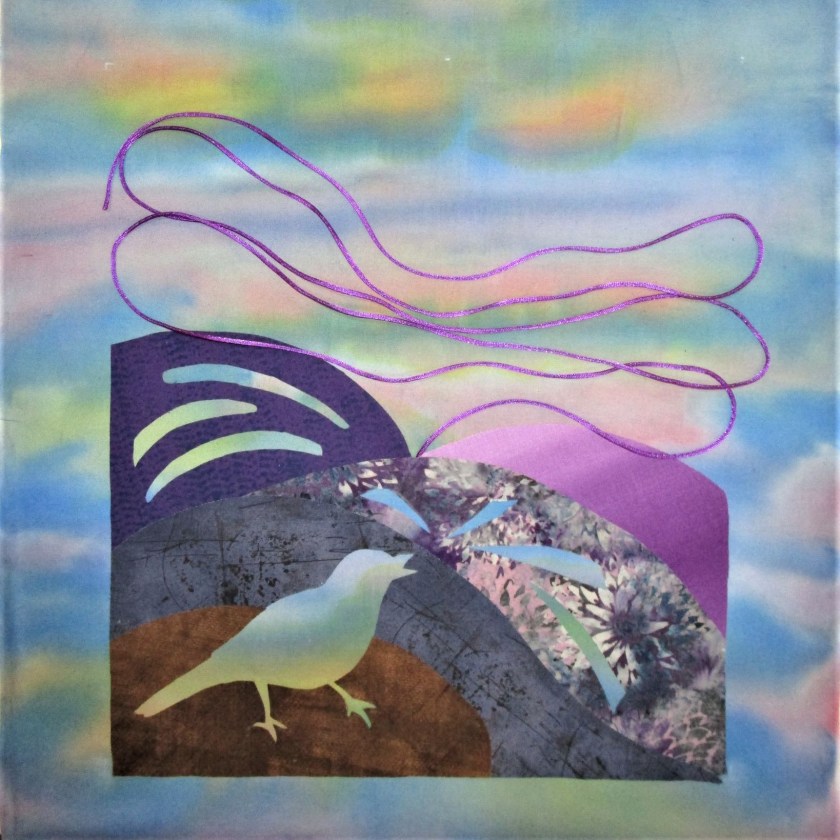
It will be couched into place when I start sewing. Next I chose and cut out various bits and bobs from two printed fabrics to represent his varied “cat calls”.

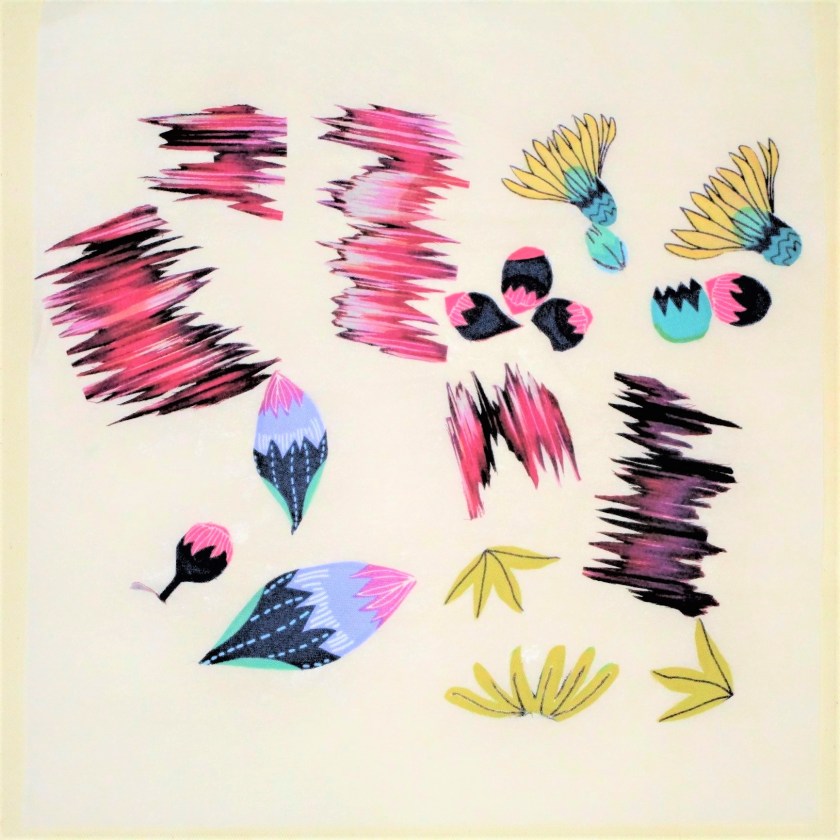
The colors all link well to the palette chosen. The wavy lines will represent the loud squawks. Before proceeding to the next steps, I treated all the edges with Fraycheck.

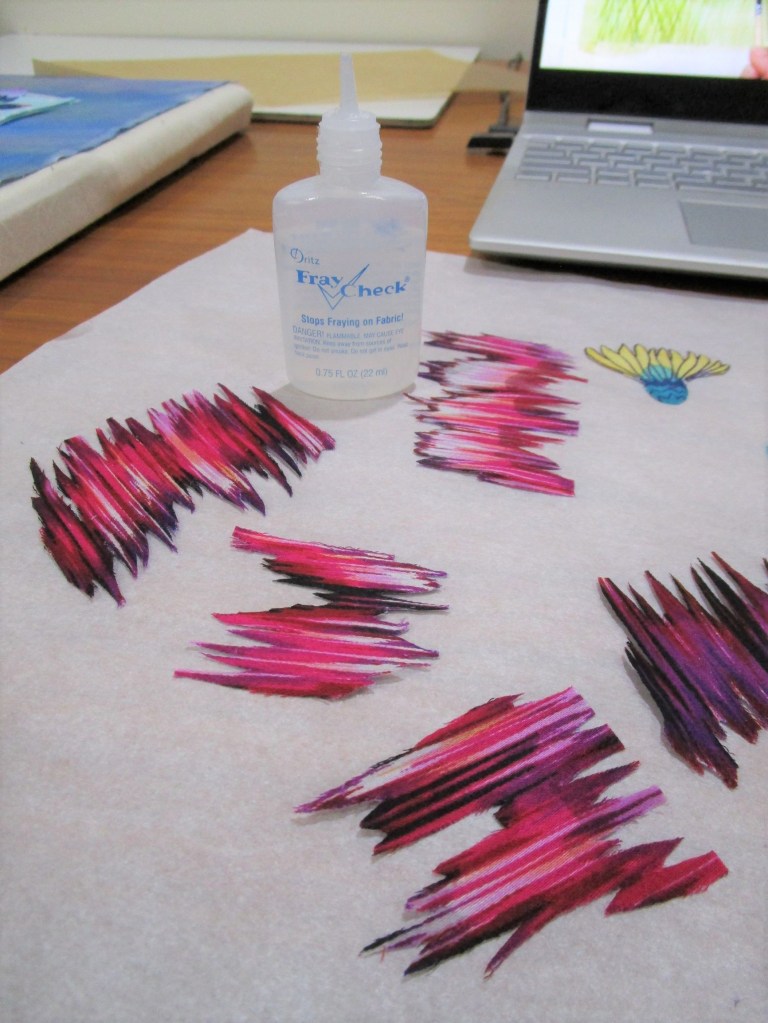
Those wavy pieces in particular will shred massively if not treated.

I was ready to test some layouts for the upper half:

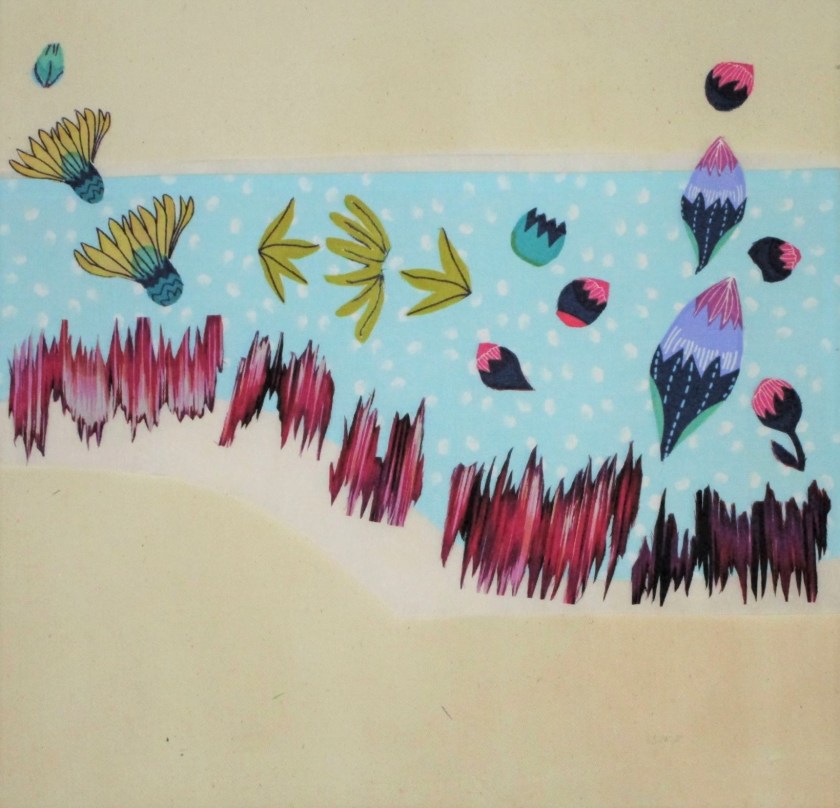
I like this grouping. But do I use the daisies with petal sides up……..

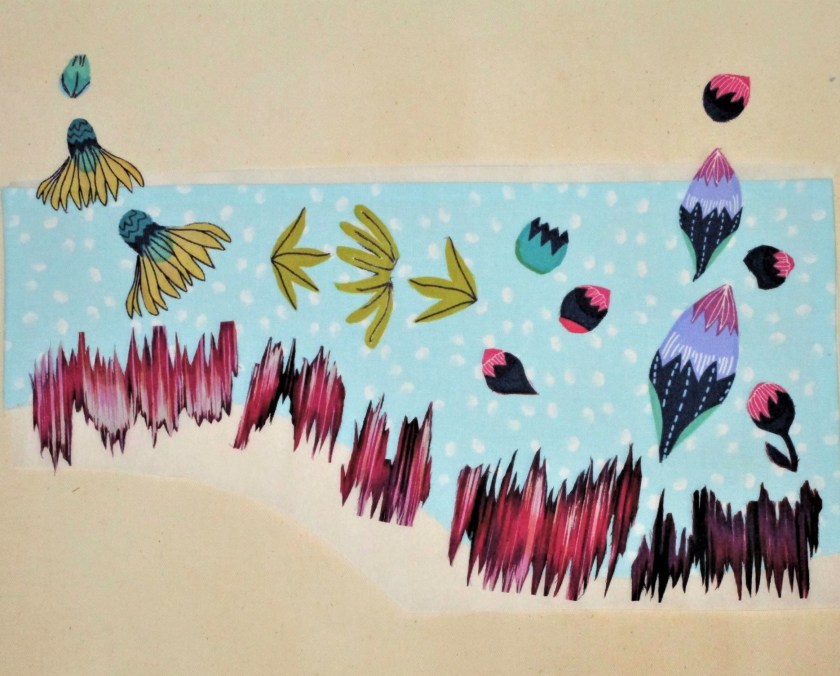
….or petal-side down. Hmmmmmmm….. I like the line created by the upside daisies.

TENTATIVE FINAL ARRANGEMENT

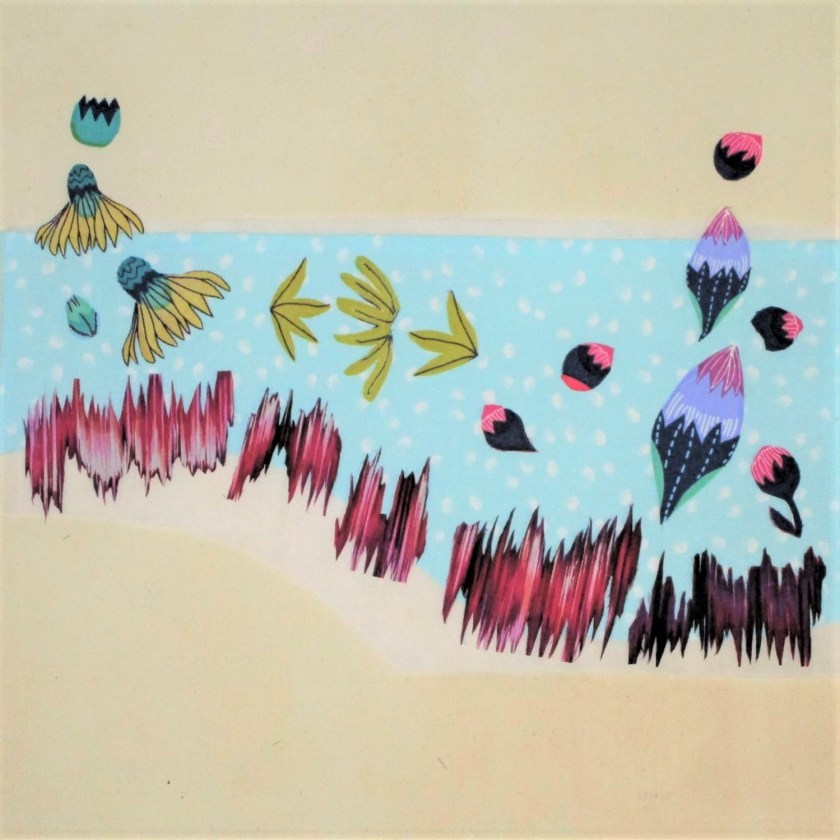
And here is how I left the work. Before I finalize, I will need to decide on how I will quilt all of the different sections. It won’t do to fall in love with a layout and then struggle to quilt around it.

I’ll sleep on it and see how I feel the next day.

Posted in hand embroidery

Shadow and Texture

In this post I am following up on the next steps for Spring Green.

Here is how the foreground looked after I finished piecing it.

With textile paint, I created shadows and deepened existing shadows.

It’s finally time to begin sewing. To start with, I added a layer of batting. So that the batting doesn’t shift, I hand-basted the two layers together, adding a few safety pins for good measure. Next came the embroidery. Using cotton twist and cotton floss, I outlined the rims of the pots with couching.

The two groups of pots nearest to the viewer got two strands of gold cotton twist couched with four strands of embroidery floss in a cross-stitch pattern. I matched the floss color to the fabric color.

For the flat of pots further from the viewer, I couched only one strand of cord, using three strands of floss and the whip stitch. This will create a bit of perspective.

I’m loving the texture that the thick stitches create. Now that I have finished couching, I will add the backing.

After that, I will throw on a bit of machine quilting, just to anchor the edges and define further the parts of the image. It will give me more time to consider exactly what I will do next.

Posted in hand embroidery

Randomly Practicing Stitches

I am in the process of working out what stitches in which colors will be embroidered on to my Spring Green project. The wacky sampler you see above resulted from my random practice.

Just in case you are curious, here are the names of the stitches.

Clockwise from upper right:

Fly stitch worked in columns, Detached chain stitch, French knot on stalks (yellow flower.) I have no idea what the top left stitch is.

The goofy face on the left: running stitch (black) couch stitch (green yarn) woven back stitch (mouth)

The seedling: Stem is stem stitch, leaves are satin stitch tied with back stitch.

Black line is coral stitch. The seedling is growing from a pot outlined in couched yarn and cross stitched. The leaves are chain stitches and stem stitch. I used paint and fabric marker to add the color.

I think that’s enough for now. Time to get dinner.

Posted in painting, quilting

Spring Green Progress

This past week I spent a good amount of time on this project. Since the background fabric is complete, I focused on the subject and the foreground. On Wednesday, I got out my fabric paints and created some terracotta and dark neutral colored swatches.

While the fabric was drying, I finalized the design layout. Because the foreground was the interior of a building, I decided to use the piecing instead of applique technique. The stitch lines would be straight and follow the lines of the greenhouse interior. Here is the full-scale drawing that I used to make the pattern pieces.

Next I traced each of the lettered sections, cut the traced images apart, pinned them to the fabric and cut each piece.

Following my decision to use a reverse-applique technique to replicate the little seed pots, I had made a template with elliptical shapes. I now traced these shapes onto the corresponding fabric pieces.

One of three sections that have seed pots.
Ellipses are cut out
Laying the cut-outs over the background fabric to check placement

Everything looked like it would fit. Starting with piece A, I sewed the pieces to each other in alphabetical order and stitched the resulting block to the background fabric.

Completed piecing.

My vision is that the bright green color glowing up from each seed pot symbolizes the energy released by the seed as it germinates. You know what I mean – like the way superheroes are drawn.

Here is an image of the project as it stands now.

I awoke several times during the night to ideas about the next step swirling around. I had so many of them! When I awoke early this morning, I could recall only a few. Too bad. I guess I could force myself to get out of bed when this happens, track down my notebook and write those ideas down. But I digress.

The next steps involve adding some final touches of paint, stitching down the raw edges of the ellipses and making the quilt sandwich.

I will also practice drawing and stitching the seedlings before working them on the real thing.

Posted in colorwork, painting

Spring Green

I like Spring. I like just about everything about Spring. It’s the time of year when we can sleep with windows open, the days are getting longer and warmer. The earth’s growing things burst forth with an abundance of new growth. Most of that growth starts out in a yellow-green color that I call Spring Green.

Photo by Pixabay on Pexels.com

This luscious shade can be painted with a mixture of lemon yellow and cool blue pigments.

Last spring, I was inspired by a post on Kate Davies’ blog showing a view from her garden shed. The weather was wet. There were big raindrops dripping down the glass. While the view itself was out of focus, it was radiantly colored – mainly in spring green.

It was so inspiring that I tried to capture the color sequence on a piece of cotton with fabric paint.

I think I was successful. After I painted it, the piece languished on my design wall for a year. I was busy with other projects that had overtaken my attention. But with the coming of spring I feel inspired to return to the subject. The painted cloth will become the background of the art quilt. For the foreground, I will focus on seedlings.

Photo by Akil Mazumder on Pexels.com

This quilt will challenge my technical abilities as I intend to hand embroider the plantlets using wool yarn and/or cotton floss.

Slow Work is in my future.