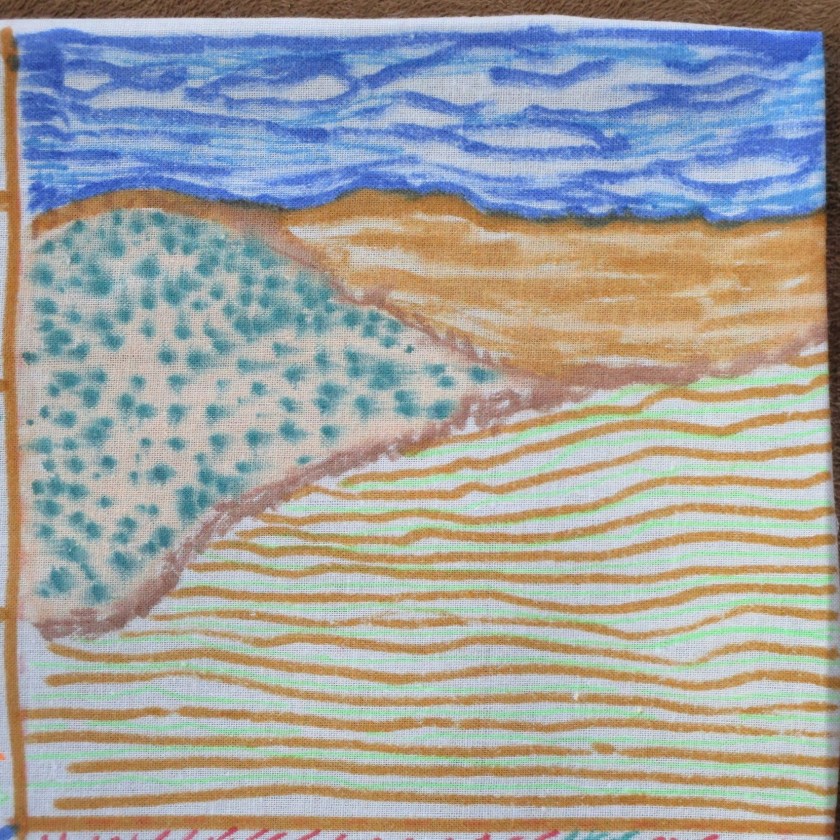
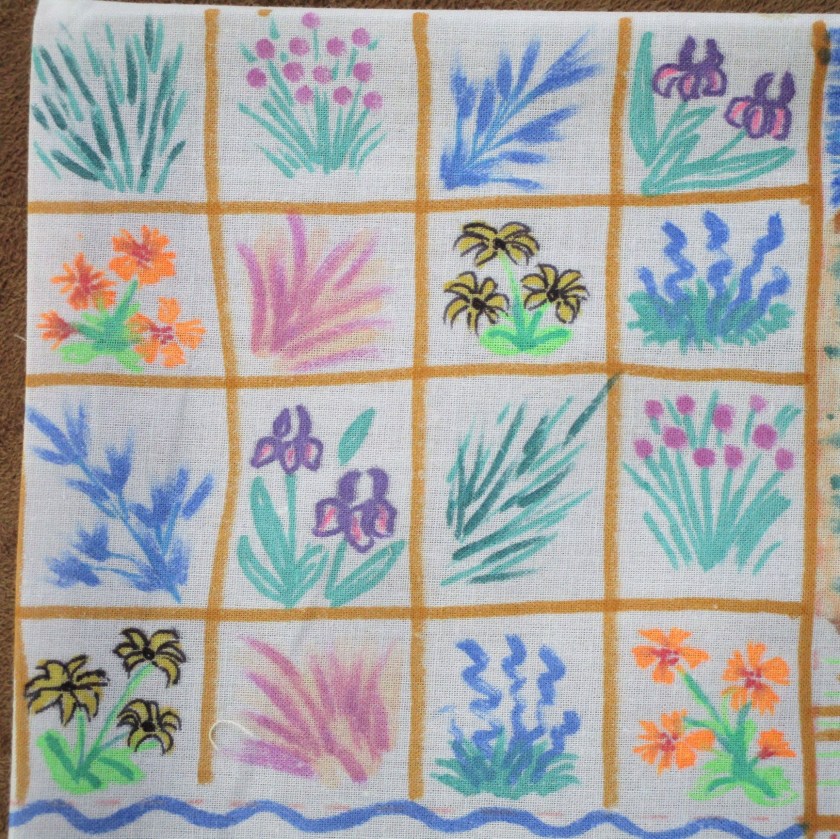
For no apparent reason, I woke up this morning with the urge to doodle. Well, really, I was thinking about a project to offer my young fiber artists. The older group is working hard on their mini string quilts. But the five to eight year old students aren’t ready, skill-wise for such a complex task. In the spirit of quilt-making, I decided to let them design 4-square blocks using fabric markers. Hence the desire to try it out for myself. I started by cutting a 9 by 9 inch square of muslin, then ironed in creases to divide the block into four 4-inch squares (plus seam allowance.) So here I am, staring at a blank canvas. I found the experience slightly unnerving. Ultimately, I let the sights of nature in spring-time inspire my doodles.
Here is what I came up with.
Tall Grass Prairie in SpringPostage-stamp FlowersStrawberry FieldsCold Water Game Fish
I have to admit that sharing these drawings is not easy for me. I am still such a novice at it. But I’m told that to improve drawing skills one must practice daily. I struggled with the markers bleeding a bit. The fish were the most fun to draw.
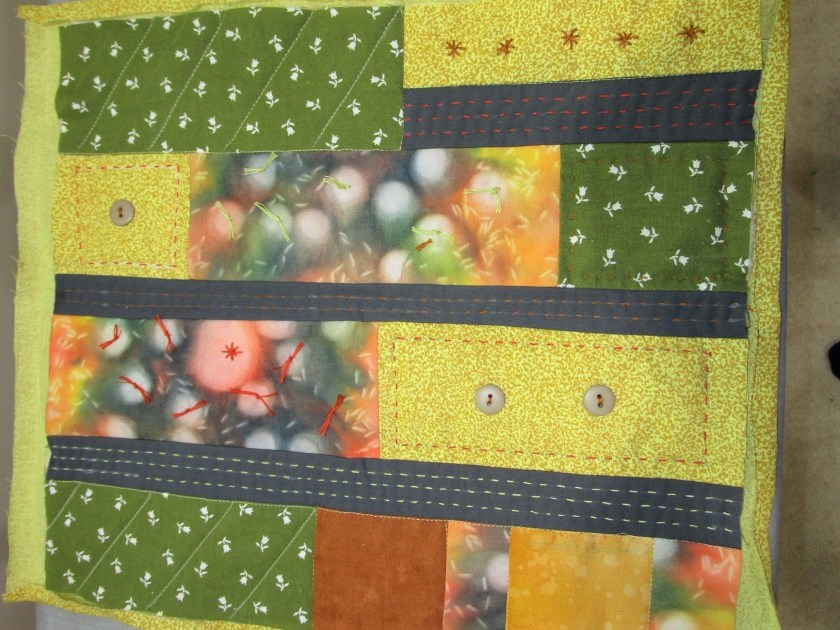
After five days of baby care and two days of travel, I have insufficient creative energy to start something new. So it’s a good time to finish up the works in progress. Primarily on my mind is the string quilts that my students are working on. It is my practice to have a good example of a finished work for my students, both to inspire and instruct. As I previously posted, I had finished the top. Today I completed the backing, quilting and binding of this sample. Here is the piece squared-off with the backing fitted and pressed. This piece will be self-bound by folding over the backing.
Wonky perspective is due to my odd camera angle.
I decided to use as many different (beginner) quilting techniques as possible, so that the students could see the possibilities. The image below shows the piece after quilting is done. I used hand quilting and some machine quilting.
Quilting techniques include knot-quilting, buttons, running stitch, and contour quilting by hand; and stitch-in-the-ditch and parallel lines by machine. And here is the finished sampler with binding blind-stitched. I used folded corners, since I consider mitered corners to be a more advanced technique.
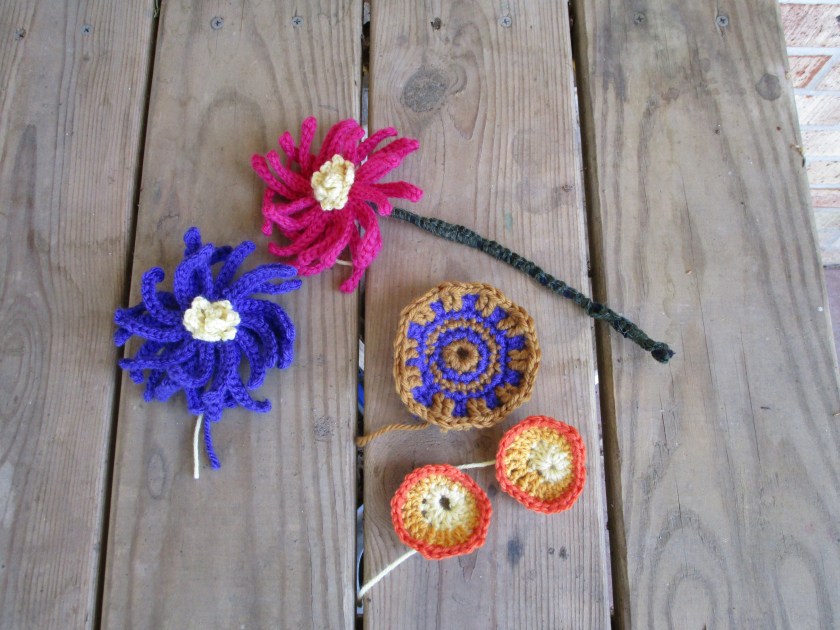
Okay, it’s time for me to admit the obvious. I really can’t complete a fiber object each and every day. That isn’t to say I don’t work with fiber every day. That part is true. The issue is finishing, photographing, writing and posting daily. So far, not possible. So here is a little taste of the crocheted posies I have been working on, and a brief anecdote from my fiber arts students today.
As you, my dear readers may recall, today the fiber kids were beginning to make string-pieced quilt tops. It is a stretch goal, but the students got busy, working away. Sometimes one of them sewed a seam backward or cut the fabric too short. I wanted to reassure them that mistakes were okay, just part of the learning process. I said, “Remember, we are experimenting. You know about scientists, and how they often perform experiments. What do you think they do when an experiment doesn’t work out right?” One of the boys said, ” Things get blown up?” A girl student said, “You are such a boy!” Fortunately for us, none of the quilt tops detonated.
Be back tomorrow with the latest in fiber. – Laura Kate
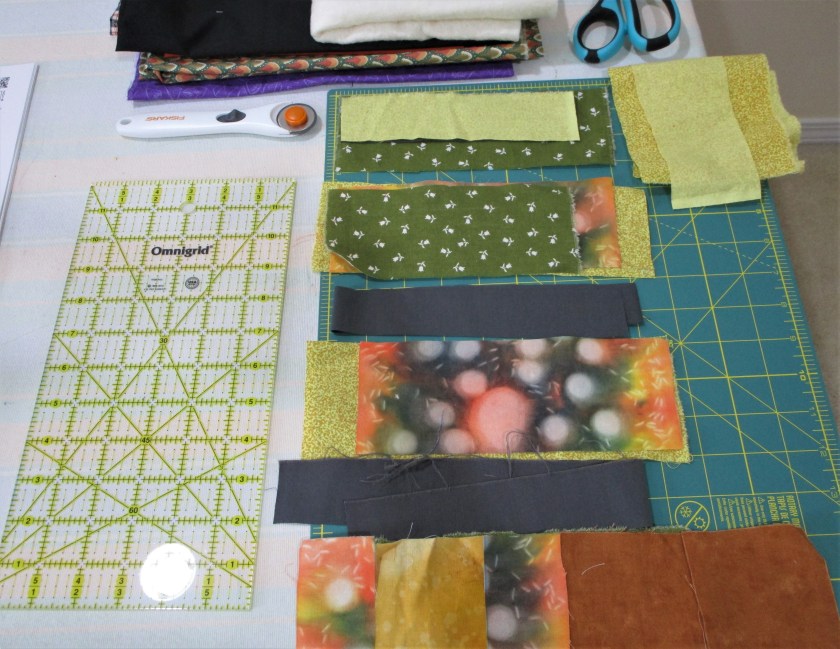
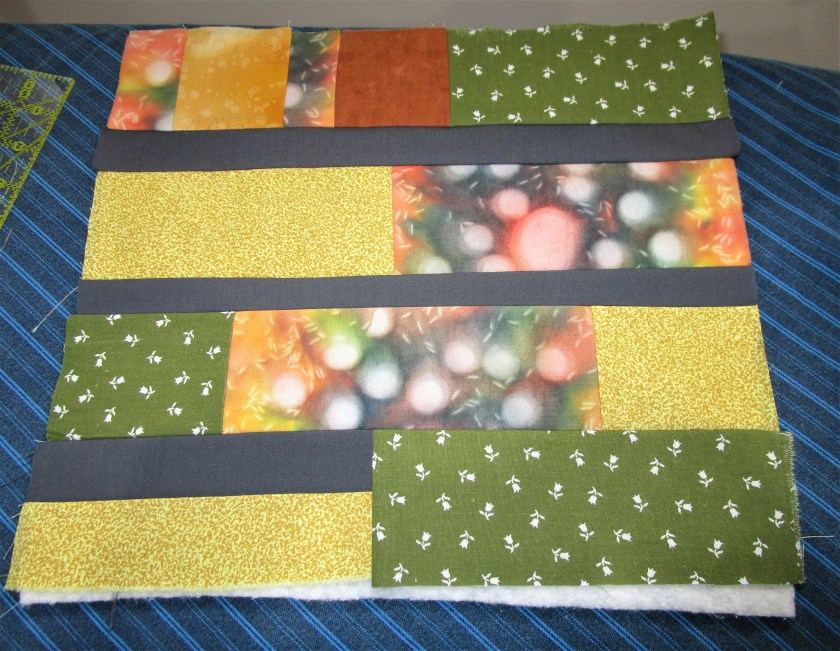
I’m teaching myself to quilt, so that I can teach my older fiber arts students to quilt. So there is some time pressure here. While perusing The Encyclopedia of Quilting Techniques by Katharine Guerrier, I learned that the string quilt is one of the simplest of techniques. So that is what I shall make today. This method was developed to use up long strips of fabric, such as leftovers from dressmaking, and pieces of worn-out clothing and blankets. The sample I am making uses 3 inch wide strips cut or sew together from fabric fragments in order to span the width of the piece. I’m excited to be using one of the heliographed fabrics from Monday’s work.
Here are my selected fabrics. There are six strips in total, four at 3 inches wide and two at 1/12 inches wide. My color scheme comes from the marble and rice swatch in orange.
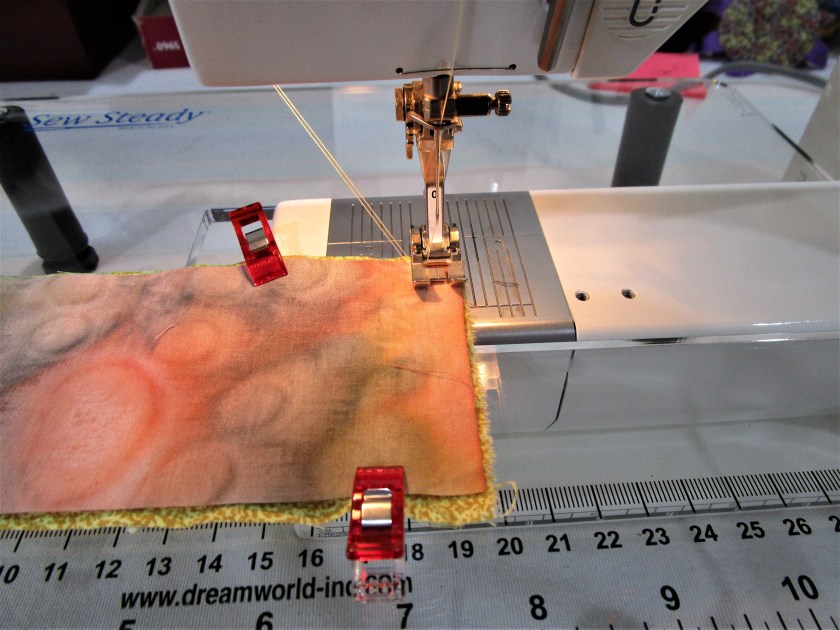
First I sewed the shorter pieces into the length of strips that I need. (14 in.)
Here’s the heliographed fabric under the needle. Notice the cute red clips I just purchased. They hold the fabric while you sew it, in place of pins. Fantastic! I highly recommend.
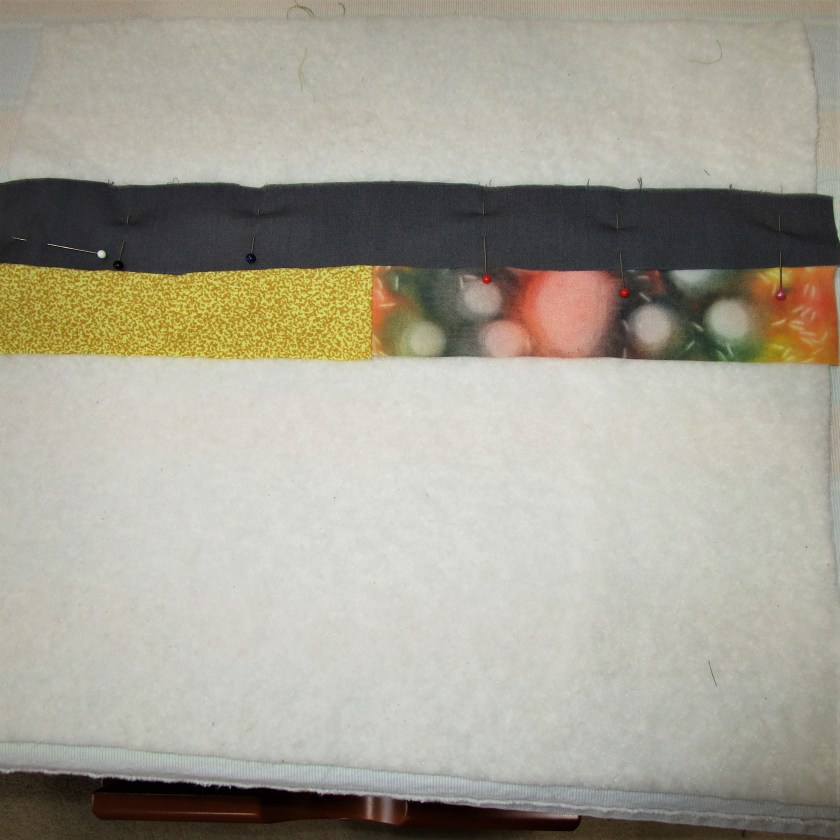
Next I position two strips, right sides together onto the upper half of the batting, and sew in place. The seam allowance is finger-pressed to one side.
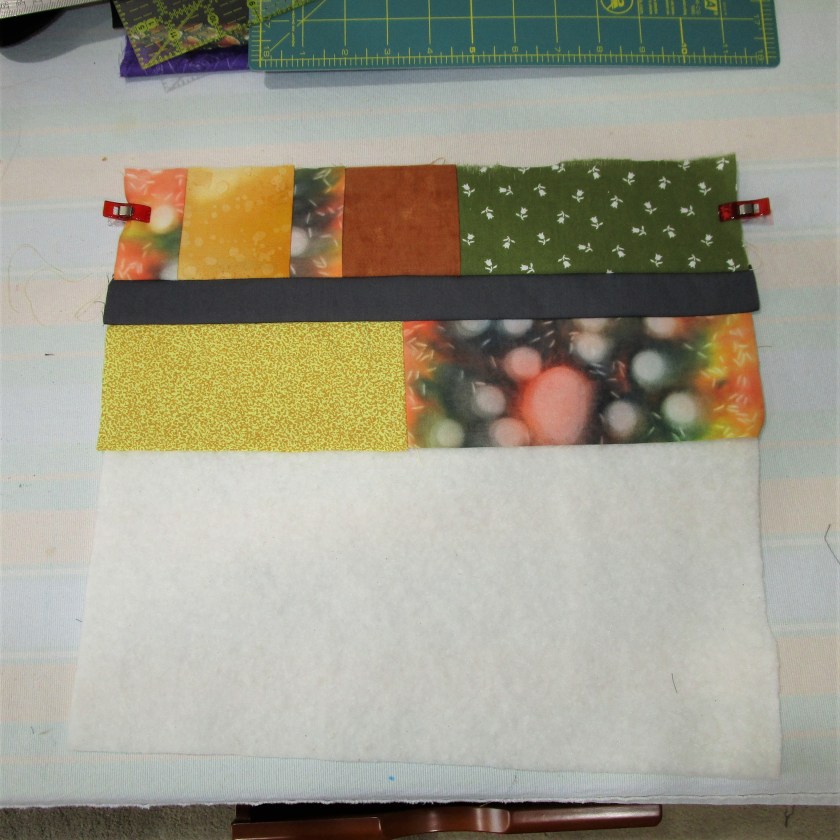
Ready to sew.The top half is sewn into place. Uh oh it appears that my batting base is now uneven. I will persevere and hope that it gets sorted out in the end.Here is the completed quilt top. I will have to square-up the edges with scissors.
I’m liking what I see. Once I got into the flow, the sewing was easy and fun. I hope that this piece will inspire my students. Next week I will add the backing fabric, top stitch the quilt and sew up the edges.
Ah, Freedom! Something we long for when pressed with daily obligations. Something we were promised by our founding fathers, along with life, liberty and the pursuit of happiness. But when is freedom not really that great? I’ve discovered in life that a complete lack of restrictions often leads to mental paralysis. If I have unlimited choices, how do I decide what to do? Which way to go?
Okay, enough philosophy. We’re talking free motion quilting today. In this technique, the machine is set up so that all motion is created by the operator. Forward, backward, sidewise, whatever. Even though I have done almost no quilting before, given an opportunity to quilt, I choose the free motion type.
So my experiment today starts with a piece of fabric which was a previous experiment in color:
This was colored by layers of stamping. The dots were created with bubble wrap. The shell motif was printed with a stamp I made. Lines were added with fabric pens. Today I want to quilt on it. My plan is to sew curvy lines around the groups of motifs, then add a center dot in each group of shells. Finally, I will stitch down the ivy stem.
The first step is to make a sandwich, which includes a muslin base, fiber batting middle and the pattern fabric on top. The sandwich is basted with safety pins.
Next is to set up the machine. Sorry, no photo of this. The steps are to attach a little circular embroidery foot and lower the feed dogs. For those who don’t sew, feed dogs are the two serrated plates underneath that move the fabric through the machine. Now I’m getting a little nervous. Better do some practicing:
A little wobbly. This is much trickier than I expected it to be.
Taking a deep breath, here I go.
This isn’t a totally bad result. I liked making the little spirals, and they turned out good. The lessons I learned are
I should have chosen a fabric with no pattern on it for my first attempt.
A thread color with higher contrast to the background would have been a better choice.
It’s important to let up on the foot control when you slow or stop moving the fabric with your hands.
With greater freedom comes greater responsibility.