Posted in knitting, painting, quilting

A Couple of WIPs

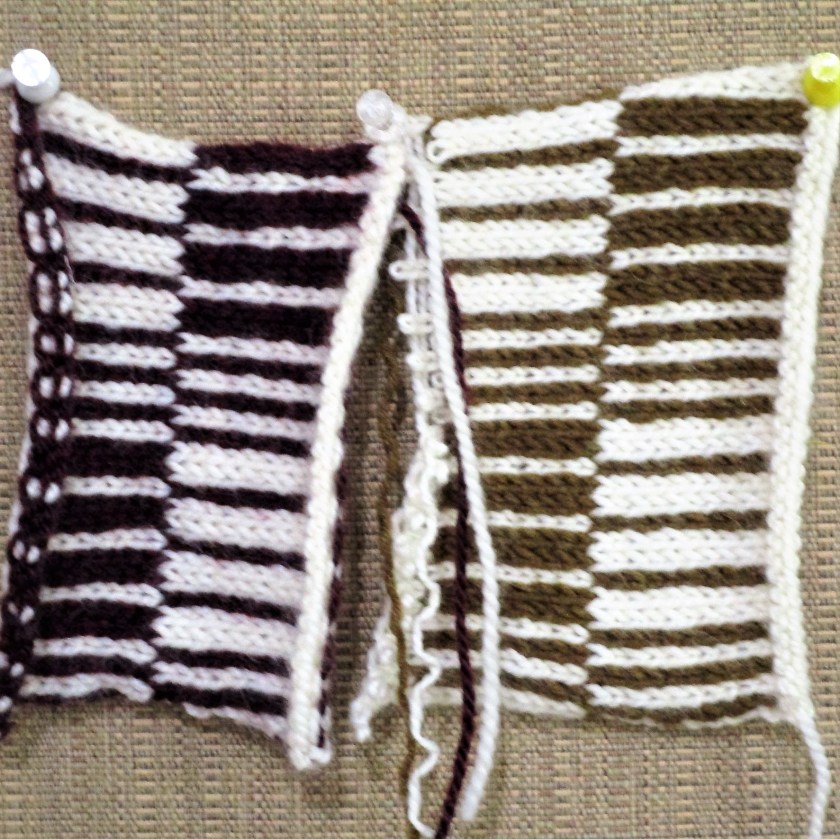
Yesterday I officially lost at yarn chicken.

AHWWWWWWW!

I have about 16 rounds plus the toe left to knit. Grr. So I wandered through my stash to see if I could find a good substitute and come up with a gameplan.

This morning, entering my studio, I suddenly spied The Swatch. Then I remembered that I had knit two swatches for this project! Both of them included the cream yarn.

SAVED!!!!!!

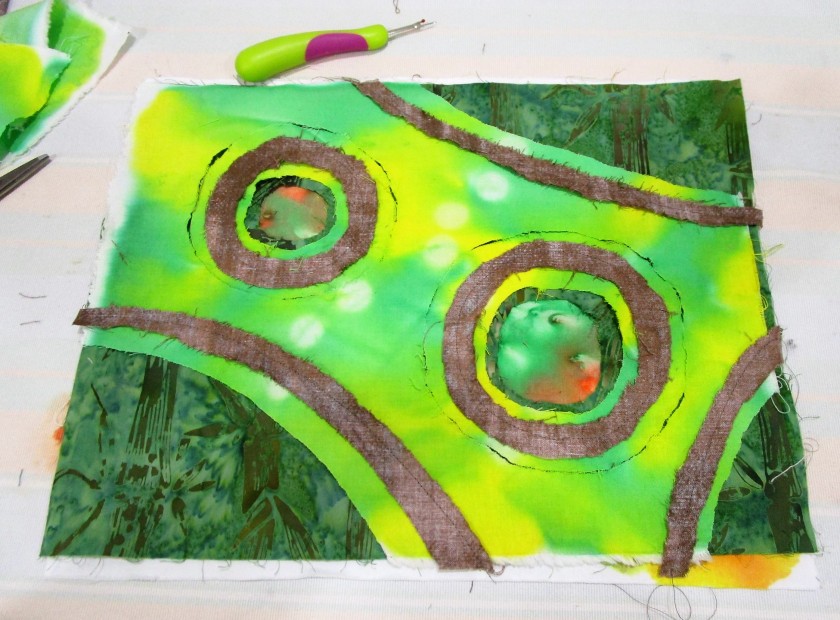
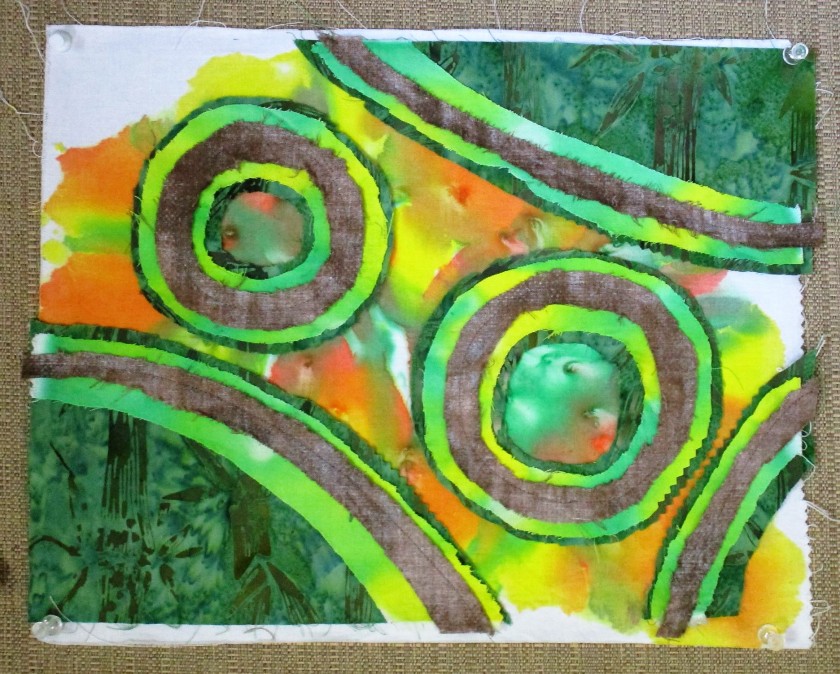
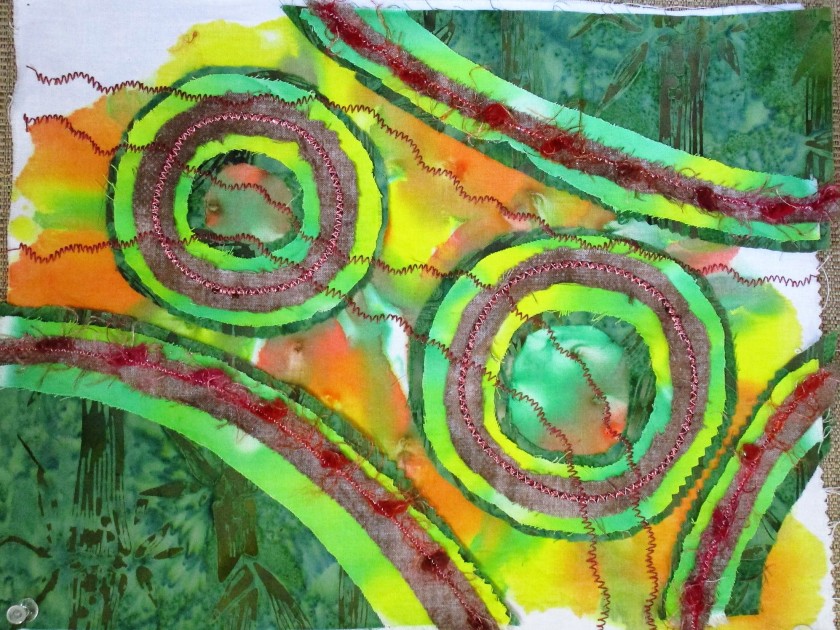
In other news, I have been painting fabric for the Badlands quilt. Here is a group of color samples in my chosen palette.

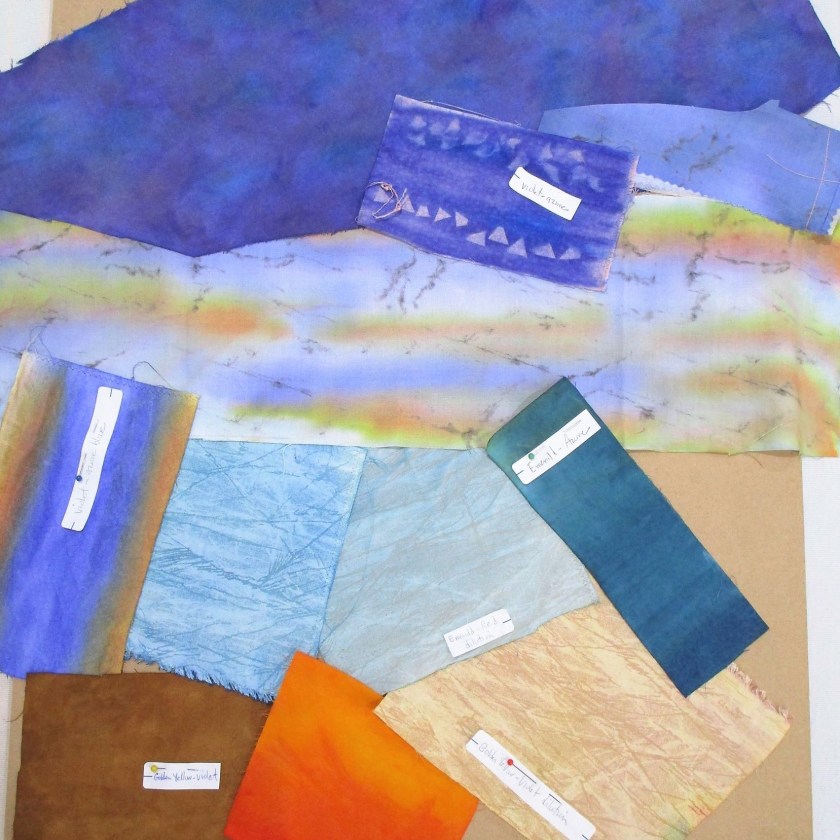
I also spent a lot of time simplifying my sketch and making a pattern on freezer paper. This pattern will become the cutting guide for the quilt’s segments. I don’t call them blocks, because they are all different shapes, following the major lines of the subject.

I actually got underway with cutting and sewing some of these segments, starting from the background.

Progress photo.

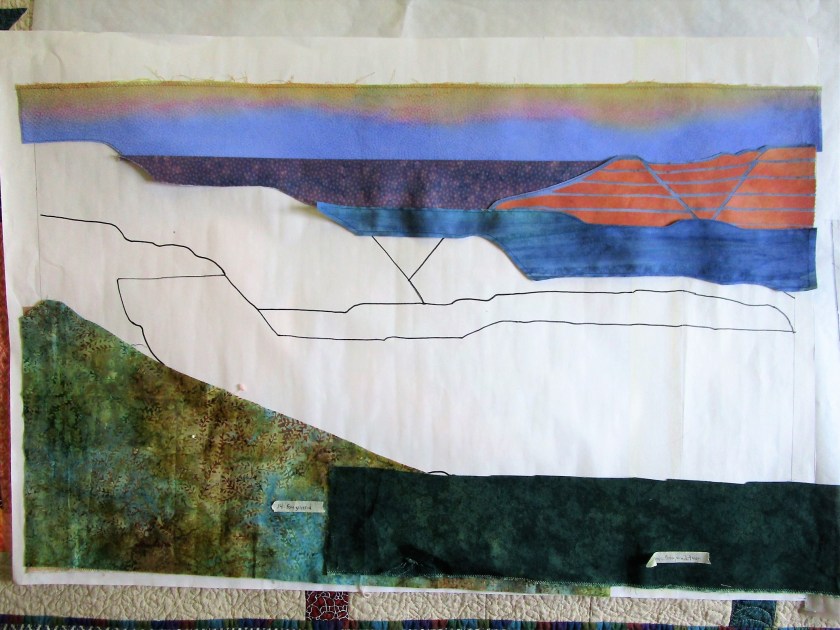
I’m pretty happy with the work so far. But now I am waiting on fabric to be delivered. In acknowledgement of my rather crude fabric painting skills, I broke down and bought some batik fabrics with colors for the middle ground of the design.

In the meantime, I plan to paint the backing fabric and make the quilt sandwich this week. Then I will be ready to move forward as soon as the package arrives.

Posted in embellishing, painting, quilting

Experiment with Stitch and Slash

While perusing available art quilt technique tutorials, I discovered another use for my hand-painted fabrics. Carol Ann Waugh teaches a modern take on reverse applique in her class on Craftsy. She calls it Stitch and Slash. It was inspired by the traditional molas made by the Kuna women of Panama.

In Carol’s interpretation of the mola, four pieces of fabric are selected and layered together. Then a design is chosen, marked on the back of the pile and stitched into layers. The similarity with the traditional molas stops here, when Carol gets out her seam ripper and slashes away at the assembled fabric Instead of nice, neatly stitched edges, she ends up with frayed, textured ones.

Okay, I thought, I have the perfect set of fabrics to try this out.

The two painted pieces are layered with a dark green batik print and a brown textured print. You see here the back side of the brown fabric, which I will be using for the top layer. Nearly all of the this layer will be cut (or torn) away.

Here is the back of my piece, showing marks stitched through.

Getting started with the slashing: You see in this photo all the top layer is gone, part of layer two gone, and the center of the circles showing the bottom layer.

This ripping took more time and was a little trickier than I expected.

All the excess fabric is now removed.

I was excited by how well the painted design is showcased.

The next steps are really just embellishments. To start, various ribbons and yarns are couched down over the seams. (Couching is just a zig-zag stitch worked over the ribbon/yarn/cord.) After that, it’s time to explore thread and machine embroidery options. I went with metallic yarns and threads in warm colors and dark shades.

To finish up, I made a quilt sandwich with batting and backing and stitched it together using free motion quilting.

My Stitch and Slash sample suggests to me how much the trees are suffering from drought and temperatures above 100 degrees. I will call it Heat Wave.

You can find Carol Ann Waugh’s class here:

https://www.craftsy.com/class/stitch-slash/

Posted in quilting

Friday Finish: Baby Quilt

Yesterday, I learned that baby quilts are the best!

Looking back at my notes, I realized that I started making this quilt only two weeks ago. Last week, in my letter to mom, I gave a few details about this project: 1. Based on a pattern by Erica Jackman, of Kitchen Table Quilting. 2. Color palette to match recipient’s nursery theme of teddy bears. 3. Background fabric and batting came from my mother’s stash.

Top completed, sandwiched and ready for quilting

And now the quilt is finished.

I say baby quilts are the best because:

  • They are suitable for a lot of fun colors and novel fabrics.
  • They don’t take much yardage, which keeps the cost down.
  • They are perfect for using up stash fabrics.
  • They can be quilted on an ordinary home sewing machine.
  • They are quick to make!
Quilted and bound

I quilted it using the walking foot – stitch in the ditch and straight-line quilting,

It was so much fun that I am actively seeking out another expectant family so I have a reason to make another one.

If you like this pattern, check out Erica’s website.

Posted in quilting

Dear Mom

Good morning, Mom. I hope you are well.

Today I’m writing to let you know how much I am enjoying the materials and tools I collected from your sewing room in May. You were so generous to let us kids have whatever we wanted.

It’s interesting to see how just a few tools have made my work so much easier. Let’s start with your big purple Martinelli self-healing mat. I can cut whole yardage into strips with ease and accuracy using this mat. Another thing I am grateful for is the tabletop wool pressing pad. I recently used both of these tools to cut, sew,press and square-up a whole bunch of half-square triangles.

Let me tell you about a few projects where I used some fabric from your stash.

I found about a quarter yard of striped cotton with black warp threads. It turned out to be just right as a binding for my Shell Lake Story quilt.

I worked the free-motion quilting on this piece wearing a pair of your quilting gloves. They fit me perfectly. Looking down at my hands I imagined how your energy, which these gloves retained, radiated back to me. I felt loved and powerful.

My next project is a baby quilt for Jasmine and Stephen’s son, expected in August. I’m certain that, if you were able, you would be working on a quilt for this baby already. In your stash was a crib-sized batt still in its package and a yard of buff color solid quilting cotton – very high-quality stuff. (I know it was a yard because you had measured and labelled it so!) It is just enough for a baby quilt background.

After speaking with Stephen’s mom, Debbie, I learned that the couple had chosen teddy bears for the nursery room theme with a color palette of blues and neutrals. Using the buff and several stash fabrics, I put together a quilt top from a pattern called Elena. It features a nine-patch block with two corners of half-square triangles.

With a backing in tumbling teddy bear fabric that I bought on the Internet, this quilt is a dream to make. The top is almost done.

Well, that’s about all I have to share today. Take care of yourself and give my love to dad and the siblings.

Love, Laura