It’s been a while since I shared progress on the Howard Wabi-Sabi quilt. For this Work In Progress post, I’m showing how I hand-quilted a few of the vintage weaves that were used in this object.
After much consideration, I decided that it was OK to sew on (aka deface) someone else’s work. This change of heart came after I was in Madison recently, where I asked my daughter to show me more samples of Margaret Howard’s work.
Oh my. There was so much of it. Huge plastic bins filled to overflowing. Several samples were woven with the same motifs found in the pieces I was using in my quilt. Perhaps each piece was not that precious to the maker. They were woven, perhaps for practice, perhaps for auditioning alternative color choices.
When I picked up my quilt blocks again, it was clear to me that my stitching could accomplish its task of quilting down the batting and backing while also reinforcing the existing weave patterns. To my mind, this is enough to honor the maker.
Today I am showing two blocks with embroidery finished.
Center Block before:
Center Block after
Fire Block before:
Fire Block after:
I’m aware that the differences appear subtle in the photographs. But in person, the embroidery stitches bring some color variation and texture that was lacking.
Thanks to Amanda for adding her embroidery to the work, which jump-started my own efforts.
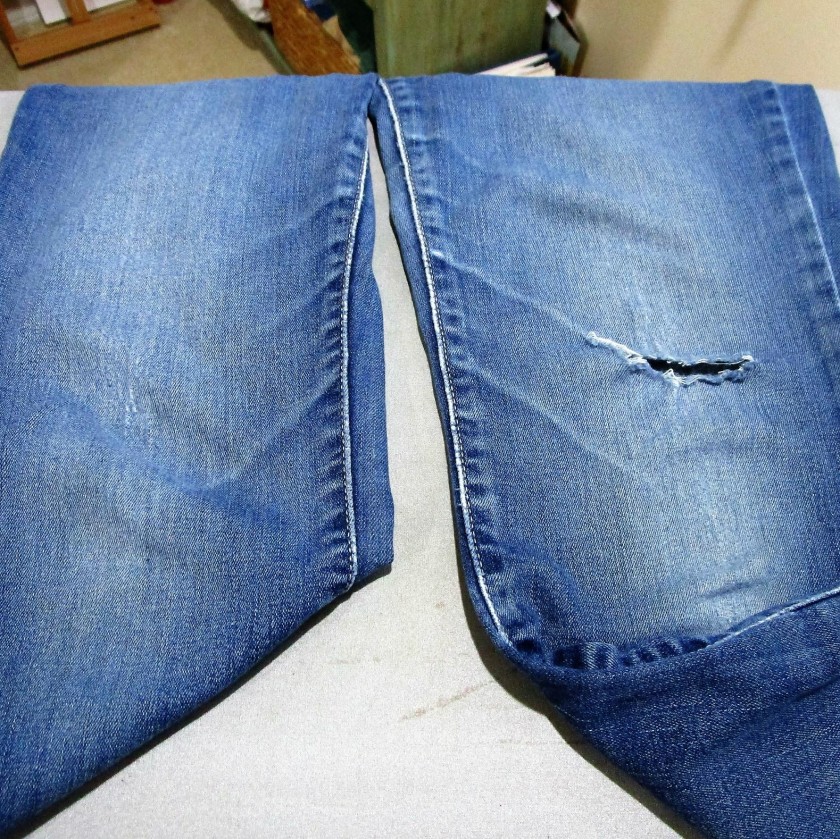
Earlier this week, a friend of a friend asked me to help him mend the holes in his favorite jeans. He didn’t bring any patches along, so I just used needle and thread to weave across one of the holes as a demonstration. That got our conversation started about the concept of visible mending.
The artist I was thinking about is Celia Pym.
An article and some images of her work can be found here:
The conversation reminded me that I had set aside a pair of jeans of my own that were now holey at the knees.
Perhaps the universe is telling me it’s time to start this project. Despite having an abundance of UFFOs littering my studio, I began working on the jeans.
First of all, I wanted to incorporate patches over the weak-at-the-knees areas. Having been told in the past NOT to throw away fabric scraps, I was able to find some interesting scraps already coated with fusible glue.
It took me less than 30 minutes to fussy-cut some flowers that could cover the holes. I added even more patches just to create a colorful floral field on the denim.
Wow – shades of the sixties.
I do intend to embroider over the patches. This will serve to strengthen the patches and unify the design a little bit.
Getting started with embroidery – pearl cotton
It’ll take me a few evenings to get all the hand stitching done. But first, I wanted to address the torn logo on the back of the jeans.
These are Levis jeans but the leathery label on the waistband is nearly gone. I used a small pair of scissors with a sharp point to cut away the remaining bits and thread.
Next I made a label of my own and stitched it into place.
DAILY FIBER FUN – BY HAND
Yesterday I purchased a variety pack of pearl cotton thread in shades of pink, purple, aqua, blue and yellow. I’m really looking forward to jazzing up these tired old jeans.
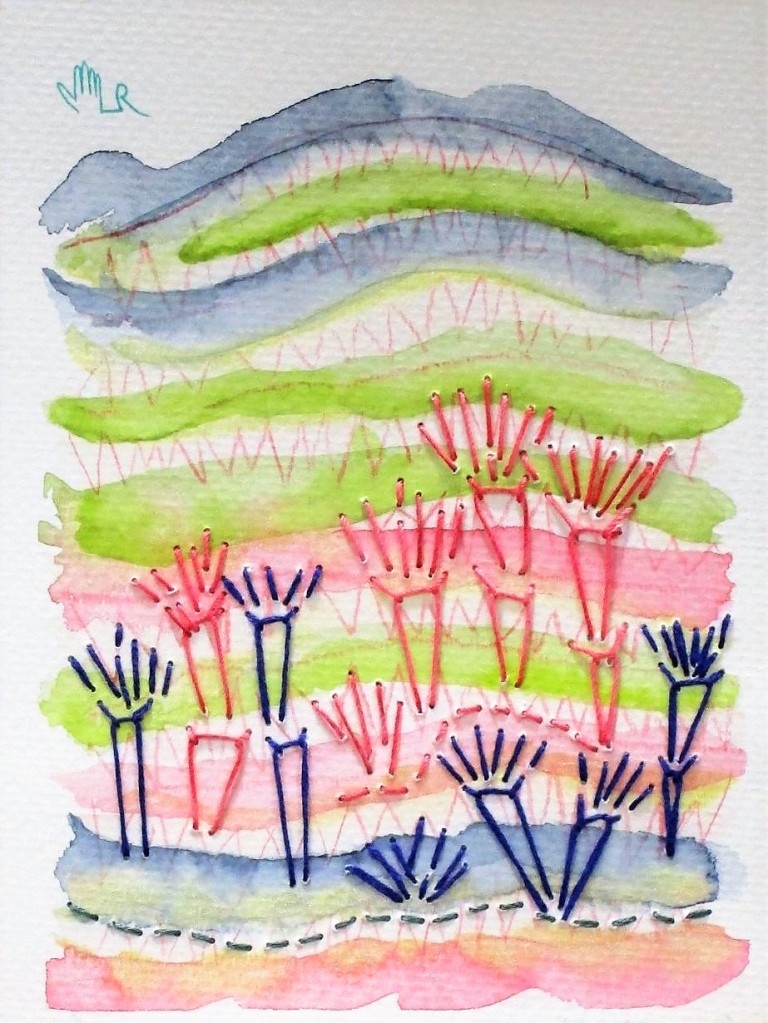
Ever since I wove a small tapestry on a hand-made loom, I’ve mused about weaving threads over a water color painting. So today I am playing around with the idea.
I started with this 4 by 6 painting I did last December.
It’s an exercise from Kateri Ewing’s book Watercolor is for Everyone. After drawing two columns of randomly sized rectangles, the artist applies selected colors, reversing the order of application in the second column.
I thought this painting would be a good background for my proposed thread embellishment because of its rectilinear structure. To start, I poked holes at regular intervals along the outside vertical edges. Next I stitched a zigzag pattern across the painting with no. 3 cotton twist thread in a gold color.
Now what, I asked myself. How about creating points along the thread intersections by tying knots? Okay. For this step I chose a dark cool green shade.
To further reinforce the intersections, I painted shapes with a metallic paint.
Not a bad way to spend a quiet afternoon. It was soothing and meditative. It reminded me of those picture stitch cards that I worked as a girl when learning how to sew.
Now I have a brand new perspective on what is possible with paint and thread.
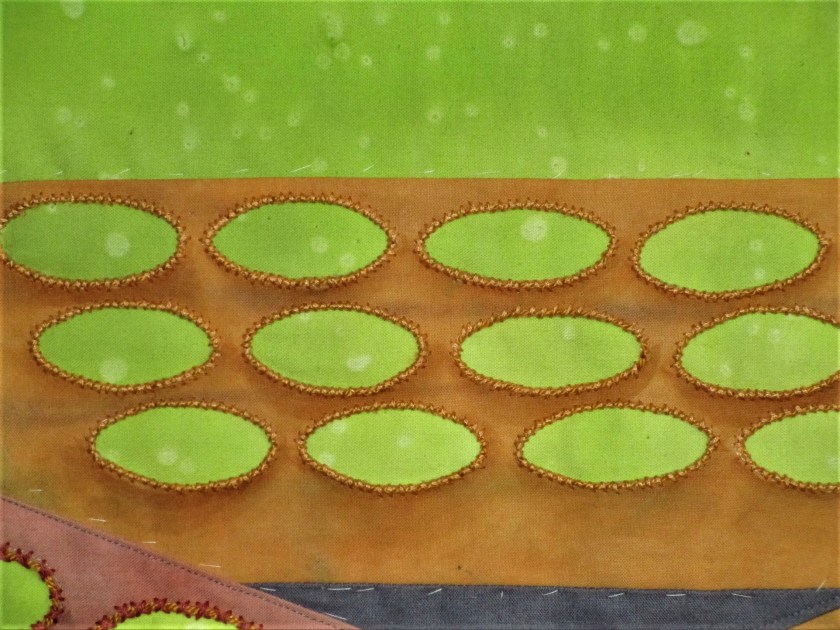
In this post I am following up on the next steps for Spring Green.
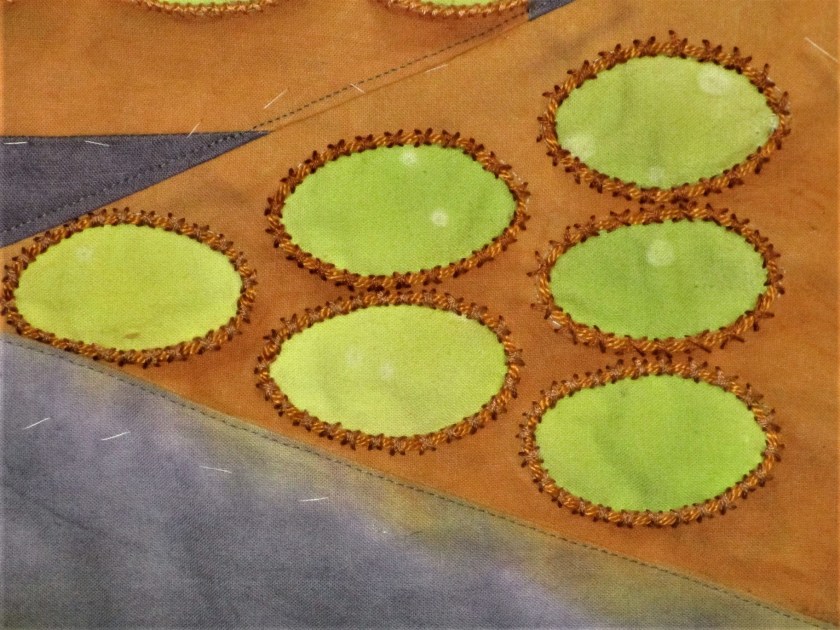
Here is how the foreground looked after I finished piecing it.
With textile paint, I created shadows and deepened existing shadows.
It’s finally time to begin sewing. To start with, I added a layer of batting. So that the batting doesn’t shift, I hand-basted the two layers together, adding a few safety pins for good measure. Next came the embroidery. Using cotton twist and cotton floss, I outlined the rims of the pots with couching.
The two groups of pots nearest to the viewer got two strands of gold cotton twist couched with four strands of embroidery floss in a cross-stitch pattern. I matched the floss color to the fabric color.
For the flat of pots further from the viewer, I couched only one strand of cord, using three strands of floss and the whip stitch. This will create a bit of perspective.
I’m loving the texture that the thick stitches create. Now that I have finished couching, I will add the backing.
After that, I will throw on a bit of machine quilting, just to anchor the edges and define further the parts of the image. It will give me more time to consider exactly what I will do next.