One of six children, I was raised by a busy mom, who instilled in me a love of fabric. Though I learned to sew and knit at a young age, it was the arrival of my first grandchild that pushed me into action. A long-time knitter, I am now ready to explore all things fiber.
I laid down this wash yesterday so it had plenty of time to dry. This is a weak blend of French ultramarine blue and sap green. It took mere minutes to paint.
This morning I had a firm idea of what I wanted to do. First I washed some water over the lower portion and blotted up the excess. This brightened the foreground. Using a one inch flat I brushed the sky with a stronger ultramarine wash and picked out the clouds with a tissue. The rest of the paint went on with the same brush using vertical strokes for the trees and horizontal slashes for the snow shadows.
At the end, I used the Sumi brush to work a little burnt sienna into the trees. It was this last step that caused the wonderful blooms. I love the texture that resulted.
Total time to make this impression: 15 minutes.
Pigments: Ultramarine blue, sap green, payne’s grey and burnt sienna.
Last week my order from Jerry’s Arterama arrived just in time. I had run out of watercolor paper. Here is my choice:
I was convinced to try this particular paper by a video demonstration from manufacturer. While the cotton content is only 25%, it was described as the next best thing to 100% cotton at less than half the price. If I use 1/2 a page per exercise, my daily cost for paper will be .25 cents.
So how did my first try go?
This is a gradient wash using Thalo blue. I didn’t get it as gradual as I would have liked, but I found it acceptable for my purpose. For the next one, I used a Sumi brush to manipulate the wash more while spreading it over the wet paper.
I really like this effect. The flares, or blooms, of pigment near the top of the paper suggest flowers to me. So I chose to paint poppies.
I probably spent about 45 minutes on this – 2 times longer than my allotted 15 minutes. What I like about this painting: By using a lot of water and working with the shapes left on the background wash, I achieved an impressionistic look. I was also able to make some nice shadows and highlights. What I don’t like: My brushstrokes are hesitant and a bit fussy. And the darks could be darker.
To evaluate this paper, I will need to paint on it a lot more. My initial impression is satisfaction. It didn’t buckle and it stayed wet an acceptable period of time.
In a traditional round robin, quilters make a block, then pass it to the next quilter who would add to it, then pass to the next, and so on, until the piece had completed its circulation. The final result is a big surprise to the original quilter when it returns to her.
This is a COVID version. Each quilter keeps her original block, but responds to weekly challenges by adding a border around her block. Each quilter in the round robin is responsible for providing one prompt to the group.
Can I try? I’m kinda new to quilting, but I have a few pieces of fabric left over from projects I finished last year. I invited myself to participate. Chris said, “go for it.”
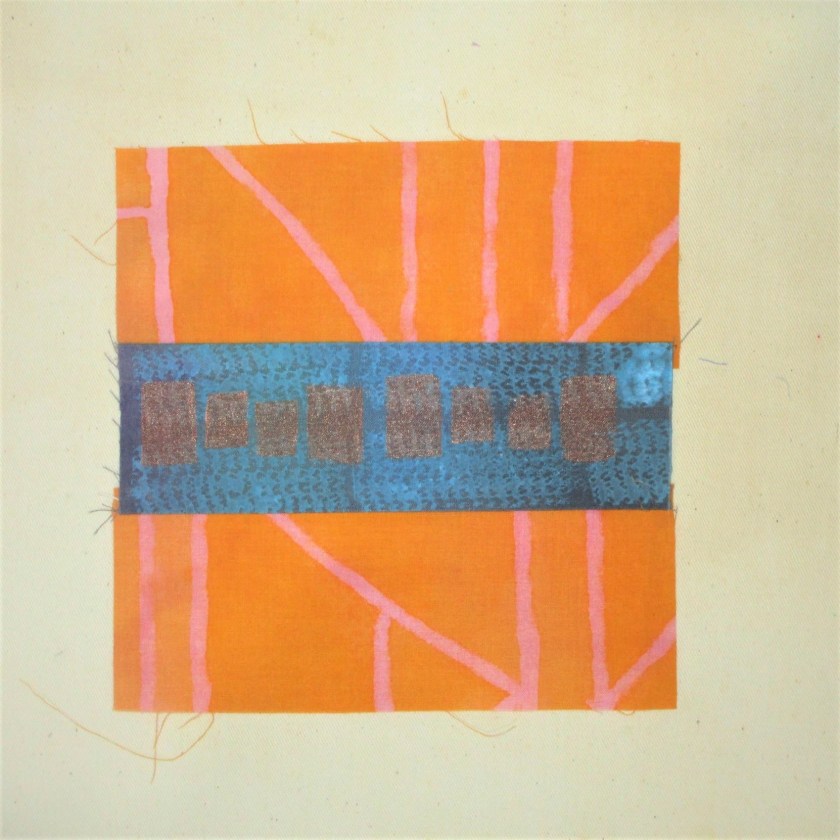
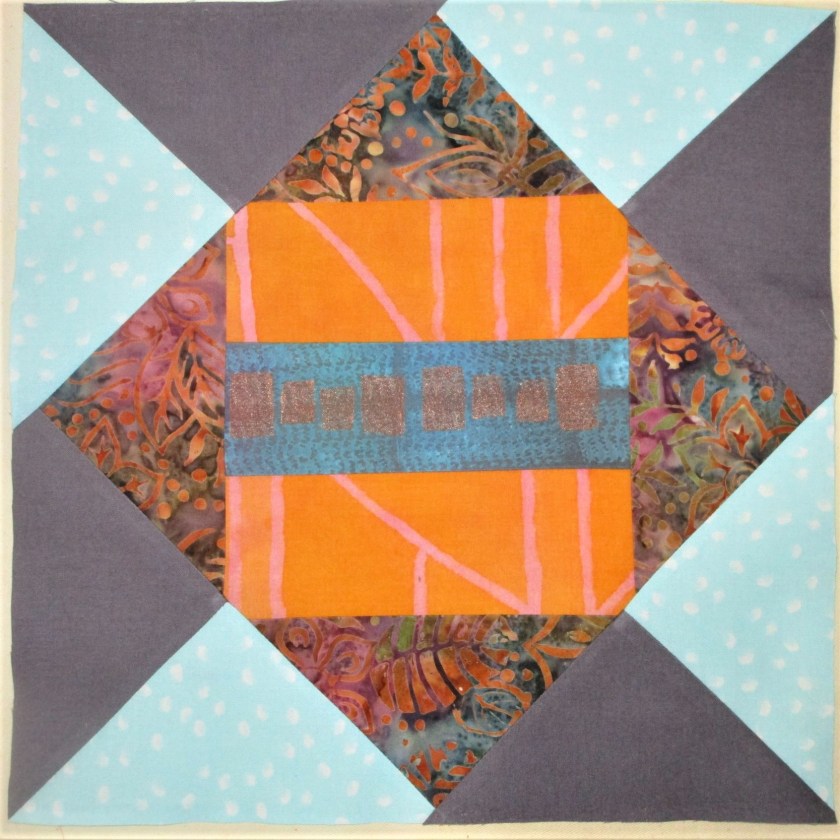
Today each quilter is unveiling her center block. I better get started. First I pulled a few leftover strips that seemed to be big enough.
Both fabrics were experiments. The center piece is overpainted with opaque turquoise. then stamped with a metallic bronze color. The orange piece was painted pale pink, then a resist applied, followed by a deep orange paint. Removing the resist reveals pink lines.
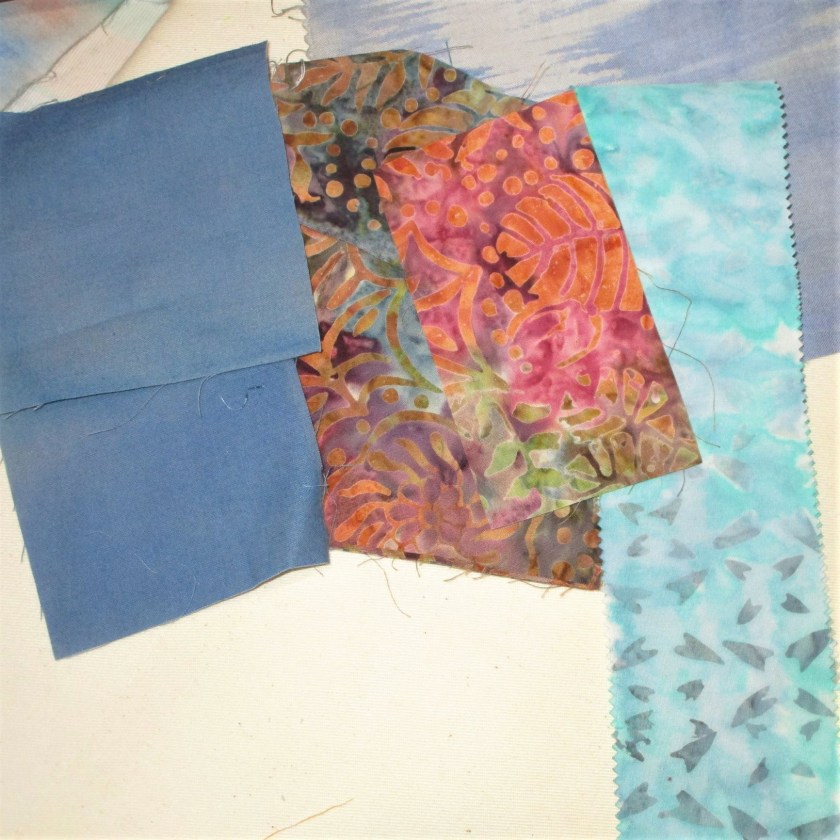
So I have my palette, but I need supporting fabrics and a plan for the rest of the block. During my stash rummage, I turned up this beautiful batik that I had bought just because it was on sale.
The other two fabrics are too small, so I went to the hobby store to buy similar colors.
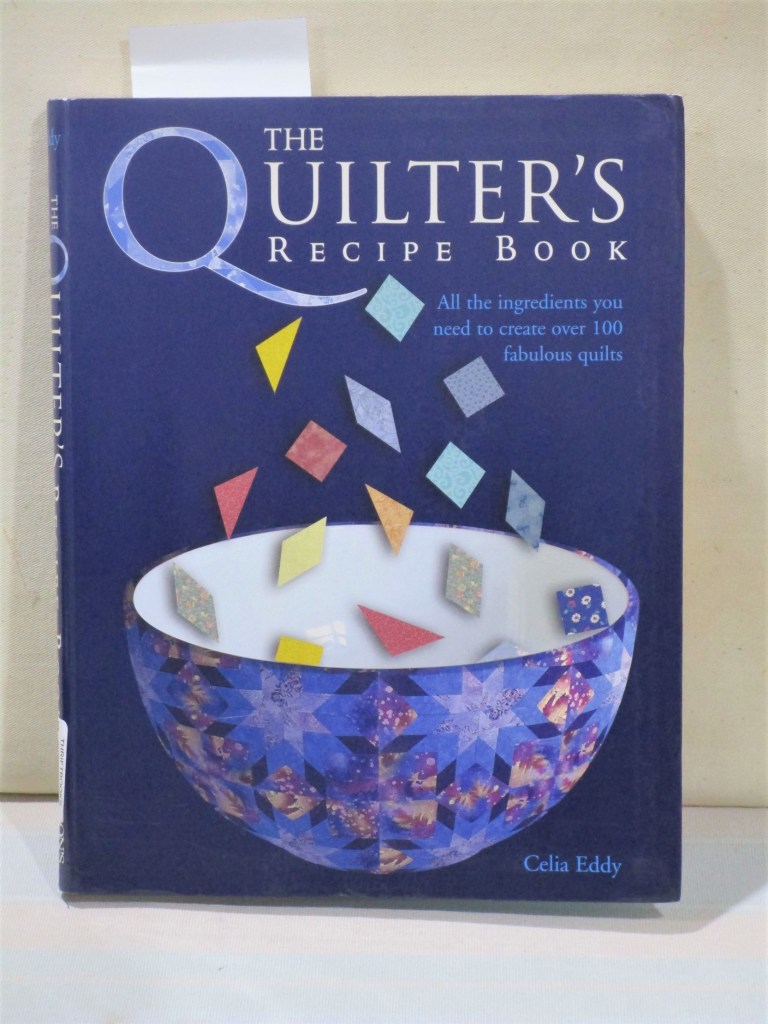
That part was easy for me. Selecting a block design? I needed help, so I got out a quilting reference book by Celia Eddy.
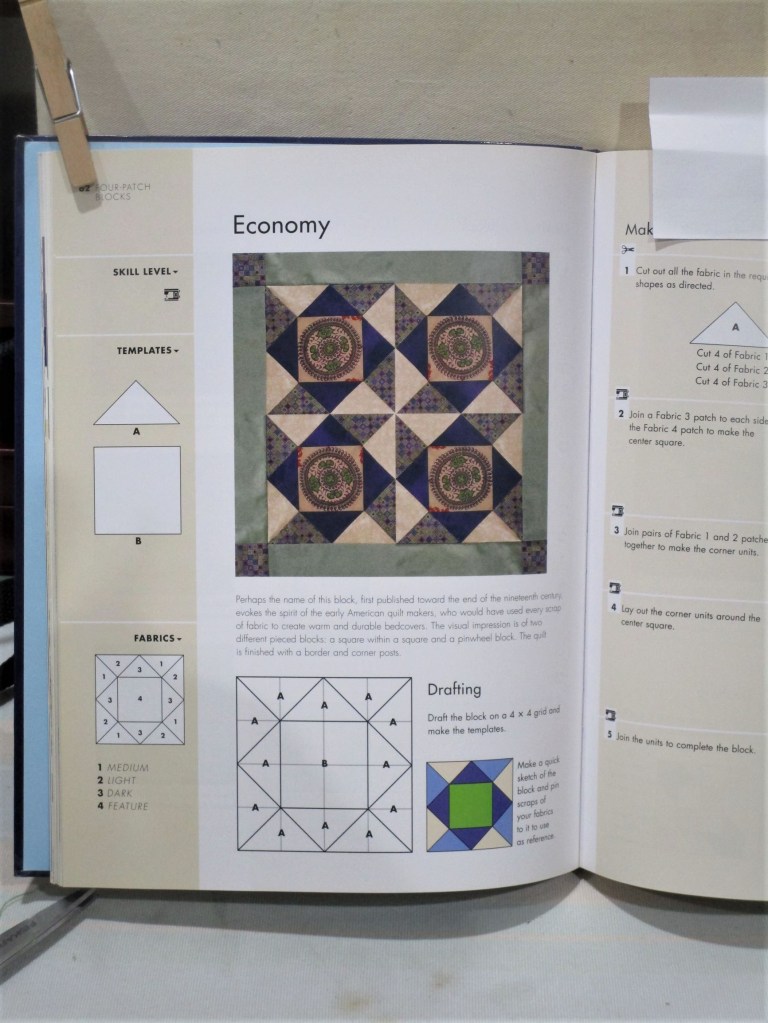
Gosh, I am so glad I bought this. Now, focusing on patterns that feature a center design and are not too hard for a beginner, I selected this one.
The pattern is called Economy, and includes a square, a right-angle triangle, a focus fabric and three supporting fabrics. It is rated for beginning quilters. Within an hour or so, I had put together my block.
If you also are intrigued by doing a round robin quilt, check out this group.
Below is the schedule of the designers and links to their blogs.
I am carrying on with color wash experiments. Today I am exploring yellow ocher. I started out by wetting the paper before dropping on the paint. Yellow ocher pulled from the top to near the bottom. Then I brought violet up from the bottom to mix and mingle with the yellow. Here you see the washes still wet.
I stared at the dried paper for a long time before deciding what to do. To me, the colors reminded me of a place where my family has spent many a vacation: New Mexico. The American Southwest is characterized by dark, crumbling mountains and earthy adobe dwellings. I wanted to portray this idea in a quick sketch.
Using a watercolor crayon, I drew in the buildings as I remembered them from past visits to Albuquerque and Santa Fe. Next came a little texture painted on the purple foreground. And lastly, I added a bit of blue for sky, pulling the paint down to touch the horizon.
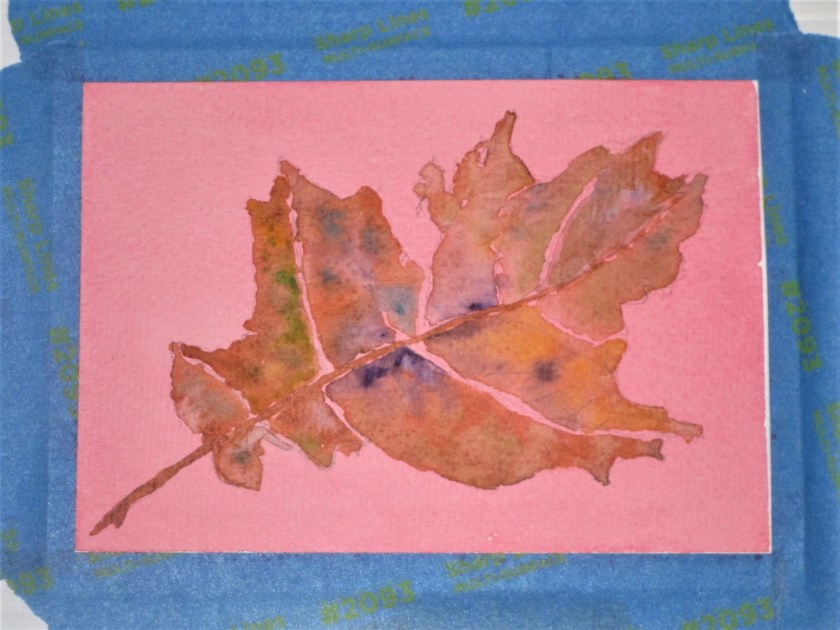
Still working with the quinacridone red wash, I decided to paint a dried-up oak leaf over the washed paper. Here is my pencil sketch, drawn from a leaf I brought home with me a few weeks ago.
My experiment today is with a wet-on-wet technique. First I used plain water stroked over sections of the leaf individually. Then I dropped in burnt sienna. After watching the brown spread out, I added drops of different colors.
Adding details, I painted in the stem, veins and a shadow. Next came a little white gouache stroked over the pale veins. And finally some brown pen outlined the edges.