When it comes to my painting practice, I have been in a months-long drought. While knitting like a demon, I have not been inspired to paint, either on watercolor paper or fabric, since the completion of the Oregon Native quilt in early August.
That ended after reading a post by Just Sketching, in which he describes a compositional tool that blows the “rule of thirds” completely out of the water. It is called the Harmonic Armature. This tool takes the rule of thirds to the next level. In the rule of thirds, the designer/artist divides the picture plane into three more-or-less equal parts, both horizontally and vertically. The goal is to organize the major elements to intersect one or more spots where the lines cross.
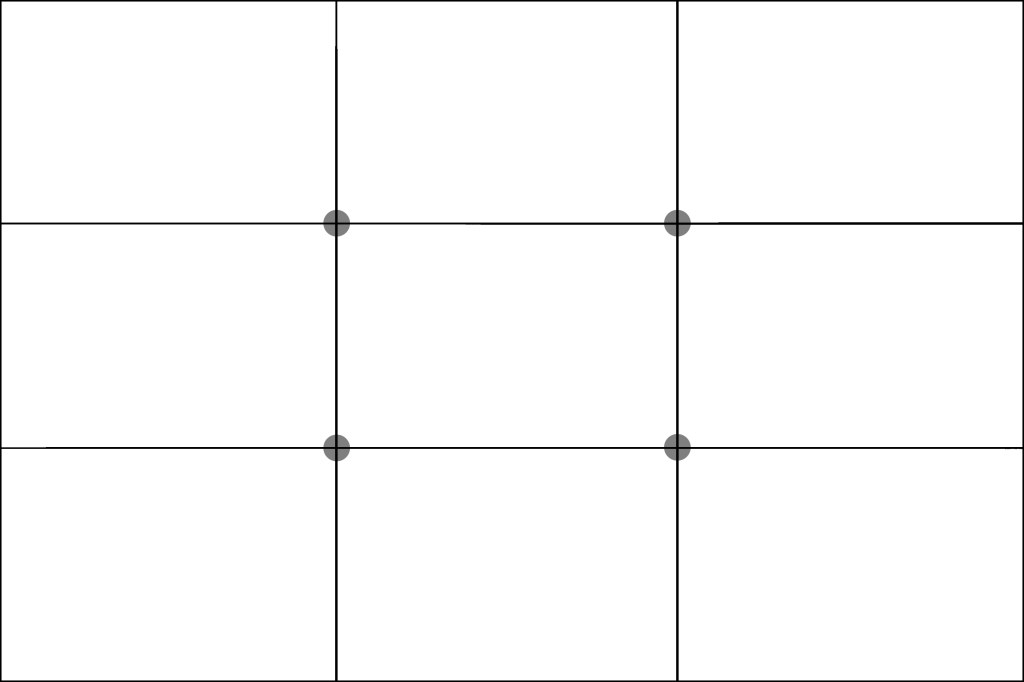
I have no trouble understanding and using this rule, but I always am left with questions about how best to lay out the rest of my composition.
Now look at the Harmonic Armature
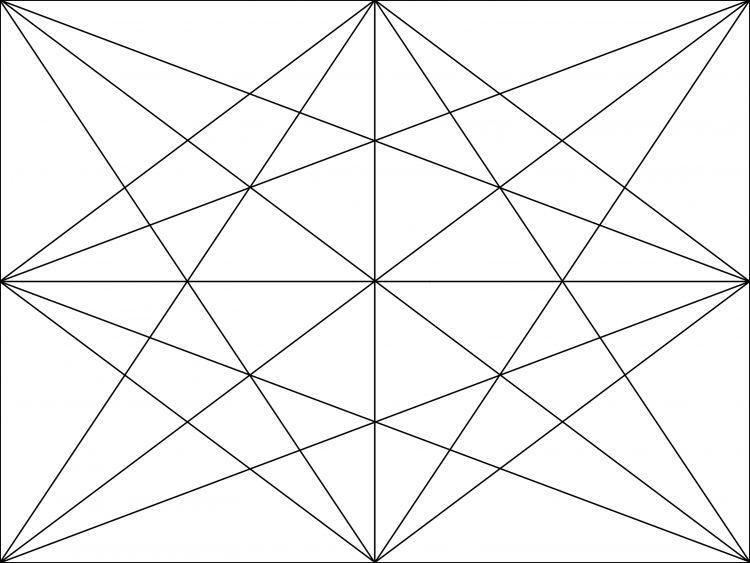
The four dots are clearly visible, but there is so much more. To get an idea of how this tool is used, have a quick listen to this video by Diante Jenkins.
I had to try this right away, so I started searching through some of my old paintings. I found one based on an excellent photograph that I did five years ago, in my early days working with watercolor paint.
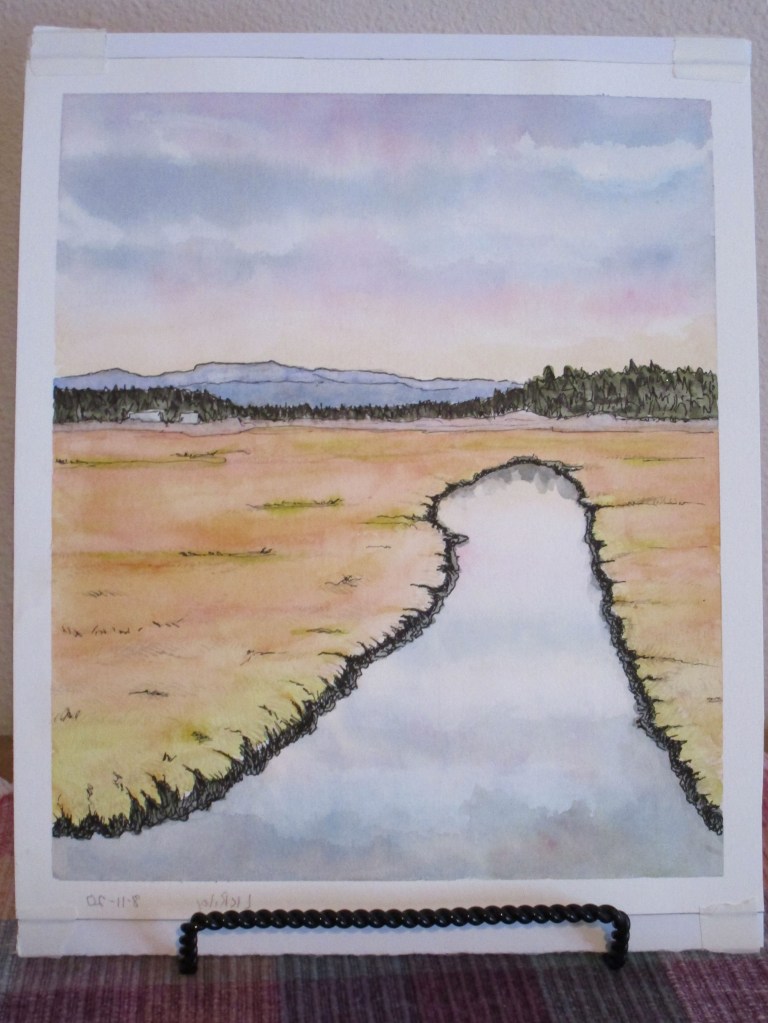
I like how it turned out, but it always struck me as too empty. This past summer, I took it to a workshop I attended on making transfer prints with a laser jet printer. I transferred a photocopy of the painting to a cradled plywood board. Then I didn’t know what to do with it . I decided to add collage to it. What it needed was something alive – like birds. But where to put them?
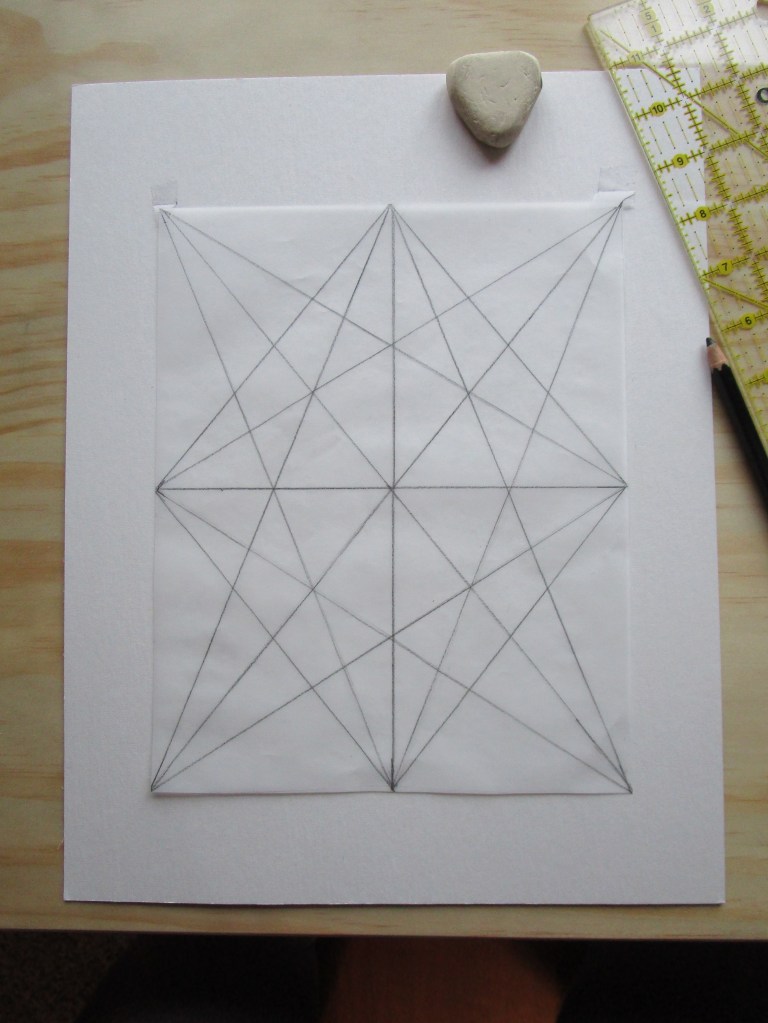
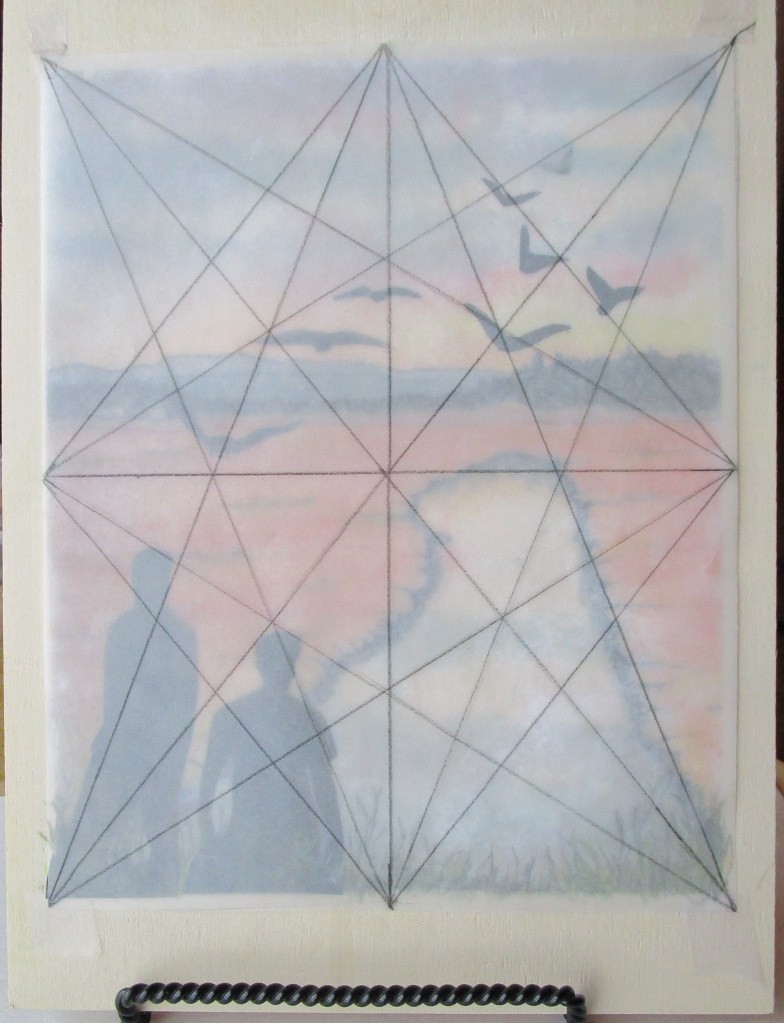
First, I drew the HA on an 8×10 piece of tracing paper.
Next, I thumbed through some magazines and cut out various shapes of birds in dark colors. I also found some silhouetted figures in the magazine, which could work in my new design, so I cut these out.
After taping the armature over the print, I carefully slipped my cut-out shapes into place, taking advantage of the converging lines and focal points visible on the tool.
Once the glue dried, I added a few colored pencil marks to blend the silhouettes with the foreground.
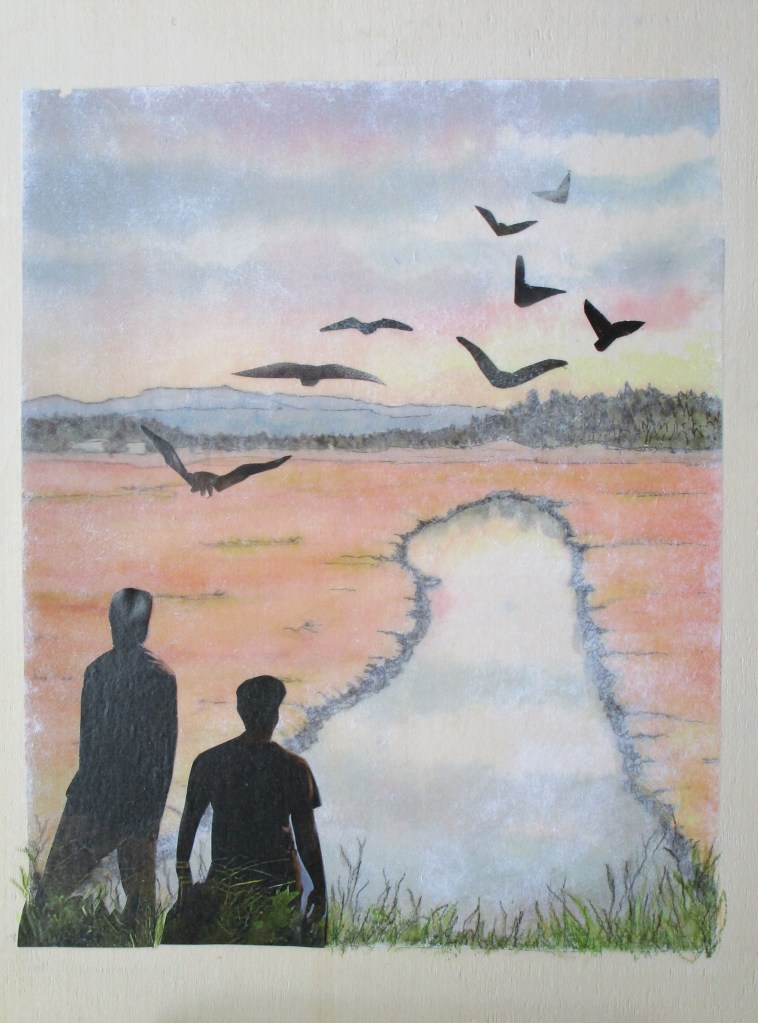
It was a delightfully spent afternoon.
Now I am keen to get out my unfinished watercolors and see how I can move them to the finish line inspired by my new tool.


Love the addition of the birds. They add movement to the landscape.
LikeLiked by 1 person
Fascinating! I really like the changes you made to that watercolor! What a fascinating rabbit hole!
LikeLiked by 1 person
Thanks.
LikeLike
I am familiar with these compositional diagrams and find them really interesting. There are templates for these on Amazon, small, pocket and the size of a credit card, and can be taken to the wild if you want (I guess). Using tracing paper to apply them to your work is a great idea – and, yup, I never thought about it and am going to try it. This is absolutely fascinating!
LikeLiked by 1 person
Love to see what you make using the tool.
LikeLiked by 1 person
I know about the rule of thirds but I have never seen the other one. I like how you added to your finished piece. Definitely a game changer!
LikeLiked by 1 person
I am re-visiting my aversion to using collage technique. It can be fun and easy.
LikeLiked by 1 person
Looks like you are learning while having fun. Best way.
LikeLiked by 1 person
Wow! That looks like a great tool, and your newly collaged painting is stunning!
LikeLiked by 1 person