This week’s prompt for the Stay At Home Round Robin quilt challenge comes from Home Sewn By Us and it is the spool block. This is one I haven’t tried yet, I believe it’s one of the easier blocks to make. And I have a good idea for using fabric from my orphaned quilt blocks for this challenge.
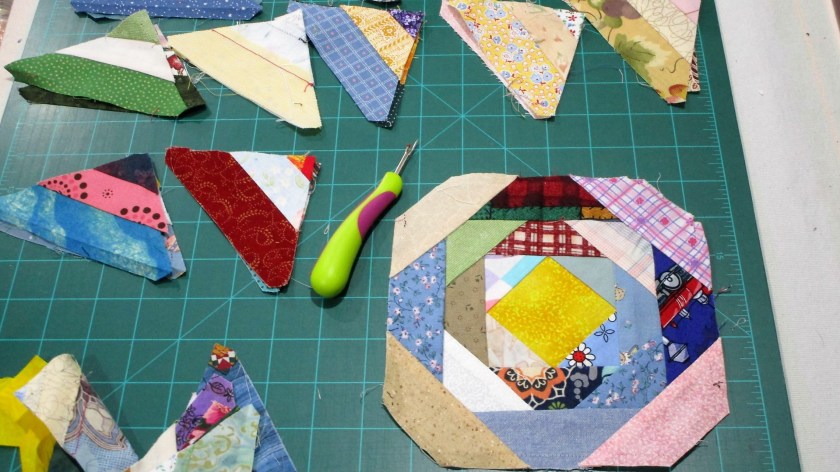
Using my seam ripper, I removed the corners from several of the blocks. (Can anyone tell me what this block is called? It’s a sort of square in a square with at least four iterations, but then stripped corner pieces were sewn on.) Anyway, I took these triangles and sewed two of them with long edges together. This gave me a square about 3 and 1/2 inches which formed the “thread” part of my spools.
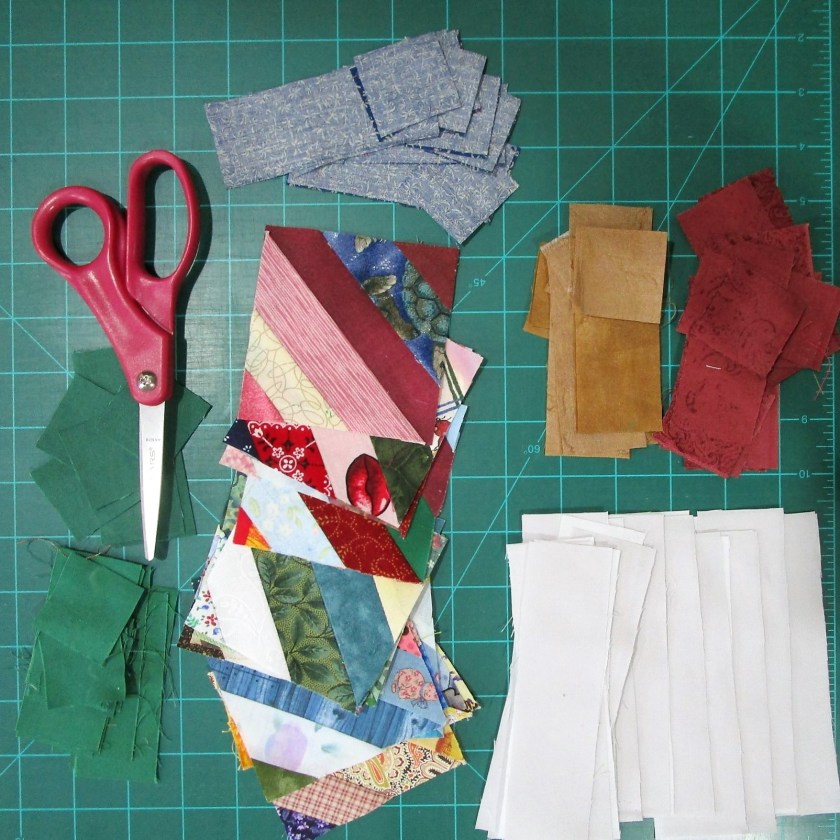
To support the center pieces, I cut pieces from four dark colors and two shades of the background fabric. Three of the dark colors were left over from my Creation quilt. The brown fabric was used in my Badlands art quilt.
Here is my first block all sewn together.
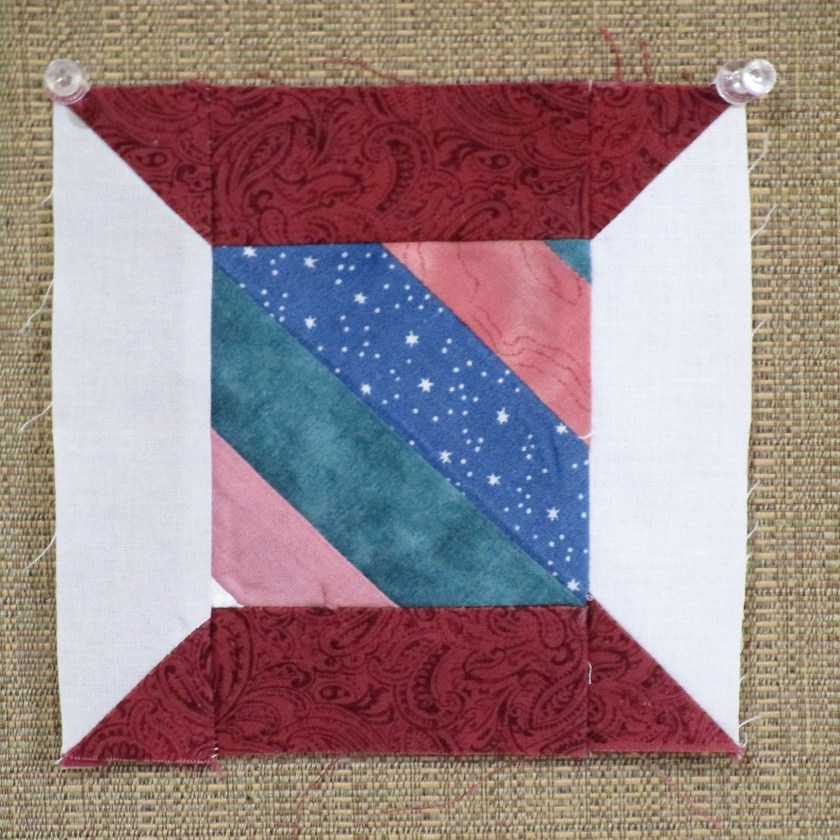
I like the way the diagonal lines on the spool look like spiraling thread.
Eventually I made four 5-inch blocks in four different colors. My original design would have the spool blocks in a continuous border. When I started positioning the blocks, it became clear that there would be too much visual clutter. I settled on using three blocks on each side, leaving the corner areas available.
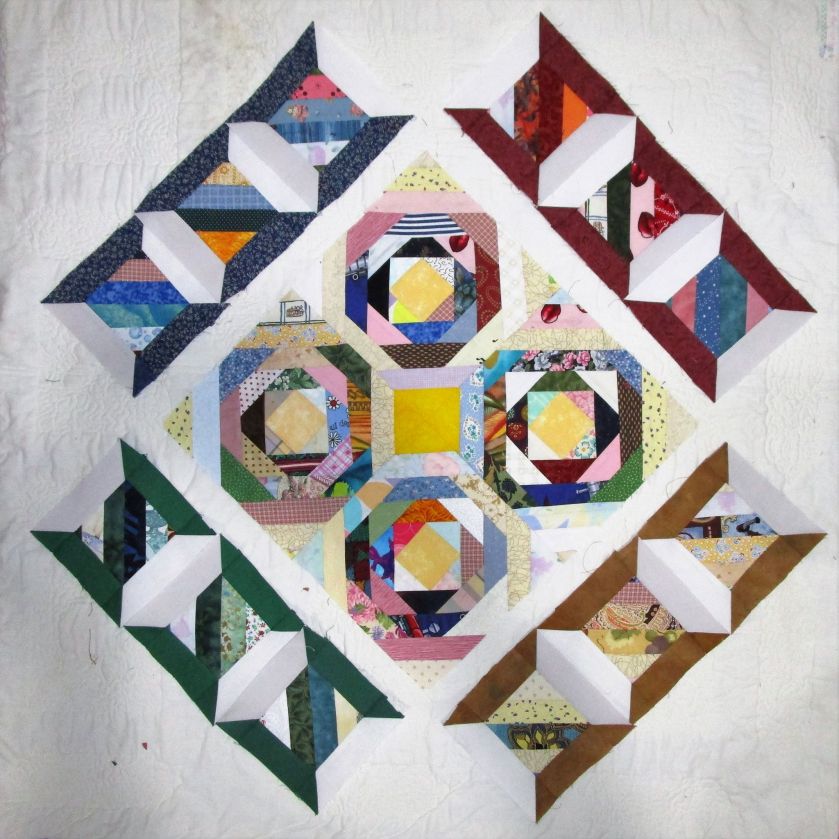
I will reserve the corners for the next round, or fashion corner posts using background fabrics.
To learn more about SAHRR 2023 and see what others are making, here is the link to this week’s round.
https://www.homesewnbyus.com/index.php/sahrr2023-prompt-1-spool-block/


Those are pineapple blocks, and how clever to change them up to make the spools! You have a fun quilt growing for SAHRR!
LikeLike
Thanks for letting me know the block name. I thought they looked like log cabins, but the construction wasn’t log cabin style.
LikeLiked by 1 person
I love your spiraling thread!! Great interpretation of this week’s block.
LikeLiked by 1 person
What a beautiful round of spools! I love your scrappy version!
LikeLiked by 1 person
Thanks.
LikeLike
Very clever way to make the “thread”! And it goes so well with the scrappy center!
LikeLiked by 1 person
Love the way this is coming together! The diagonal spools and the setting adds a lot of interest.
LikeLiked by 1 person
Glad you like it.
LikeLike
Hi Laura! Oh, what fabulous and cute spool blocks. I just LOVE how the diagonal fabrics makes it look like thread. It also is a smart design choice using a different color for each of the four sides. All around, this project is really taking on a personality of its own. I can’t wait to see the next round! Happy Friday to you. {{Hugs}} ~smile~ Roseanne
LikeLiked by 1 person
Thanks Roseanne. I was surprised when my husband dropped into my studio and decided to help me with block placement on this round. He actually did help! Who would have thought.
LikeLiked by 1 person
Very pretty!
LikeLiked by 1 person
Love the scrappy look to you quilt!
LikeLiked by 1 person
Thanks. So far it’s working.
LikeLike
Love, love, love this. Your pineapple block has changed so much.
LikeLiked by 1 person
Thank you!
LikeLike
I do believe your block is a “square within a square” – you could keep going until you filled an entire quilt with a single square if you wanted. I agree with your decision to limit the “thread” blocks on each side – I’ll be interested to see what you put in the corners. I also quite like the “shading” between the spools – effective 3D technique.
LikeLiked by 1 person
Thank you! I’m not a very experienced quilter but I adore solving design problems and expressing myself through my choices. Just don’t look too closely at my points!
LikeLike
The more you quilt the better you’ll get. It takes a lot of practice to get that 1/4″ seam allowance dead on – although there are aids which help – choosing the right presser foot (I use the 1/4″ quilting foot with right guide most of the time, although on my Drunkard’s Path I stuck with my narrow universal on my Brother Quilter), putting a strip of blue masking tape on your sewing bed 1/4″ from the needle position is also useful. You develop an eye for 1/4″ after a time. If you use blue masking tape your eye should be about 2″-3″ in front of your foot, trusting the feed dogs and foot to do their work while you match the fabric to the left side of the masking tape.
LikeLiked by 1 person