Posted in weaving

Another Friday, Another Finished Object

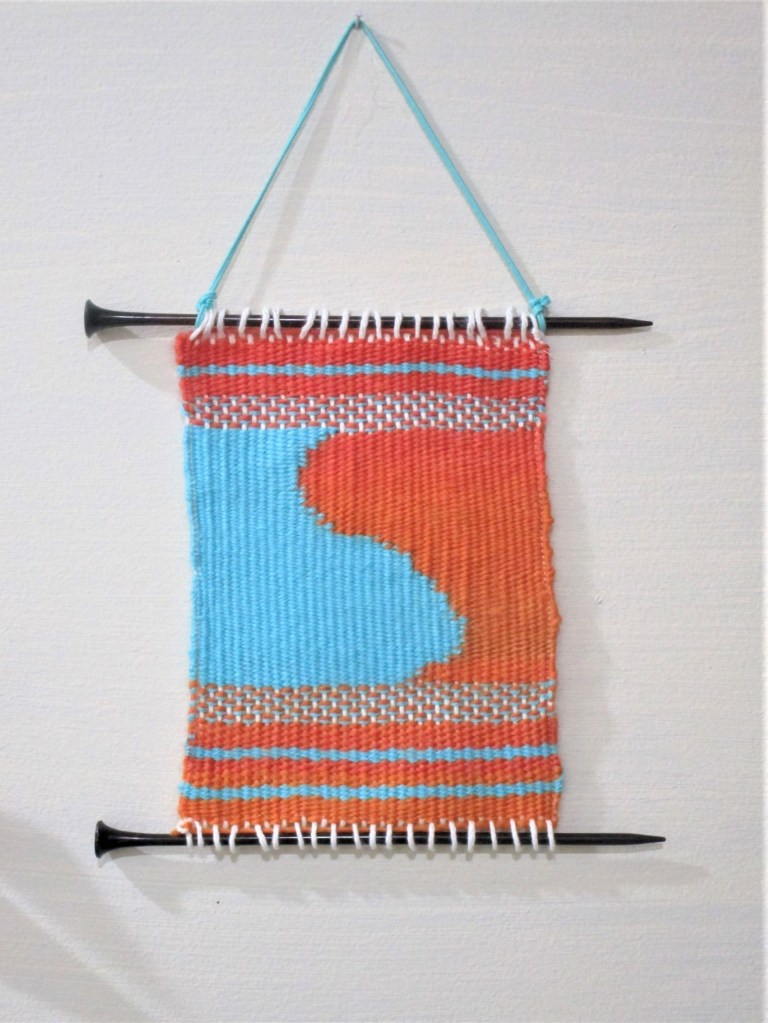
This is the little weaving that I had started as an example for my fiber arts students. A few weeks ago, I was cataloging a list of my unfinished objects. Spying it lying around, I realized that I needed to count it as one of the dirty dozen UFOs.

https://dailyfiberfun.wordpress.com/2020/04/02/omg-ufoooooooossss/

Today I can announce that this weaving has moved to the finished pile. After working to the top of the warp, I cut off the yarn and worked the loose ends into the back of the weaving. There was still a lot of looseness on all four edges of the piece. I decided to machine stitch around the sides. After that, I slipped the top and bottom loops onto a pair of knitting needles and considered it done.

I call it Blue-Orange Duet.

Image showing machine finished edges.

Mulling about what to do with it…….. Hm, I noticed that the weaving’s colors worked very nicely with my origami installation piece on the east wall of the studio.

https://dailyfiberfun.wordpress.com/2019/05/18/paper-week-finale/

So up it went. It looks quite at home amid the pinwheels and the birds. Sort of like a punctuation point, a period at the end of a sentence.

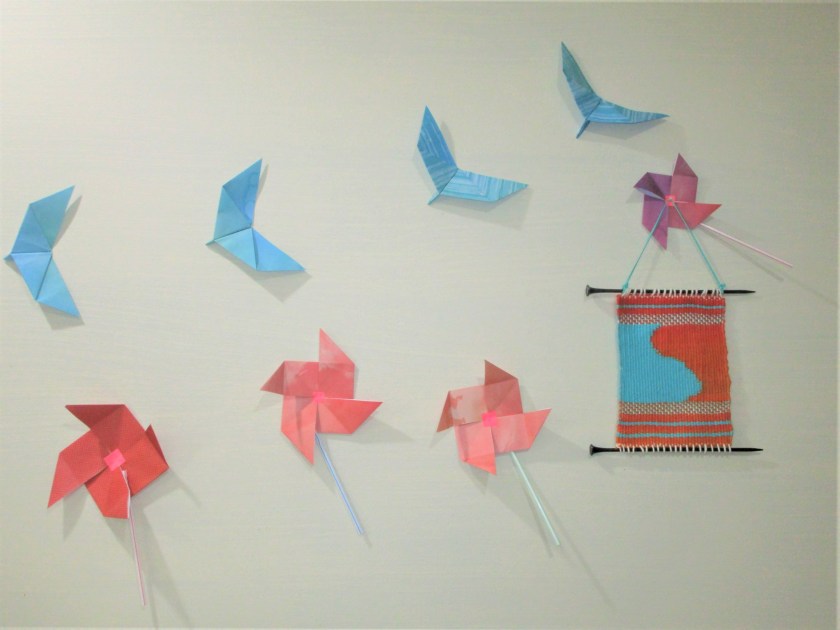
Welcome to the studio, Blue-Orange Duet. Make yourself at home.

Posted in knitting

Friday’s Finished Object

Glammed up water bottle carrier

Keeping with my self-imposed deadline, I managed to finish off another UFO. This is the be-ribboned and beaded water bottle carrier that I started over five years ago.

The part that had stumped me was how to finish out the top edge and strap. I found a solution by Melanie Smith on Ravelry. She simply divided the stitches in half, working each half in stockinette, gradually decreasing until five stitches remained. Then she worked I-cord about 15 inches each side and grafted the sides together.

https://www.ravelry.com/patterns/library/4th-of-july-water-bottle-holder

Thanks, Melanie.

I tried to make the strap long enough to sling it over a shoulder. Here I show it knotted so it can be carried over the wrist. The yarn is a bamboo blend purchased from the hobby store. Hopefully it will prove strong enough. I worked the middle section side-ways, knitting a metallic ribbon in. The top section is beaded.

This is a standard 16 oz. bottle. The piece is actually big enough to hold a taller bottle.

Two down, eleven to go. Hooray!

Posted in knitting, sewing, weaving

Back Home

Yesterday we arrived home after spending a week in Wisconsin. The trip was undertaken to help our daughter and her family prepare for a move. It was a weird and wonderful trip. With constant changes implemented by the authorities in the states we traveled through, we never knew what to expect from day to day. Thankfully, many businesses on the interstate highways remained open to provide for the necessities of travelers. All the staff we encountered along the way were both kind and helpful.

The trip was a success. While we stayed with the kids, daughter and son-in-law found and put an offer in on a suitable house in Madison. That’s a big hurdle accomplished.

I discovered a new travel craft – weaving on the little 8 by 10 artists’ canvas loom. All the materials fit into an average size project bag, and the motions of the fiber artist do not ever distract the driver. You see in the photo above my attempt to create an S-curve out of two colors of yarn.

I received two items from daughter that will inspire future fiber objects:

The Vogue Knitting book is a delightful compilation of the best of the Vogue Knitting magazine, from the 1980s through to 2011. Lots of inspiration is here. I have my eye on a couple of patterns found within. Of most value to me are the charts of various lace stitches.

This little book is called omiyage, by Kumiko Sudo. It was purchased by my mom, who passed it to daughter, who gave it to me. The Japanese have a thousand-year-old practice of making and giving small gifts. Back then there were strict rules and a great deal of formality surrounding this ritual. The author re-interprets omiyage for modern times, using fabrics both traditional and modern. As she is a quilter, she pulls fabrics from her stash of quilting cotton, and incorporates bits of silk and wool as well. I plan to try making some Good Luck dolls.

Traditionally these dolls were the focal point for a festival called Girl’s Day. I think they would be wonderful made from some of my hand-painted fabrics. Because they are small, making one should be a fun, inexpensive and quick project.

Well, I am keen to resume my making. The Just Trees mini quilt is still unfinished and I would like to get that weaving off the loom soon.

Until next time, keeping making and be well.

Posted in painting, quilting

Just Trees in Progress

It’s a cold, drippy, soggy-ground day here. Even with the sun behind a cloud, one can revel in the beauty of Spring arriving. This is our neighbor’s tulip magnolia which overhangs the fence in our yard. It is robed in amazing color just a handful of days every year. So I put on shoes and went out into the wet to capture its moment of glory.

Yucky weather seems to give one full permission to huddle indoors and work on fiber objects. The Weaver’s Square vest is within three inches of being fully knitted. I should have a good image to post in a couple of more days.

Here is a progress photo showing work on my latest fiber object, which I call “Just Trees.” I have cut and basted four rows of clam shell shapes, then painted each with a tree.

My original intent was to paint all trees without leaves. But hey, I can’t ignore the burst of color right outside my window. The three trees with black trunks and pink tops are meant to be redbuds. It is a native tree that puts on screaming pink to magenta blossoms in mid Spring – usually before any of the other hardwood trees have even leafed out.

I think three redbuds will be enough to create a nice focal point.

So far the top two rows of appliques have been stitched – by hand – into place. This step is only a little bit tricky. But patience and persistence always yield results.

With a continuation of rainy weather and the unceasing announcements of event cancellations, I may easily finish this object before next weekend.

Posted in colorwork, painting, quilting

Painting Thread

So far I have found myself frequently frustrated while shopping in my local craft store for decorative topstitch thread. My local craft store, which is a Hobby Lobby ( I have a love-hate relationship with H-L,) has a limited selection of quilting threads, none of which are what I am wanting for my current project. And the threads that are available are not particularly affordable.

I have nothing to lose in experimenting with painting my own thread. (Not be confused with thread painting, a hand embroidery craft in which stitches are worked densely to create a painterly landscape of thread on fabric.) I have everything I need.

1. A 50 gram spool of 100% cotton DMC thread no. 10 in an off-white color. 2 Assorted jars of Jacquard Dye-Na-Flo fabric paint. 3. water proof freezer paper. 4. latex gloves.

After coiling several yards of thread and tying them together with string, I let the thread soak in the paint for about ten minutes. Wearing latex gloves I lifted the coil from the paint, squeezed out the excess and laid the threads on paper. Drying took several hours. The next day I pressed the dried thread with a hot iron, under a pressing cloth, for about 30 seconds. This was my attempt to fix the color. Because Jacquard Dye-Na-Flo is an acrylic paint, it is essentially color-fast from the moment it dries. But if you want to use the paint on an item that will be washed, I would recommend letting it cure for at least a week before washing.

Here are my hand-painted threads wound on spools.

I love that the paint gave the thread a variegated effect. I’m not sure if this happened because I mixed paint colors together or because I had a cord tied around the coil. It certainly makes for a splashy look.

Airplane is in natural thread. Moon is stitched with painted thread.

So far I haven’t noticed any color bleed on my sample fabric. Tomorrow I will start using it on my quilt. I’m excited to see how that goes.