Today I have a progress report on my quilt inspired by a medieval manuscript.
Here is the center of the quilt. It is formed by the four corners of each four-by-four block. Upon first seeing that blank white diamond, I knew that it would work beautifully for a God’s Eye. After practicing on scrap fabric, I wove the centerpiece design into place. The four arms of the weaving are gold satin cording which I couched into place. The weft yarns are a combination of cotton embroidery twist and wool fingering weight yarn leftover from many a sock project.
I think it balances the four creation paintings beautifully.
Here are the quadrants of the piece at this point.
Now I can begin quilting. To start, I will stitch into the seamlines of all pieces. (AKA stich-in-the-ditch.) Next will come the free motion quilting. I have something special in mind for the light color patches which will involve more colorwork.
It’s been heart-breakingly beautiful outside over the past several days. The weather forecast for today predicts extreme thunderstorms. So I thought I would memorialize some of the garden’s spring perennials. They are so lovely, and their day in the sun is so short every year. Here are a select few.
Columbines
Peonies in front of Lorapetelum
Solomon’s Seal
Yesterday I finished sewing the last of three quilted buckets. This project is meant to yield a system for organizing and storing fabrics. While my stash is not large, it is somewhat unweildy for its size.
Three buckets holding fat quarter to one yard sized pieces.
That leaves the scraps. After a year of working with fiber, I have a much better idea of how I tend to use fabric in my projects. I particularly like using scraps in little strips to make small art quilts. Consequently I have become very reluctant to throw any of them away. Resulting in this:
Sorted by color family, they are even more beautiful and precious to me. Like the colorful spring growth only more enduring.
So I still don’t have a useable system for keeping this hoard in order, under control, and yet easily accessible. Reluctantly, I will be putting these gems back into the shoeboxes. Suggestions are encouraged. How do you keep your stash sorted?
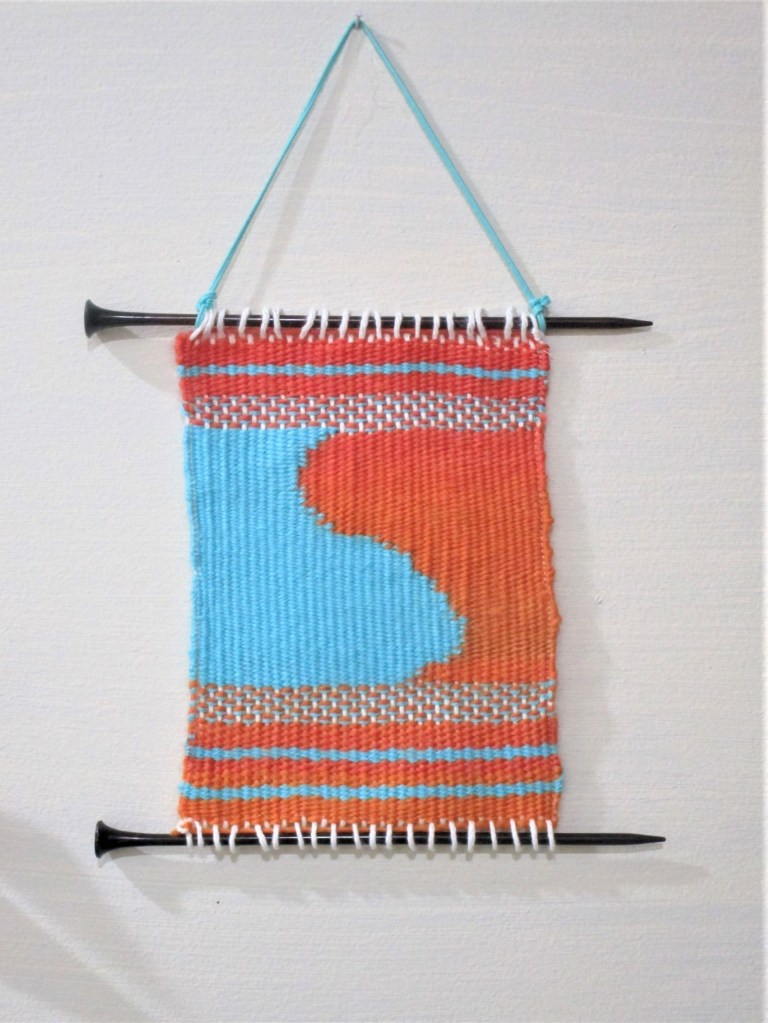
This is the little weaving that I had started as an example for my fiber arts students. A few weeks ago, I was cataloging a list of my unfinished objects. Spying it lying around, I realized that I needed to count it as one of the dirty dozen UFOs.
Today I can announce that this weaving has moved to the finished pile. After working to the top of the warp, I cut off the yarn and worked the loose ends into the back of the weaving. There was still a lot of looseness on all four edges of the piece. I decided to machine stitch around the sides. After that, I slipped the top and bottom loops onto a pair of knitting needles and considered it done.
I call it Blue-Orange Duet.
Image showing machine finished edges.
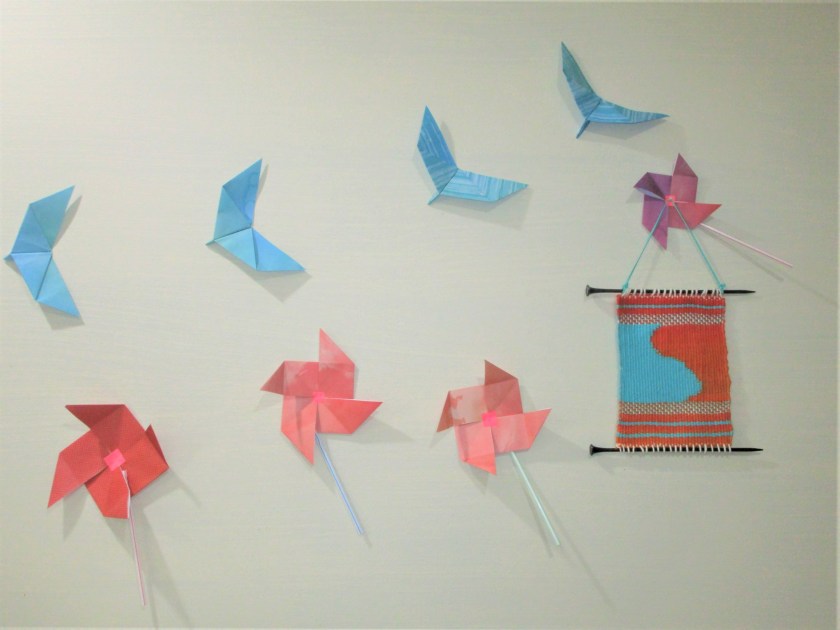
Mulling about what to do with it…….. Hm, I noticed that the weaving’s colors worked very nicely with my origami installation piece on the east wall of the studio.
Keeping with my self-imposed deadline, I managed to finish off another UFO. This is the be-ribboned and beaded water bottle carrier that I started over five years ago.
The part that had stumped me was how to finish out the top edge and strap. I found a solution by Melanie Smith on Ravelry. She simply divided the stitches in half, working each half in stockinette, gradually decreasing until five stitches remained. Then she worked I-cord about 15 inches each side and grafted the sides together.
I tried to make the strap long enough to sling it over a shoulder. Here I show it knotted so it can be carried over the wrist. The yarn is a bamboo blend purchased from the hobby store. Hopefully it will prove strong enough. I worked the middle section side-ways, knitting a metallic ribbon in. The top section is beaded.
This is a standard 16 oz. bottle. The piece is actually big enough to hold a taller bottle.
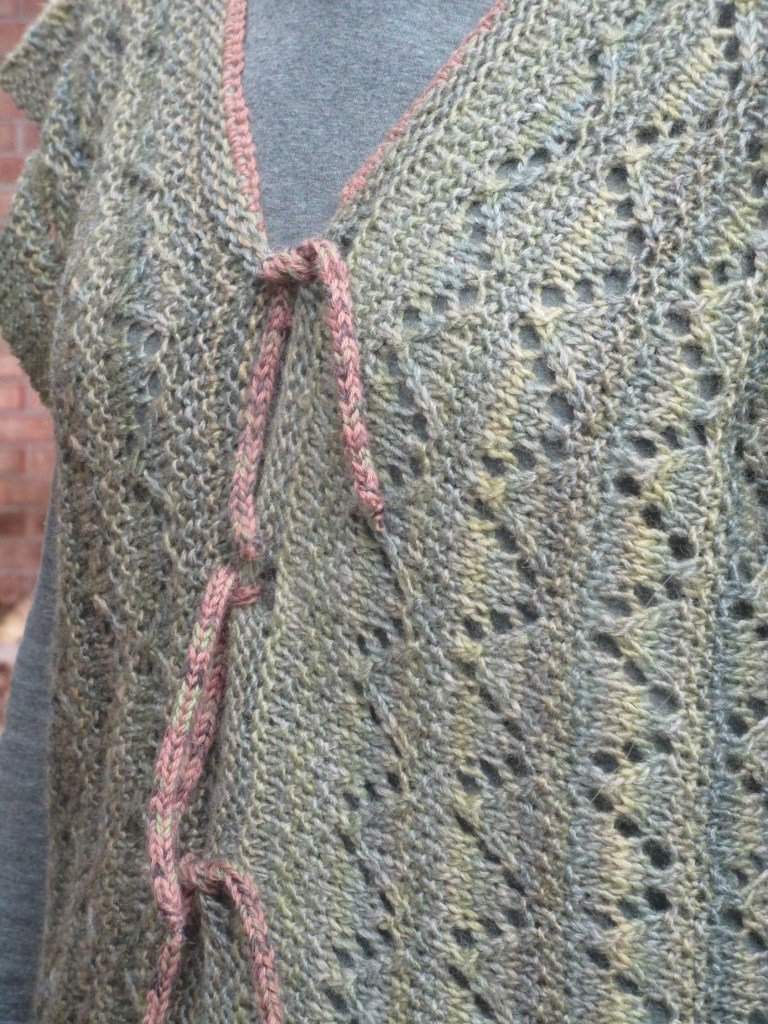
After recovering from the shock of UFO discovery, I came up with a plan. I made a promise to myself to finish one each week. At that pace, I will feel like I am dealing with the problem while still allowing plenty of time during the week for creative play. Above you see the first finish: the Northwoods Serape.
I had purchased this self striping yarn for another project, then rejected it as inappropriate. On one of our road trips last year, I brought it along for mindless travel knitting. As you can see, I ended up knitting three basic rectangles: a wide one in garter for the back and two narrower ones in a lace pattern for the front.
All knitting was done from side to side – this gives a vertical line to the stripes. Edges were picked up and knitted in garter stitch from bottom edge to top.
After that the piece languished for months. In a moment of carelessness I gave away all the extra yarn to a student. The finishing bits will have to be added in another yarn.
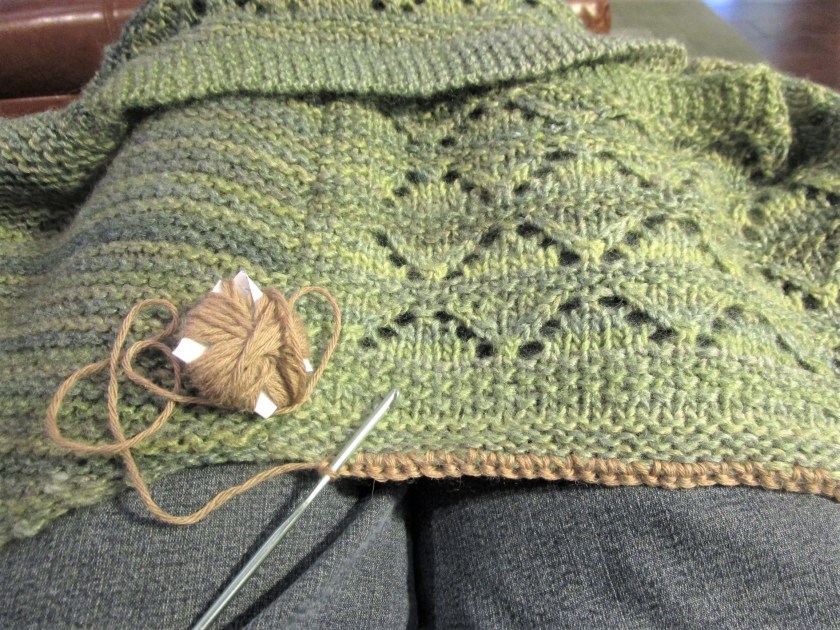
I thought I would use this blog to show more specifically how I finished up the serape.
First I blocked all the pieces. This is an essential step for any knitted garment larger than a hat, but especially so for lace knitting. Give it a quick dip in soapy water, rinse, wrap in a towel and squeeze out excess water before laying flat and pulling it into shape. I have 12 x 12 interlocking blocks and U-pins for the pulling into shape part. For this garment the finished size ended up 44 inches in diameter and about 30 inches long.
Since I had prudently worked buttonholes into one garter edge, I decided I-cords would make a good closure.
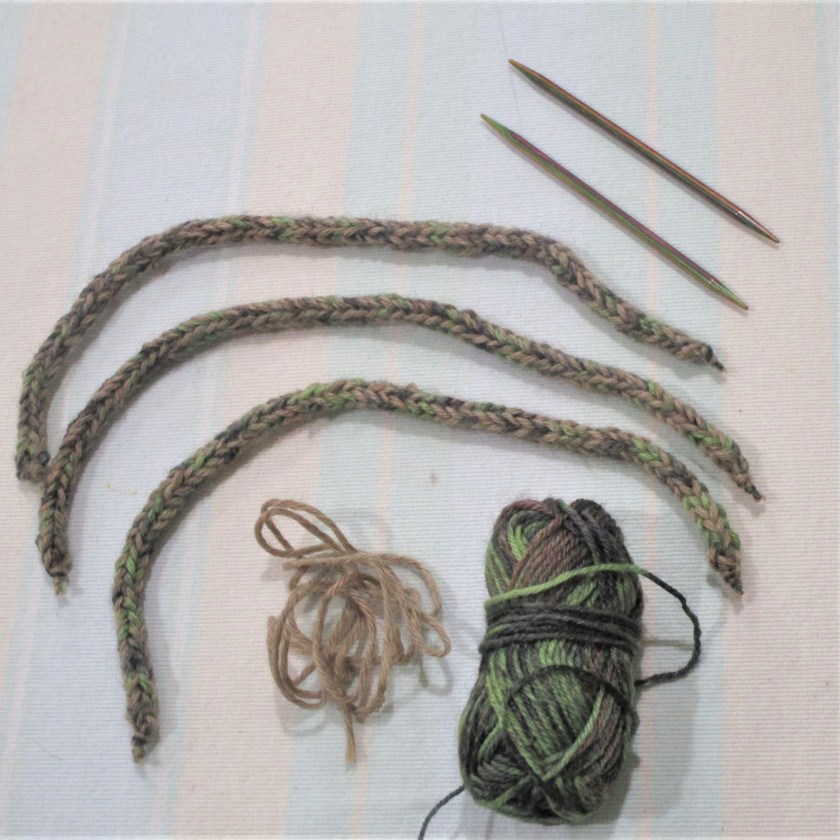
Fingering weight yarn, size 4 needles
You see the tools and materials above. These yarns were odds bits found in my stash. I held two colors together to make nice, fat I-cords. Using short double point needles, cast on three stitches. Knit them. Slide all the stitches to the other end of the needle and knit. Repeat this step until you get the length of cord you need. Mine are ten inches.
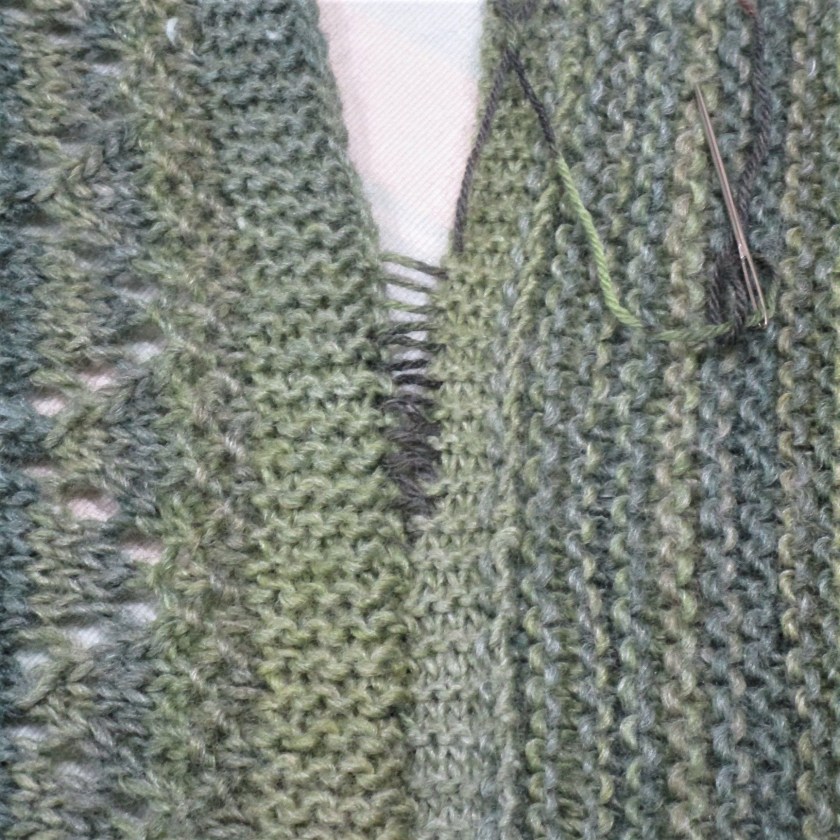
The back neck edge looked very ugly, so I decided to use a row of single crochet to finish off the entire neckline. There are lots of resources for learning to crochet, so I won’t go into it here. I will suggest a few things for this particular application. Work from the front of the garment and draw up a loop from right edge of the neckline. Leave about a three inch tail. If you are clever, you can hide this tail while you work the row. I just left it until I finished and then wove it under the first few crochet stitches. Work UNDER the next stitch to the left. It’s important to have both yarns of the stitch you are working over top of your hook. This keeps the crochet row straight and tidy.
Next is the side seams. I used mattress stitch. Align the front and back edges with the right sides of the garment facing you. Thread a tapestry needle with yarn and fasten the end to one edge. When working mattress stitch into garter ridges, you will insert your tapestry needle into the “knotted” looking part of the garter ridge. Work back and forth from edge to edge like this, keeping your stitches loose.
My work here is a bit slip-shod. I knew that my knitted pieces were already quite irregular. Perfect seams won’t improve the end results.
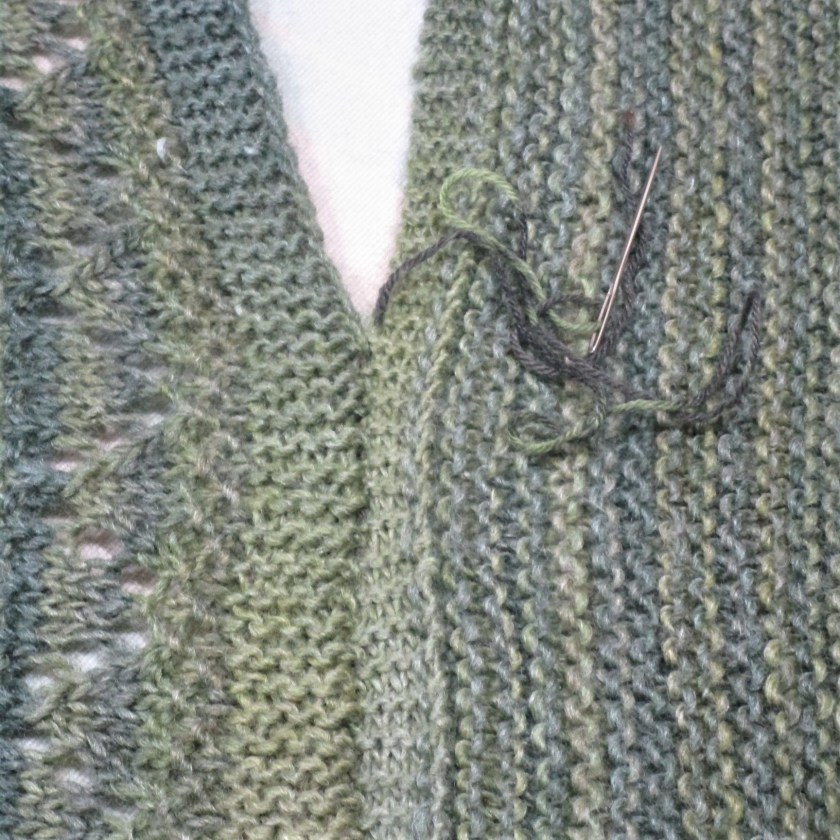
After running the stitch up the seam about three inches, snug the seam closed as thus: Hold the lower end with one hand and pull firmly and smoothly on the working yarn. The seam should close up. As a side benefit, you will find that your sewing yarn is totally invisible.
Continue sewing until you reach the top, then fasten yarn on the wrong side. Cut yarn and weave in ends.
The last step is to sew the I-cords opposite to the button holes and it’s Done!
I have to admit, now that it’s finished I am suddenly in love with the yarn and the garment. By the way, this lace stitch is called seed stitch lace diamonds. I found it in 750 Knitting Stitches: The Ultimate Stitch Bible.