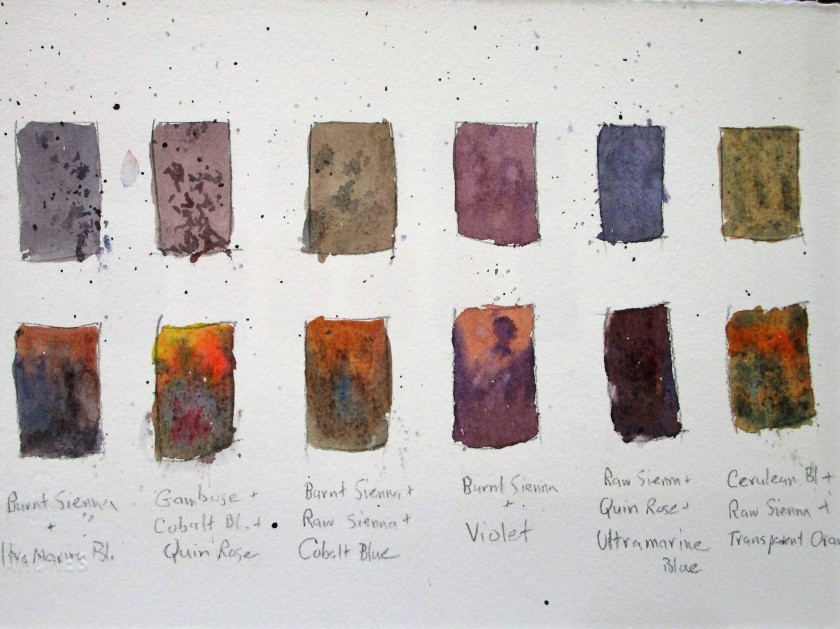
For the first lesson, Shari walked us through the mixes we would be using throughout the course. My swatches came out nicely, despite the fact that I had no Hooker green paint and substituted Winsor green.
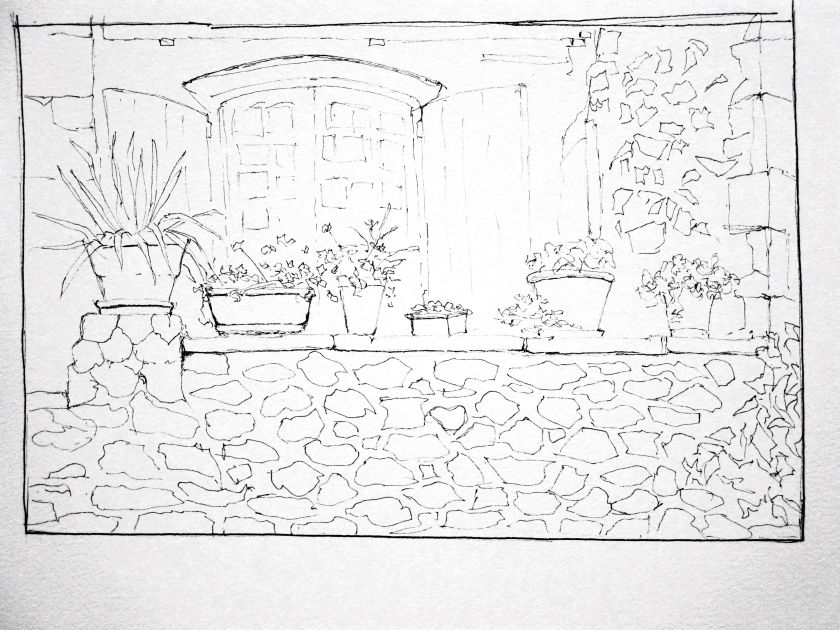
Our first painting was of a balcony scene in a Normandy village featuring lots of stone and pots of plants perched on a wall.
Photograph taken by Shari Blaukopf
Shari suggested that we avoid pencil lines and draw straightaway with the ink pen. I am using Pigma Micron with archival ink.
Not too bad. The basic shapes and textures look as expected.
First wash.
I was so focused on finishing that I didn’t take any other images of intermediate steps.
Here is my final ink and watercolor painting of the balcony scene.
While I didn’t have fun throughout the entire experience, I got re-introduced to my watercolor paint and had enough fun for a Wednesday.
I call this painting Cheryl’s Poinsettia. Yes, I did paint it, but it was while attending a tutorial session offered by Cheryl Bryan in early December. The image is hers and she walked us through all the steps.
While working on this still life, I felt totally relaxed and engaged – to the point that I was sorry when I had finished it. It’s a feeling I hope to capture again.
One of the many fiber projects on my to-do list is the replacement of my kimono.
Many years ago, my mom made matching kimono robes for Bill and me. They were sewn in an Asian cotton print of cranes (his) and cherry blossoms (mine) on a black background. We wore them frequently in hot summers, and packed them to travel all the time. Now both are threadbare. I managed to sew a replacement for Bill’s about six years ago. Mine finally gave out this year.
Last winter my mom let me browse her fabric stash. There I found a light blue textured cotton piece with enough yardage for a kimono. I snagged it and smuggled it home in a box.
Recently I found a kimono pattern offered for free on Connection Threads.
So I chose to get this project started yesterday. To line the kimono I bought this butterfly print at Hobby Lobby. At $3.00 per yard, it was hard to resist.
Ready, set, cut!
I made two modifications to the pattern. The first was a no-brainer, I just shortened the robe to knee length. That quick change saved me two yards of fabric. The second change was the addition of a side seam pocket. This type pocket was part of my first kimono. I just loved it for carrying around a set of eyeglasses and a tissue. It was so handy and yet so invisible. I couldn’t imagine my morning routine without it. (See my earlier post Who Needs Pockets? ‹ Daily Fiber ‹ Reader — WordPress.com )
The only difficulty is that I had no idea how to make a side-seam pocket.
Hah!, you say – This is a job for U-Tube. And you would be right. I found the perfect tutorial. Let me introduce you to Catherine Sews:
Having got that task out of the way, I moved on to sewing the robe fronts to the back.
……..and then the lining fronts to back.
Today I spent a good hour or so zig-zagging all the seam allowances to minimize the problem of fraying. Then I attached the neck band. It is sandwiched in between the outer fabric and the lining, which very neatly gets the lining sewn in to place.
Here is how the kimono looks at the end of today’s efforts.
I like how it looks so far. With any luck I will have the kimono finished by Friday.
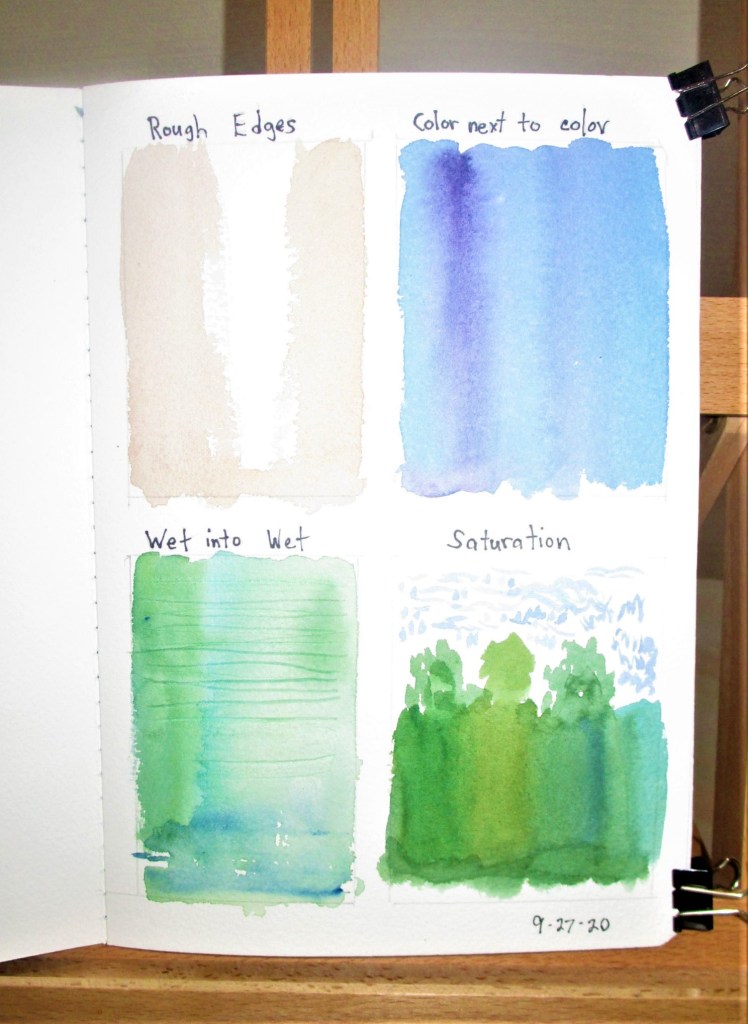
I’ve moved on to the next tutorial by Shari Blaukopf. This one is exciting to me because it’s all about techniques for painting water. Still water, moving water, rapids, reflections, waterfalls – these are all subjects that interest me greatly.
First off was brush techniques frequently used to paint water.
Sketchbook – first attempts
Hm, I think the wet into wet needs a little more practice.
A little better.
There’s no substitute for learning by doing, so I moved on to the first subject: Still water. Here you see my sketch and the first washes.
While I might have made the blues darker, I was well enough satisfied to move on to the next steps.
In my enthusiasm to paint, I failed to get photographs of each stage. Let’s just say that there were two more layers of wash (mostly on the trees) and then final details. Once everything had dried, I applied some white gouache lines to the still water.
Completed painting:
While I feel that I succeeded in getting the reflections right, I’m not terribly satisfied with the overall painting. I’ll probably try it again.
Friday, Oct 2nd. Today I painted the still water scene again. This rendition is much more pleasing to me.
The colors are cleaner and more transparent. The sky and water are vibrant instead of washed out. And the vegetation in the background is clearly defined.