Posted in hand embroidery, quilting

Sunday Walk, Sunday Work

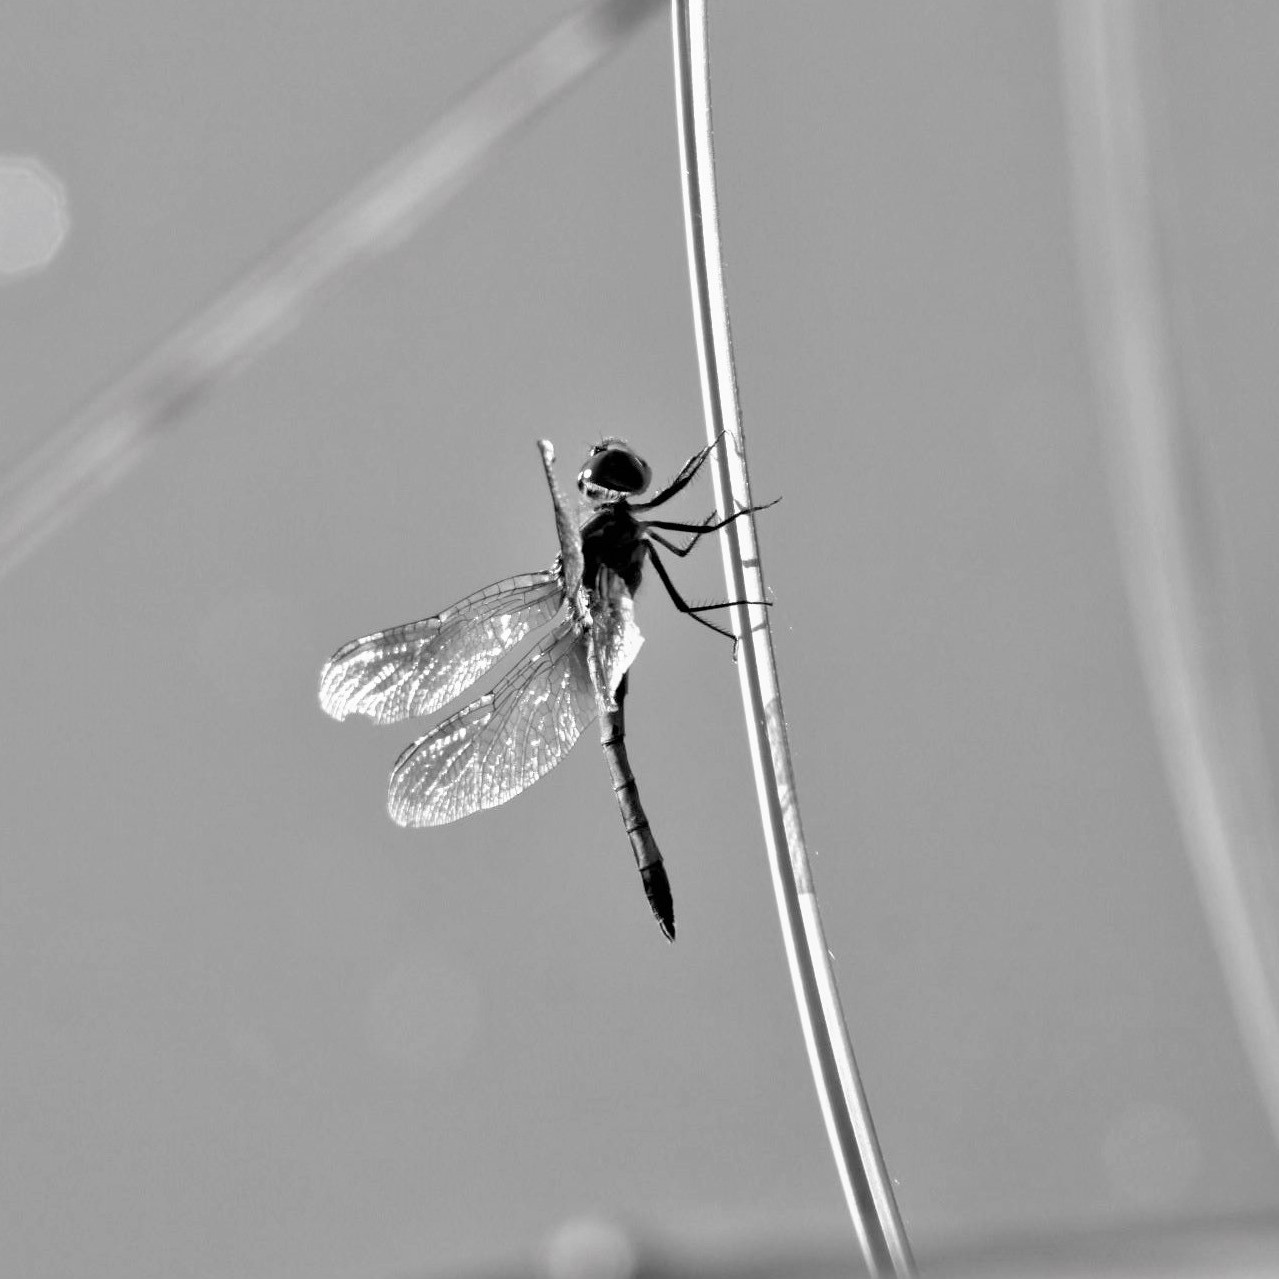
Yesterday was cool, but sunny. We went walking on our favorite trail, the Pathfinder. On sections of the path which are not shaded by trees, there were wide swaths of blooming flowers, predominantly white clover. Clover is not a native plant here, but still highly valued by the local denizens of the air – bees, butterflies and dragonflies. Bill got some great photos of these fliers with his high-tech telephoto lens. I confined my efforts at photography to things that hold still – especially the flowers. I also snapped photos of the pond, focusing on the willow branches which overhang the water. My goal is to incorporate additional elements into my turtle fiber object.

Upon returning home, I set to work. I have been fussing for the past three days over how to add pond insects to the turtle FO. I first tried making appliques on a scrap of fabric with the intention of fusing them to the background. That technique didn’t seem to work well. It didn’t give me the transparency I wanted for the wings and it didn’t give a life-like look.

But then I stumbled upon Lola Jenkins, a self-taught fiber artist who specializes in thread painting.

https://www.lolasdesignerquilts.net/craftsy-class

This bold, fearless quilter takes a black sharpie marker to her quilt, creating permanent stitch lines. She then stitches over these lines with black thread. In her Craftsy class, she likes to say, “If you are like me, go for it!”

So I did. Not with a marker, but a pencil. I drew the insects, then free motion quilted all of the pencil lines. Here are the inspiration photos (taken by Bill) and the resulting free motion quilted images.

I used embroidery floss to fill in the bodies

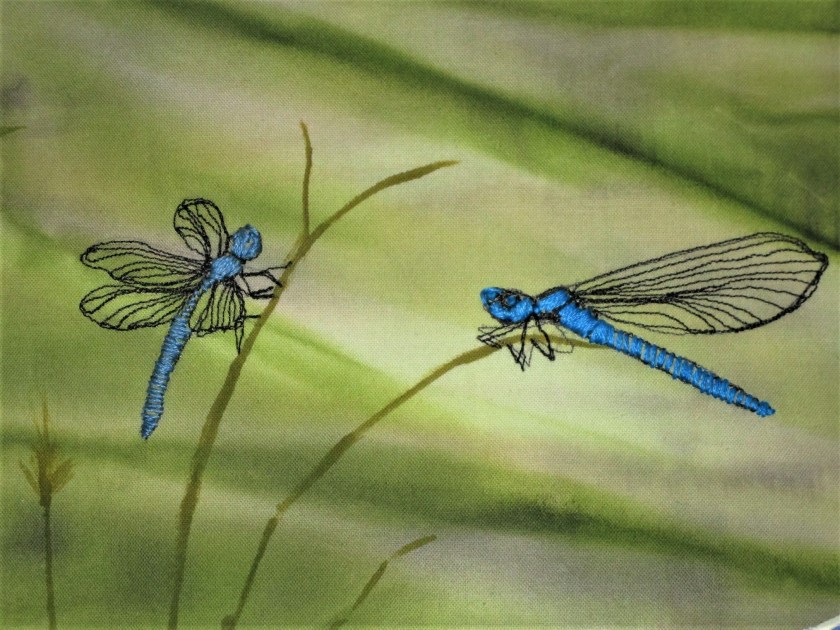
Now my lovely turtle has a few companions. I’m happy with today’s additions and feel more confident about starting the next step – background quilting.

Posted in colorwork, painting, quilting

Painting Thread

So far I have found myself frequently frustrated while shopping in my local craft store for decorative topstitch thread. My local craft store, which is a Hobby Lobby ( I have a love-hate relationship with H-L,) has a limited selection of quilting threads, none of which are what I am wanting for my current project. And the threads that are available are not particularly affordable.

I have nothing to lose in experimenting with painting my own thread. (Not be confused with thread painting, a hand embroidery craft in which stitches are worked densely to create a painterly landscape of thread on fabric.) I have everything I need.

1. A 50 gram spool of 100% cotton DMC thread no. 10 in an off-white color. 2 Assorted jars of Jacquard Dye-Na-Flo fabric paint. 3. water proof freezer paper. 4. latex gloves.

After coiling several yards of thread and tying them together with string, I let the thread soak in the paint for about ten minutes. Wearing latex gloves I lifted the coil from the paint, squeezed out the excess and laid the threads on paper. Drying took several hours. The next day I pressed the dried thread with a hot iron, under a pressing cloth, for about 30 seconds. This was my attempt to fix the color. Because Jacquard Dye-Na-Flo is an acrylic paint, it is essentially color-fast from the moment it dries. But if you want to use the paint on an item that will be washed, I would recommend letting it cure for at least a week before washing.

Here are my hand-painted threads wound on spools.

I love that the paint gave the thread a variegated effect. I’m not sure if this happened because I mixed paint colors together or because I had a cord tied around the coil. It certainly makes for a splashy look.

Airplane is in natural thread. Moon is stitched with painted thread.

So far I haven’t noticed any color bleed on my sample fabric. Tomorrow I will start using it on my quilt. I’m excited to see how that goes.