Posted in drawing, knitting, painting

Life in the Studio

As much as I enjoyed our little trip to visit family, it’s nice to be back into my routine. Just as an aside, the faux suede baby booties, while slightly too big, were well accepted by little L. In the meantime, she had also acquired two other items of footwear – a pair of sneakers and a pair of snow boots. She did a brief baby runway show, modeling all of the above. It was so funny to watch her toddle around the house awkwardly, although looking quite pleased with herself and her ability to work the crowd.

Back at home, I have picked up where I left off on various fiber projects.

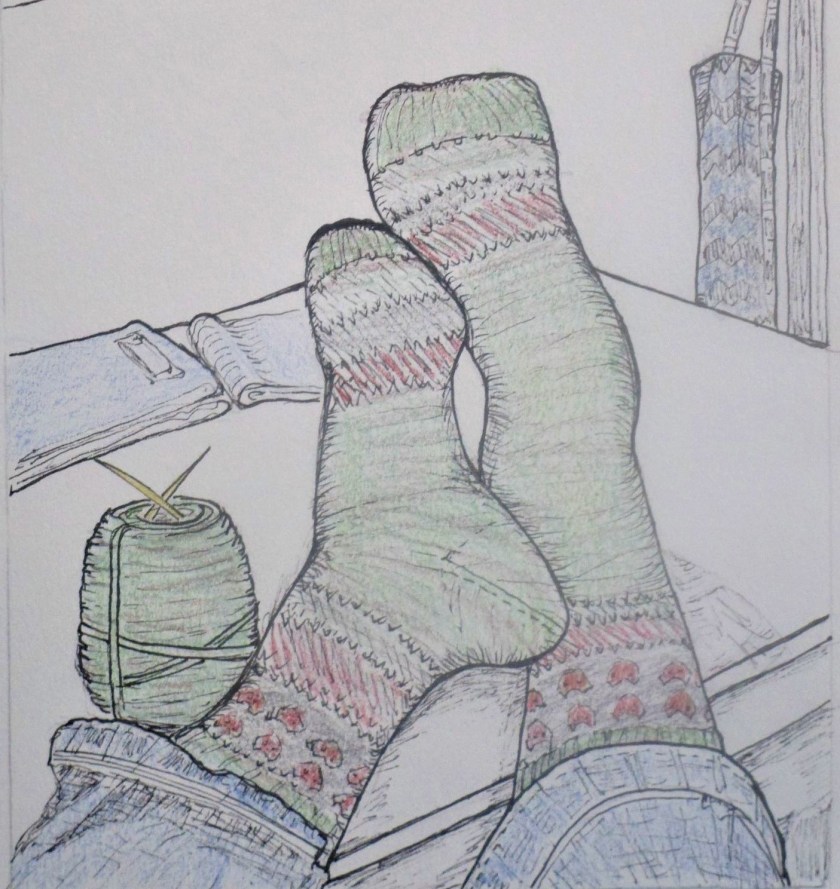
First of all, I’m knitting a birthday surprise for my daughter. (A big clue to the surprise is found in the sketch above.)

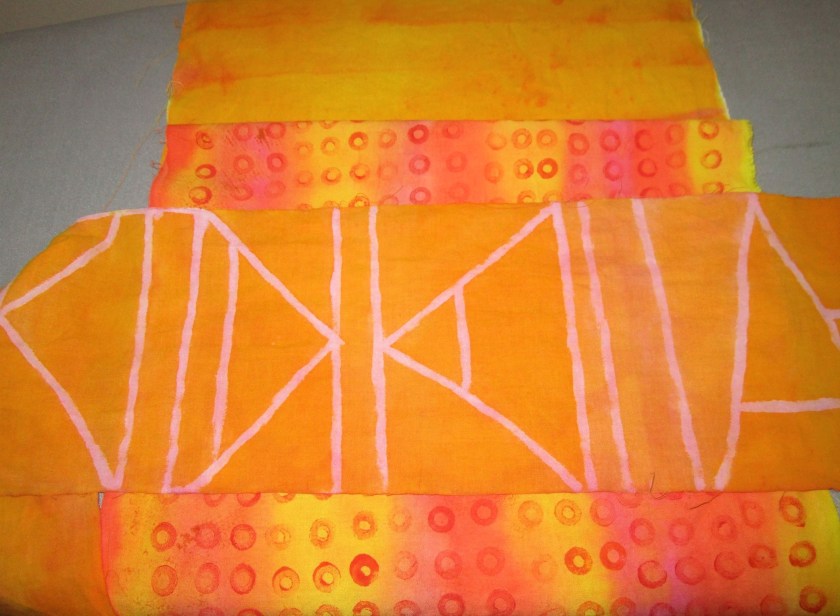
Secondly, I’ve resumed efforts toward making the Arches quilt. It’s amazing how just writing down the next steps motivated me to work. I have finished drawing the full-size patterns for each block. And by completing this step, I have been able to determine exactly how may squares of each color will be required. Over the past two days I have been painting the background fabric. I chose to paint the background squares on a gray fabric, in order to keep the background looking like the night sky.

Next up will be the fabric for the quilt subject.


Posted in colorwork, quilting

Inspiration, Gestation, Implementation

INSPIRATION: The idea for creating a fiber object based on the Gateway Arch has been rattling around in my brain for some time. It really started way back in 2012, after my husband and I visited the Gateway to the West museum in St. Louis. At that time, he took a series of photographs showing every possible angle of the Arch at ground level. They are rather remarkable, taken as a group. Here is an example.

Earlier this year, I asked for copies of these images and began to imagine how a series of different views would look on quilt blocks. I printed out nine pictures and pushed them around against each other. In the end, I shelved the project. I decided that I really lacked the necessary technical skills to realize my idea.

GESTATION: Over the summer I completed several on-line quilting lessons and actually made a quilt based on my own design. I now feel ready to tackle the Arch project. So yesterday I pulled the photos back out and arranged them into a nine-block design with a look that pleased me. It took me hours to get it right.

IMPLEMENTATION: Dear me. Thinking about the many steps required to move a quilting project from the idea stage through to completion is giving me pause. Let’s take stock of where I am so far:

  • I have a design and a layout, pictured above. Each image represents one block at 1/3 scale. I’ve decided that I will need a paper template for each arch image, in order to draw and cut it accurately from the background material. For this task, I have located a pad of giant post-it notes. From it I have cut nine pieces that are 14 and 1/2 inches square.
  • Block Content: Each block will consist of 16 squares with a finished size of 3 1/2 inches. The flowing arch will be cut free-hand into the sewn blocks and inserted.
  • Colors: There will be three background colors in hand painted fabrics, moving from left to right they are purple, blue-purple, and blue. The arch section which winds through each block will be made of golden-orange-pink fabric. Here are some samples that I made earlier this year.
  • Other design decisions yet to be made: sashing or no sashing, type and number of borders, backing. While I plan to quilt it myself, I haven’t decided on a pattern yet.

Next steps seem to be

  • Draw to scale the templates for each block
  • Determine yardage needed for quilt top and purchase fabric
  • Cut fabric into manageable strips
  • Hand dye strips according to design plan
  • Cut out the squares
  • Practice cutting free-style curves.

A wise woman said, the journey of a thousand stitches begins with one thread.