Posted in quilting

Gateway Arch: Nine Views

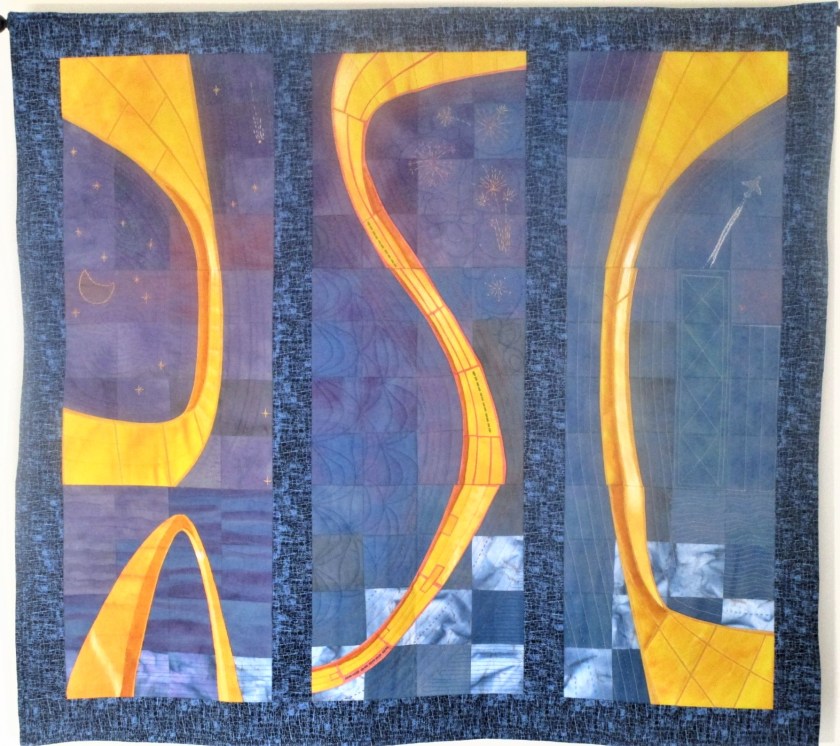
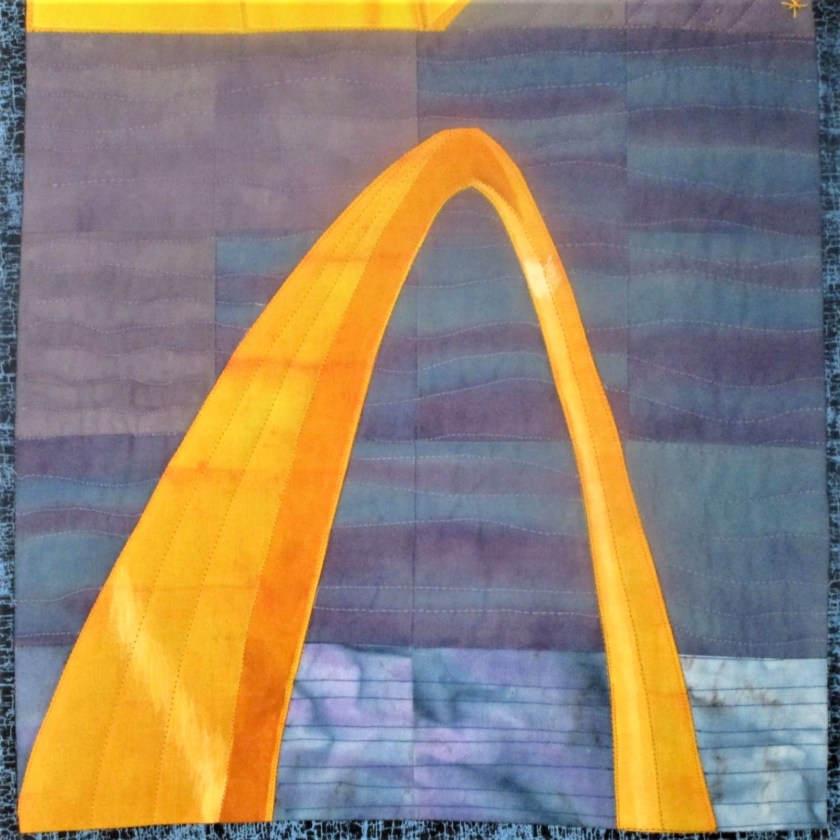
A culmination of six months spent thinking about and working on it, here is the Gateway Arch quilt. I finishing sewing on the binding while watching the Super Bowl (Yay KC Chiefs!) I feel an odd combination of elation, satisfaction and relief. The finished object is largely what I had envisioned.

IMAGE OF UPPER RIGHT PANEL

The colors are wonderful. The curving shapes are a good representation of the real arch. I’m happy with the embroidery.

MIDDLE RIGHT BLOCK REPRESENTING CITY BUILDINGS

The construction flaws bother me a little more that I had expected them to, especially the waviness of the right border. How did that happen?

LOWER RIGHT BLOCK SHOWING ONE TRIANGULAR BASE AND RIVER

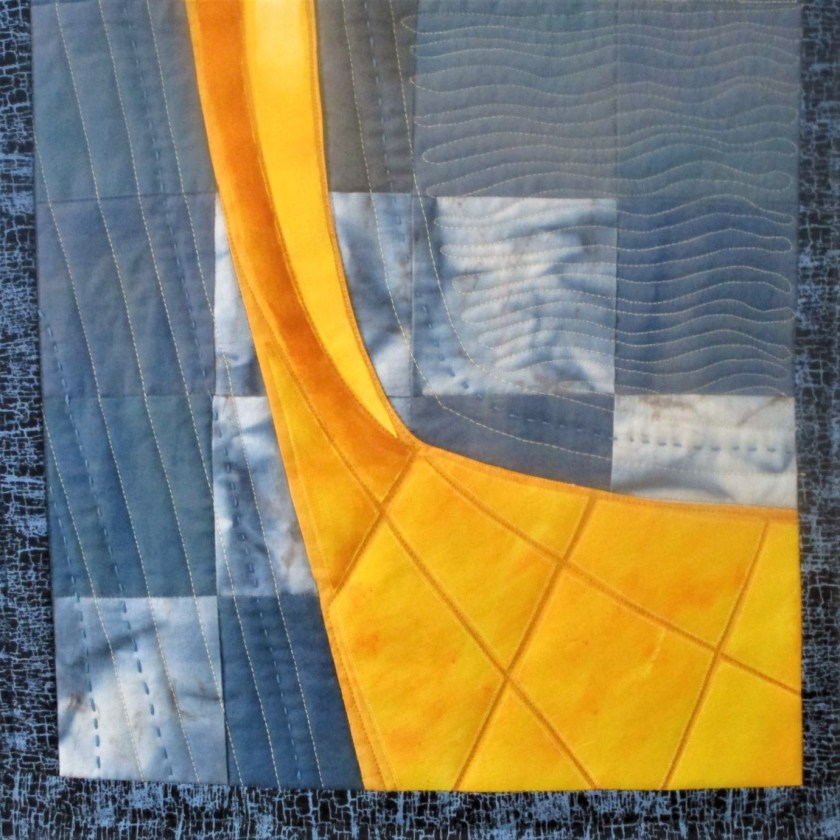
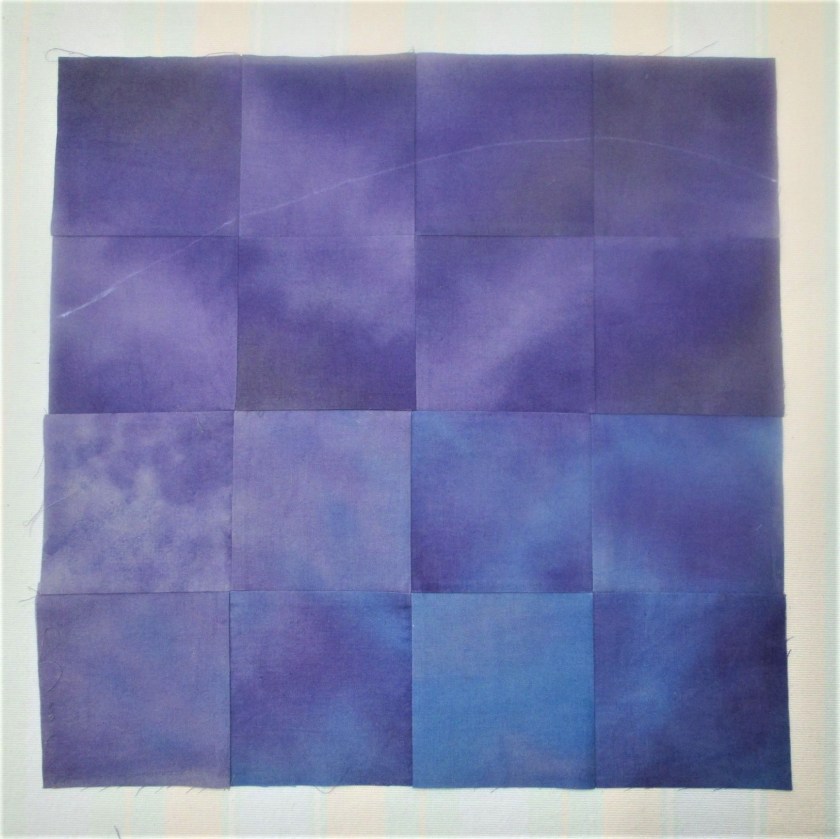
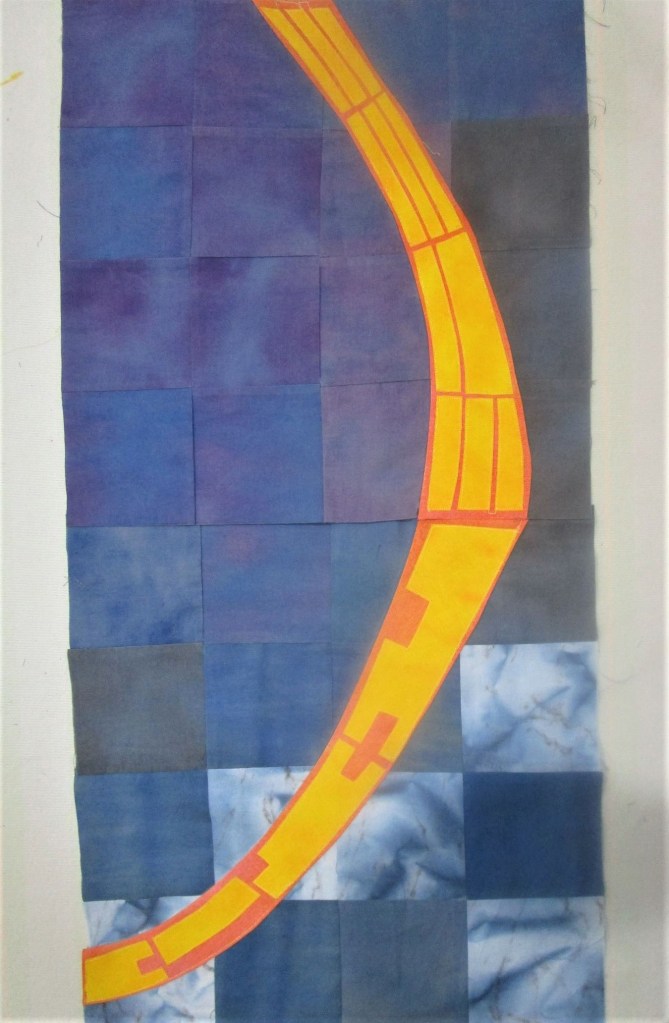
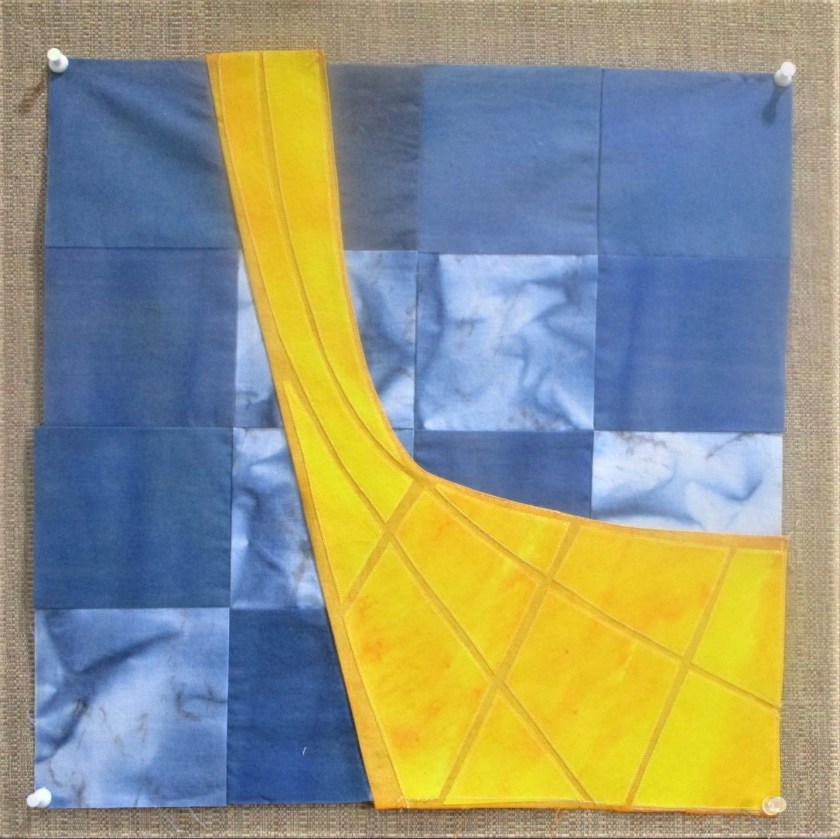
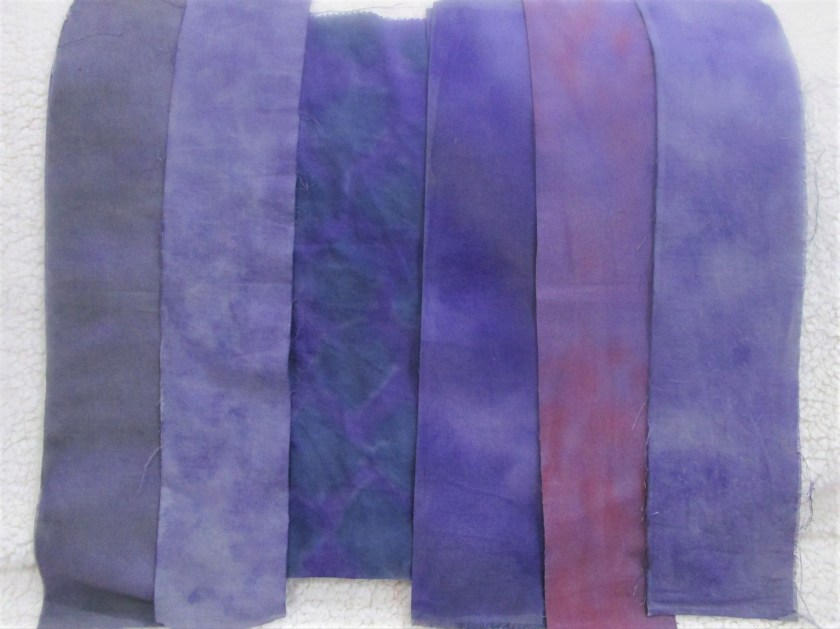
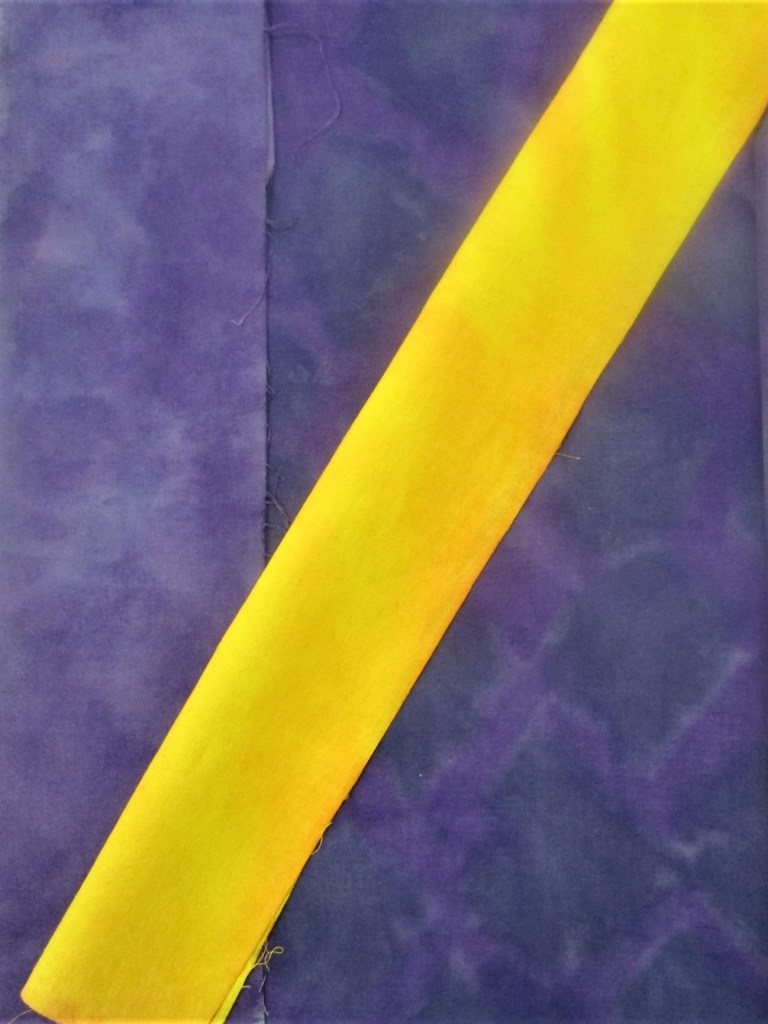
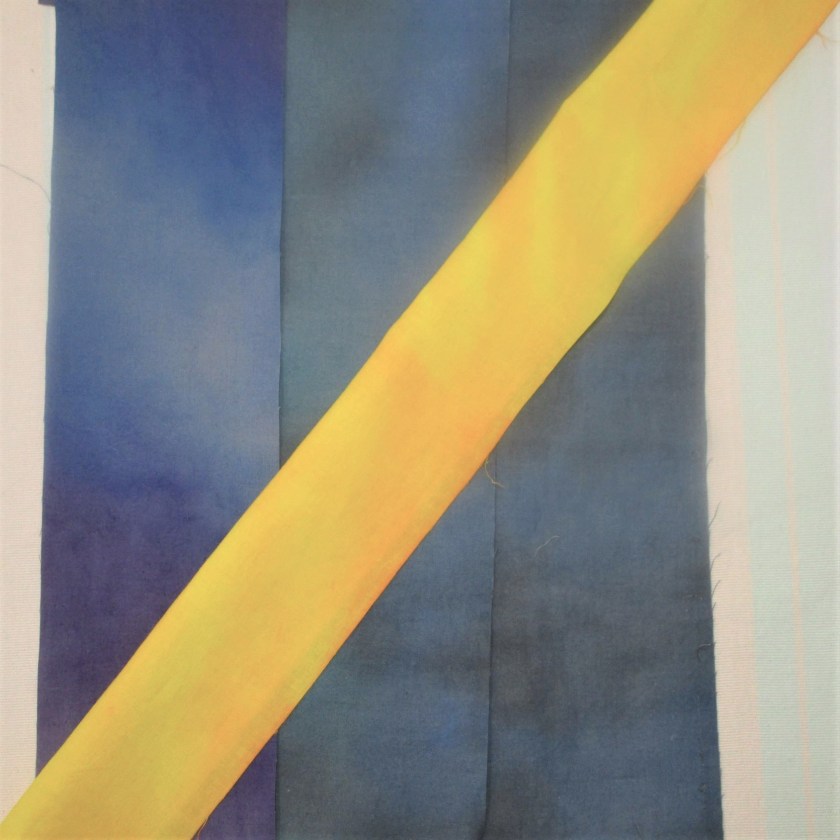
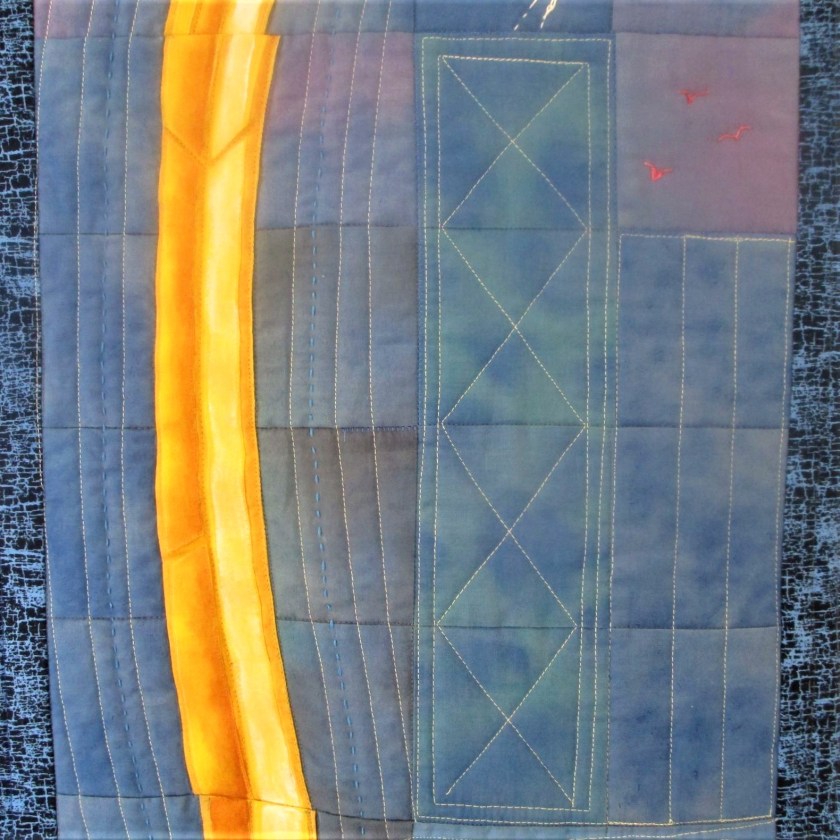
The arch shapes were made from hand-painted fabric cut apart into shapes that mirrored the arch’s steel panels and then fused to a solid background. This piece was then cut into the sixteen square background block on the left edge and appliqued on the right edge before being top-stitched in matching thread. Shading was painted on with acrylic paints after the block was finished.

THREE BLOCKS OF CENTER PANEL

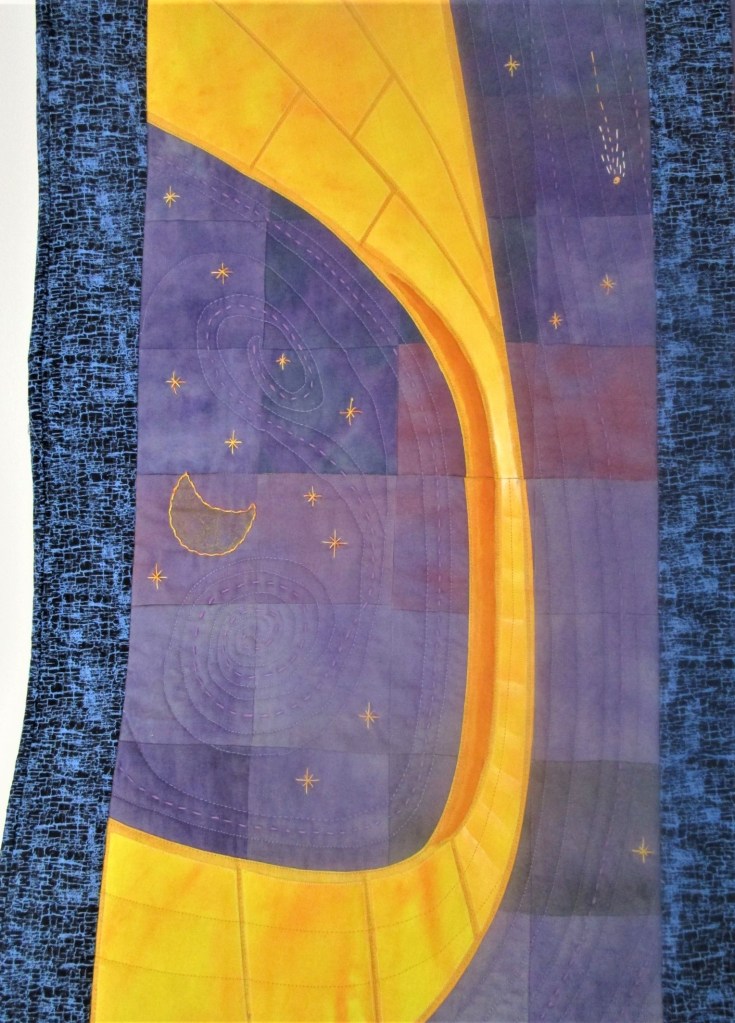
I had a lot of fun with free motion quilting. I chose patterns to emulate aspects of the landscape or city-scape. I did a lot of experimenting with thread colors, either matching or contrasting with the background colors as the spirit moved me. Eventually I hand painted some thread to get the colors I needed. The idea for the fireworks came from my memory of a July 4th trip when my family stopped in St. Louis for dinner.

UPPER AND MIDDLE LEFT BLOCKS

This project was a real stretch from the perspective of skills required. Thanks go to Bluprint.com for all the quilting tutorials I accessed. I learned a lot about painting on fabric, matching points, sewing curved shapes and putting the whole thing together. I also learned about the limitations of my current tools and studio space.

LOWER LEFT BLOCK: THE WHOLE ARCH, RIVER AND SKY

What’s next? I have a few ideas. But first I’ll be taking a short break from quilting to focus on painting, knitting and teaching.

Posted in quilting

Quilting Along

I hadn’t planning on ditch-stitching the Arches quilt. But I have been a bit stuck – uncertain about how to proceed and wary of my skills (or lack thereof) to quilt free motion. Hence, I partook of another tutorial. This one, taught by Susan Cleveland on blueprint.com, promised to teach me some alternatives to free motion quilting.

https://shop.mybluprint.com/quilting/classes/creative-quilting-alternatives-to-free-motion/60838

But first, here are a few views of the panel that I have already quilted.

This block pleases me. I was able to free motion quilt around the color waves in the background which imitate the sky and river. Using the walking foot I quilted the arch itself around the perimeter and also along the color breaks. I then stitched two lines up the side, which give a sense of the way the stainless steel panels are attached.

I quilted around the arch in the top two blocks the same way. In the background to the right of the arch, I chose to echo the arch shape. On the left side I stitched free motion in big swirls. These did not turn out well. I guess I will rip it out, but that kinda scares me.

Susan recommended that I stitch in the ditch between the squares. This is said to stabilize the piece. I am having a problem with fabric stretching out of shape. The ditch stitching and the basting of the panel edges should solve this issue. Once this step is done, decorative stitching can be applied. Some techniques I plan to try include top-stitching with big thread and hand embroidering areas of the quilt.

Now I need to decide which thread to use for the top-stitching and which designs to embroider. (sigh.) The completion date for this project is rather uncertain.

Posted in painting, quilting

Artful Santa

Ho, ho ho – I must have been a good girl. Santa left me some wonderful art supplies this Christmas. He knows that I am playing around with color these days.

True confession: Santa was working from my list. This set of 36 watercolors is made by Arteza. The first thing I did after unwrapping them was swatch each color. The Prismacolor pencils are the erasable type. I’ve been told these are very useful in sketching, specifically the line drawing used to start a water color.

Since Christmas day I have been working fairly steadily on the Arches quilt. I’m pleased that I have finished assembling the hand painted backgrounds of the16 blocks that make up the quilt design.

Block C1 (Center top) The chalk line indicates where the arch starts.
Final Block – L3 Bottom left. I’m so proud that I matched all the corners.

The images below show a few completed blocks compared to the reference photos I worked from. Here is the upper right block.

This photo shows two blocks, representing the slender upper sections of the Arch.

I’m on a roll now. My hope is to finish the quilt top before the new year.

On a shopping trip to Tulsa I found the backing fabric – a purple-black color with a graffiti style print on it. I still need to choose border fabric. But what color? I am considering something lighter, just to provide separation from the dark blue and purple of the background. But I don’t want the border to compete with the bright yellow-gold of the subject fabric. Suggestions would be welcome.

Posted in drawing, quilting

Welcome to Winter

Here in the central time zone we are mere hours away from the winter solstice – the official start of winter. With all the busyness of Christmas preparations, I didn’t make a special fiber object to celebrate the change of season. Instead today I am recycling one of my Inktober drawings made on the prompt of Snow. The reference photo I used for this charming scene was taken in front of my brother’s home in Ohio. While I did use artistic liberties with the content of the background across the pond, the scene is essentially like reality. There is an air of nostalgia about it, not unlike the way I feel at this time of year.

Work on the Arches quilt continues. I have solved some of the technical issues facing me in piecing the blocks together. The blocks on the right edge of the quilt have been pieced and pressed. Here are two.

As I finished stitching the lower right block, I started to feel a real sense of accomplishment. My idea is actually coming together, just the way I envisioned it.

Posted in painting, quilting

Update on Arches Quilt

I last wrote about this project on November 16th – almost a month ago. In that post I made a list of next steps. While I have completed all but a few of those steps, I started to lose enthusiasm for the project while painting my fabric. It seems that all of my fabrics began to look alike. I told myself that the background fabrics SHOULD look alike, otherwise they wouldn’t retreat into the background. But I still wanted more texture and movement in the colors. So I decided to go back to Cindy Walter’s fabric painting class, to review my technique and discover what I’m missing.

https://shop.mybluprint.com/quilting/classes/fun-techniques-with-fabric-paints/35491

That did the trick. I worked a few variations on color washing and finished painting the background fabric. I now have enough fabric to start building the quilt blocks.

Looking at all the difference in the fabrics, it’s clear to me that I need to organize them in a way that illustrates the scene I want to paint. The solution came to me while I was in the shower. (Why do I get my best ideas while washing my hair?) The Arch stretches itself across three different backdrops.

Water.

City.

And sky

I have my design, my structure, my fabric and my pattern. Now I can begin to sew.