Posted in painting

Friday Finish: Spring Flowers

After my latest experience in watercolor painting that yielded (to me) disappointing results, I decided to sign up for a tutorial. I reasoned that it would give me some pointers on realistic shadows and rebuild my confidence in painting.

Shari Blaukopf has a new course that teaches painting spring flowers. This will be my fourth or fifth tutorial with Shari, so I knew what to expect.

https://learn.shariblaukopf.com/

The first lesson is crocuses. Shari chose a perspective that it dramatic and not hard to do. Her reference photo was taken looking straight down at a group of flowers just opening up.

COPYRIGHT SHARI BLAUKOPF

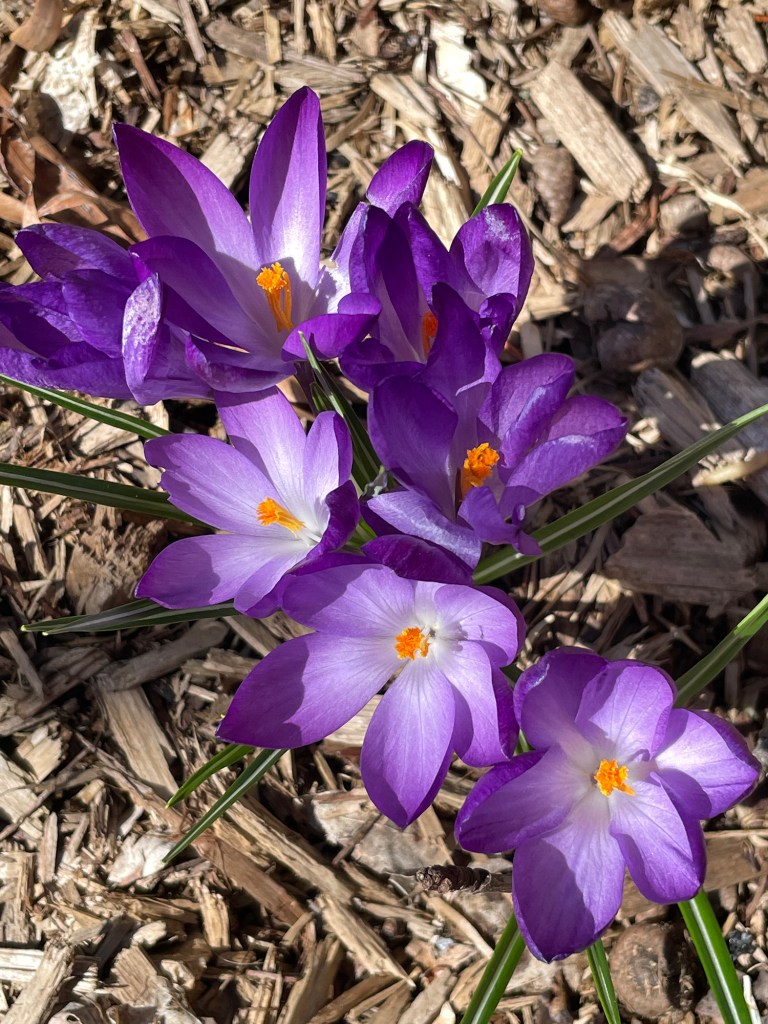
I jumped right into the lesson, sketching it yesterday and painting it today.

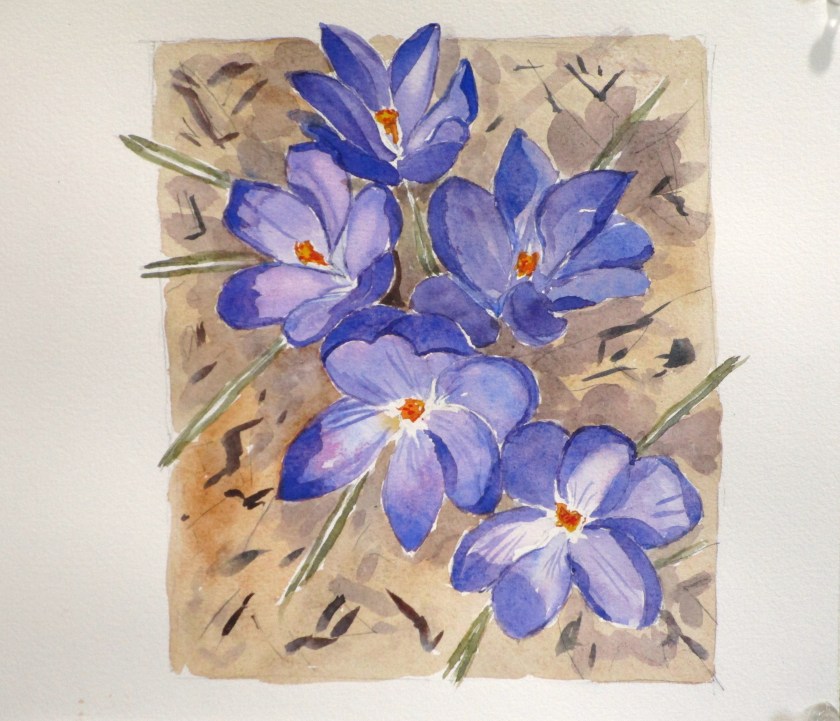
Maybe I could have made my cast shadows darker.

This exercise was fun and relaxing. The palette I used incuded cobalt blue, quinacridone magenta, hansa yellow deep, transparent orange, carbazole violet, burnt sienna, ultramarine blue and yellow ochre. Paper is Arches cold press, 140 weight.

After I finish the next two lessons, I’ll go back and try painting my Admirable Weeds subject again.

Posted in drawing, painting

Friday Finish: Tutorial with Shari Blaukopf

Earlier this year I shared some work made following a tutorial taught by Montreal artist Shari Blaukopf. She is an urban sketcher and watercolorist who offers a wide range of online lessons through Teachable. Today I finished painting A French Village Scene, which is the final lesson in her course by the same name.

https://learn.shariblaukopf.com/courses/

The challenges were multiple: perspective drawing, sketching in ink, and completing the scene with watercolor.

Here is Shari’s reference photo. She took it while teaching in France this year.

Photograph by Shari Blaukopf

I labored over the perspective drawing for 2 or more hours. Perspective drawing doesn’t come easily to me, and I wanted my work to be believable, if not 100% accurate. When satisfied, I inked the important lines and erased the pencil marks.

I was forced to take some liberties with the scene, because my paper was not proportional to the original. Mine is wider.

I did most of the painting before our Thanksgiving trip to Wisconsin. Returning home, I was keen to finish this and get it off my workspace. Other projects, both started and planned are stacking up awaiting my attention.

Here is my (almost) final painting.

It’s a truism, at least for painters, that they must take some time away from a work before deciding that it is finished. So that’s what I will do. Even looking at it now, I see a few areas that need more work.

Posted in drawing, painting

Watercolor Wednesday: Blaukopf Online Learning

I gave myself a gift by purchasing another Blaukopf tutorial through Teachable. This one appealed to me because it featured ink and watercolor.

https://learn.shariblaukopf.com/p/sketching-a-french-village-scene

For the first lesson, Shari walked us through the mixes we would be using throughout the course. My swatches came out nicely, despite the fact that I had no Hooker green paint and substituted Winsor green.

Our first painting was of a balcony scene in a Normandy village featuring lots of stone and pots of plants perched on a wall.

Photograph taken by Shari Blaukopf

Shari suggested that we avoid pencil lines and draw straightaway with the ink pen. I am using Pigma Micron with archival ink.

Not too bad. The basic shapes and textures look as expected.

First wash.

I was so focused on finishing that I didn’t take any other images of intermediate steps.

Here is my final ink and watercolor painting of the balcony scene.

While I didn’t have fun throughout the entire experience, I got re-introduced to my watercolor paint and had enough fun for a Wednesday.

Posted in painting

Learning to Paint Water

I’ve moved on to the next tutorial by Shari Blaukopf. This one is exciting to me because it’s all about techniques for painting water. Still water, moving water, rapids, reflections, waterfalls – these are all subjects that interest me greatly.

First off was brush techniques frequently used to paint water.

Sketchbook – first attempts

Hm, I think the wet into wet needs a little more practice.

A little better.

There’s no substitute for learning by doing, so I moved on to the first subject: Still water. Here you see my sketch and the first washes.

While I might have made the blues darker, I was well enough satisfied to move on to the next steps.

In my enthusiasm to paint, I failed to get photographs of each stage. Let’s just say that there were two more layers of wash (mostly on the trees) and then final details. Once everything had dried, I applied some white gouache lines to the still water.

Completed painting:

While I feel that I succeeded in getting the reflections right, I’m not terribly satisfied with the overall painting. I’ll probably try it again.

To see Shari’s work, you can visit her blog here.

Friday, Oct 2nd. Today I painted the still water scene again. This rendition is much more pleasing to me.

The colors are cleaner and more transparent. The sky and water are vibrant instead of washed out. And the vegetation in the background is clearly defined.

Posted in painting

Final Lesson – Painting Shadows

Yesterday my husband and I returned from a week in Wisconsin. It was the baby’s 2nd birthday and we were there to celebrate. I loved my time there. My granddaughter had just broken the code on language, and words were tumbling out of her mouth in great abundance.

I had intended to post this blog last Sunday, but family life took priority.

The reference image for the lesson was a slightly decayed old service station in South Carolina. I will admit that I wasn’t terribly inspired to paint it. Bu I knew there were lessons to be learned from the effort.

First the sketch. Only a small number of pencil lines were used. I didn’t ink them.

There is a wide curving drive way across the foreground. The sun is coming from the right side of the image. It is high in the sky, but not directly overhead. First wash:

Next came the trees and shrubs in the background.

I was okay with this work, except for the dark tree on the right. The green doesn’t seem to fit with the other shades of green paint. Here is the final painting.