Posted in quilting

SAHRR 2026 Round 2 Make-it-a-double. Twice

On Wednesday Kathleen McMusing declared that round two of this year’s Stay at Home Round Robin quilt challenge will be doubled. This very clever and open invitation sent me back to my Costa Rica photographs to consider how I might interpret the challenge within my theme. It was quite pleasant looking at photos of a tropical paradise while huddling inside away from the cold and snow. I remembered several animals that demonstrated the theme of doubles, starting with the Scarlet McCaw. This bird mates for life. In Costa Rica they are seen in pairs: flying, roosting, grooming – everywhere.

We saw other animal pairs frequently

While I would love to paint these creatures, in the interest of meeting my deadline, I went back to Kathleen’s post for more guidance. She had suggested a dozen blocks to choose from that included two of a kind. I liked the double tulip block. It reminded me of tropical flowers, and that I had this fabric:

Hibiscus print, with flowers that flow in an ombre effect. It was in my mother’s stash, and she let me have it a few years ago.

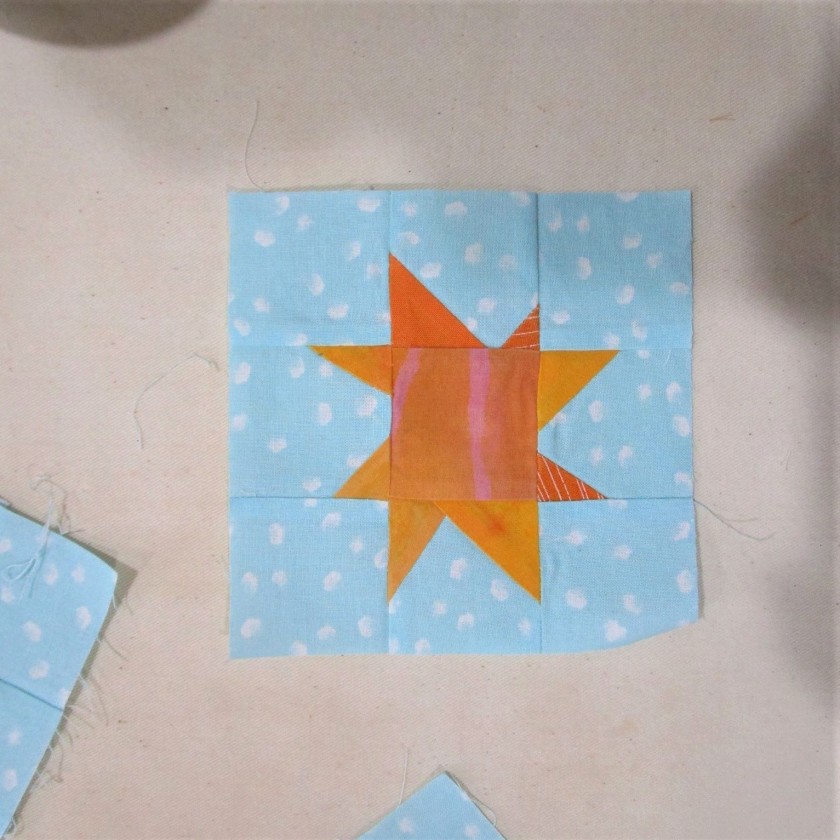
I quickly worked out the piecing needed, then cut and assembled my first tulip (hibiscus)

After making one other like this one……..

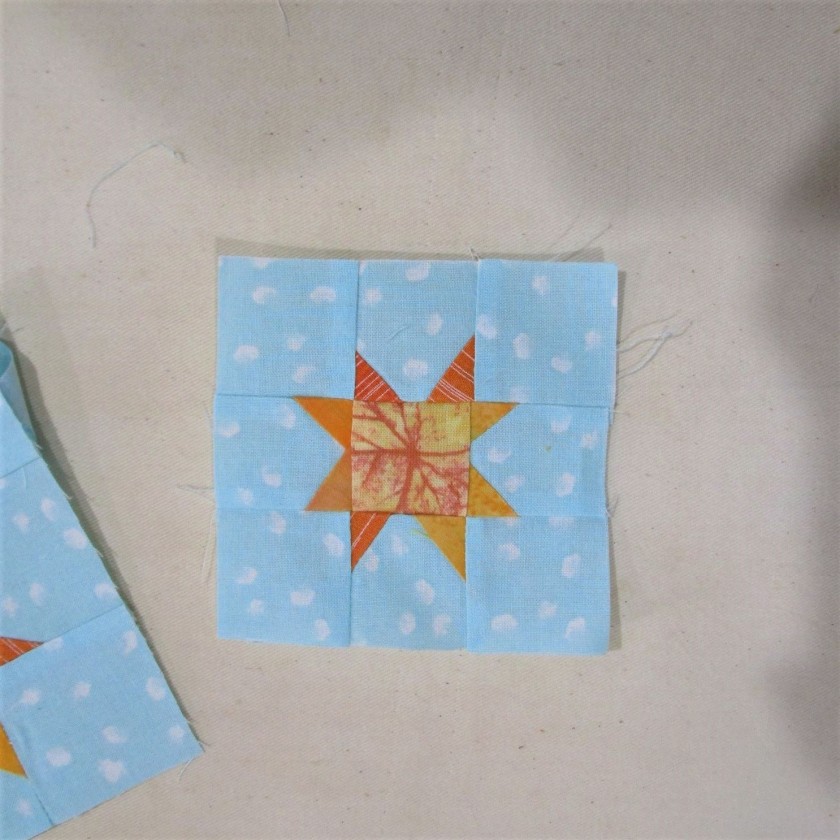
….. I cut and assembled two more blocks with a leaf background instead of a sky background. I also used the solids that appear in my center block.

Now I have four blocks, but no idea about where to put them. They may become the corner blocks of the quilt. Laying them aside, I got busy with idea no. 2.

We were fortunate to stay in a beautiful villa high up on a hill in the Osa Peninsula.

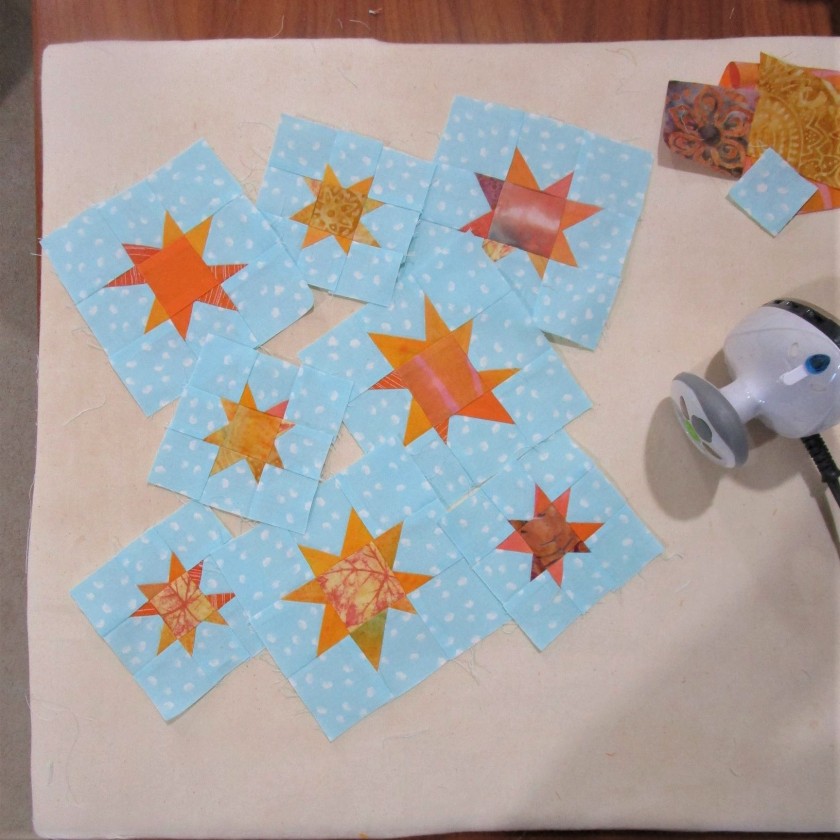
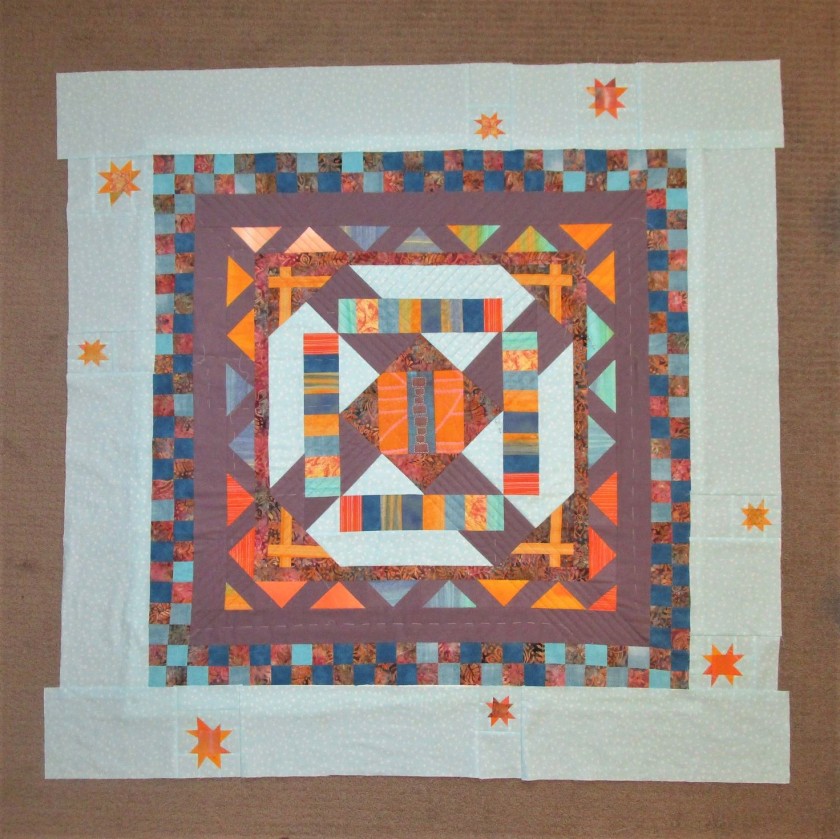
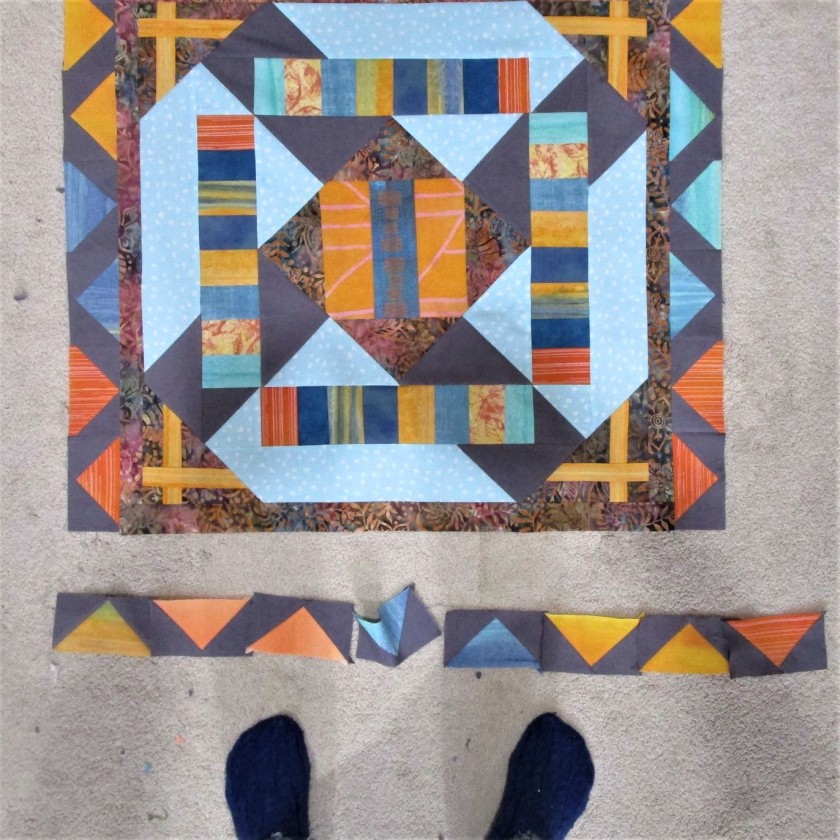
One feature of the décor was the generous use of tiles. They were everywhere, on walls and floors, the pool, deck and walkway. I was inspired to make a double border in the form of tiles. While I didn’t get any photographs of the tilework, I think I can come up with something close. On pale blue fabric, I used fabric paint to approximate a fancy glaze. Here are my swatches.

I cut this and some compatible blue-green fabric into 3 and 1/2 inch squares. To imitate grout, I cut cream colored solid fabric into 1 inch strips.

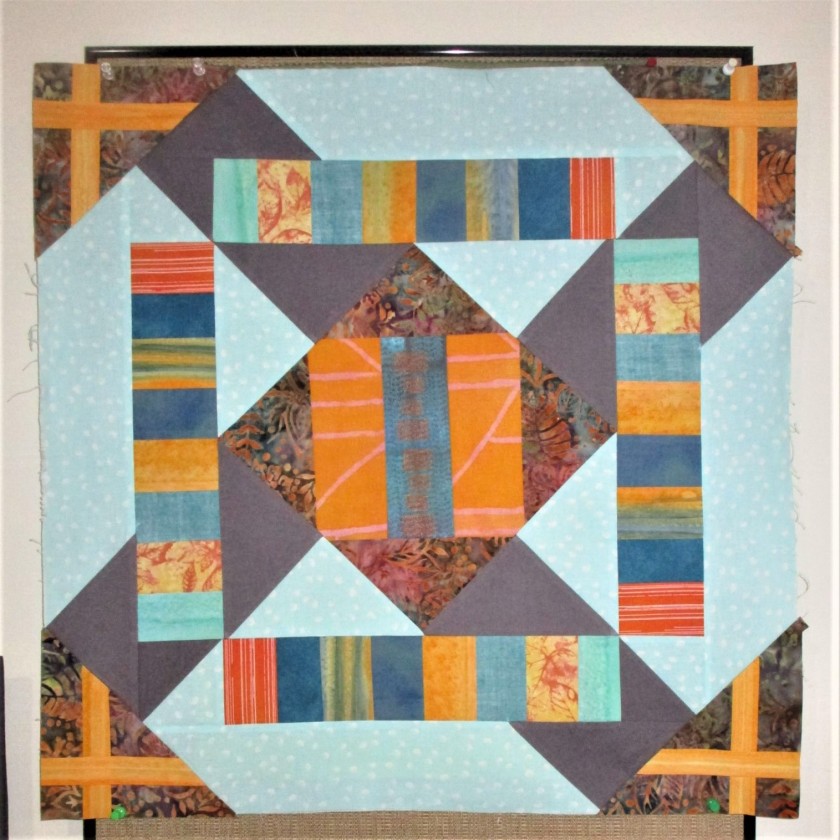
And here is my Costa Rica quilt at the conclusion of Round 2.

I’m quite pleased.

If you enjoyed reading this post, please consider visiting Kathleen’s post where the InLinkz party is happening right now.

Remember each week, the host listed is the one that has a link up for you to post your progress. The others will also be showing their interpretation, so you get the added benefit of seeing 6 different approaches to the same prompt!

  • ✓ January 14: Each of the hosts will be sharing their center blocks
  • ✓ January 21: 1st Round:    Brenda @ Songbird Designs
  • January 28: 2nd Round: Kathleen @ Kathleen McMusing <——-This Week
  • February 4: 3rd Round: Emily @ The Darling Dogwood
  • February 11: 4th Round:   Wendy @ Pieceful Thoughts
  • February 18: 5th Round: Gail @ Quilting Gail 
  • February 25: 6th Round: Anja @ Anja Quilts
  • March 25:   Parade: Your Finished SAHRRs!

By the way, my quilt is now 31 inch wide by 18 inch tall.

Posted in painting, quilting

The Creation Fiber Project: Work continues

It was a cloudy day when I staged and photographed this image. It documents the assembly of my latest quilt project, tentatively called “Creation.” From a few feet away, the piecing looks fine. All points that are not exactly matched are at least closely matched. You can see on the right one border attached.

At this point, I really needed a break on lining up and sewing points. So I moved on to the border’s corner blocks. In reading about medieval manuscript paintings, I learned that the owners of the missals often had their family coats of arms painted at the corners. Here are examples.

I desire to do something simpler. (Only partly because I don’t want to spend several years of my life painting an elaborately decorated border like the example!) I have a fascination with symbols, so I decided to place historical and ancient symbols of God and/or creation at the corners instead. After a bit of research, I got busy.

Three out of four are complete. They are painted on the same golden fabric used as used for the scenes of Creation. I used watercolor pencils again. Behind and to the left you can see my border fabrics.

Perhaps tomorrow I will get back to sewing.

Posted in quilting

SAHRR #5 – The Stars Above Us

After putting in a few hours of sewing yesterday and today, I find that I have something to show for this round after all. First of all, here is my assortment of wonky stars.

There are two sets of four – the smallest will finish out at 3 inches, the larger at about 4 1/2. While it took some patience to stitch on the tiny scraps of star points, I found myself enjoying the process. And in the end, they are so darned cute! I also made them fiery stars, in hot shades of yellow, orange and red. They jump right out from the pale blue background.

As I stitched along, though, I found my stars getting less and less wonky!

First Star
Last star

The blue border will be six inches wide. This will give the eye a good break from the dark and busy center of the quilt while allowing the stars to shimmer. Here are the assembled borders laid in place.

This project is so big, it is almost impossible to take a decent picture.

As you can see, the border is not attached yet. I am in the process of quilting the center body. My plan is to make separate quilt sandwiches for each border, attach them and then finish up the quilting by working around the edges. Or perhaps I will quilt them before sewing them on. Anyone have a recommendation for me on how best to manage this step?

If you would like to see the work of other quilters doing this challenge, follow these links:

Posted in quilting

All These Geese – Twist their Tails

Photo by GEORGE DESIPRIS on Pexels.com

Here I am, for the third day, working on Round 3 of the Stay Home Round Robin quilt challenge. Yesterday I wrote about my efforts to assemble flying geese blocks – a technique that was brand new to me.

I started with a quilt that looked like this:

To line all four sides with Flying Geese blocks, I would need to make 48. Thinking about how much time and effort I had already spent and considering that I needed another 24 blocks, I decided to change the design of this border.

What if I turned the blocks 90 degrees, and let the long side go parallel to the quilt edge? And while I was twisting the blocks around, what would happen if I alternated the direction – turn one left, the next right, and so on.

So that’s what I did. I made up more blocks anyway, because I needed certain colors for the new plan. Ditching the bright green geese, I went with my current palette of blue-green, orange and gold.

The quilt is now too big to stick on my bulletin board, so I am photographing on the floor. Here’s my round with the first three sides finished.

And here is the finished round.

I grouped the orange and yellow geese toward the corners, where they can have a conversation with the plus signs. And I laid the blue geese near the sides of the pale blue octagon. The result of this layout is a path for the eye to move all around the quilt, guided by the color groupings.

I feel very pleased. Maybe, just maybe the results were worth the effort.

If you would like to visit other quilters who are working on Stay At Home Round Robin quilts, you can follow these links: