Posted in collage, colorwork

Inspired by a Bird

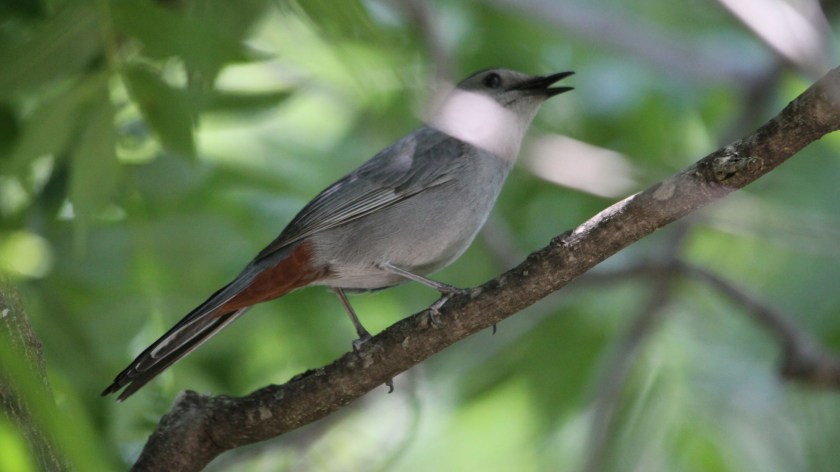
The idea for this fiber object came to me one morning while porch-sitting with a book. It was a gorgeous day, but I was poring intently, with all my focus, on the book in hand. Surprisingly, I no longer remember what I was reading. The probable cause of this memory lapse was the very thing that intruded upon my thoughts. A catbird had begun an insistent and virtuosic song. The sound tore my mind from my book and into the present moment. Looking about, I failed to spot him. So instead of continuing to search with my eyes, I closed them and sat back in my chair.

Pretending that I possessed synesthesia, I imagined what that birdsong might look like, if it were visible. There were deep chortles and murmurs, but also squeaks, shrieks and ascending melodies. It went on and on. And on. Eventually the catbird flew off.

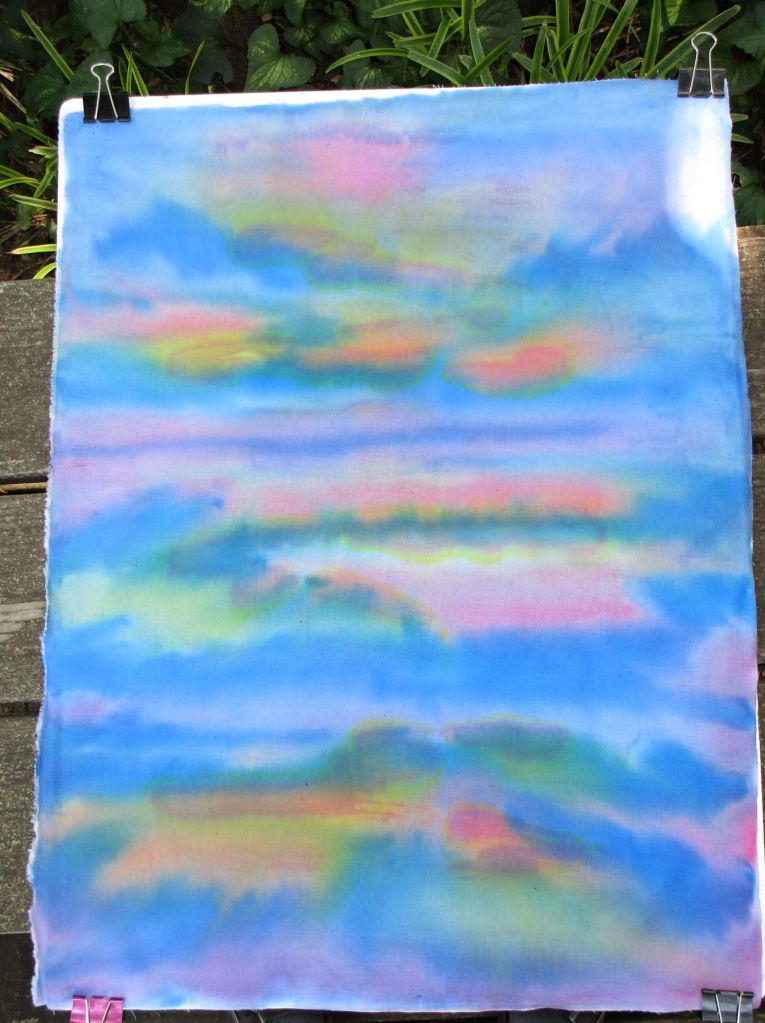
Here’s what I wrote in my journal: “Sky-inspired painted background. Reverse applique to suggest an unseen bird. Throaty -chortling purples, warm tones high pitch trills – bright white squeaks. dashed gestural lines to suggest direction of pitch. Parallel wavy lines for a musical staff.”

All very poetic. But I want to make a piece of visual art, and as such it must have form.

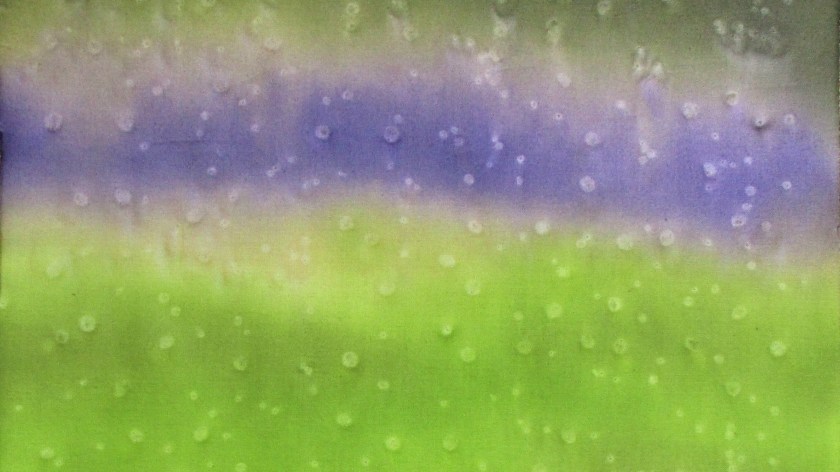
This week I got underway. Since my fabric paints were out, I started with the background. On a piece of white quilting cotton I stroked colors that I thought would make a good sky at daybreak – pale blue, violet, peach and gold. I achieved this rather startling canvas:

Paint is still wet here

What sort of a sky has leaf and dark green in it? None I’d ever seen. I was prepared to set it aside and start again. But on second thought, I chose to continue with this background. The unconventional sky colors can represent the effect of birdsong on the air. Here is my bright background after it dried.

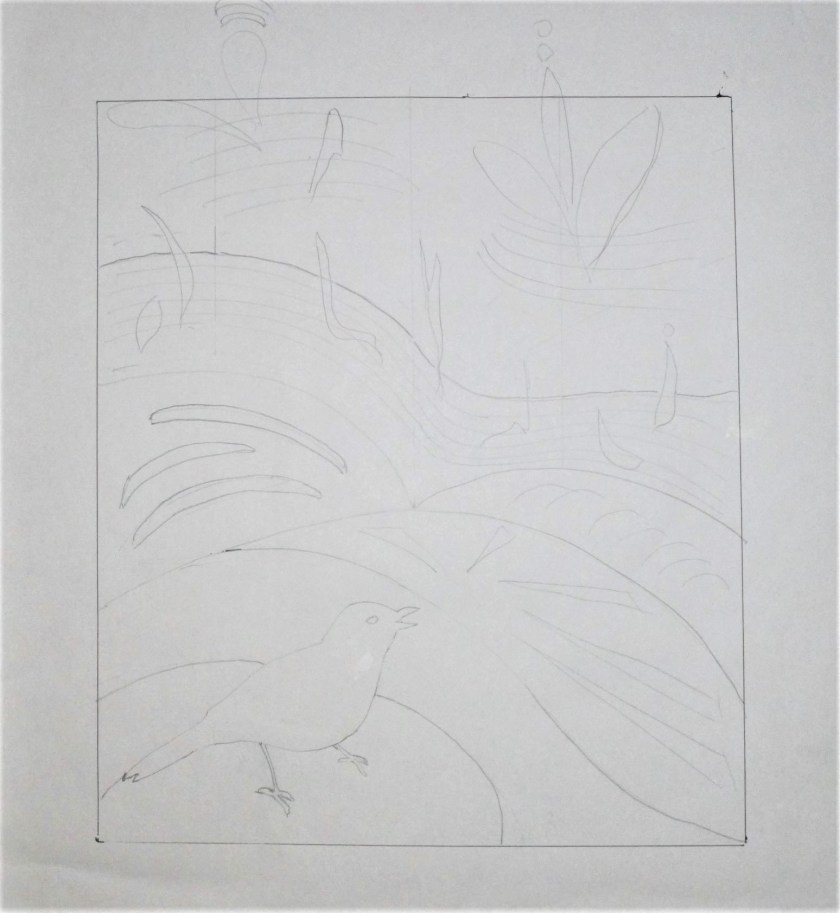
Next comes the sketch. I put the catbird’s silhouette in the lower left.

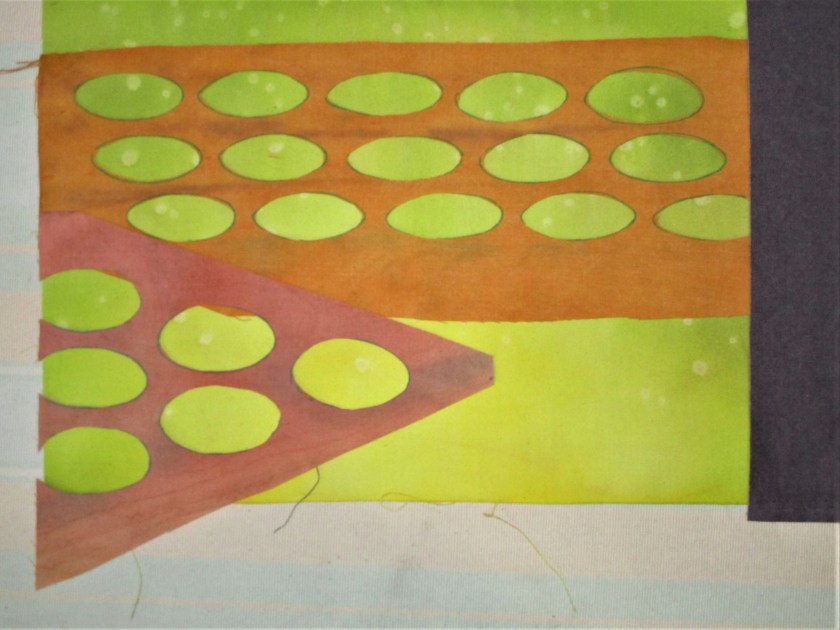
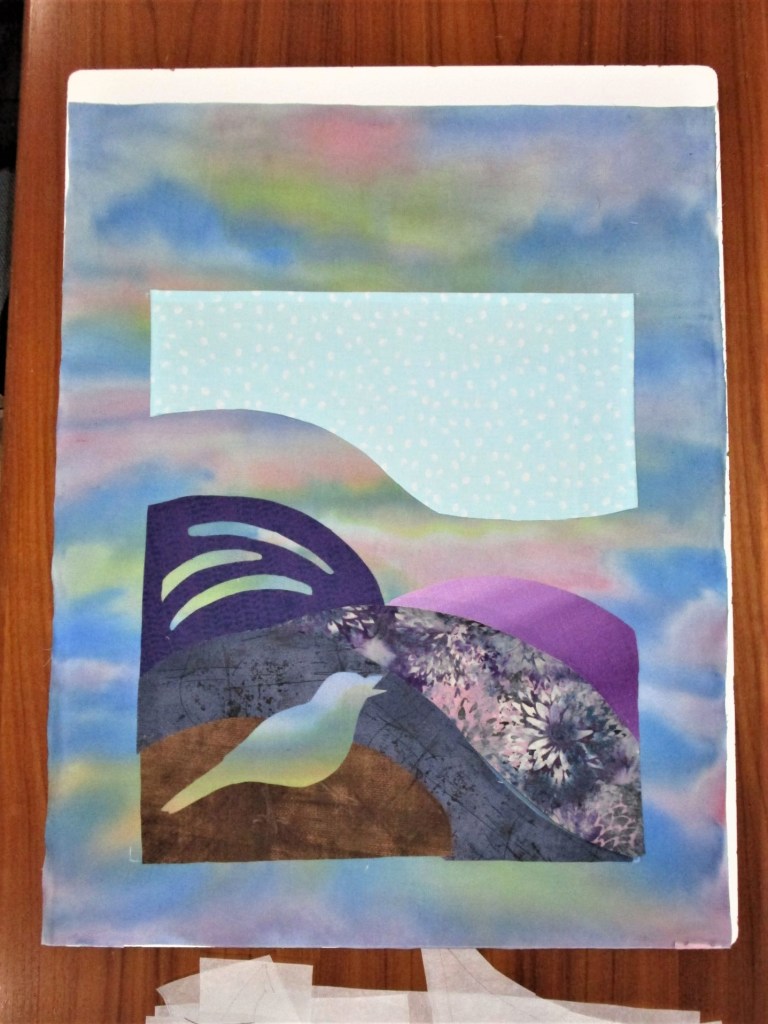
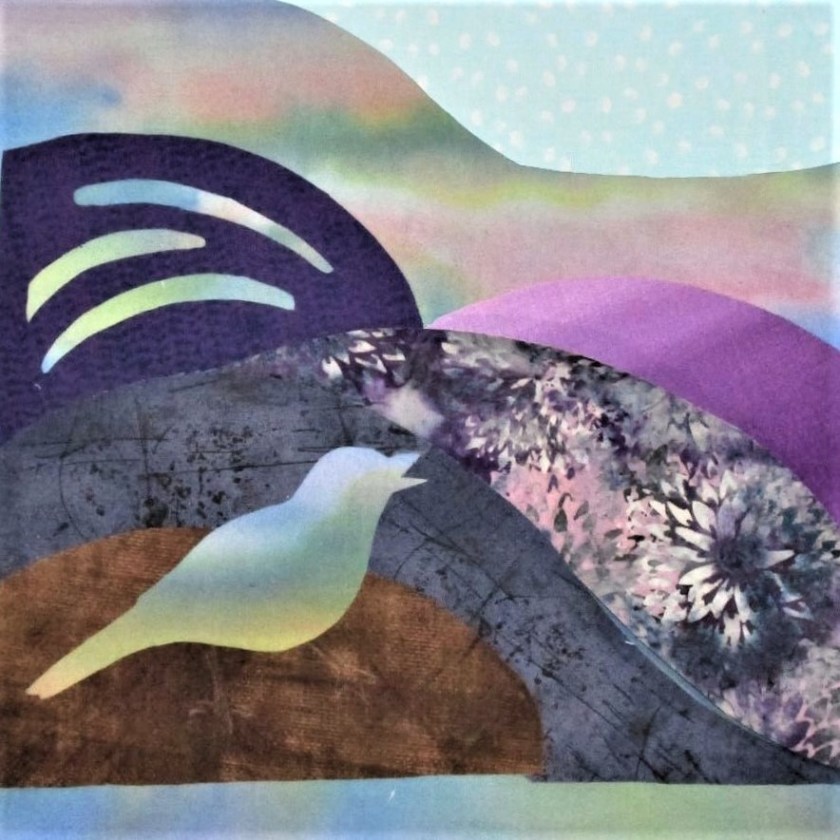
Now the hard part. Searching my fabrics for the colors mentioned in the journal, I found some purples and some brassy bright scraps. Also a few interesting prints. Most of yesterday was occupied with choosing, cutting and attaching fusible to the back of my chosen fabrics. Here is what this applique quilt looked like at the end of the day.

“Catbird Sings” stage one
Close up

While I am keen to get on with this work, I need some supplies. So I will have to pause pending a visit to the craft store.

Posted in painting, quilting

Spring Green Progress

This past week I spent a good amount of time on this project. Since the background fabric is complete, I focused on the subject and the foreground. On Wednesday, I got out my fabric paints and created some terracotta and dark neutral colored swatches.

While the fabric was drying, I finalized the design layout. Because the foreground was the interior of a building, I decided to use the piecing instead of applique technique. The stitch lines would be straight and follow the lines of the greenhouse interior. Here is the full-scale drawing that I used to make the pattern pieces.

Next I traced each of the lettered sections, cut the traced images apart, pinned them to the fabric and cut each piece.

Following my decision to use a reverse-applique technique to replicate the little seed pots, I had made a template with elliptical shapes. I now traced these shapes onto the corresponding fabric pieces.

One of three sections that have seed pots.
Ellipses are cut out
Laying the cut-outs over the background fabric to check placement

Everything looked like it would fit. Starting with piece A, I sewed the pieces to each other in alphabetical order and stitched the resulting block to the background fabric.

Completed piecing.

My vision is that the bright green color glowing up from each seed pot symbolizes the energy released by the seed as it germinates. You know what I mean – like the way superheroes are drawn.

Here is an image of the project as it stands now.

I awoke several times during the night to ideas about the next step swirling around. I had so many of them! When I awoke early this morning, I could recall only a few. Too bad. I guess I could force myself to get out of bed when this happens, track down my notebook and write those ideas down. But I digress.

The next steps involve adding some final touches of paint, stitching down the raw edges of the ellipses and making the quilt sandwich.

I will also practice drawing and stitching the seedlings before working them on the real thing.

Posted in quilting

Fun with Free Motion Quilting

Yesterday my Bernina and I spent some quality time together. I used my Autumnal Equinox square to practice free-motion quilting techniques.

One of the things that gave me more confidence is the discovery of the 1/2 speed button on the Bernina. So far, I have mastered wiggles, loops, lazy eights, dot-to-dot and circles. I still can’t do meander.

I had fun drawing with thread on my reverse applique picture. Oh, also a few birds and a squirrel were added by hand embroidery.

Many thanks to Christina Cameli for her class on bluprint.com. https://shop.mybluprint.com/quilting/classes/free-motion-quilting-essentials/40670

Posted in quilting

Autumnal Equinox

I have been sewing like a mad woman, trying to finish the Oakleaf Hydrangea quilt. It’s very close to finish now – needing only the binding sewn on. I ran out of thread yesterday just as I was finishing quilting. So today, I am giving that project a rest to celebrate the change of seasons.

For the first day of autumn, I am making a block using a technique that I haven’t tried yet: reverse applique. My idea is to do a tree silhouette, with negative and positive images of each tree half. When describing this to my husband, he came up with the idea of making each side equal – to acknowledge that the first day of fall has day and night of equal length. I agreed and got to work on a sketch.

I chose a charcoal gray fabric to make the reverse portion of the image. Here is it, all cut up and smeared with glue.

My background fabric will be a gold print, to represent the forest in fall. Here is the positive image glued to the background and the final block with both images in place.

The other pattern I wanted to try is the Maple Leaf. I have seen really pretty quilts made in this pattern. I plan to use up left over hand painted fabric from the hydrangea quilt as the background color.

Green for the background and orange for the maple leaves.

I found instructions for this pattern on The Spruce Crafts website, by Janet Wickell. Maple Leaf is an exercise in half square triangle construction. Here are the stem pieces, made with one orange and two small green.

Okay, I didn’t takes pictures of every step in constructing the remaining squares. Basically, you make four half square triangles in the two different colors, then combine one solid background, three solid leaf color squares, the stem and four half triangles to make each block. I made two blocks. Here is the finished object.

I will add some stitching on the tree square, and perhaps quilt a bit on other parts of this work. But right now I am off to buy more thread.

Janet Wickell’s site and instructions for the maple leaf pattern are found here:

https://www.thesprucecrafts.com/maple-leaf-quilt-pattern-4145689