My local art association is having a fundraiser. I agreed to make some artwork on six-by-six canvases that will be sold for $66 each at the event.
Because of the small size of the canvas, I decided that I would paint only small creatures. This choice allows me to make them life size. Last month I completed a butterfly and a nest full of sparrows. This weekend I am painting a hummingbird. I was inspired to paint one in a hand when a woman at our farmer’s market presented me with a hummingbird she had found on the ground. The bird was alive, but stunned. She wondered what to do with it. I suggested she find a place in the shade of a tree where the bird could recover safely.
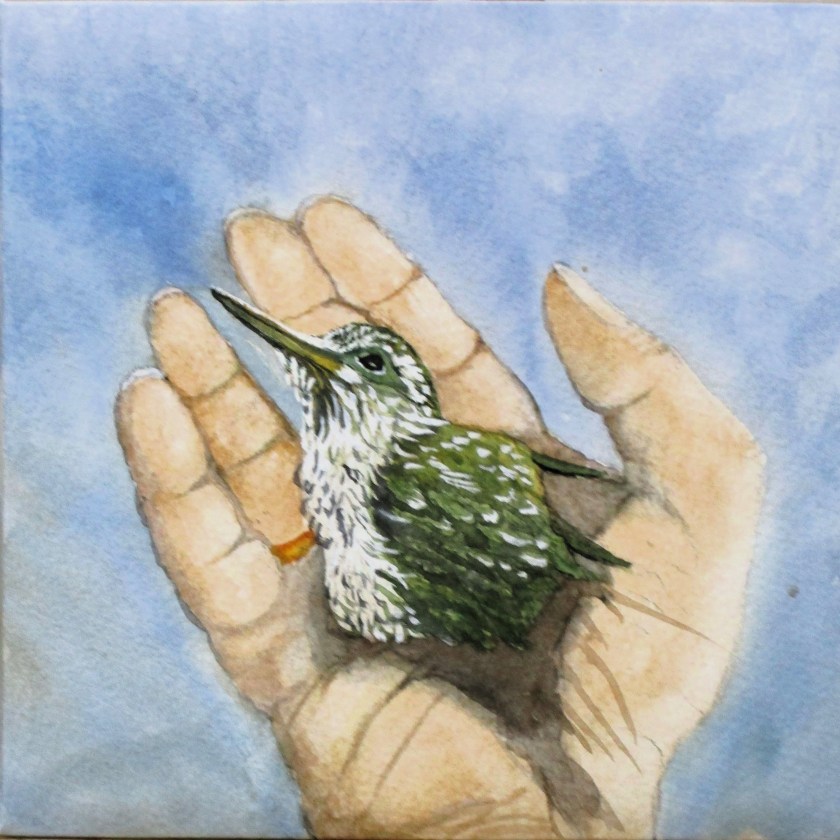
The image of that tiny, but alive bird in her hand lingered in my memory. Today I finished a six by six painting that depicts the event.
SHE OFFERED ME A HUMMINGBIRD
The hand model was me.
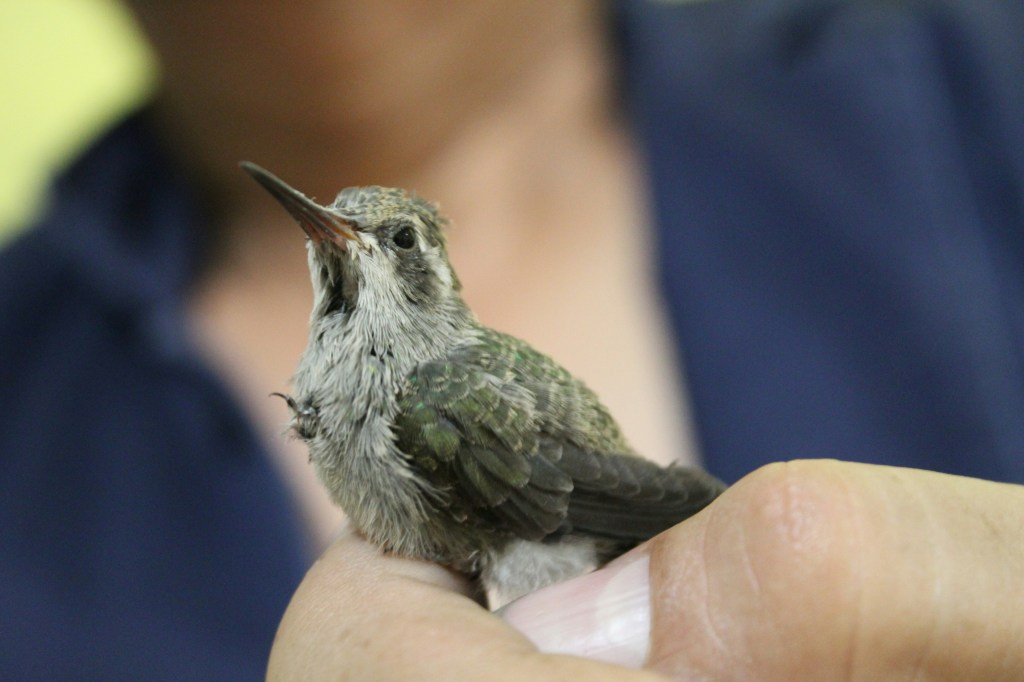
I used a photo on Unsplash taken by Osvaldo Pompa for the hummingbird reference.
For my final submission to the fundraiser, I cut down a painting that I completed in 2020 and attached it to the six-by-six canvas.
LITTLE GREEN BUG
This cute beetle was crawling around on the brick planter in front of my house. I snapped some photos and did the painting. While I loved rendering the bug, the real challenge for me was painting brick, mortar and shadows. I’m pleased that after four years I still like this painting. It’s on cheap watercolor paper with student-grade paints. A few lines with an ultra-fine sharpie did well for the legs and antennae.
I’ll turn these in next week. Hopefully someone will be willing to buy them for $66.
Since completing the Japanese Knot bag (which turned out quite well, IMHO,) I keep thinking about the potential of making art by sewing strips of fabric together. Casting around for some inspiration, I thought about making another abstracted landscape art quilt. Last year’s landscape quilt was inspired by a visit to the Badlands at Roosevelt National Park. My technique of choice for that piece was layered applique. It interests me to try another landscape but this time piece it with blocks made of fabric strips.
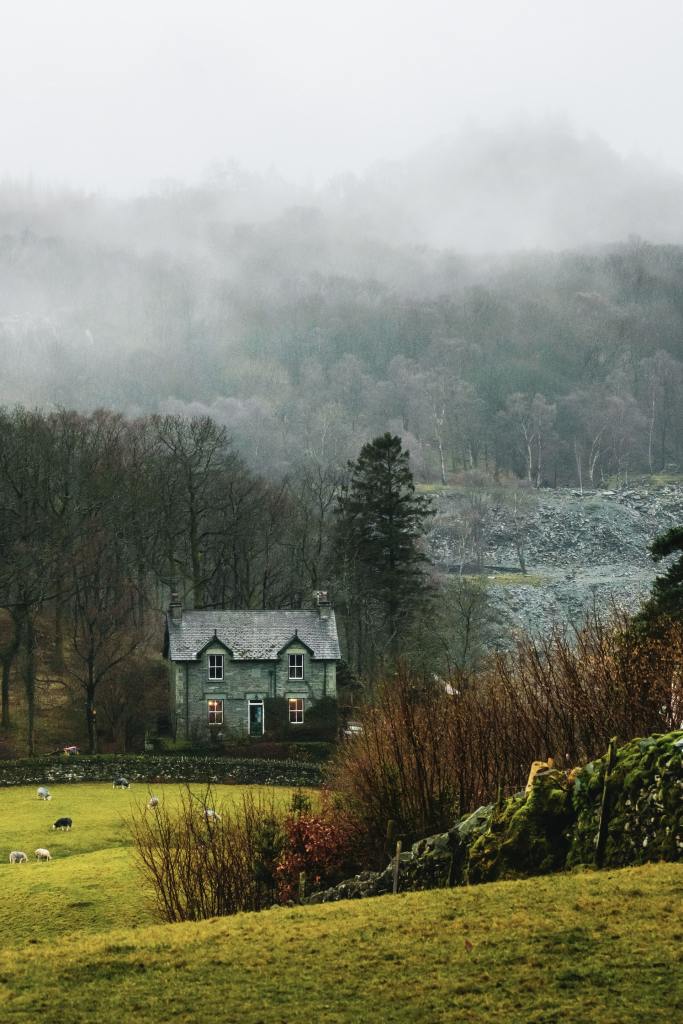
In searching suitable references, I returned to this evocative photograph by James Kemp which I had found on Unsplash a few years ago.
james-kemp-bXFEiuZtk64-unsplash
I love the contrast of pale foggy high places, with a midground of dark trees and a foreground of warm grasses and red twigs. If I can simplify the big shapes and translate the photo’s colors to fabric scraps, it could work.
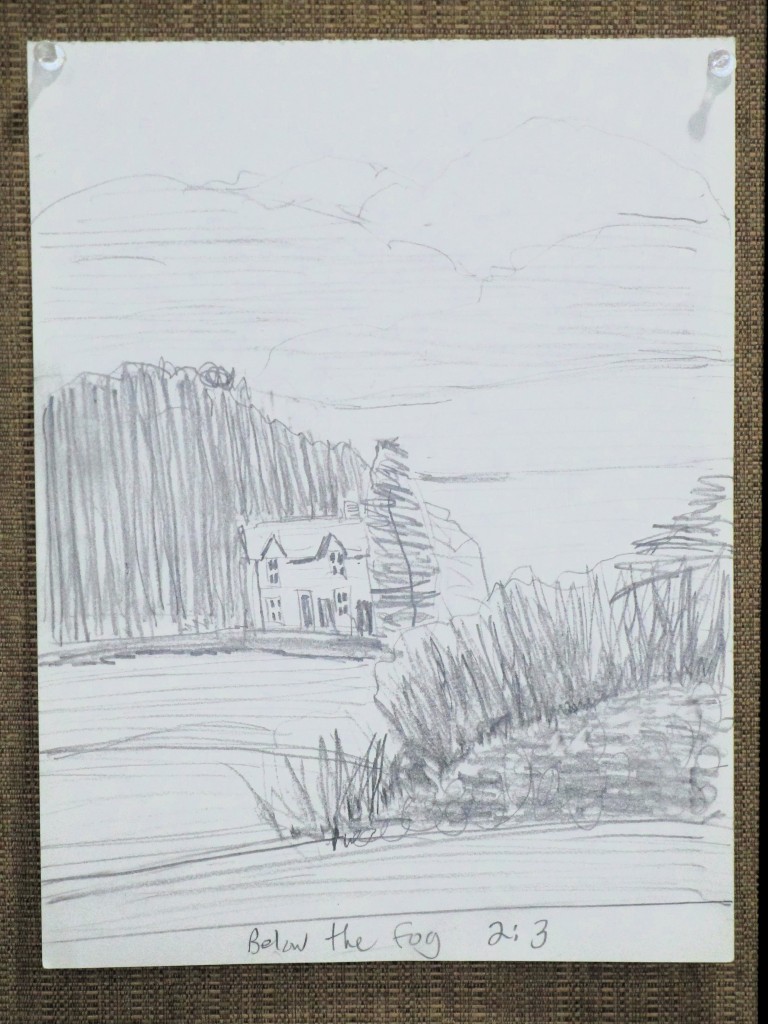
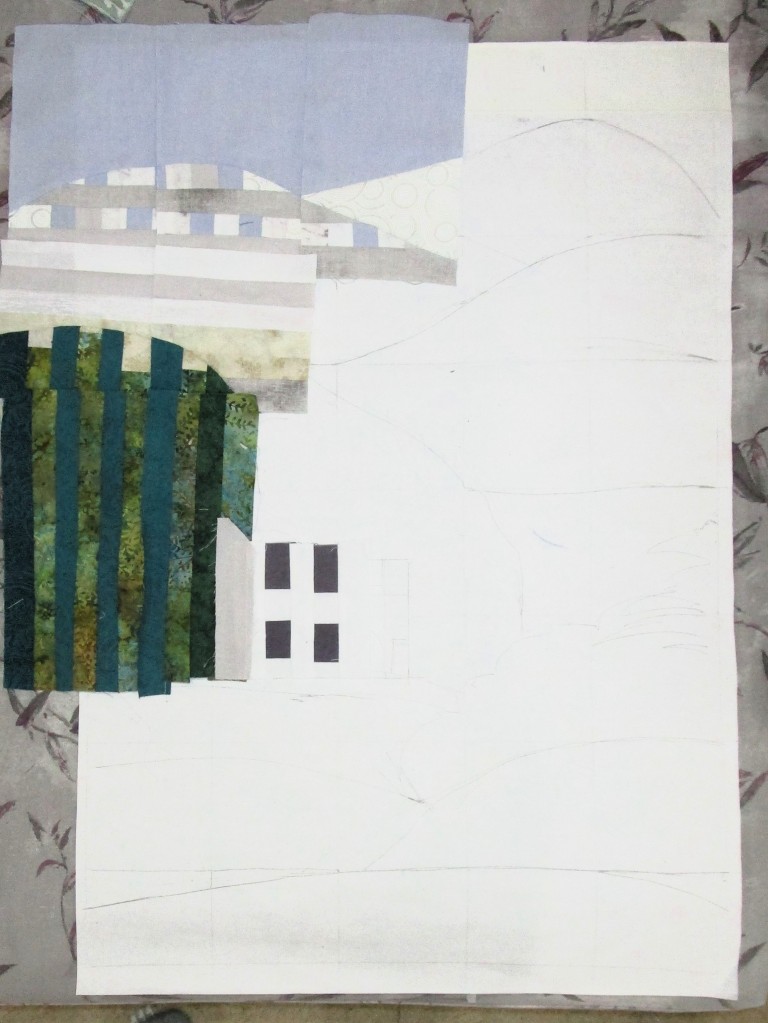
Next I did a quick, scribbly value sketch.
I transferred the major lines to a giant Post-It note, which happened to be full-size for this project. I next drew in a grid of 4 x 4 squares. Using 4 inch blocks, I will need to make 35 blocks.
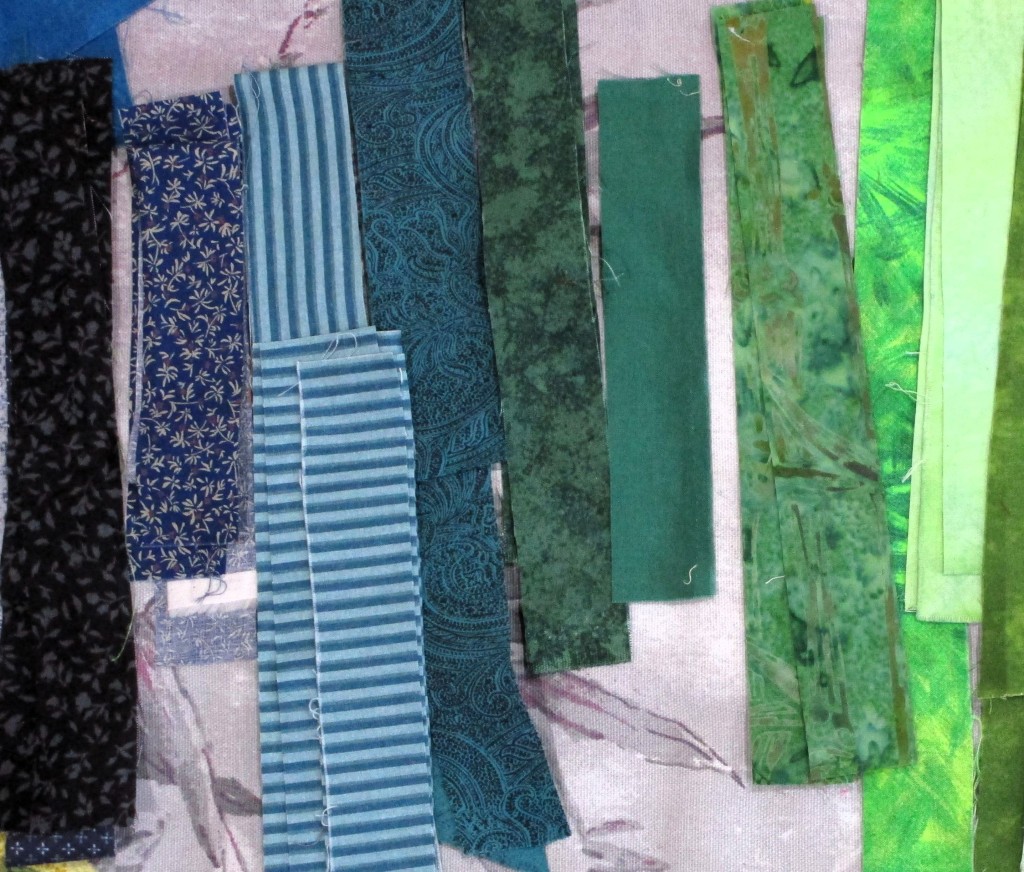
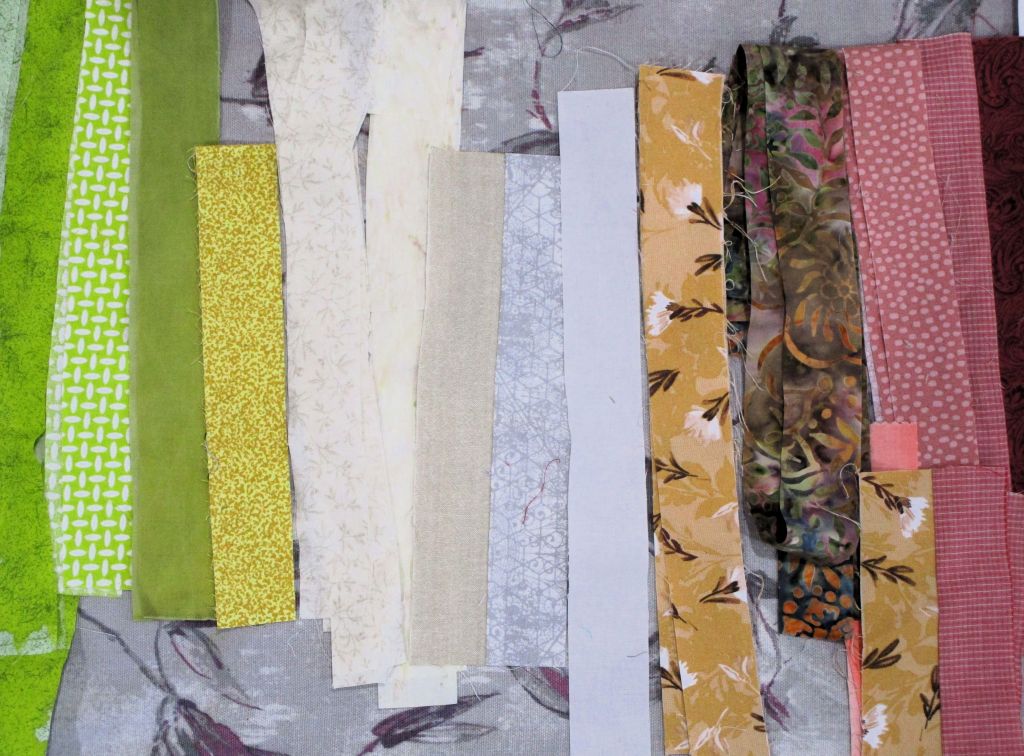
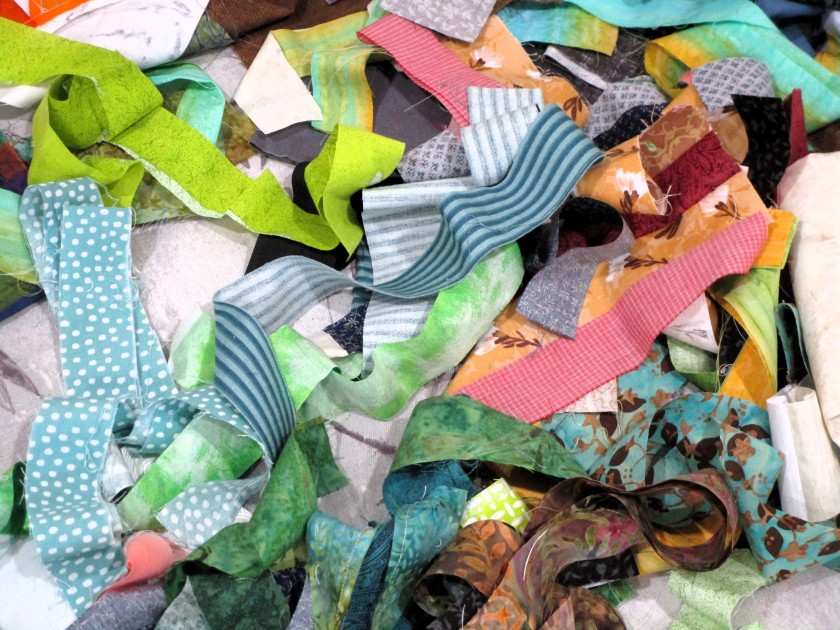
I started cutting my strips and sorting them by color.
Using the image as my guide, I built sets of six strips, arranged them along the grid and cut them down into squares.
The whole project started to spin out of control. Weirdly enough, instead of getting frustrated, I was drawn into working with more effort and thought.
Two days later, things looked something like this.
No, look away Nothing to see here!
Ah, more like this.
Sad little blocks. Believe me, it does look better IRL than in this photo.
I predict that if it keeps raining, and I can’t go outside and play, I’ll continue to cut, strip and sew on this project.
This is the week that Quilting Gail has designated for challenge participants to post pictures of their finished quilts. The Stay At Home Round Robin challenge is in its fourth year. It’s been a fun ride for me, and pure pleasure to see the work of other quilters as they add a border week by week.
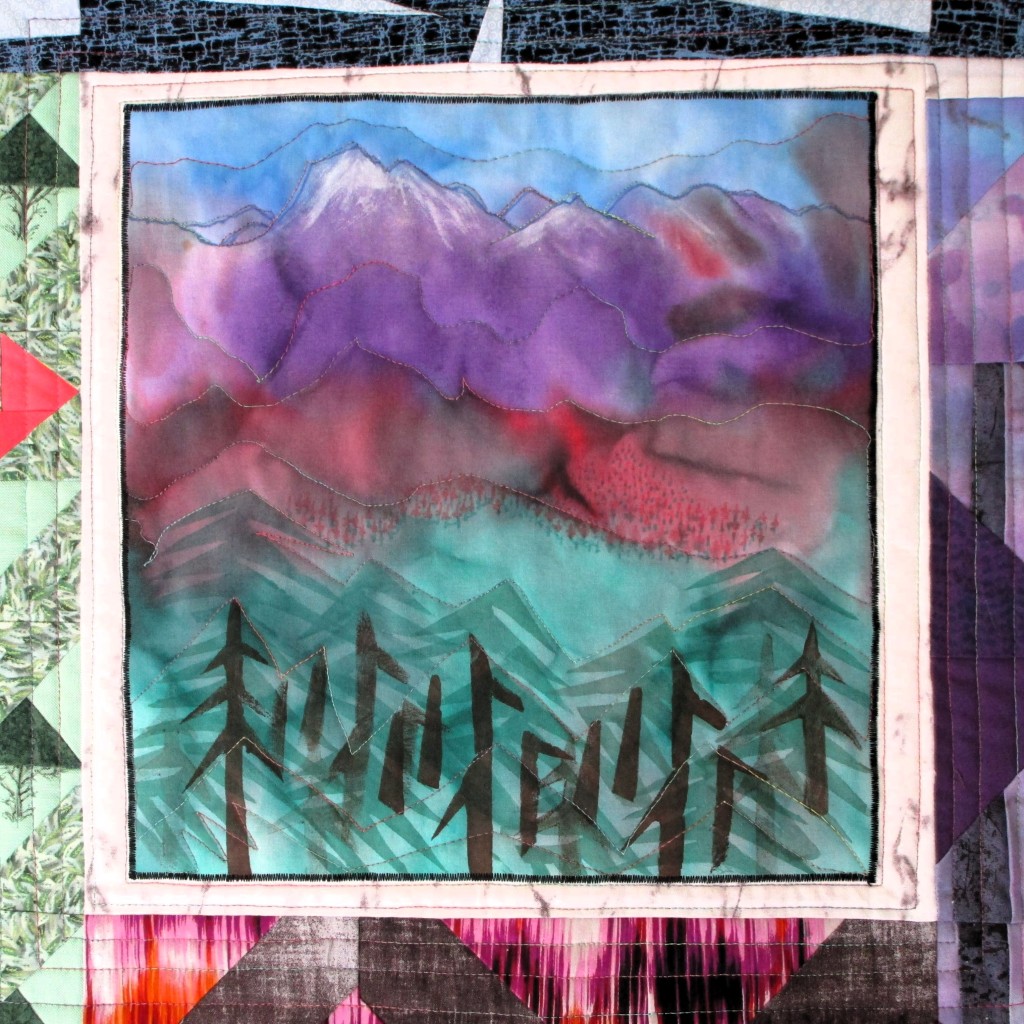
It started for me when I chose a center block from a group of experiments that I did almost five years ago. Back then I was teaching fiber arts to a group of home-schooled children. One week I had the students experiment with fabric paint on pieces of a cut-up sheet. The panel I used in my SAHRR came from the example I made, to show the students some of the possibilities of fabric paint.
Four colors of paint were applied in bands horizontally across the fabric and allowed to bleed together. When the panel dried, it looked like a mountain scene to me. I enhanced the image with opaque white paint, paint pens and stencils of pine trees.
The painted panel set the color palette for my SAHRR.
That choice led me on a path which resulted in a quilt about migration. For some time, I had been toying with designing and sewing paper pieced butterfly blocks. Could I make a quilt about the monarch annual migration to Mexico? The time I spent researching this migration led me to think about the wider issues of habitat loss and climate change. Now I had a broader story to tell with my quilt.
The weekly challenges offered by SAHRR quilters helped me to build some structure around my ideas. For that I am grateful.
Here are some close-ups of a few details I added with applique and micron pens.
And here is my finished quilt:
Just a word about the materials used: I was determined to buy nothing for this project, making it entirely with stuff that I already owned. I mentioned the cut-up sheet. In addition, I recycled pieces of clothing such as dresses and men’s shirts. The main fabric, which was used as sashing, was also divided up and painted various colors to carry it into most of the borders. Ultimately, I did have to buy a few quarter yards of black patterned fabric and the quilt’s batting.
Thank you to organizer Quilting Gail and her fellow designers who put together this year’s SAHRR challenge. You can find their work here:
It is the final week of the 2024 Stay at Home Round Robin challenge. In my last post, I had part-way finished the round 5 challenge (the number 4) but was flummoxed by the Round 4 challenge (square in a square). Working many hours on my quilt this week, I managed to sort out and assemble round four, as well as the second side of round 5. If you are following this, I recommend that you get comfortable, because this is a long post.
Let me start by sharing two inspiration photos.
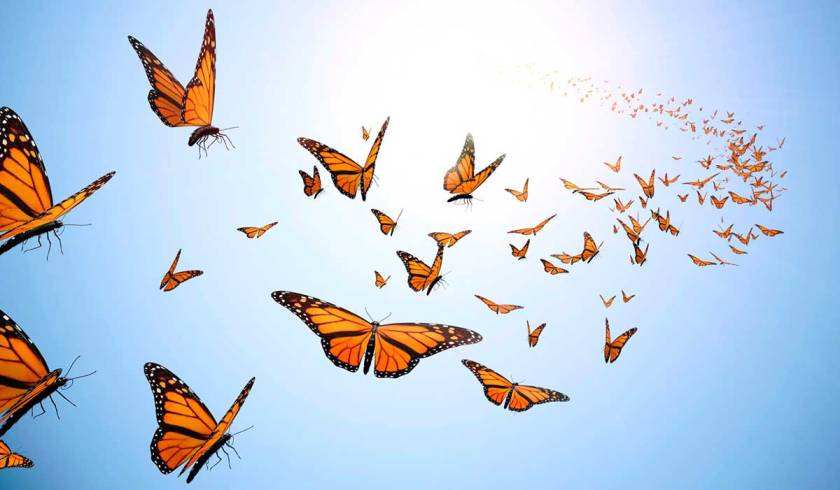
A kaleidoscope of butterflies.
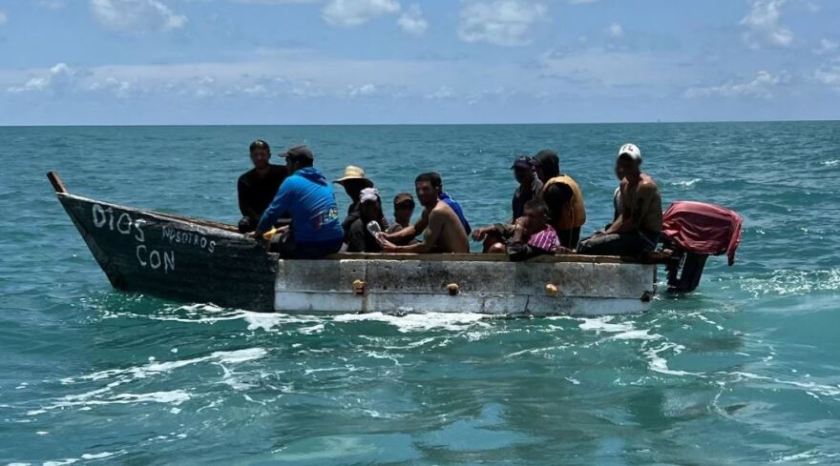
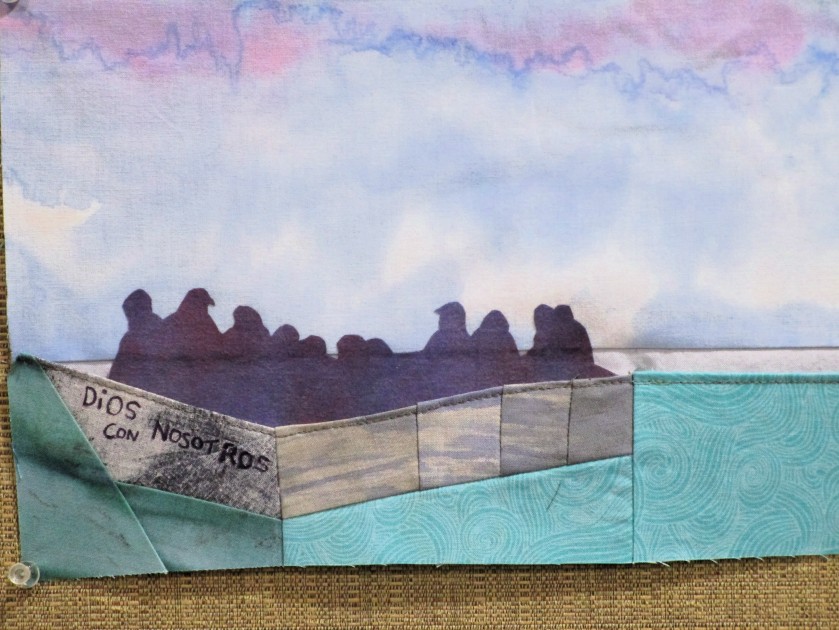
A boatful of refugees.
It’s possible that the connection between these two images isn’t obvious. When I tell you that the theme of my quilt is migration, my choices will make more sense to you.
For at least a year I have wanted to paper piece some butterflies and use them in a quilt about migration. I even went so far as to design three different patterns in multiple sizes. After fooling around with them, I ended up putting them away for a later date. It’s now 2024 and, it’s clear to me that now is the time for the butterflies.
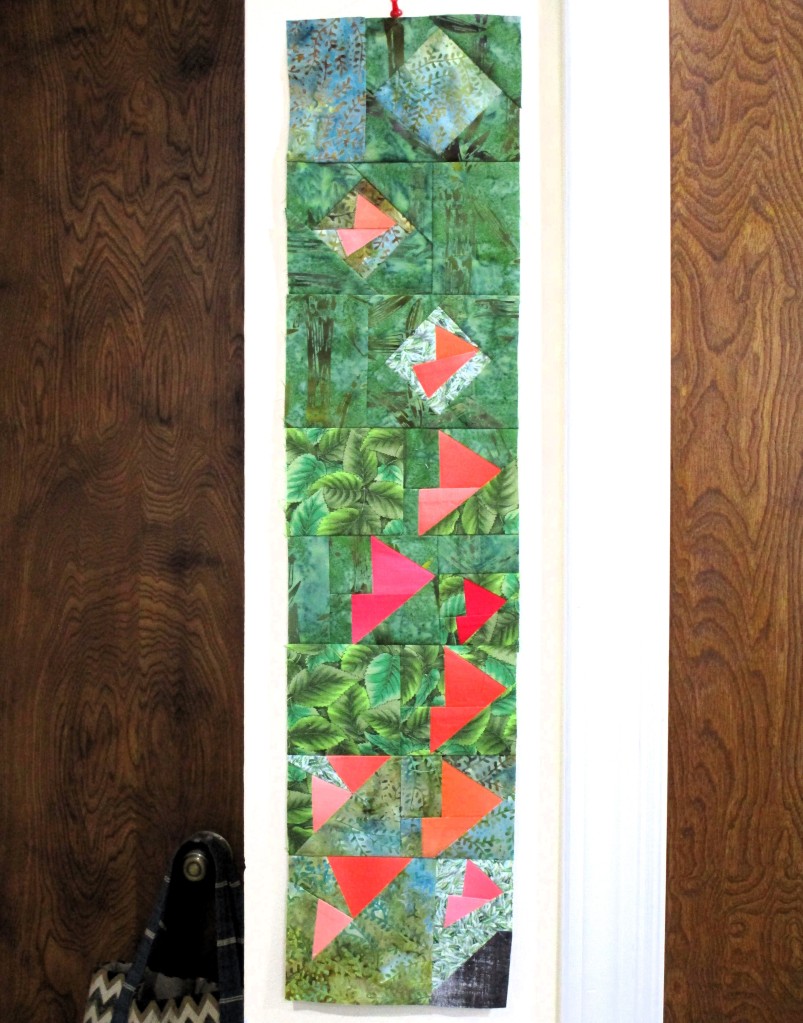
Most of my paper pieced butterflies were in plain blocks. But because Round 4 is square in a square challenge, I used two small butterflies as centers
This border took me almost three days to design and construct, but I don’t regret any of the time, or the mess left behind. The result exceeds my expectations.
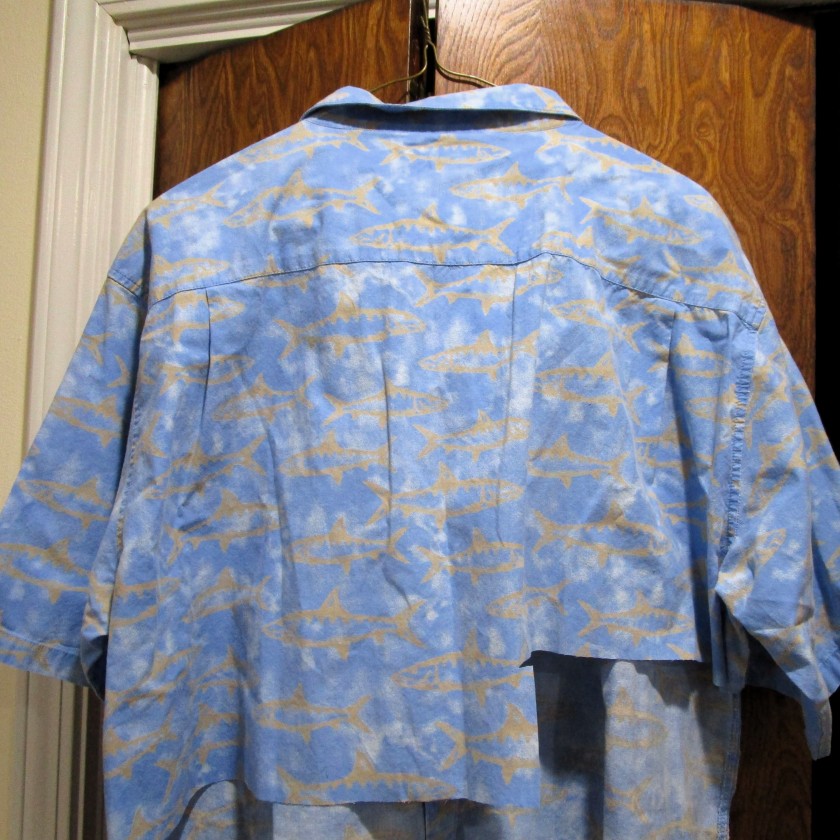
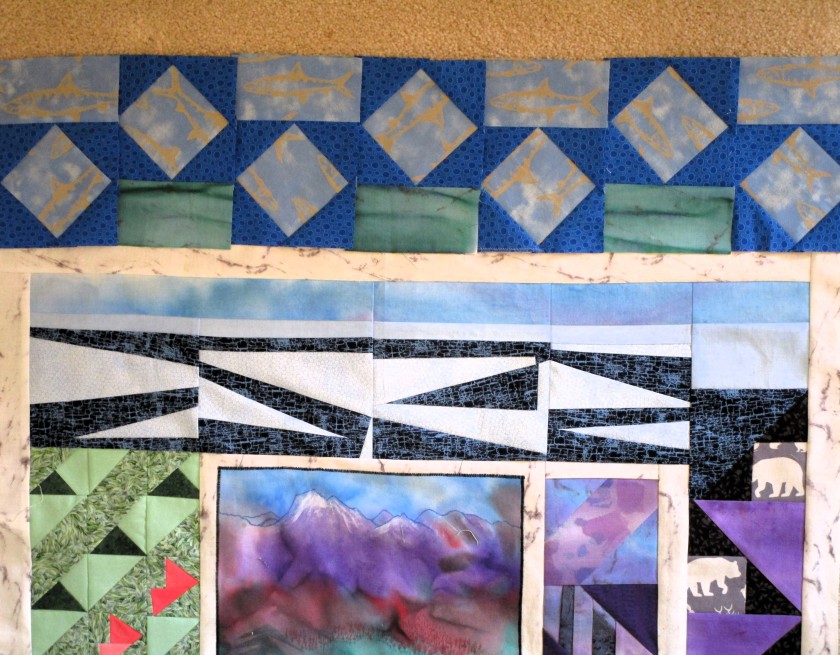
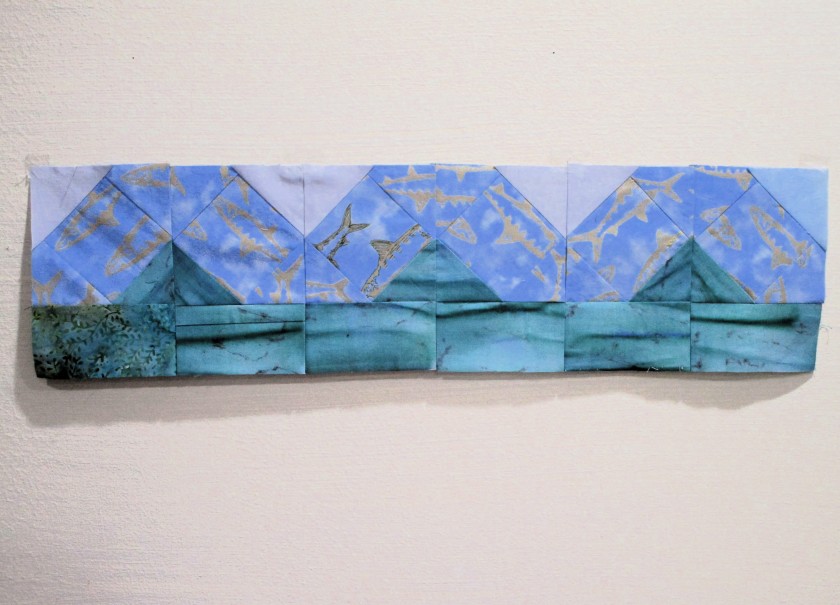
Moving on to the top border, which also is included in my Round 4. Here is the shirt I cut up to get the fish fabric.
I wanted to sew the blocks in a manner that gave the illusion of fish swimming upstream. Here is my first attempt, which was a total fail.
To move forward, I did what everyone else does. I looked at other quilters’ work. I noticed one quilter put together a square in square that totally changed the appearance of the block, simply by mixing up the corner triangles’ colors. The lesson: you can use more than one color. Ahhhhh! Out came the seam ripper to completely disassemble my entire border. I threw away all the corners and made new ones. Now I have six square in square blocks that work together the way I envisioned.
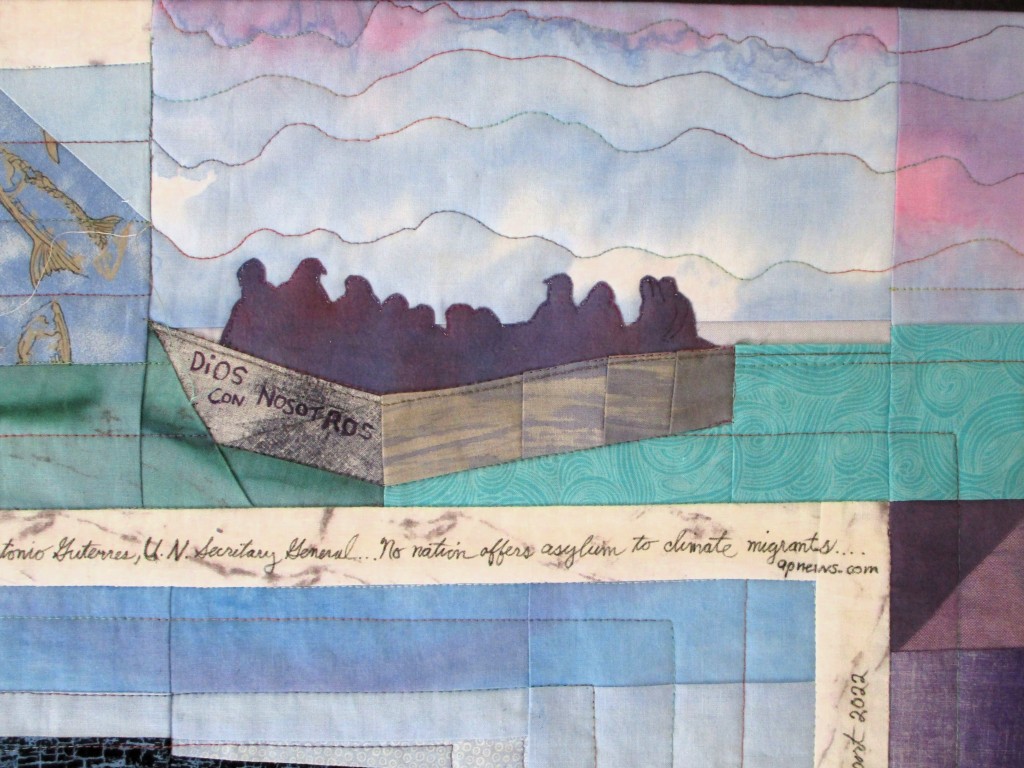
Deep, breath – on to my refugees. Using my inspiration photo, I made a sketch that caught the essential elements. Then I turned the sketch into a pattern. Because the shapes of the people are not straight lines, this part of the design was not made by paper piecing. It was appliqued to a background of sky and water.
The finished block is 12 x 6 inches.
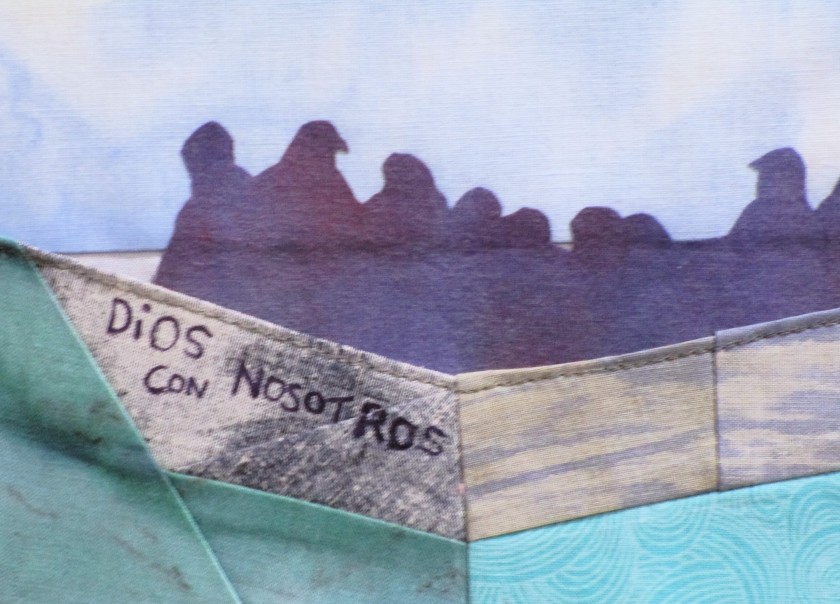
And if you look closely, you can see how I met this week’s challenge by adding the lettering that appeared in the inspiration photo.
I wrote the words with a purple fabric pen.
This morning, I threw together several four-patch blocks to fill in the right side of the quilt. And while it’s not completely sewn up, and two corners need transition blocks, this quilt top is close enough to a finish that I can post it on the linky party site.
MIGRATION WORLD
If you are still with me, thanks for reading all of this. It felt important to me to share my process. Maybe it’s a way to clear my mind for what may come next.
This week’s Linky party is hosted by Kathleen McMusing. Visit her to see the quilts of other participants.
I’m onto a new project that, I hope, will enhance my home while using up a ton of fabric scraps that are stacking up in my studio. It all started when I got tired of looking at the naked drapery rod over my bedroom window.
So I did what any practical woman would do. I browsed images in Pinterest to find out what is trending in home decor these days. Here’s what grabbed my attention:
QUILTED BORDER ON PLEATED DRAPES
I like the look, but wasn’t too keen to make this curvy pattern. Instead, I seek to emulate the look of slate mosaic, like the tile border in my shower.
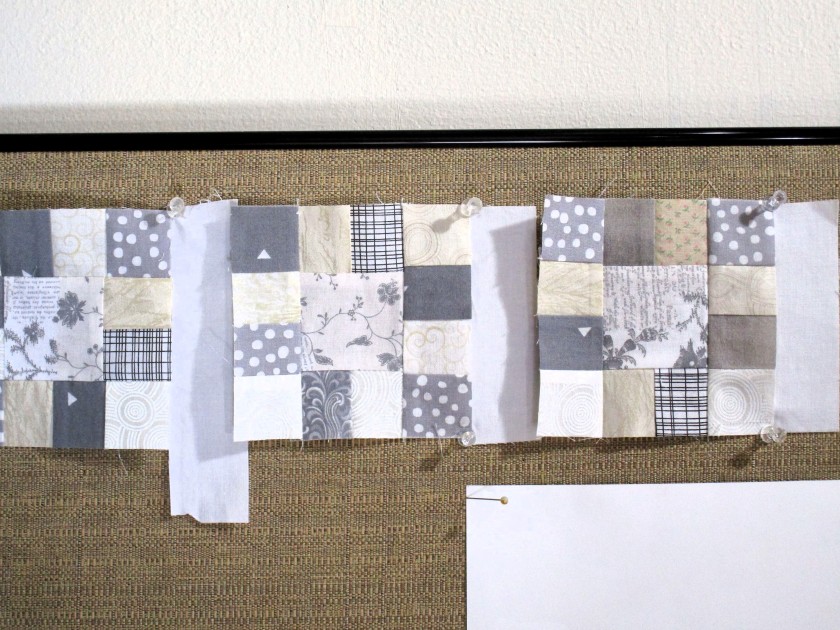
Settling on a pattern of 1-inch squares surrounding a 2-inch center, I pulled all the gray, beige and white fabric left over from my past quilt projects. Next,I sliced them into 1 and 1/2 inch strips, then sewed these together in twos, and fours.
The white strips will serve as sashing between blocks.
Strip sets on the work table.
Attaching the strips to the center, cutting back extra.
After three sessions, I have 25 blocks made with low volume, neutral colors. My estimate is that I will need about 30 for the two borders, depending on how long my draperies end up.
Time to lay out a few to see how the border might look.
Gosh this would be easier if I had a design wall (sigh.) Maybe I’ll have room for that in the next house.