Posted in weaving

Button Loom Weaving: Finished Object

I finished up the weaving on the button loom yesterday. Today I spent a fair amount of time making a backdrop for the weaving. I used silk triangles.

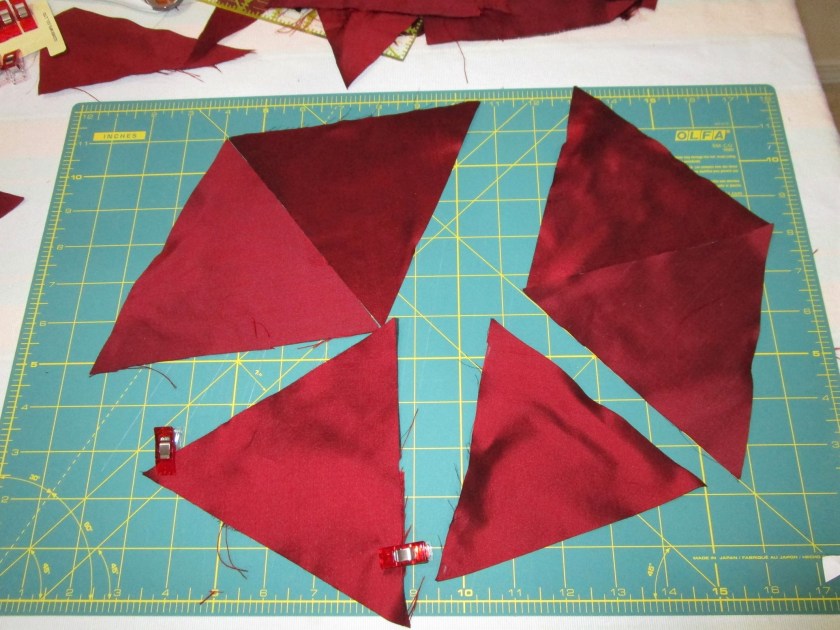
After sewing together enough triangles to cover the frame backing, I attached the silk to the backing with spray adhesive. In retrospect, I should have used non-woven interfacing behind the silk before attaching it. Wrinkling was a problem.

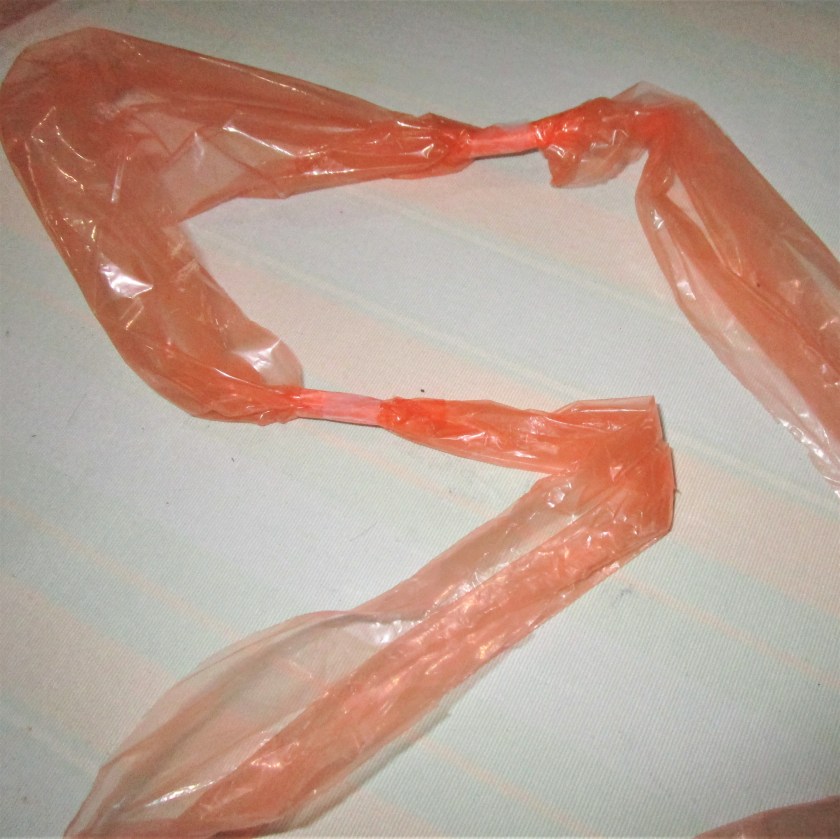
And here is the finished object. I call it Escape from the Tower. In case you are wondering about the story behind the title, rest assured that everyone was able to get out. It’s fortunate that the artist thought to attach a coppery rope to the tower. Those on the top floors used it to get to safety by rappelling down the wall.

ESCAPE FROM THE TOWER

Here is a closer view of the top section.

Posted in recycling, weaving

Button Loom

When thinking about all things fiber, I occasionally ponder the role of objects associated with fiber. Buttons come to mind very quickly. Who doesn’t have a handful (or jarful) of these tiny essentials? While they are often mundane adjuncts to your cardigans, coats and jeans, is it possible for buttons to step out of the ordinary? Let’s make something that gives them a stellar role. I am designing and building a button loom. This loom won’t handle the work of any serious weaver. But it can hold the warp threads for a modest tapestry. If positioned artistically, the buttons can become a key design element of the finished object.

Among my collection, I have two dozen metal shank buttons that were saved from various worn-out blazers and jackets.

The pretty silver ones came from my mom’s stash of vintage buttons.

If I sew them very close together on sturdy upholstery fabric, and then wrap the fabric around a wooden frame, it could start to become a loom.

The button-covered fabric rectangles were wrapped around the short sides of the black frame and stapled in place. I used the glue to prevent fraying.

Here is my finished frame with warp threads in place. I have used cotton and acrylic yarns for the warp, pulling and tying them together at the lower edge of frame.

Next time I will weave the tapestry.

Posted in recycling, weaving

Boho Basket

I’m staring at this really ugly wire basket which has been pressed into use in my studio. You may know the kind – available through Container Store. While it is commodious, it isn’t pretty.

Poking around in my linen closet, I identified several cotton woven placemats that are refugees from the eighties. We really liked these colors back then – peach, mint green, mauve and pale blue. They haven’t seen the light of day since I moved them sixteen years ago to our present home.

IT’S TIME TO RECYCLE!

I decided that the wire which ran the length of the basket would be the warp, and the cut-up placemats will be the weft. The opening between wires are 1 and 1/4 inch.

I cut up the placemats parallel to the warp, and across the weft. It is my hope that the full-length warp threads will keep the strips from fraying. I sewed two strips together so that they stretch down both sides and across the bottom of the basket. Here is the color sequence that I settled on:

After a bit of sewing and weaving, my new Boho-style basket is finished. Here it is, put into service holding yarn:

I like this . And it feels good to re-cycle stuff that’s just taking up space in a closet. However, I must admit to you, dear reader, that this project produced a bunch of lint!

Posted in crochet, recycling

Consider the Plastic Bag

It is my stated goal to explore the possibilities of everything fiber, or even fiber-ish. Plastic bags seem to accumulate at an alarming rate in my home. This photo shows the orange plastic bag that my daily paper comes in, if the weather is even the least bit damp. Recycling these wrappers is not an option in my community. Of course the re-use option is the most likely destination for this item. I don’t have a dog, so that re-use is not going to happen. I re-use them occasionally to cover my paint rollers temporarily, if I am unable to finish the paint job in one day. But considering that the wrappers are long and narrow, I wondered if they could be woven, crocheted or knit?

The answer is yes to all three. I started out by knitting and, indeed, came up with a respectable looking little orange swatch. But I couldn’t think of any use for it. I moved on to crochet, using my no. 15 hook.

  1. I connected the wrappers with clear tape. I tried sewing them end to end, but the plastic clung to my needle every time I pushed it through wrapper.
  2. Here is my chain, slip-stitched together.
  3. Here is the finished object, viewed from the bottom. My husband says it looks like a bunch of Cheetos.

The object ended up as a sort of Koozie, or in this case, a cover for a plant pot. I inserted a glass jar, added a cotton bow and filled with herbs. One could just as easily insert a cold beer which would likely stay cold until consumed.

My conclusion is that one can crochet a bunch of plastic together, but it isn’t fun and it isn’t pretty. The result is a bit of a “sow’s ear” trying to be a “silk purse.”