Posted in sewing

Follow up on Patio Decor Posts

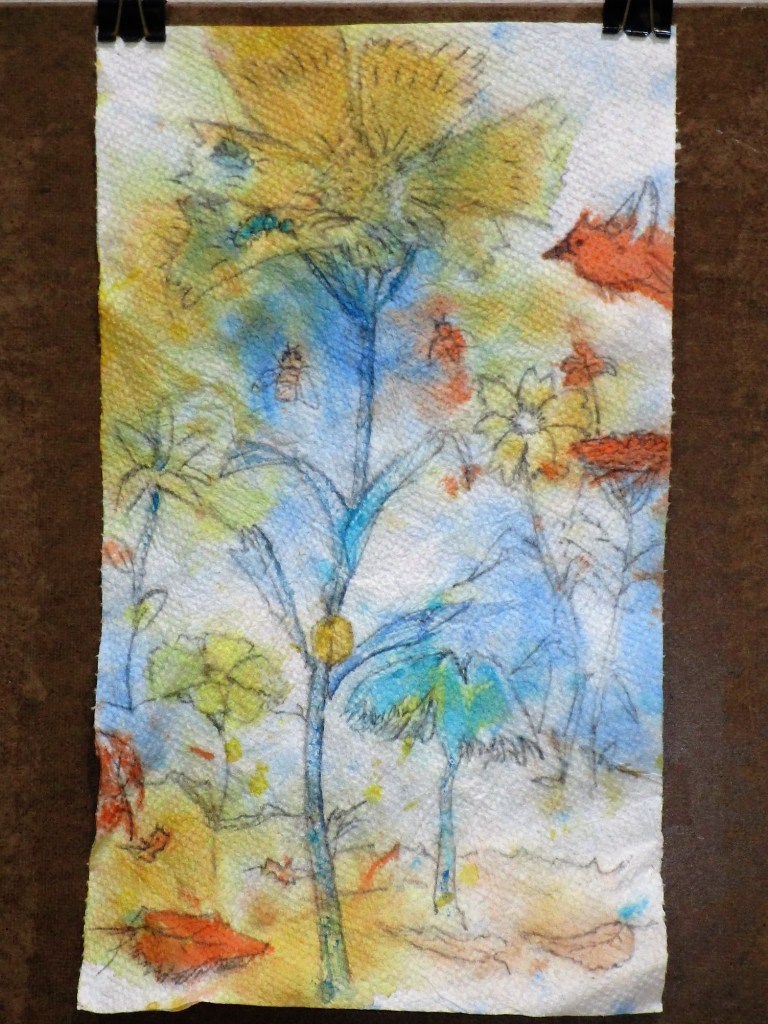
Last week I was finally able to get my Patio Geranium painting mounted into the salvaged wood frame I found and hung on a brick wall of my patio.

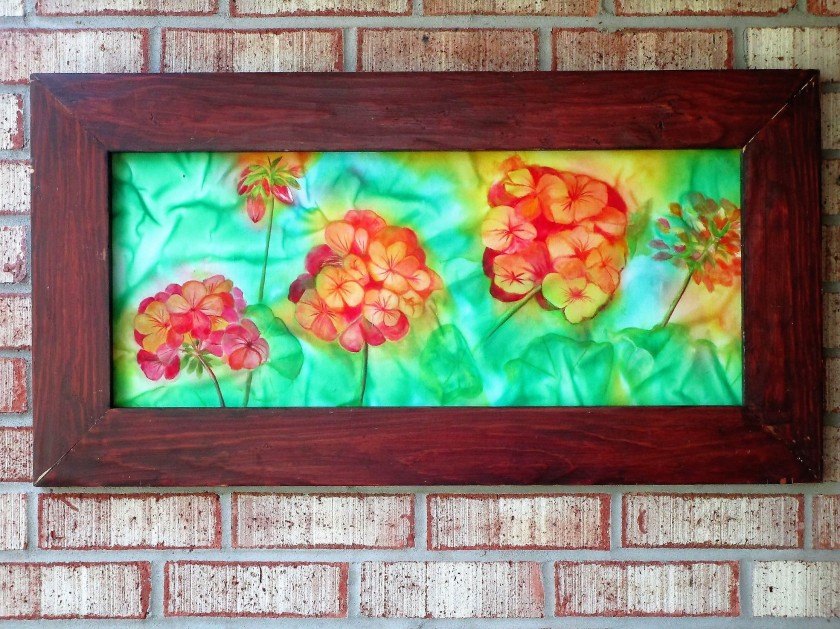
The painting is quite striking, and easily viewed from inside the house as well. To celebrate this event, I thought I would make new cushions for the patio’s chairs. I had been thinking about doing this for years now, ever since one cushion was destroyed by a squirrel, which must have thought it would make good nesting material. The current crop of squirrels seems uninterested in chewing up cushions, so the time was right to undertake this project.

Here’s the outdoor fabric I purchased at Hobby Lobby.

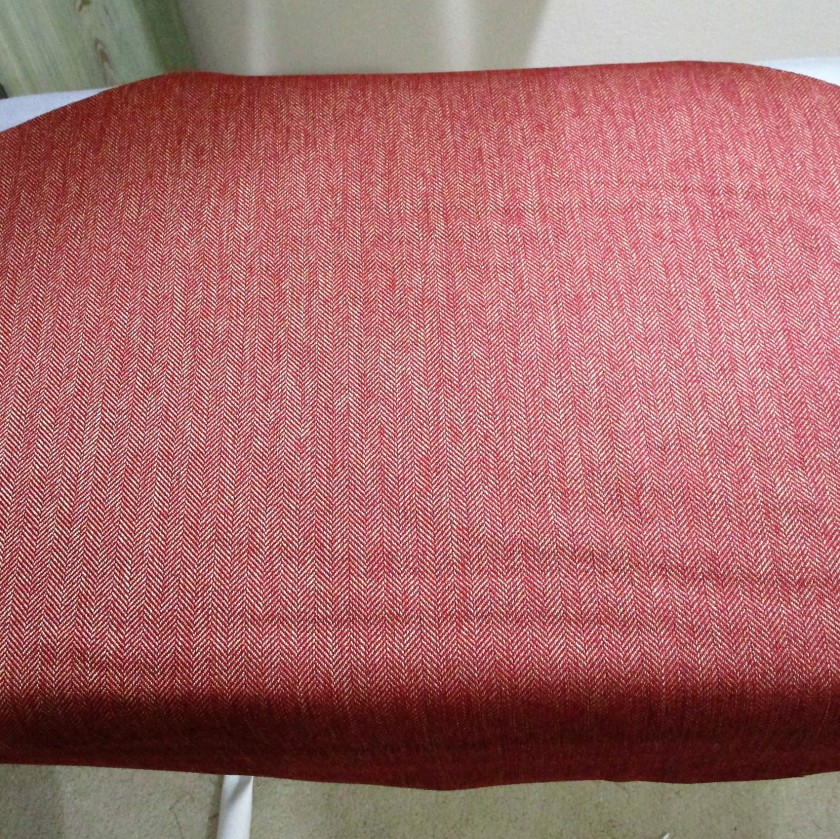
It seems very nice indeed.

To begin work, I disassembled the remaining cushion to use the fabric pieces as patterns and to re-use the padding and cording in the replacement cushion.

Several frustrating hours later, I did manage to sew up one cushion. The fabric was terrible to work with- shredding and fraying at the slightest provocation.

So – while I did make an acceptable cushion, I can state unequivocally that the process was NOT FUN!!! At least it seems to be functional.

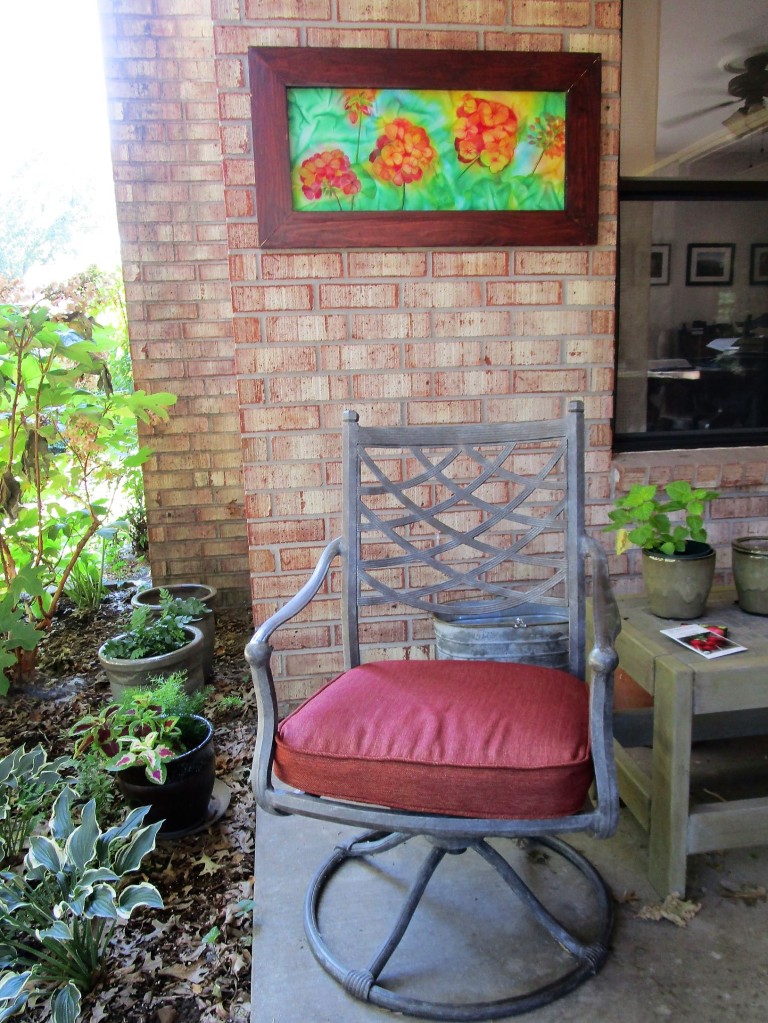
……..and the color is nice.

It could be a while before I attempt the other cushion, since I will need to cut some foam rubber to shape into a matching cushion pad.

I’m pretty sure that this task will also be NOT FUN.

If any kind reader has sewn anything using outdoor fabric, I would be grateful for any advice you would be willing to share.

Posted in quilting, recycling, sewing

Inspired by Vintage

While visiting Daughter’s Family last Thanksgiving, I was invited to rummage through a stack of weaving samples. These pieces were made over a number of years by my son-in-law’s grandmother, Margaret. They were then stored away with Margaret’s son, and eventually passed into the next generation.

Here are some of the pieces that came home with me.

I was invited to keep these lovely samplers with the understanding that they could be worked into a fiber object. I feel honored to receive them.

So today, I have a tiny glimpse of an idea on what to make with them. What if they formed the feature blocks in a quilt? It would be a wabi-sabi quilt, assembled with additional fabrics recycled from articles of clothing and household linens. In my stash I came across the following items that fit the description.

Cut up shirts and old pillowcases in compatible colors

I began my work by washing and pressing the linens, then examined each piece for needed repairs. It seemed to me that, while the samples were firmly woven, the weaves are much more open than standard quilting cotton. How could I stabilize them so they wouldn’t shift during quilting? This called for a consultation with quilting expert Jackie, aka, my mom.

She had some great pieces of advice. Ultimately, I decided that I could sew the linens to a light-weight muslin backing, string piece style, then work in some rows of decorative stitching. This particular idea was top of mind, because I am currently reading this book on the Japanese practice of boro and sashiko.

I call this sort of happening a Convergence.

Let’s start the work with these three pieces as a center block.

They are of sizes that will fit together into a 12-inch block without cuts. The three contain all of the colors in my chosen palette, which could make an ideal focal point for the rest of the quilt.

DONE!

The next steps will be to design and sketch a layout, then acquire supporting fabrics. Maybe I can source more second-hand clothing items from local thrift stores.

Posted in embellishing, hand embroidery, recycling

Visible Mending

Earlier this week, a friend of a friend asked me to help him mend the holes in his favorite jeans. He didn’t bring any patches along, so I just used needle and thread to weave across one of the holes as a demonstration. That got our conversation started about the concept of visible mending.

The artist I was thinking about is Celia Pym.

An article and some images of her work can be found here:

The conversation reminded me that I had set aside a pair of jeans of my own that were now holey at the knees.

Perhaps the universe is telling me it’s time to start this project. Despite having an abundance of UFFOs littering my studio, I began working on the jeans.

First of all, I wanted to incorporate patches over the weak-at-the-knees areas. Having been told in the past NOT to throw away fabric scraps, I was able to find some interesting scraps already coated with fusible glue.

It took me less than 30 minutes to fussy-cut some flowers that could cover the holes. I added even more patches just to create a colorful floral field on the denim.

Wow – shades of the sixties.

I do intend to embroider over the patches. This will serve to strengthen the patches and unify the design a little bit.

Getting started with embroidery – pearl cotton

It’ll take me a few evenings to get all the hand stitching done. But first, I wanted to address the torn logo on the back of the jeans.

These are Levis jeans but the leathery label on the waistband is nearly gone. I used a small pair of scissors with a sharp point to cut away the remaining bits and thread.

Next I made a label of my own and stitched it into place.

DAILY FIBER FUN – BY HAND

Yesterday I purchased a variety pack of pearl cotton thread in shades of pink, purple, aqua, blue and yellow. I’m really looking forward to jazzing up these tired old jeans.

Posted in drawing, recycling

Autumnal Equinox 2021

Today I want to celebrate the changing of seasons. Weather-wise, it’s still summer here. But a cool front is expected here in the next 12 hours.

I am hopeful for cooler breezes.

With the idea of using non-traditional materials for this art piece, I started by rummaging through my paper storage drawer. Among the half-used scrapbook pads, pages from old calendars, brown paper bags, pieces of card stock and carefully saved rice paper, I came across this:

Yes, your eyes do not deceive you. This is a paper towel that had been used as a wiping rag. If I had to guess I would say this it is covered in fabric paint, because it was fiber artist Cindy Walter who suggested that I save my used paper towels.

https://www.craftsy.com/class/fun-techniques-with-fabric-paints/

Well, why not, I told myself. This could be made into something, by applying a little imagination and some carefully chosen marks.

The towel was quite fragile, so I started with a 4B pencil. Flowers, I thought. Working through the blobs and streaks, I decided to include other living things that associate with flowers. These creatures are currently busy preparing for the coming of winter. I drew beetles, bees, caterpillars and a curious cardinal. Soon the paper was full of pencil marks. I considered adding color. In the end I did put a tiny bit of blue paint onto the stems, but refrained from adding other embellishments, due to concern about damaging the paper towel.

HAPPY EQUINOX TO ALL.

May this fragile drawing remind you of the frailty of life and our pledge as stewards of the earth to preserve it.

Posted in sewing

Making a Paintbrush Wrap

My collection of water color brushes has been growing. Every time I take a new class on line, I end up purchasing new brushes. Storing them stuffed into my water jar just doesn’t work too well anymore. So I decided to make a roll-up brush holder from my quilting left overs.

You see in the picture my fabric selections. The log cabin square was made to practice free motion quilt stitches for Under the Sea quilt. The funny tape measure fabric was left over from the journal covers I made as gifts.

Let’s get started.

First, measure your brushes. The roll needs to be long enough to hold them all and tall enough to cover up the tallest brush. I cut the backing fabric 13 inches wide and 11 inches tall. The inner piece holds the brushes. I cut this fabric 13 inches by 12 inches and folded it in half, which gave 13 inches wide by 6 inches tall.

Fabric trimmed up and ready for sewing.

Sew them together around the outside edges. Next, mark the points where you want to make dividers. This was easy and fun with the tape measure fabric!

All my stitch lines came out straight. Yay!

Make a standard quilt binding strip and apply it around the four sides.

This fabric was left over from the Arches quilt border.

That’s pretty much it!. You will want to add a cord to tie the roll shut.

For now, I just grabbed a piece of ribbon, wrapped it around the roll and tied a bow. Eventually I will get a nice cord or strap. Or maybe I will add a toggle and loop.

But for now, I am ready to paint en plein air at a moment’s notice.