Posted in quilting

SAHRR 2023 Round One: Spool Block

This week’s prompt for the Stay At Home Round Robin quilt challenge comes from Home Sewn By Us and it is the spool block. This is one I haven’t tried yet, I believe it’s one of the easier blocks to make. And I have a good idea for using fabric from my orphaned quilt blocks for this challenge.

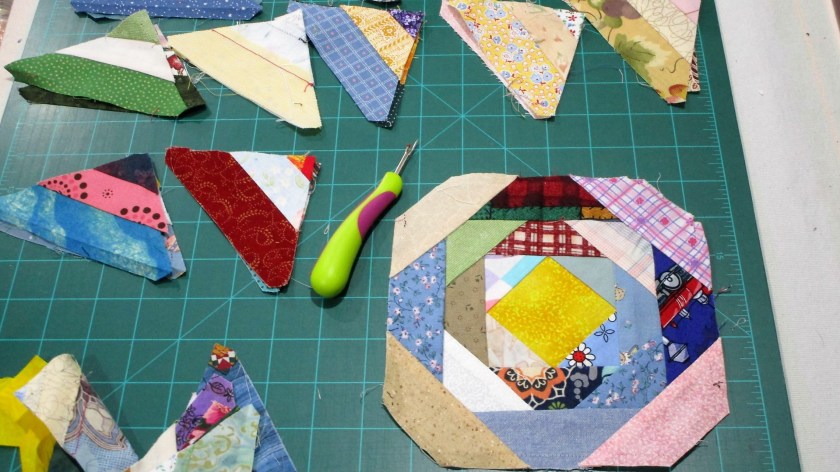
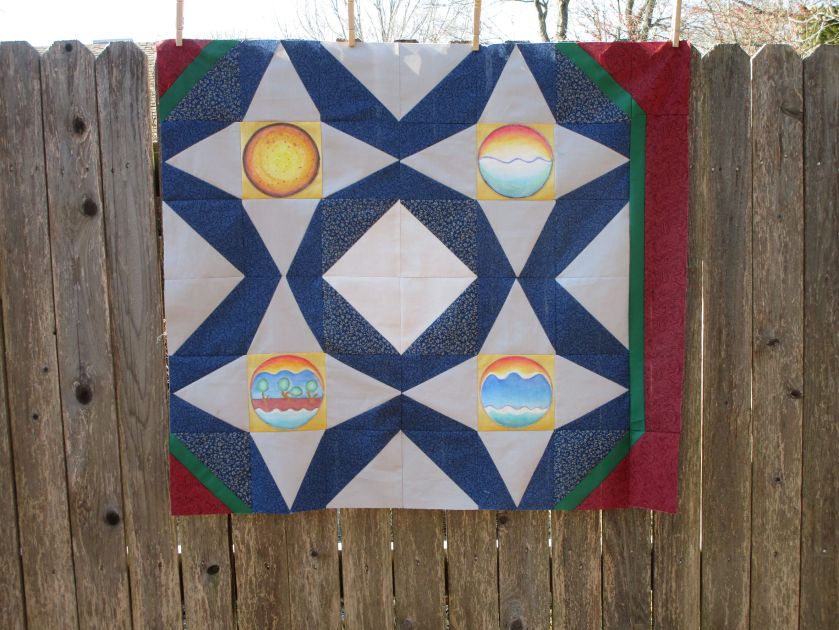
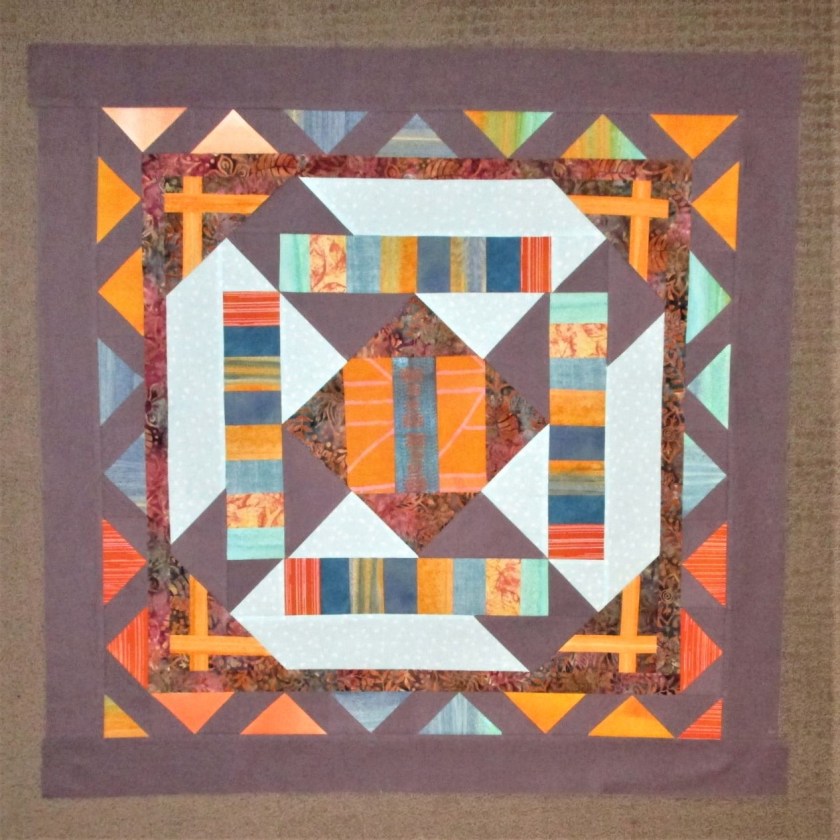
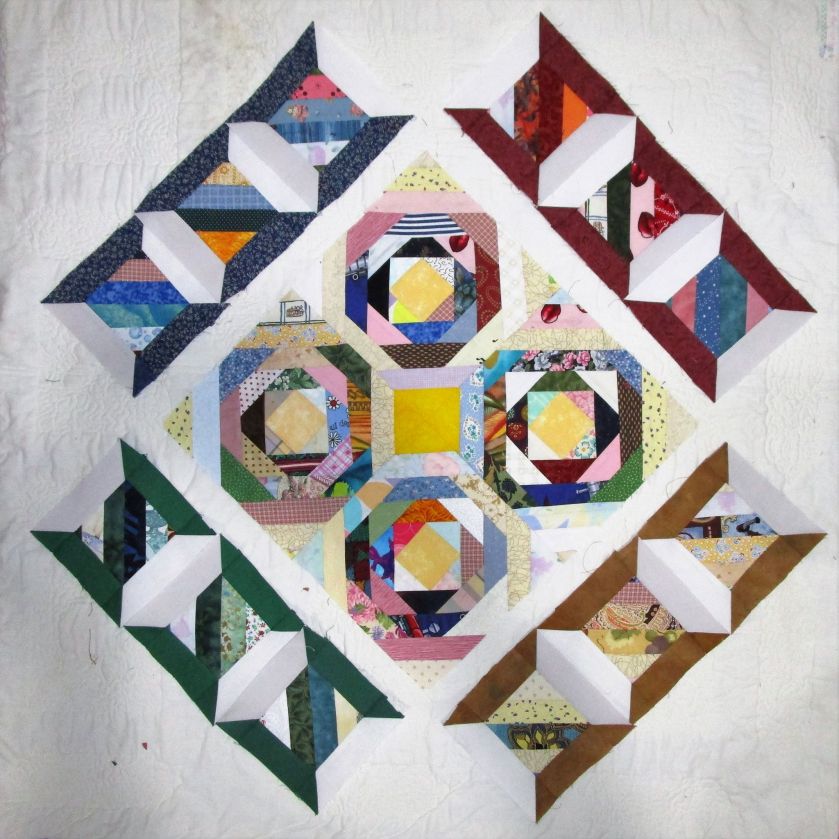
Using my seam ripper, I removed the corners from several of the blocks. (Can anyone tell me what this block is called? It’s a sort of square in a square with at least four iterations, but then stripped corner pieces were sewn on.) Anyway, I took these triangles and sewed two of them with long edges together. This gave me a square about 3 and 1/2 inches which formed the “thread” part of my spools.

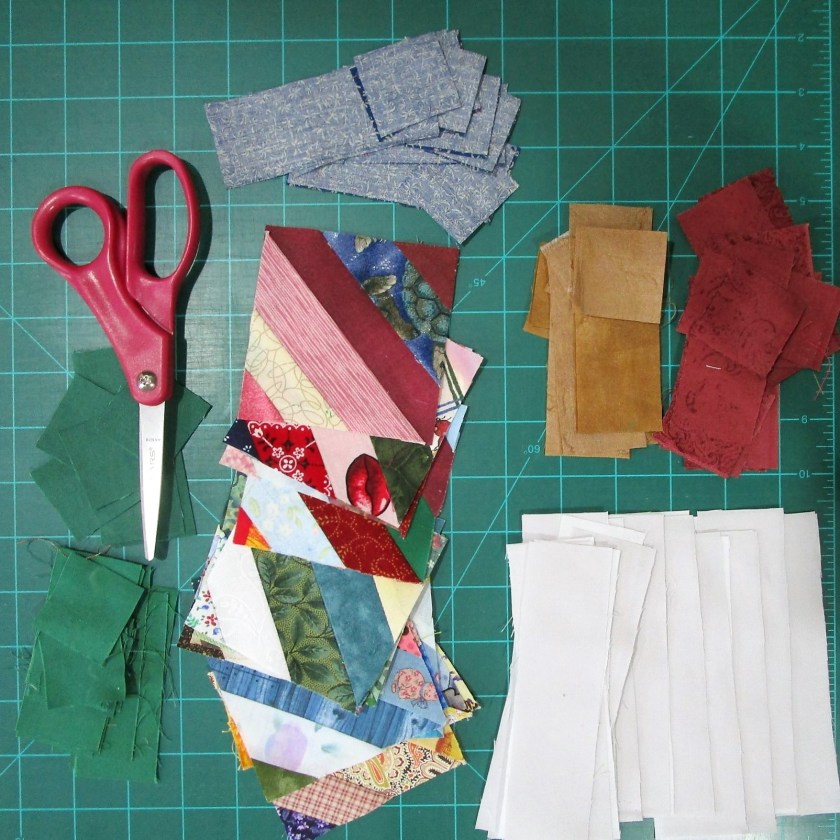
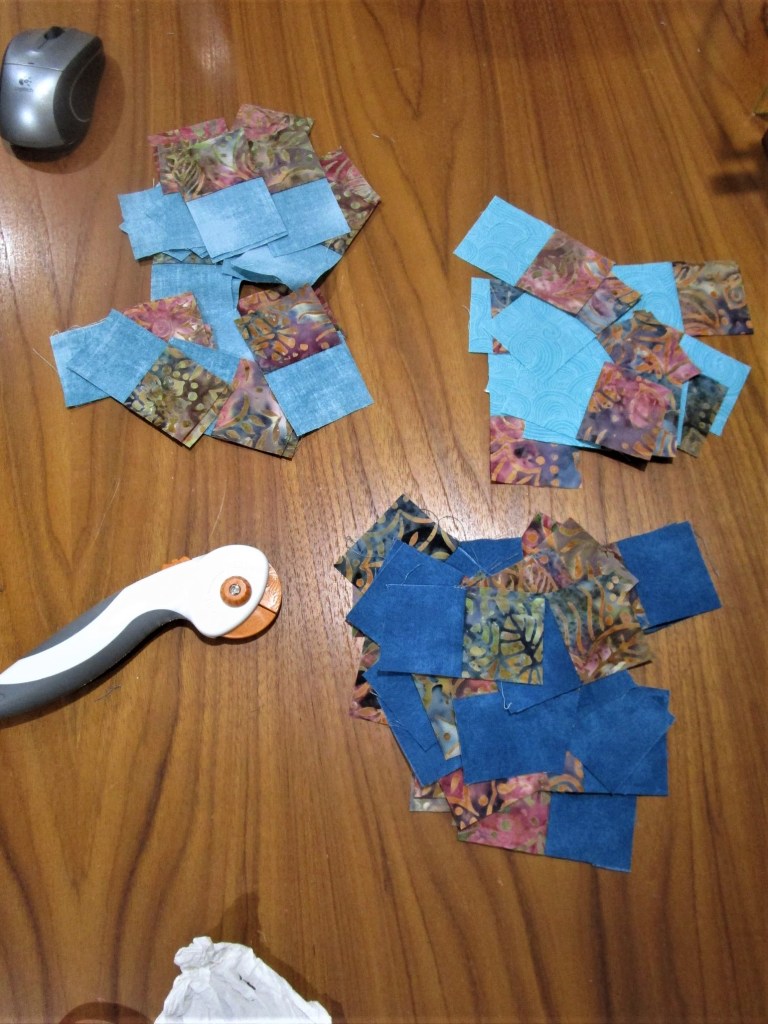
To support the center pieces, I cut pieces from four dark colors and two shades of the background fabric. Three of the dark colors were left over from my Creation quilt. The brown fabric was used in my Badlands art quilt.

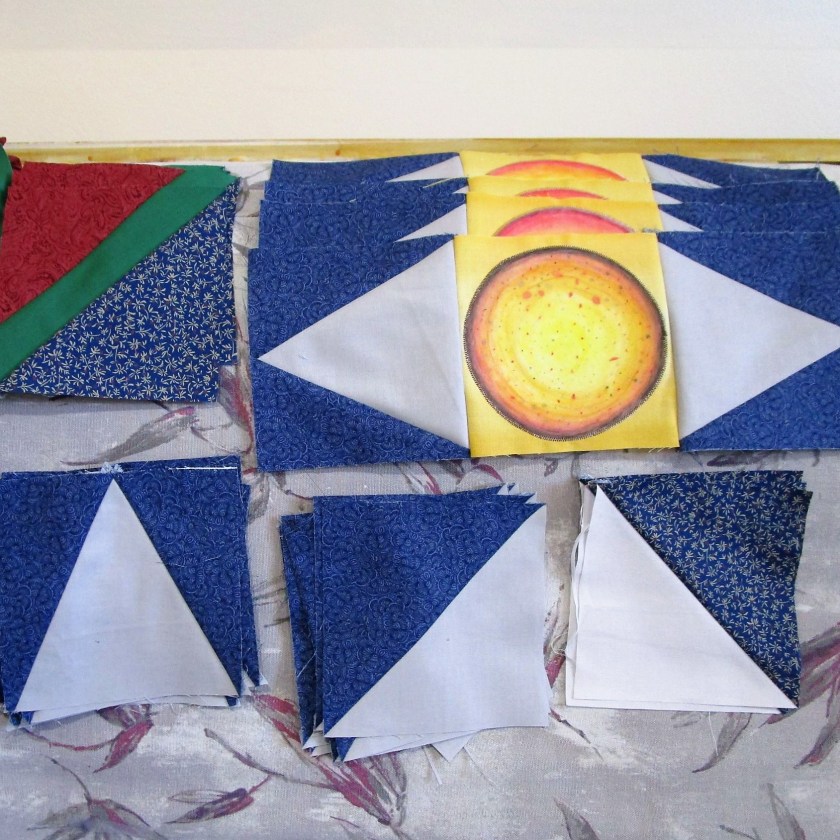
Here is my first block all sewn together.

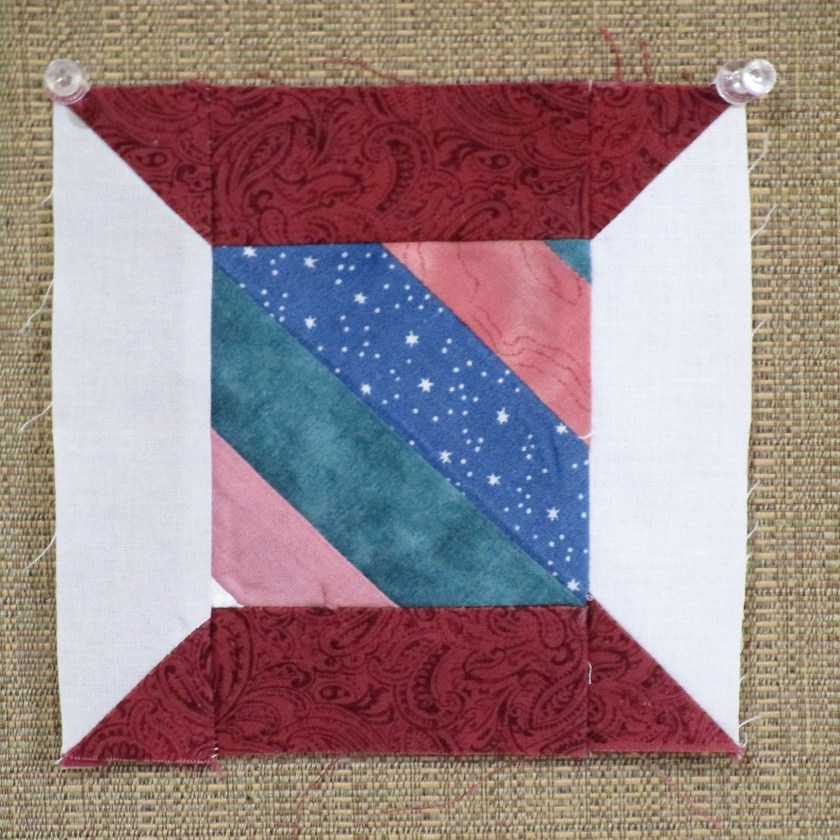
I like the way the diagonal lines on the spool look like spiraling thread.

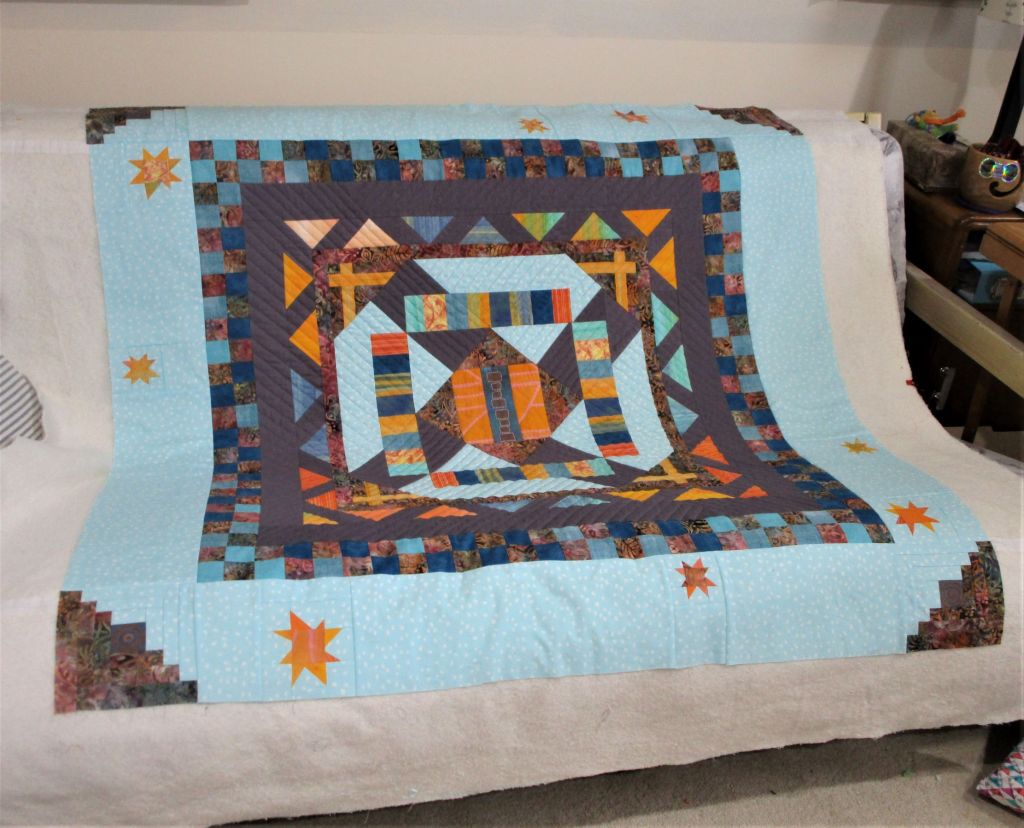
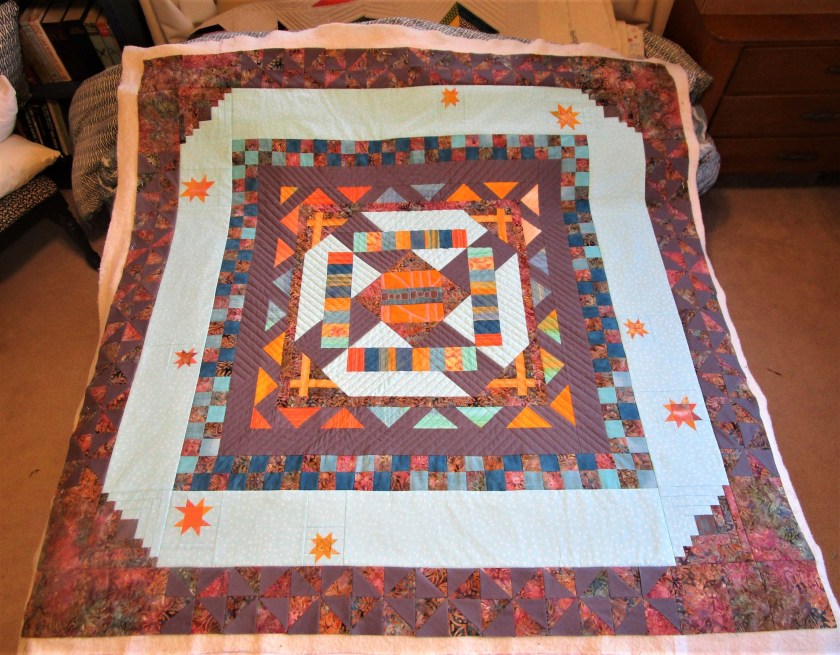
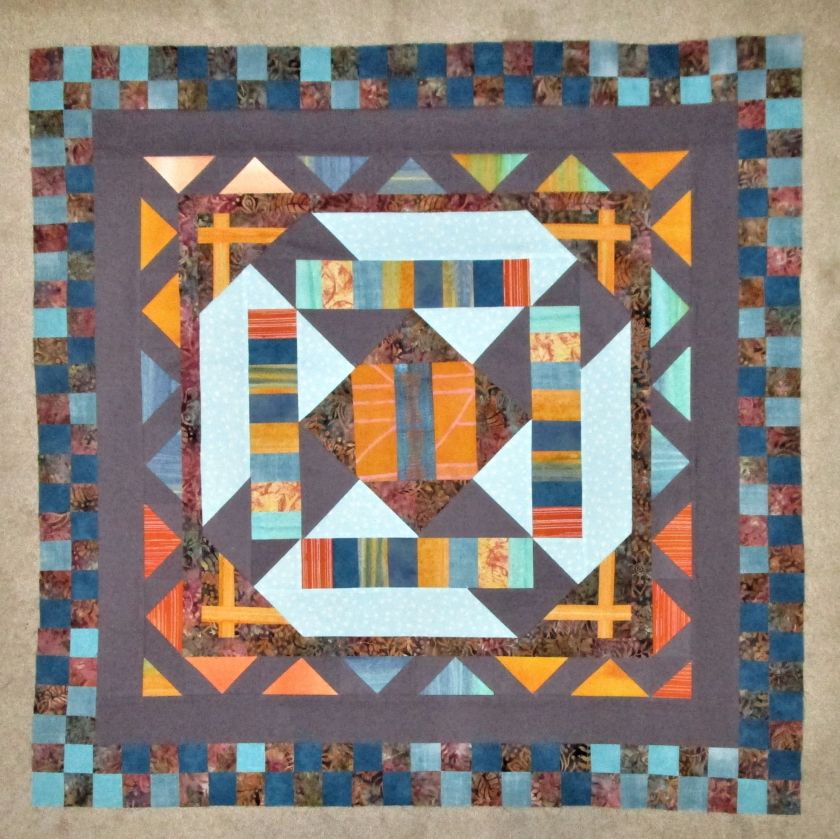
Eventually I made four 5-inch blocks in four different colors. My original design would have the spool blocks in a continuous border. When I started positioning the blocks, it became clear that there would be too much visual clutter. I settled on using three blocks on each side, leaving the corner areas available.

I will reserve the corners for the next round, or fashion corner posts using background fabrics.

To learn more about SAHRR 2023 and see what others are making, here is the link to this week’s round.

https://www.homesewnbyus.com/index.php/sahrr2023-prompt-1-spool-block/

Posted in painting, quilting

The Creation Fiber Project: Work continues

It was a cloudy day when I staged and photographed this image. It documents the assembly of my latest quilt project, tentatively called “Creation.” From a few feet away, the piecing looks fine. All points that are not exactly matched are at least closely matched. You can see on the right one border attached.

At this point, I really needed a break on lining up and sewing points. So I moved on to the border’s corner blocks. In reading about medieval manuscript paintings, I learned that the owners of the missals often had their family coats of arms painted at the corners. Here are examples.

I desire to do something simpler. (Only partly because I don’t want to spend several years of my life painting an elaborately decorated border like the example!) I have a fascination with symbols, so I decided to place historical and ancient symbols of God and/or creation at the corners instead. After a bit of research, I got busy.

Three out of four are complete. They are painted on the same golden fabric used as used for the scenes of Creation. I used watercolor pencils again. Behind and to the left you can see my border fabrics.

Perhaps tomorrow I will get back to sewing.

Posted in quilting

Update on Creation Project

It’s time to turn my full attention to incorporating the panels into a quilt. After perusing my Quilter’s Recipes book, I settled on a block called “A” Star Variation.

This version of a nine-patch block is described as Easy. I notice that the book shows a small quilt made with four blocks. This would work very well for my four panels. A secondary design is revealed right in the block’s middle. I have a good idea for an embellishment on that location.

As of today, I have all the patches cut and assembled.

The middle rows of each block, featuring the applique patch, are sewn up.

The next step is to assemble the first block. This will be a true test of my cutting and piecing skills.

It looks…………okay. The three-piece triangle blocks show my weakness in cutting and matching points. I’m not bothered sufficiently by the block’s wonkiness to take it apart and re-make those patches. But I will double-check the remaining patches of that type for accuracy and size.

Soon the assembly will be done, and I can move forward to making surface designs, which will make me happy. I also plan to add a double border using dark teal and rust red fabrics. Those fabrics are visible in the upper left corner of this block.

Have a great day. It’s nice here – I plan to take a walk.

Posted in quilting

SAHRR 2021 Last Round Celebration

GOTCHA. Okay, I have some personal business to share before I tell you about the last challenge of the Stay at Home Round Robin. Yes, today is my birthday. Mr. Mouse and I were celebrating this occasion, but he has a math problem for you. (I’m not telling my age. But I will give you a clue. I have a 12 year old grandson.) If you like math problems, chew on this: The first integer of my current age times the second integer plus 20 will give you how old I turned today. Good luck!

Now to the quilt top. At the end of the last round I had added log cabin squares to each corner. It looked like this:

Quilting Gail told us to add pinwheels.

SAHRR – Round # 7 ‹ Quilting Gail ‹ Reader — WordPress.com

I was happy to hear that because I like unity in my work. The center block has a sort-of pinwheel, and now I can echo that shape in the final border.

Of course, I had never made a pinwheel square before. Here is my first one.

The technique I chose was quick, but I ended up with bias edges on all sides of my pinwheel. This meant I needed to be very Careful Not to Stretch them out of shape. And I had 31 more to make, if I wanted the pinwheels on all sides.

Long story short, after careful cutting and lots of spray starch, the pinwheels were done. I sewed them into a border and attached the border gingerly to my quilt.

Close up of corner

My finished top is 60 inches square. I’m so pleased! Now I have until March 29th to get it quilted and bound before uploading images to the last link party. I also need to give this quilt a name. Two different thoughts come to mind:

  1. The spinning pinwheels, the combination of hot and cold colors and the scattered stars suggest to me “The Expanding Universe.”
  2. On the other hand, when I studied the patterns and shapes, I think of ancient maps, at a time when the far reaches of the earth were unknown. “The Earth is Flat.” or “Here be Monsters.”

I’d love to hear your choices. Also, anyone who does the math and guessed my age will receive a hand-painted postcard.

Posted in quilting

SAHRR 21 Round 4 – Checkerboard

My week has been a bit full – which is quite a change of pace for me. Among other things, I received my first COVID-19 vaccine jab yesterday. (sore arm today.)

None the less, I have been working steadily on this week’s challenge – checkerboard. I quickly decided it was important to make a definitive break in the design. It is desirable to separate out the triangular rounds from the checkerboard border, which will be strongly square. To make this, I added a wide coping border in the dark grey fabric.

I like the way the geese triangles now look like stained glass pieces.

To me, the checkerboard border can be a mosaic tile border. To achieve this effect I chose to use all medium toned fabrics, including the flowered batik. Here is a small mock-up for my design, using 1 1/2 inch square pieces.

The first step is to cut and sew together several strips, then cut the strips cross-wise into paired squares. Here you see the three piles.

Next I joined these strips into four square blocks, then joined the blocks into long strips. It took me a while to make the first side. For one thing, I again failed to true up the blocks before attempting to sew on the border. Soon, however, I was fully in the swing of it. The first side…………

……. and finally, all sides completed. There are a total of 48 four-square blocks used.

I like it pretty well. Despite my best efforts, there are some ripples. (Thankfully there are no pleats.) I can try to smooth them out by removing, adjusting, and re-attaching the checkerboards.

I’m ready for the next challenge, although I will probably have to buy more fabric.