Posted in painting

New Year Changes

Yesterday I got to work on changes to my studio, so that I can keep painting and sewing projects going at the same time. First of all, I put together a table top pressing board. It is a rectangle measuring about 19 by 21 inches. This addition allowed me to put the big ironing board away in the closet. I set up the card table under the window.

There is just enough room to allow me to paint on one canvas at a time, with all of the painting supplies directly at hand. To the right you see the big table that serves as my main work surface. The Bernina is on the shelf, ready to go at a moment’s notice.

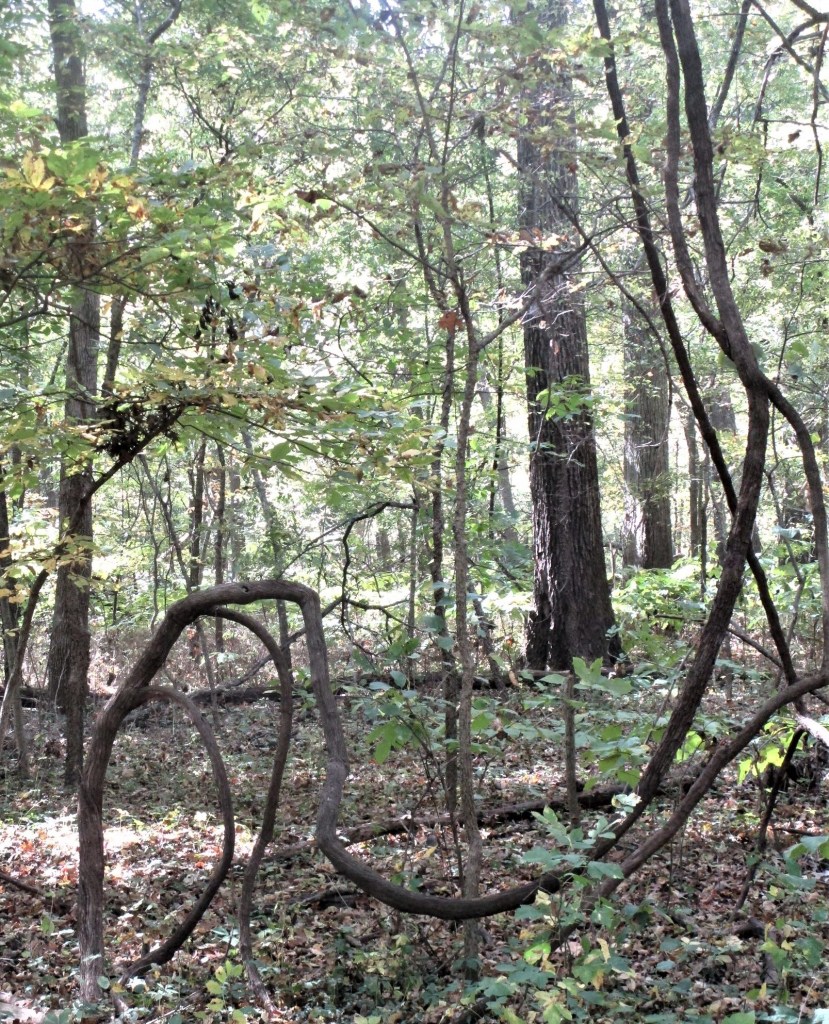
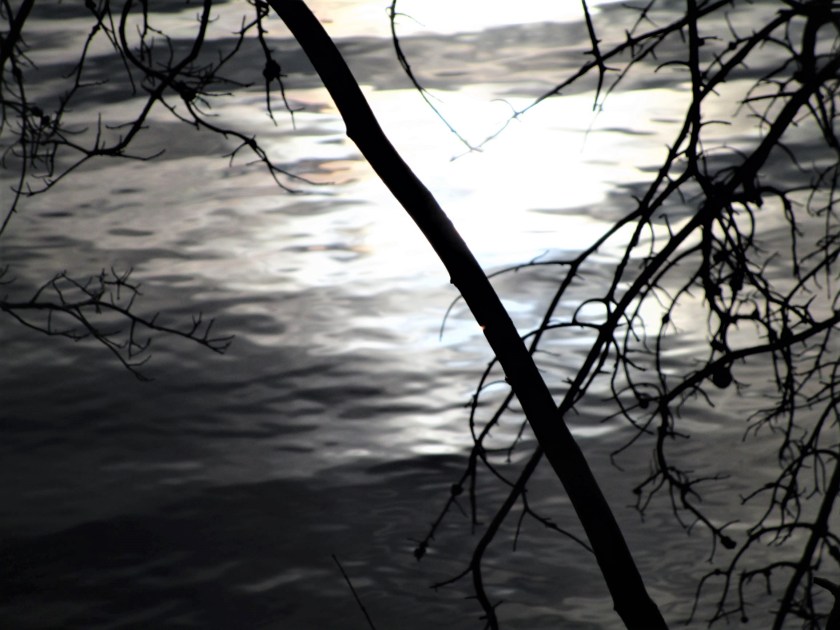
To test out this arrangement, I got busy with the watercolors. I brushed washes on to two pieces of paper. My inspiration for the first painting was a photo I took when visiting Ohio in November. It is a slightly fuzzy image of Mogadore reservoir, the shoreline surrounded by bare branches.

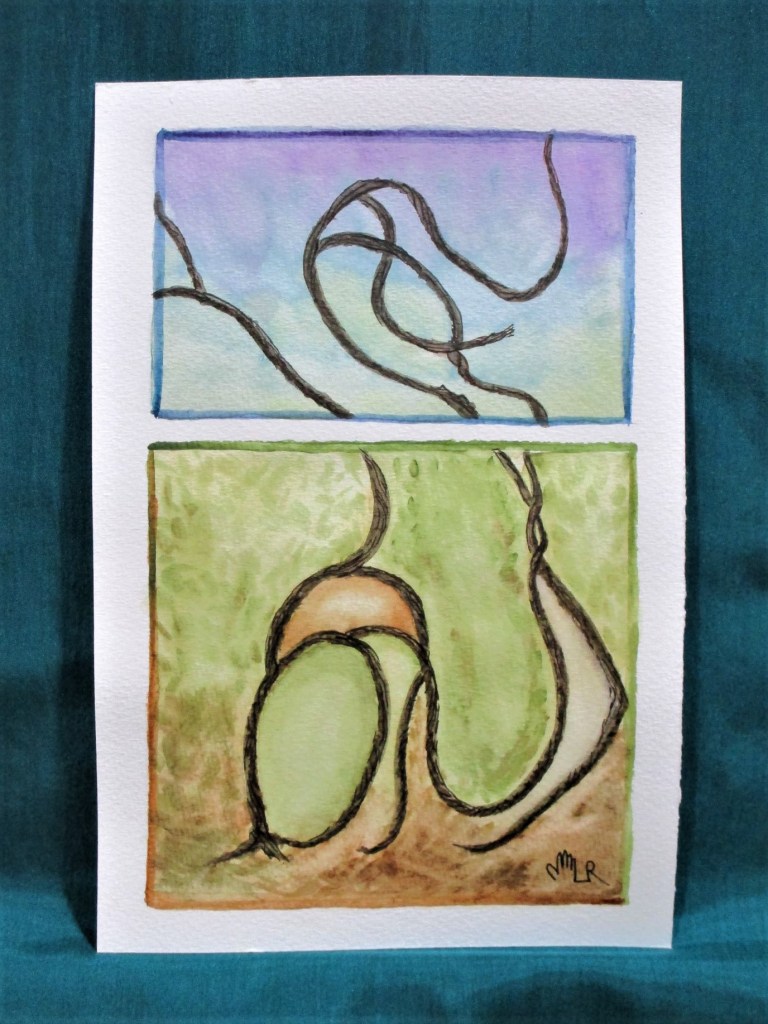
Quite a lovely, abstract landscape. Here is my interpretation of the scene using a violet and turquoise wash blended slightly.

The second piece of paper was washed with the turquoise alone – two coats to get it even. For inspiration, I flipped through some reference photos I had saved and came up with this indigo bunting.

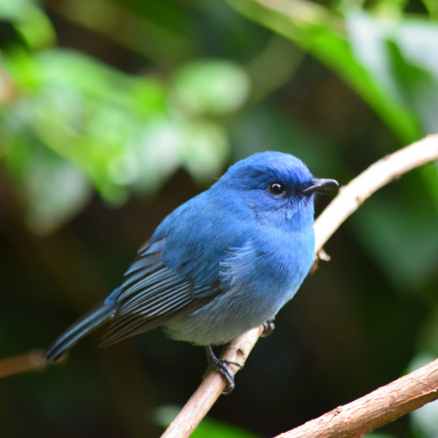
It inspired me to attempt a negative painting. In this technique, you paint around the area of the subject, drawing it out by subtracting the surrounding space. This first try at negative painting didn’t go very smoothly. I ended up having to use some white gouache on the bird to pick out the details.

Once the paint had dried, the little bird flew away. He found a perch among some of his feathered friends. I quickly snapped this photo.

Birds of a Feather” by Cheryl Bryan. This watercolor also features negative painting

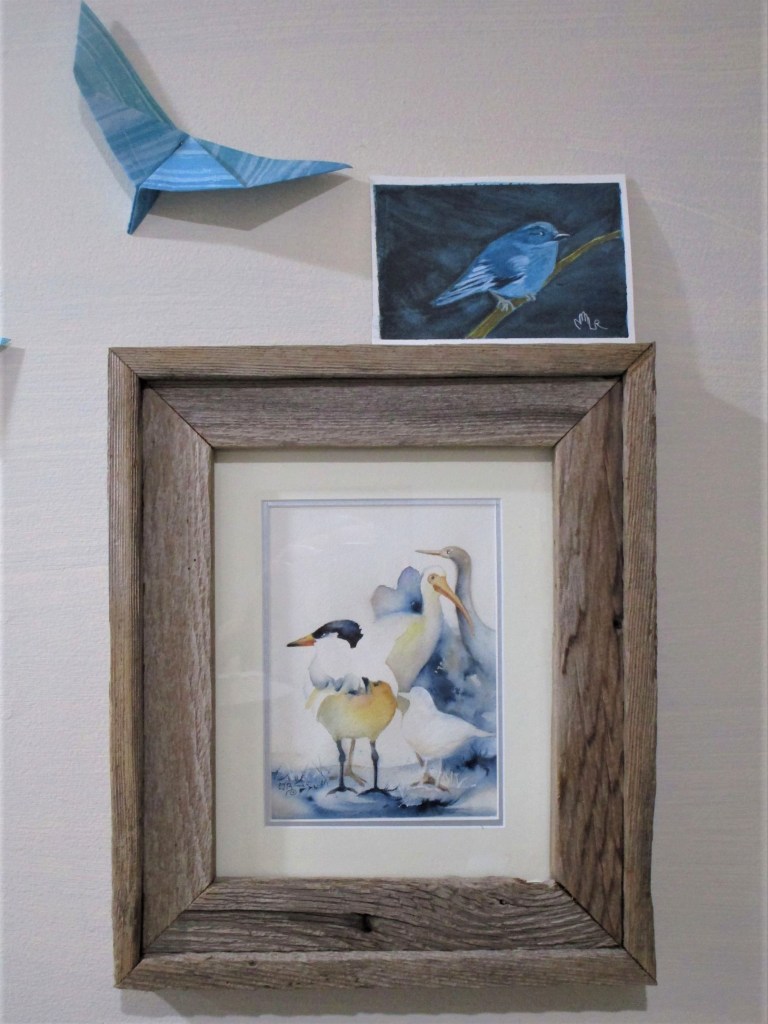
He seems so at home there.

Frame made from old fence slats by my husband.

The casual observer will notice that my background turned out very streaky. I used a combination of burnt sienna and Payne’s gray with not too much water. It took a few coats over the turquoise wash to get the uniform color I was seeking. I used quinacridone gold on his perch.

Perhaps tomorrow I will start sewing again.

Posted in painting

Thoughts on Starting a New Year

Day Two of 2021: I’ve spent some time pondering how I might use my creative collateral in the new year. While I have no grand plan, I did make one resolution regarding the pursuit of water color painting.

I will keep my painting efforts small, regular and modest. For example, in January I plan to practice painting washes every day, on small canvases of artist quality paper – no bigger than 4 by 5. Today I did an abstraction of the grapevines growing along the Pathfinder trail. Here is a photograph I took last month.

And here is my simplified study:

There are two potential good outcomes of this decision.

1. My watercolor skills will continue to improve.

2. The rest of my time can be spent on making improvisational and art quilts, which have gained my attention this past year.

Of course, I will spend the twilight hours of each day knitting.

To make the plan work, I will need to re-arrange my studio slightly, so that I don’t have to put away the paints every time I want to sew. It can be managed, with a few adjustments and additions. I will set up a small table for painting, near the window. And I will construct a table-top pressing board, so that I can put away the ironing board.

How are your resolutions coming along?

Posted in quilting, sewing

Springtime and Sorting

It’s been heart-breakingly beautiful outside over the past several days. The weather forecast for today predicts extreme thunderstorms. So I thought I would memorialize some of the garden’s spring perennials. They are so lovely, and their day in the sun is so short every year. Here are a select few.

Yesterday I finished sewing the last of three quilted buckets. This project is meant to yield a system for organizing and storing fabrics. While my stash is not large, it is somewhat unweildy for its size.

Three buckets holding fat quarter to one yard sized pieces.

That leaves the scraps. After a year of working with fiber, I have a much better idea of how I tend to use fabric in my projects. I particularly like using scraps in little strips to make small art quilts. Consequently I have become very reluctant to throw any of them away. Resulting in this:

Sorted by color family, they are even more beautiful and precious to me. Like the colorful spring growth only more enduring.

So I still don’t have a useable system for keeping this hoard in order, under control, and yet easily accessible. Reluctantly, I will be putting these gems back into the shoeboxes. Suggestions are encouraged. How do you keep your stash sorted?

Posted in crochet, knitting, sewing

OMG: UFOooooooossss!

Did you ever decide to organize your yarn closet, and in the process discover an overwhelming number of Unfinished Objects: I have!

I have clearly been in denial about the quantitiy of UFOs piling up on my watch. To be honest, I knew about a few of them. Some are over five years old. They were slumbering quite peacefully until disturbed today in my zeal to clear out the yarn cabinet. They are the dirty dozen, plus one. Here is a brief run down.

From the top, left to right:

  • Cabled gloves in dark green yarn. Pattern by Brooklyn Tweed, from Vogue Knitting magazine Winter 2009. I started with great enthusiasm, but lost steam when I fully understood the complexity of making cables up Each Finger. Tossed the pattern about six months ago.
  • Sparkly and beaded water bottle purse. I was making it for a former boss as a gift about six years ago. I couldn’t decide how to make the closure and strap.
  • Granny Square whimsical bird house. This was an experiment to see what Else could be done with granny squares.
  • Ladies’ woolen slacks. Frustrated with my inability to buy wool trousers that fit I decided to re-fashion a pair of men’s wool trousers. Purchased the pants at Goodwill, the pattern for $1.00 at Hobby Lobby.
  • Made the mistake of buying extra fine alpaca lace weight yarn. Tried to knit it held two strands together into a shawl. It’s not going well.
  • This is almost done. It is a serape-style poncho knit in a Northern Woods colorway yarn. Today I blocked it and expect to finish it soon.
  • This collection of yarn is set aside to make fingerless gloves. Still working on a design.
  • This is the pattern and fabric for making quilted baskets. I’ve made two so far. Eventually I will have enough little baskets to organize and store all my fabric.
  • This is a piece that I knit from Icelandic wool received from my daughter. I intend to felt it into a little purse – at some point in the future.
  • This shawl kit, designed by Laura Nelkins, includes beads. Someday it will be done.
  • Here is the 8 by 10 inch weaving that I made as an example for my fiber arts students. It’s nearly finished. But I ask – what do I do with it when it is?
  • And finally, I recently started a triangular cardi-vest designed by Melody Johnson. I thought it would be a good way to use up the odd balls of yarn.

Oh yes, I did say a dozen plus one. The last UFO is a felt coat.

It needs to be altered. I removed the first sleeve and then hid it in the back of my closet. It will likely stay there until next winter.

So, my fellow fiber artist – which UFO looks the most appealing to you?

Posted in quilting

Back to the Scrap Heap

I’m taking a break from knitting and painting to do a little sewing.  Some may recall my brief panic the day I realized what happens to my studio as a consequence of quilting.

Crazy Out-of-Control Scrap Heap

After spending time perusing other quilt blogs to find out how other quilters deal with this situation, I found part of the solution in the form of quilted buckets.  This lesson comes to us from Christina Cameli and Bluprint.com.

https://shop.mybluprint.com/quilting/classes/free-motion-quilted-gifts/673670

So yesterday I started on my first of three fabric buckets that (I hope) will contain my fabric-waiting-to-be-used.  This project is also an opportunity for me to practice free motion quilting while adding color and style to my studio. Her are my fabric choices for the first bucket.

120619a
Pink for the outside and gray for the lining.

I’m quilting dimensional triangles for this bucket.  Here is the first step done.

120619b
I had to use a chalk pencil to keep my row straight.

The next few hours were spent happily quilting.  Eventually the first basket was finished.

120619c
Some inch-wide grosgrain ribbon I found became the basket handles.

I have to admit that I sewed up the wrong sides of the baskets, so my basket is actually two inches longer than the one in the lesson. This turned out to be fortunate. The revised dimension held lots of fabric and fit nicely into the allotted space on my shelves.

120619d

I used the Kon-Marie method of folding the fabric and filled the bucket with the folded fabric pieces inserted on edge. It was amazing to see how much fabric this little bucket holds.  Each fabric piece remains clearly visible and easy to grab.

So my plan now is to make three more buckets to use in storing 1 yard and fat quarter size pieces, and to make some smaller baskets for the various colors of scraps.

I highly recommend Christina Cameli’s class. She is delightful instructor.  Each of her projects can be made in an afternoon and would make wonderful gifts.