It’s time to share two more paintings resulting from my lessons last week with Jan Brieschke. She taught three days on how to approach abstract painting using watercolor and ink. She calls her style Fractured Light.
Last week I posted photographs of these works at the half-way point.
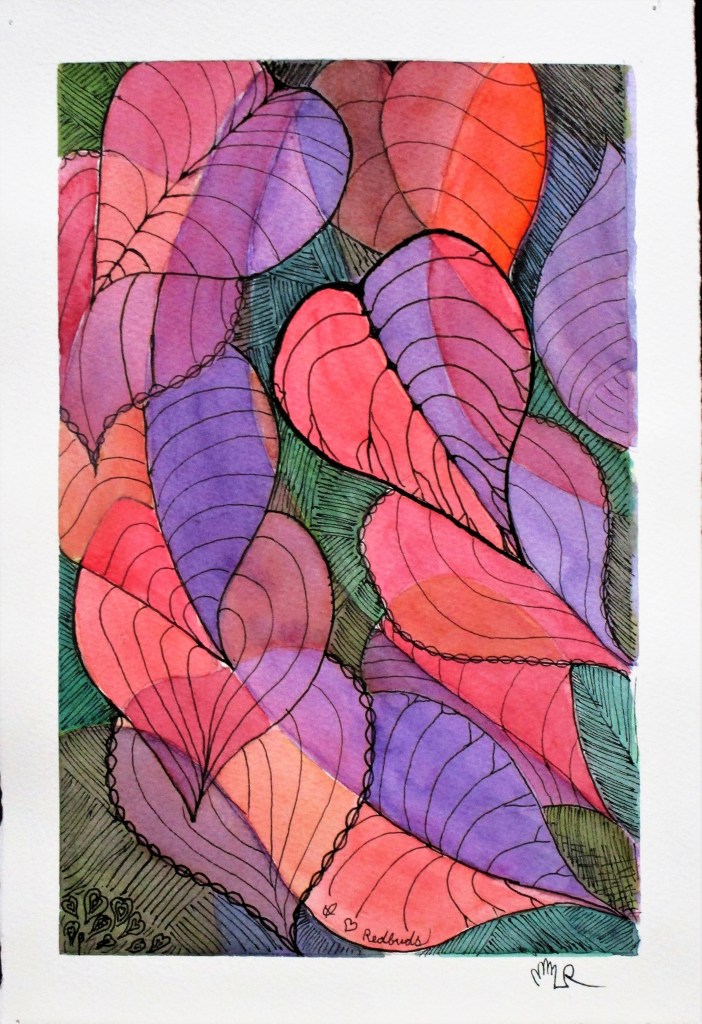
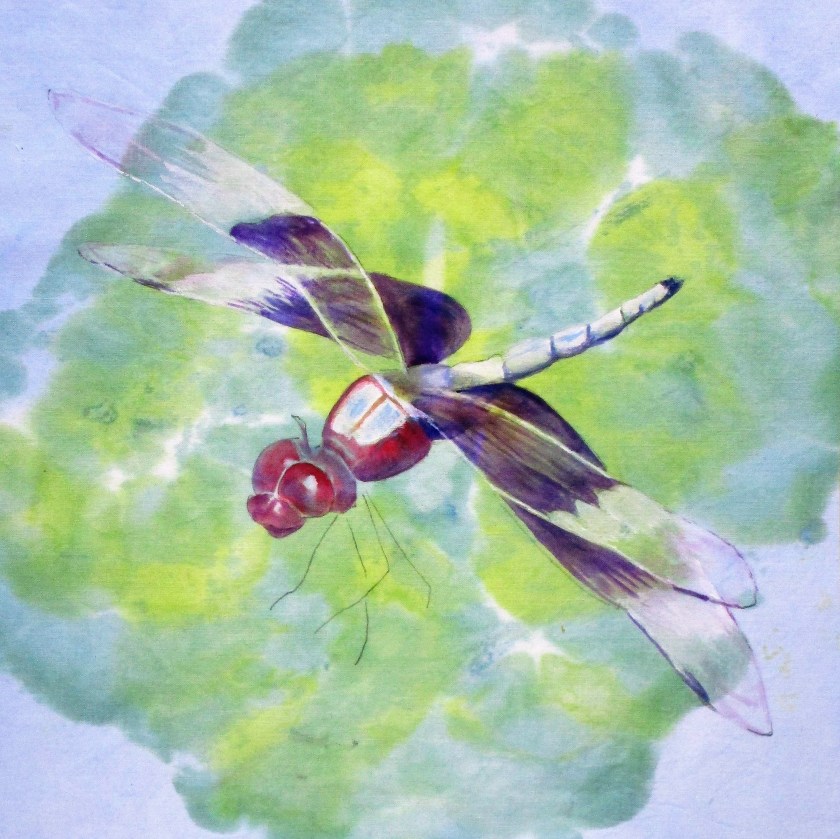
First is an exercise featuring iterations of a leaf. After drawing some directional lines, we traced a leaf over and over again, following the lines. I chose a red bud leaf.
Initial lines and first washFinished Painting
The next exercise was truly abstract. It involved a string, puddles of paint and two pieces of paper. The wet string is pulled vigorously through the paper sandwich.
Initial painting. This is a close-up of the section I worked further.
Finished painting. I fleshed out the design with many, many stipples. I also used a soluable graphite pencil to augment my painted lines.
This one pleases me a lot. I found myself in the flow while working on it. Somehow I knew exactly what to do, and exactly when it was finished.
So mysterious.
I’m sorely tempted to do more work in abstract style. I’d like to know if I got lucky or if I can find myself “in the flow” again.
More accurately, this is Watercolor Week. Our local art association is opening its annual art show and sale on Friday. In conjunction with this event, the association invited the judge, teaching artist Jan Brieschke, to give a three-day class.
Jan is teaching me and 10 other students how to compose and paint in the abstract style using watercolor and ink. Her work in this form of mixed media is stunning.
The first two days have been great fun. Jan is soft-spoken and low key. Her lessons on how to get an abstract composition started are inspired by four modernist painters:
We haven’t got to the Pollock yet (dripping and throwing paint at paper will be pretty darn exciting for a bunch of conservative Oklahomans!) Today I’m posting my work resulting from the first two days of class.
We started with Mondrian and geometric abstracts. Jan’s method was to have each student to suggest a shape. We then had to incorporate those suggestions into our initial drawings. Here is my work after drawing, inking the lines and painting washes.
To finish, we were asked to stipple our paintings using black Micron pens. I limited my stipples to the red circles, as you can see in this slightly wonky photograph.
The next technique involved the organic shape of a leaf. We started by making directional lines on our papers. Then we traced the leaf many times, overlapping the shapes in the direct of the lines. Color was added to the spaces made by the lines crossing. I chose to use warm colors on the leaf shapes, keeping the background in mixed shades of green.
Tomorrow I hope to finish by drawing more lines and some texture in black ink.
Our technique this morning involved soaking a string in one or two colors of paint, laying the wet string on a paper, covering the paper with another piece, and then pulling the string out while rotating it. I pulled two strings through mine, one twisted one straight. This is how it looks after the paper dried and I added a few twisty lines in a pale color of paint.
After studying the result for a while, I decided that I will crop it down, maybe like this.
Tomorrow is the last day of class. Hopefully I will finish my leaf and string paintings. And who knows what other crazy things Jan will show us using paint and ink.
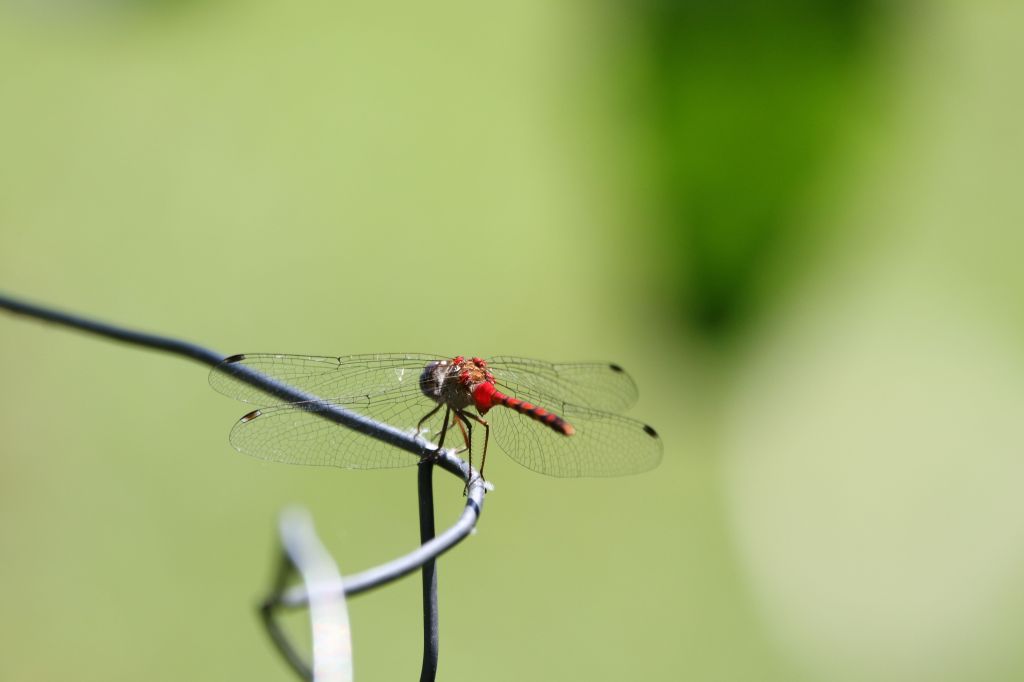
I could have called this post Wednesday WIP. But since I worked from three of Bill’s photographs to create this panel of the dragonfly art quilt, I prefer to focus on the inspiration.
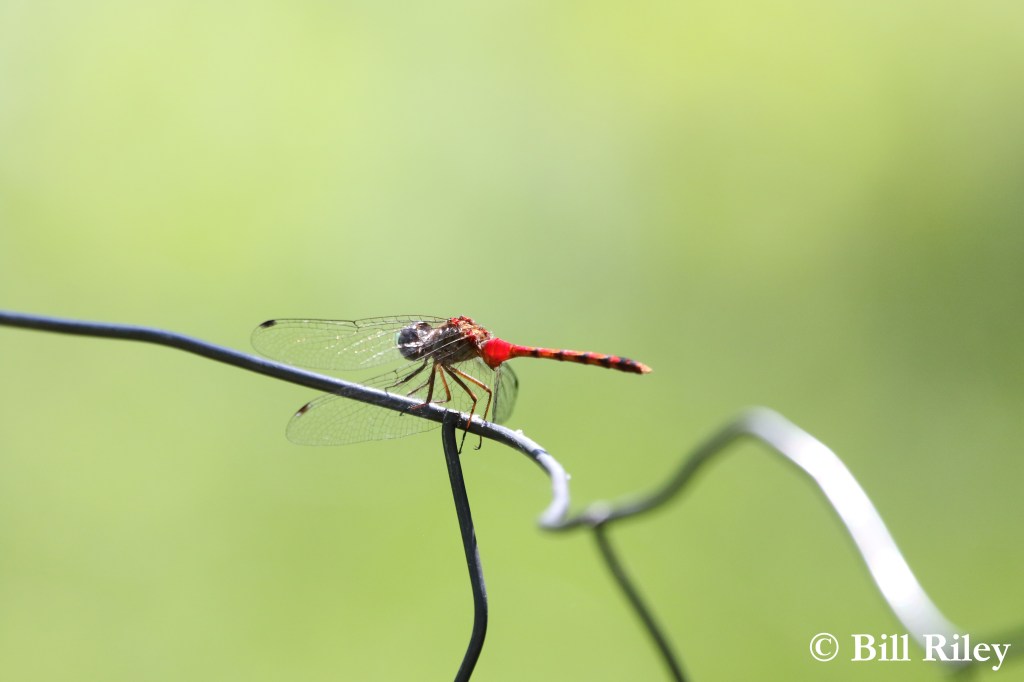
As noted above, I am still working with dragonfly photographs. In this installment, I selected two images of the same dragonfly……….
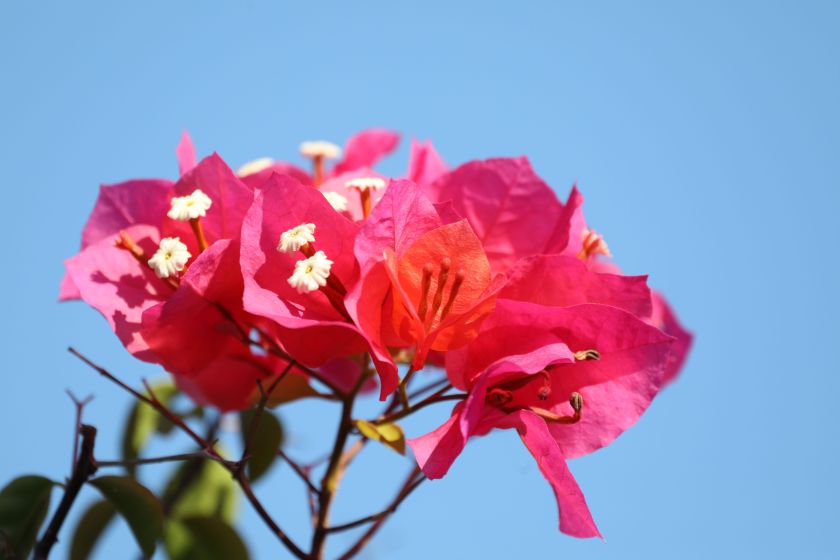
…….plus one photo of some bougainvillea blooms.
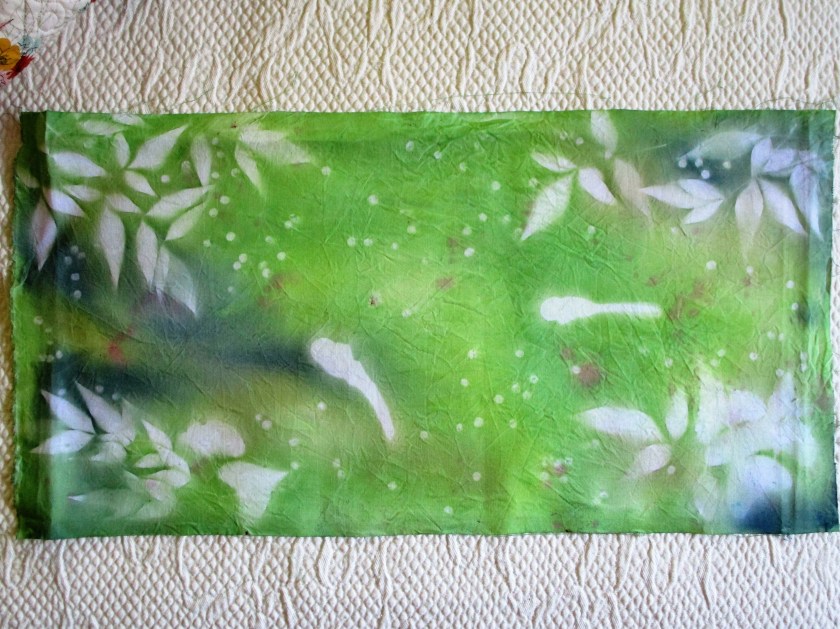
The three images will be combined in a horizontal panel measuring 12 x 24 inches.
On the first day I painted the background. I dipped the scrunched white cotton into two different pigment baths, wringing it out in between soaks. After smoothing the fabric onto my dry erase board, I placed two dragonfly shaped masks, several sprigs of dried leaves, and a sprinkling of dried peas. Next, I dropped on a little bit of purple and magenta paint, then set the board outside in the sun to dried.
It didn’t take long.
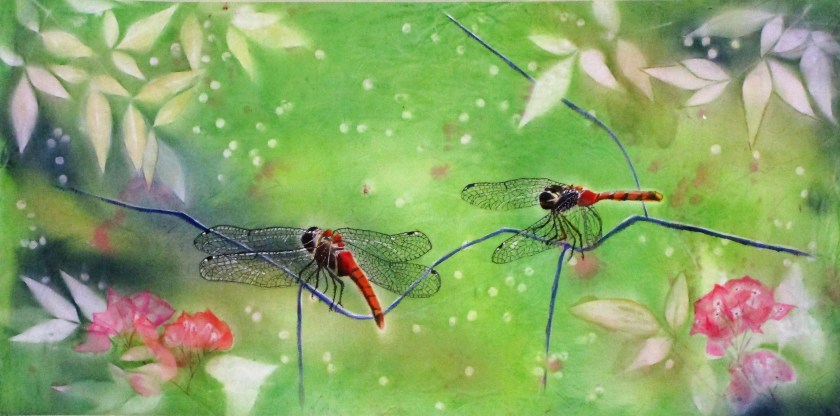
I took my time painting the dragonflies. Today I finished up by drawing the delicate wing veins. Next the background got more attention. I enhanced the leaf shapes with color, then painted a long line across the panel – my interpretation of the wire plant support seen in the photos.
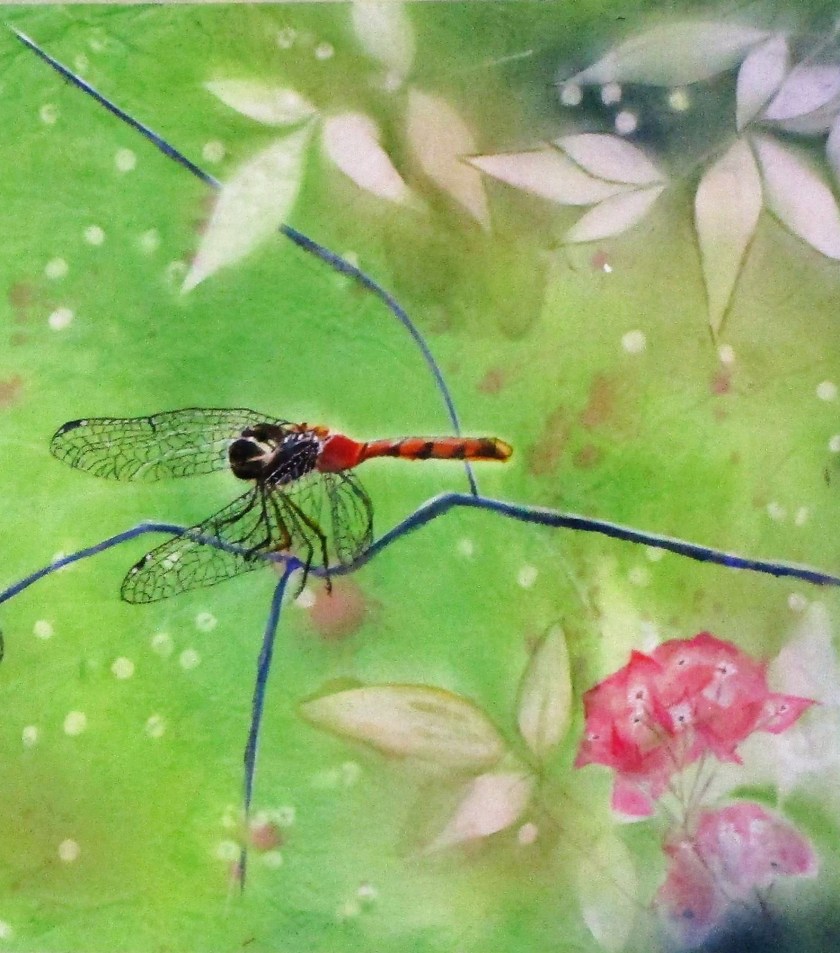
A closer look…………
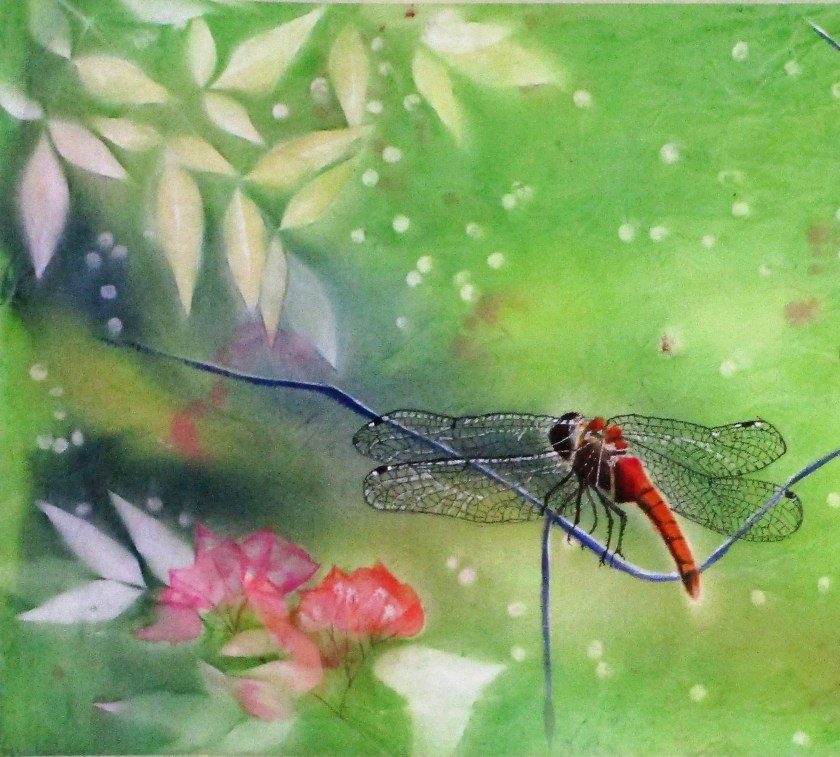
another…….
Again I used Micron pens, watercolor pencils and a little white Gelli pen for the finishing touches.
I have been busy painting dragonflies on my hand-painted backgrounds. The process is really fun! I have also been researching dragonflies. They are amazing animals.
Did you know that some dragonflies can live for six years? That is pretty good for an insect. Granted, up to four years are spent as naiads, in water. They look kind of like shrimp. Adult dragonflies have six legs, yet they cannot walk. They use their legs to snatch prey in flight, which they then tear apart and eat while still flying. If you were the size of a fly, you would find dragonflies terrifying.
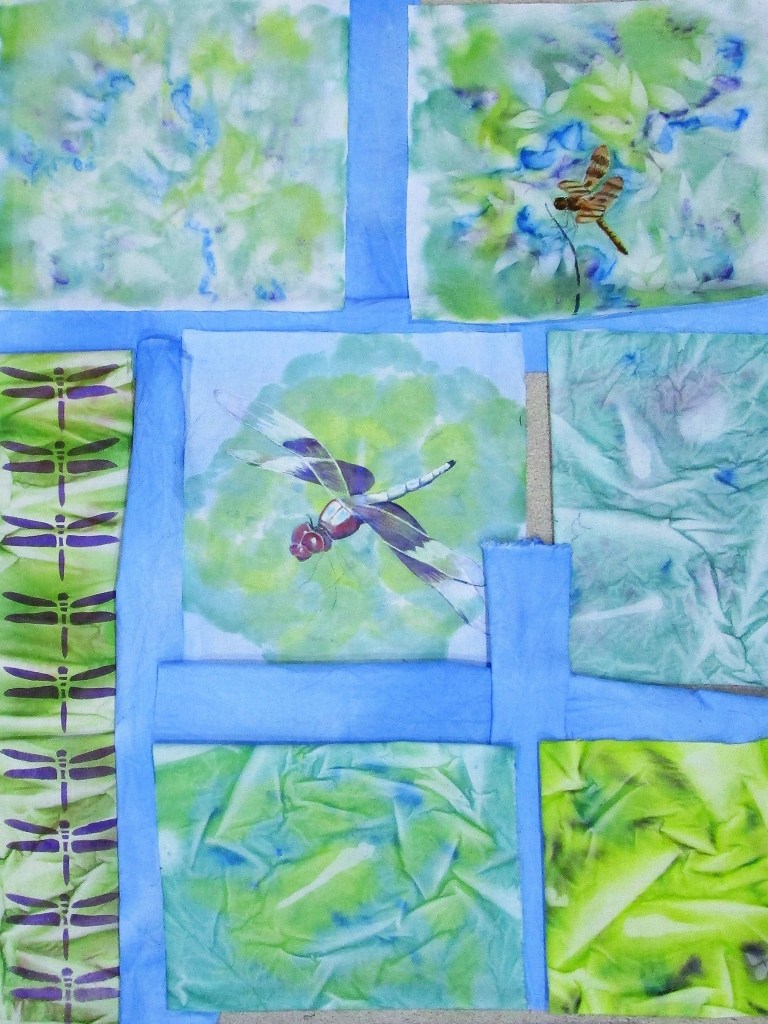
So far, five of my panels have dragonflies on them.
I cut a stencil to make these two panels
In addition to Jacquard textile paint, I am using watercolor pencils and Micron pens. The paint is thinned with FolkArt floating medium, which permits better blending and lengthens the drying time.
Here is a mock-up of the quilt layout I’m considering.
If I go with this layout, the finished piece will be 28 x 36 inches.
Two more panels need dragonflies, and then I will consider painting some details on some of the backgrounds.
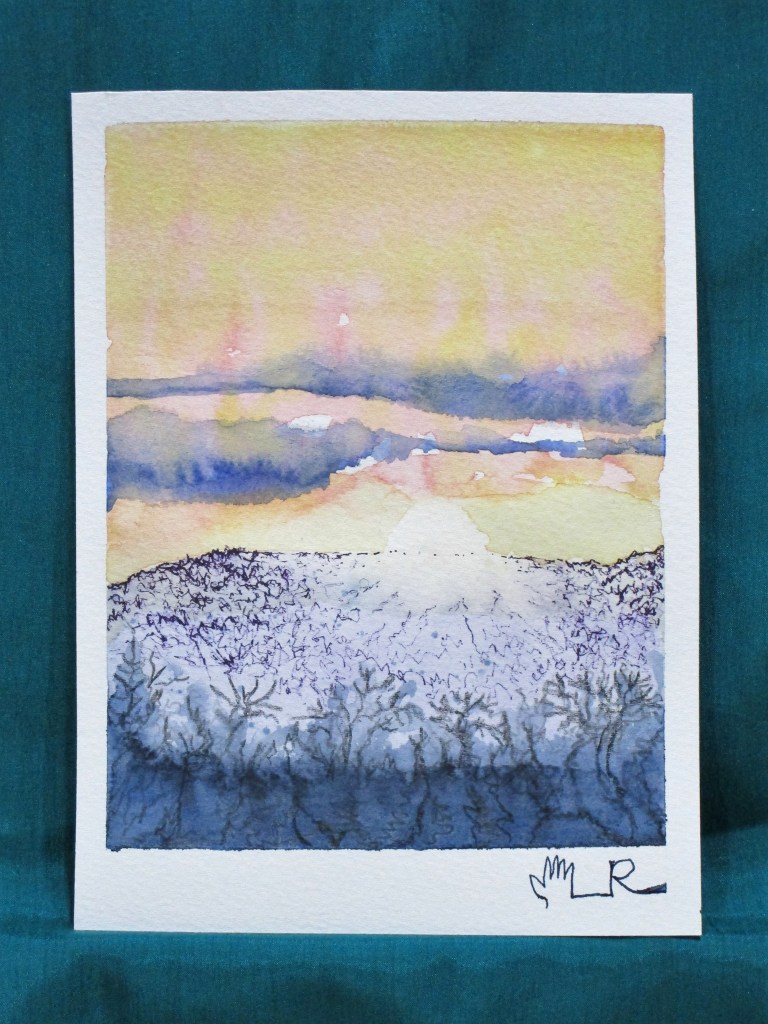
In this exercise, I chose to paint washes that were opposites on the color wheel. Then I decided what the resulting painting reminded me of. Next I “brought out” the image.
Red Giant with webbing, using red and green.
Sunset over Circle Mountain, with yellow and purple.
Detail drawn in with watercolor pencils and Micron pens. Cold press paper by Winsor and Newton, 4 x 6.