After working out the details of Challenge #5 SAHRR 2021 (the wonky stars border) I paused before completing that border. My quilt is currently 39 inches square, and dangerously close to being too big to quilt on my Bernina. Therefore, I decided to start quilting the completed sections before adding any more fabric.
First task is cutting and layering the quilt sandwich. Getting the backing and batting smoothed out was a tricky chore since the quilt is too wide for my worktable. After I had managed it, I proceeded to hand baste every three or four inches – just enough to keep the layers from shifting while I sewed.
Yesterday I got about 1/2 way done with parallel rows of quilting. It looks like this on the back side.
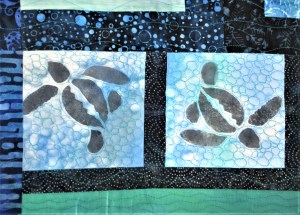
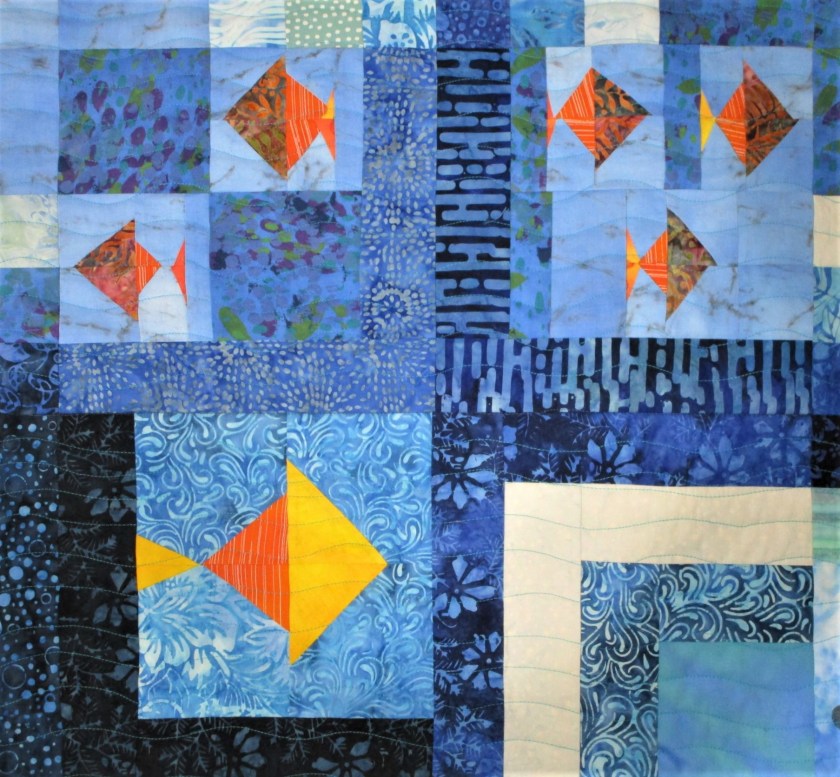
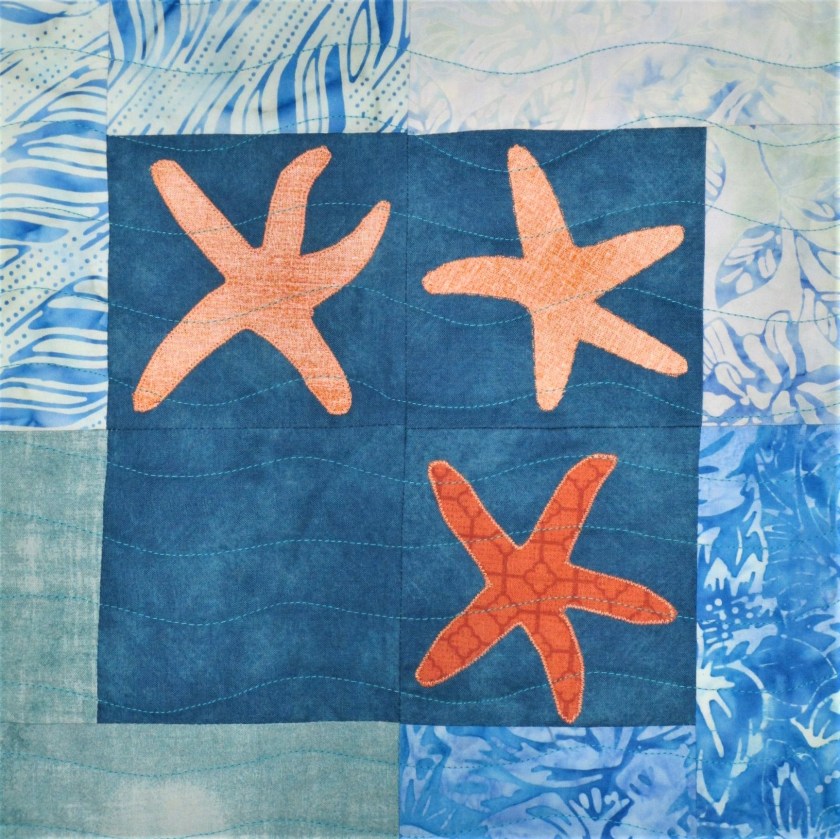
I chose to hand embroider the central square, which emphasizes the shapes.
Still undecided on how to quilt those batik triangles.
The gray spokes were quilted in parallel lines about 1/2 inch apart.
Image showing machine quilting and hand basting.
I’ll continue to quilt until the section is finished. Then I hope I have time to sew on the wonky star border before being faced with Challenge #6.
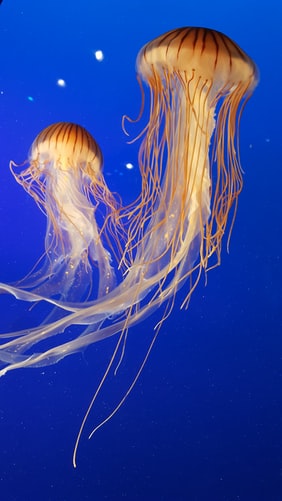
It was with great satisfaction that I sewed my last stitch into “Under the Sea” quilt. Today is the big reveal. Since many of you have already seen the completed blocks, instead I will share the inspirations for my quilt’s design.
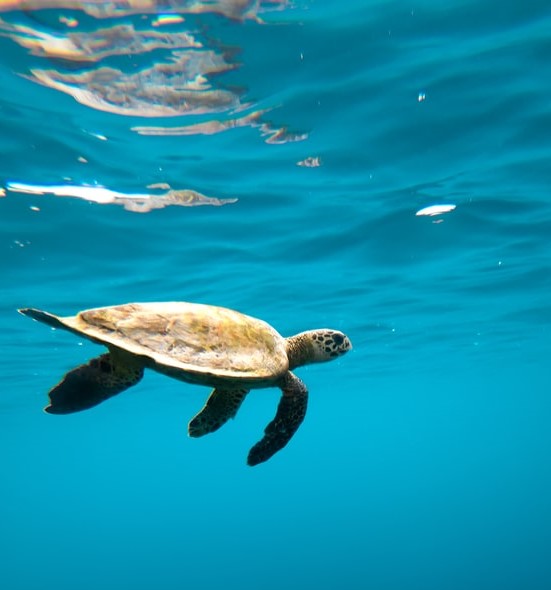
It all started with sea turtles. I painted the first one last April, on Earth Day. Ultimately, the sea turtle became the centerpiece of this project.
Green Sea Turtle, Costa Rica
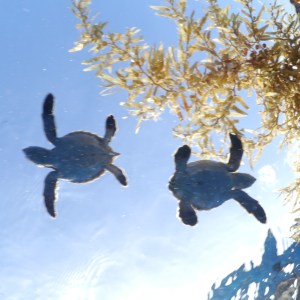
One thing I learned about these amazing animals is that they roam broadly over the ocean. Yet they always return to the place of their birth to start the next generation. It’s a hazardous journey across that beach. Many newly hatched turtles fall prey to other creatures. Even once they are afloat, life is precariously
As I spent time drawing various sea creatures, I realized that I would probably never see a healthy coral reef. Humans have done a poor job of conserving the world’s oceans. According to the National Geographic Society, a mere 7 percent of the sea has any official protection – and these are mostly weak rules, with multiple exceptions. Only 2.5 percent of the ocean is highly protected from human exploitation.
Most disturbing to me is the effect of global warming on the ocean. As more and more carbon dioxide is absorbed by the water, the ocean get more and more acidic. Following that process to its natural conclusion implies a great die-off of species. The acid water will dissolve the calcium in the reefs until they can no longer sustain life.
So my process of making “Under the Sea” turned into a love story about all the creatures living under the threat of extinction.
…….. and a plea to those who have the power to act on their behalf. If we do nothing, what we have left of the ocean may not be enough to sustain our own species.
Because there is always hope, I will leave you with this: The Pristine Seas project launched by National Geographic Society in 2008 has helped create 22 marine reserves across the world’s oceans. New research indicates that as a result of rigorous protection, fisheries adjacent to these no-take zones experienced a rebuilding of stock – almost doubling the catch.
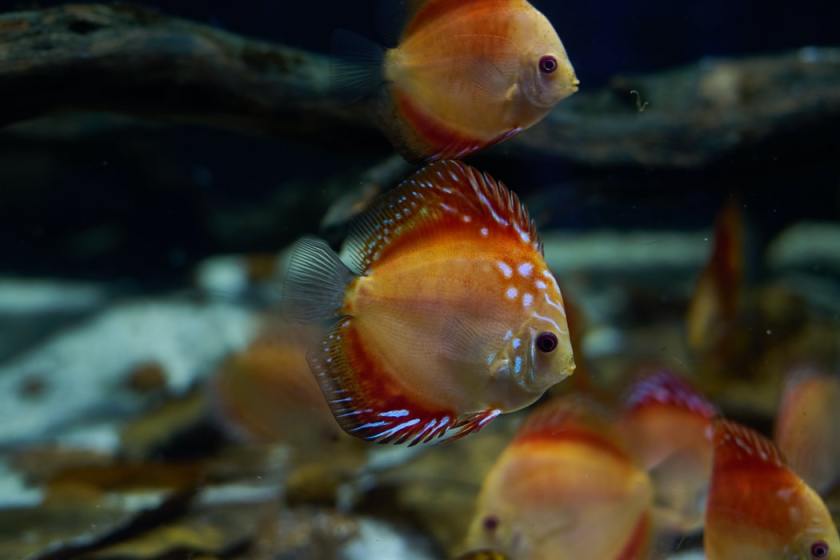
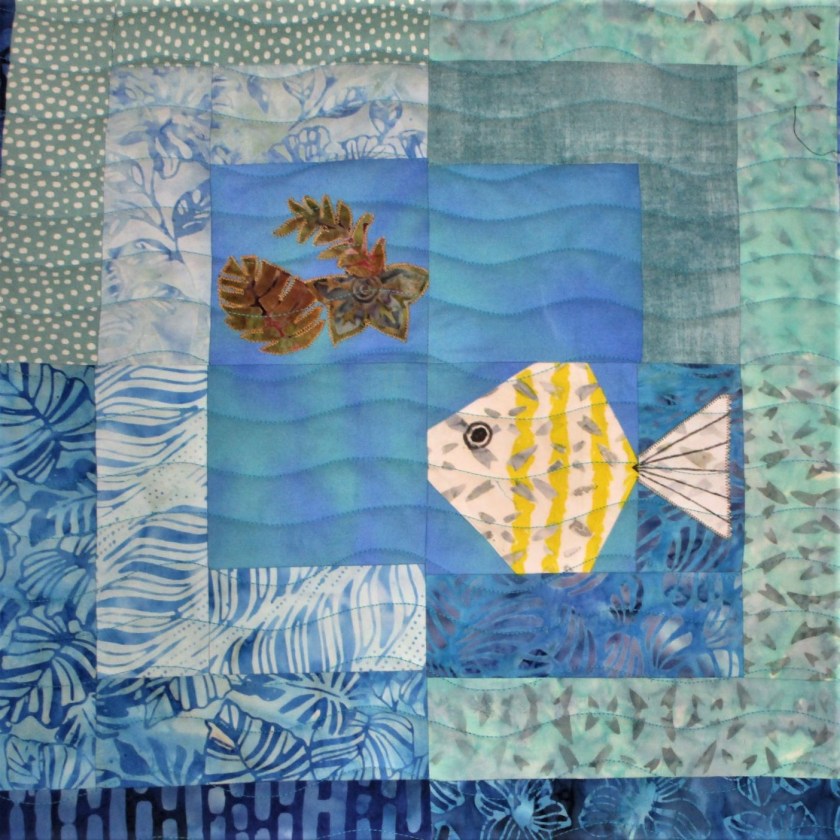
Fish blocks pieced by flip and stitch. Turtles stencil painted, free motion quilted.
It is possible to keep our coral reefs and continue to feed ourselves and our children.
This is a qualified finish. I still need to quilt the border and bind the edges. But the creative work is essentially done. I chose to use echo lines to quilt the background. The work went swiftly and smoothly.
The cotton damask fabric is a joy to work with. I had the benefit of a fresh needle in my machine, thanks to the delivery of my on-line order from Bluprint.com.
Following the example of Lola Jenkins, I used Prismacolor pencils to color the image. I had never tried this medium on fabric before. But by working slowly and carefully, I managed okay, rendering shadow and highlights modestly. Here she is as of today.
Here is a close-up of the subject.
I noticed that a damask vine landed smack in the middle of her onesie. I didn’t plan that placement, but serendipity happens. So I chose to leave it unpainted and embroidered a running stitch around it.
At 18 inches square, this piece is a good size for framing or mounting on artist canvas. Perhaps the arts supply store will open soon and I can buy what I need. In the meantime, she will be tacked up on one of my foamboard panels, allowing me to admire her on a regular basis.
How many of you remember a time when fine dining took place on a table set something like this? Okay, don’t answer that. I’d like us all to maintain our youthful appearances. I do remember that time – perhaps 30 or so years ago. Back then I went to the extent of buying crystal glassware. But the silverplate and the damask linens were given to me by the generation ahead of me. Every once in a while I get out the silver. The pale pink damask napkins you see in the photo were a gift from my mother-in-law. I’ve never found a use for them that fits my current lifestyle. They have been in the back of the linen closet, unused, for almost twenty years.
But that ended this week, thanks to Lola Jenkins and Thread Art. While stashing away some other fabric, one of the napkins fell out onto the floor. Timing is everything! It came to me that I could sew a portrait on this pale pink piece of fabric.
The subject I have in mind is my grand-daughter, from this photo taken at four weeks.
Awww!
I decided to overlay this image onto one of a daylily. How about this one?
In the thread art process, the photographs are manipulated to size, and then the contour lines of the image parts are marked up. Here is the baby photo after marking.
I enlarged the flower until the baby could settle comfortably into the center of it. Oops, the baby is missing a foot. I manipulated one of the daylily petals to cover the place where the foot should be. After more fiddling, I came up with this.
Bill thinks this looks like an Anne Geddes photograph. I don’t care.
Now to transfer the lines to the fabric. This proved a little trickier than I expected. I first tried the chalky transfer paper used in traditional embroidery transfers. The lines were way too faint and uneven. Then I found, in the deep recesses of my sewing cabinet, an Aunt Martha’s transfer pencil. Using this tool, you mark up the back side of the image, lay the marked side against the fabric and press with a hot iron.
You get bright pink marks that ARE PERMANENT. But I am living by Lola’s slogan today – and Going For It! I will be covering all the pink lines with black thread.
For the best results, the quilt sandwich should include interfacing fused to the quilt top. I did that and then I cut the batting and backing, pin basted and started quilting.
Here she is at close of business yesterday ……………………
…………….And here is the image with all the contour lines stitched.
So far, making this fiber object has been challenging and fun! I’m so happy to have found a use for the damask napkins.
The next steps are to quilt the background and then add color to the subject. Lola Jenkins uses colored pencil. I will start with that medium, but I may experiment also with some fabric markers. After all, it’s time to go for it.
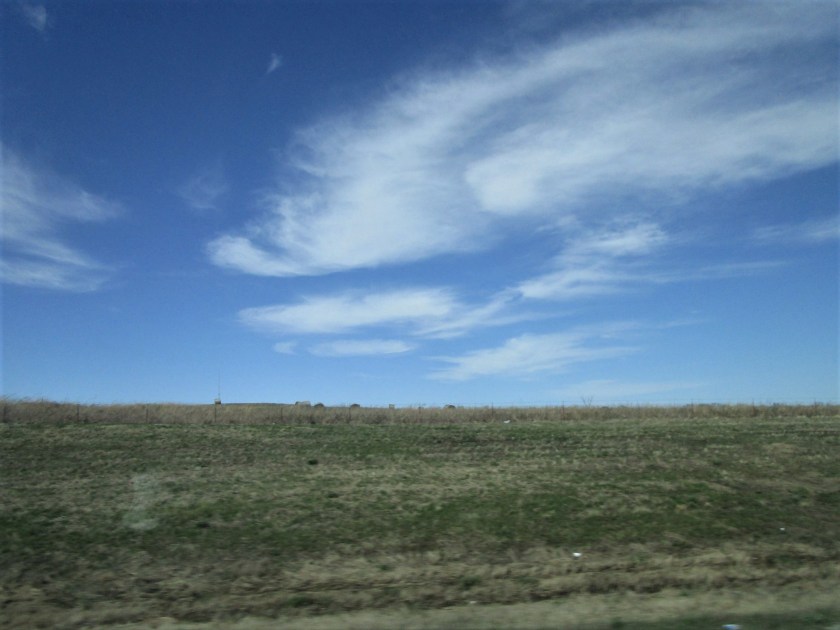
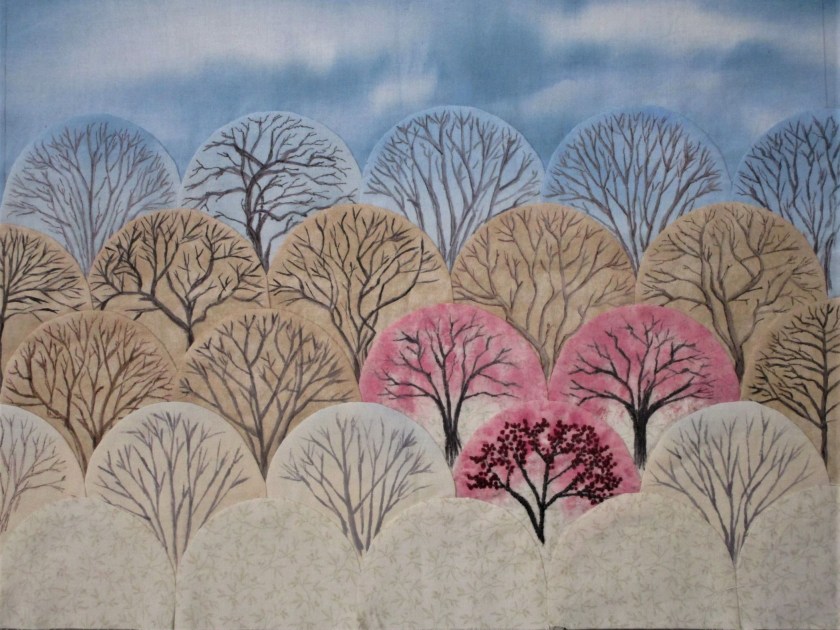
Yesterday was spent finishing up the Just Trees miniquilt. This project was inspired from the way treetops look in the winter. As spring started to move it, I had to add some color in the form of blooming redbud trees. New skills practiced: paper piecing, hand applique of clam shell shapes, using textile paint mixed with floating medium on fabric. This last technique allows a more precise line by slowing the flow of the paint into the fibers. The floating medium is made by Folk Art. Here is my miniquilt all pieced together and painted, but not yet quilted:
I decided to improve my focal point by embroidering details into the lowest redbud tree.
French knots for the magenta buds and stem stitch for the trunk and large branches.
And here is the piece fully quilted, with a border of commercially printed fabric. I used my walking foot to stitch around the applique. I free motion quilted the sky and around the border.
JUST TREES
I’m happy with the results of this fiber object. It reminds me of the view across the floodplain in my little Oklahoma town.