Posted in sewing

Finished Object Friday: Binding

This elaborately embroidered art quilt is not mine. It was made by my mother Jackie – one of the last pieces she worked on before being abruptly retired from sewing by a stroke last January. Her right side and her speech functions were seriously impacted. Recovery has been slow in coming.

This quilt is so dense with embroidery that it is stiff and heavy from the massive about of thread added. She completed it all but the binding. Now our mother cannot tell me or my sisters anything about the pattern, materials, or work involved. We know only that it was embroidered on the Baby Lock Destiny II.

So that it can be used by one of my sisters, I volunteered to add the binding.

I thought that it would be a simple matter to match the green, but it was not. Eventually I chose a Moda fabric in color Emerald.

It reminded me of a prom dress I made for myself. The skirt was sewn from satin in a shade just about this color. Working on this binding gave me a flash-back to my then-boyfriend and the moment we posed for a photograph at the dance – I think it was sometime around 1969. I seem to have lost the photo.

Actually, sewing this binding on took all my concentration. With all that weight and stiffness, the quilt resisted my efforts to manipulate it through the machine. It felt like I was arm-wrestling a tent.

Finally finished.

I guess the color is a good match.

I wish I could tell my mother about it. At least I will send her a photograph. Perhaps seeing it will stimulate her brain to remember making it.

The quilt itself will go to my younger sister.

Posted in embellishing, painting, quilting

Experiment with Stitch and Slash

While perusing available art quilt technique tutorials, I discovered another use for my hand-painted fabrics. Carol Ann Waugh teaches a modern take on reverse applique in her class on Craftsy. She calls it Stitch and Slash. It was inspired by the traditional molas made by the Kuna women of Panama.

In Carol’s interpretation of the mola, four pieces of fabric are selected and layered together. Then a design is chosen, marked on the back of the pile and stitched into layers. The similarity with the traditional molas stops here, when Carol gets out her seam ripper and slashes away at the assembled fabric Instead of nice, neatly stitched edges, she ends up with frayed, textured ones.

Okay, I thought, I have the perfect set of fabrics to try this out.

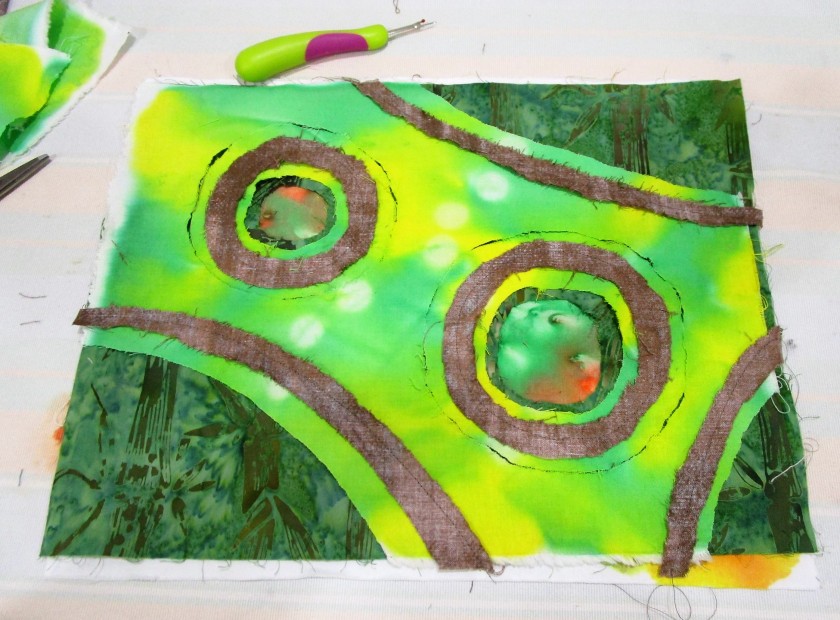
The two painted pieces are layered with a dark green batik print and a brown textured print. You see here the back side of the brown fabric, which I will be using for the top layer. Nearly all of the this layer will be cut (or torn) away.

Here is the back of my piece, showing marks stitched through.

Getting started with the slashing: You see in this photo all the top layer is gone, part of layer two gone, and the center of the circles showing the bottom layer.

This ripping took more time and was a little trickier than I expected.

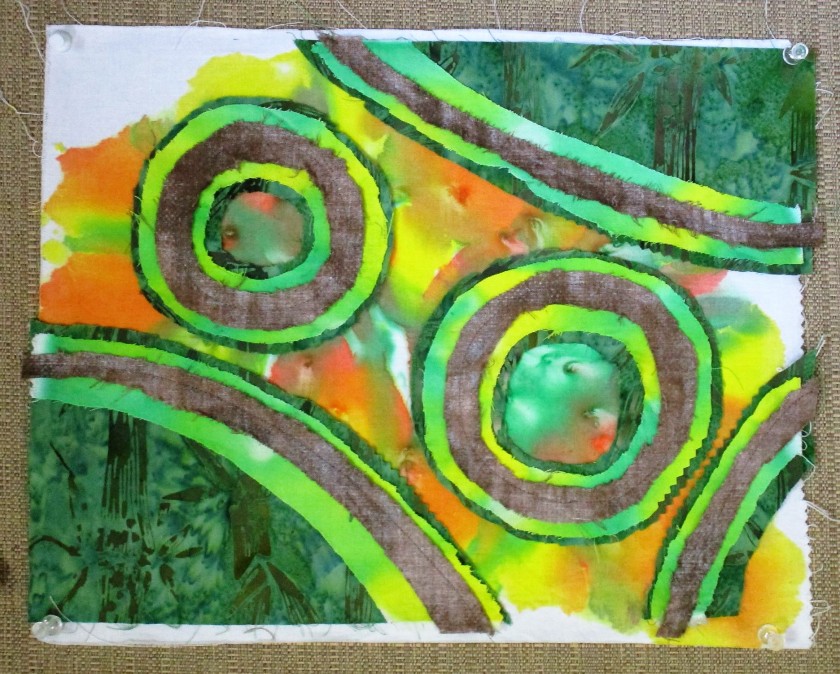
All the excess fabric is now removed.

I was excited by how well the painted design is showcased.

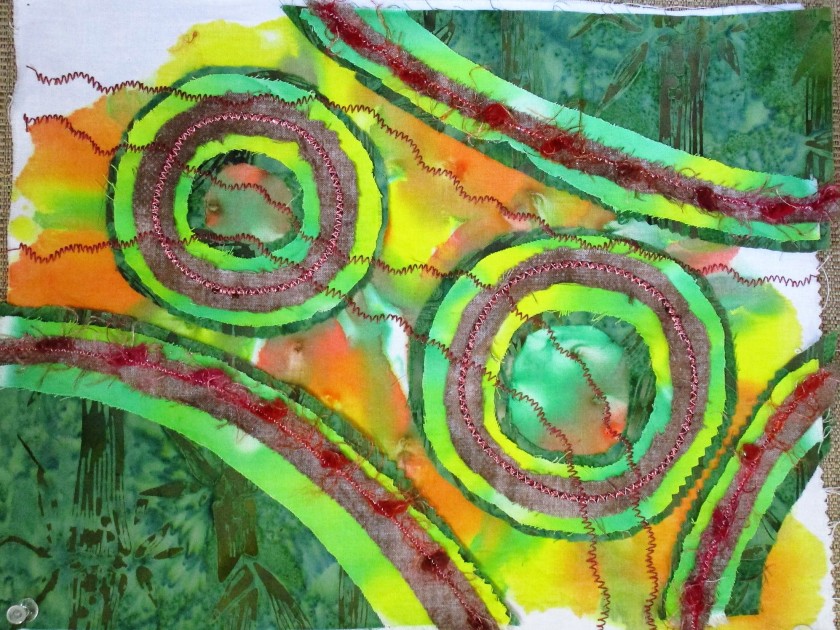
The next steps are really just embellishments. To start, various ribbons and yarns are couched down over the seams. (Couching is just a zig-zag stitch worked over the ribbon/yarn/cord.) After that, it’s time to explore thread and machine embroidery options. I went with metallic yarns and threads in warm colors and dark shades.

To finish up, I made a quilt sandwich with batting and backing and stitched it together using free motion quilting.

My Stitch and Slash sample suggests to me how much the trees are suffering from drought and temperatures above 100 degrees. I will call it Heat Wave.

You can find Carol Ann Waugh’s class here:

https://www.craftsy.com/class/stitch-slash/

Posted in quilting

Jackie’s Pandemic Quilt

While visiting my mom last week, she showed me this quilt, just come back from the long arm shop. She called it her Pandemic Quilt. Apparently, in order to earn that name, a quilt must be made entirely with materials you already have in your stash.

Close up of nine blocks, including Spring and Summer.

She told me that the inspiration for this improv, scrappy quilt came when she was experimenting with embroidery patterns available on her new, very fancy, baby lock machine. Take a look at the flower in the upper left corner block, above. After working this center she cut it into the shape of a pentagon. This allows for the crazy log-cabin piecing to take place. After a little experimenting, she embroidered the block centers first, made her cuts and then did the piecing. The centers include the words “Spring” and “Summer.”

The white sashing and black cornerstones give the quilt a fresh modern feel.

Good work, Mom. I love to see you get creative.

Addendum: Jackie says,

” I think this quilt is a good example of combining techniques.  The embroidery is strictly modern and surrounded by an old technique of crazy patch piecing.  A purist would hand quilt this but my old arthritic hands no longer hand quilt so it was finished on a long arm machine which is also a modern invention.  “

Posted in quilting

Days of Fine Dining – Damask

How many of you remember a time when fine dining took place on a table set something like this? Okay, don’t answer that. I’d like us all to maintain our youthful appearances. I do remember that time – perhaps 30 or so years ago. Back then I went to the extent of buying crystal glassware. But the silverplate and the damask linens were given to me by the generation ahead of me. Every once in a while I get out the silver. The pale pink damask napkins you see in the photo were a gift from my mother-in-law. I’ve never found a use for them that fits my current lifestyle. They have been in the back of the linen closet, unused, for almost twenty years.

But that ended this week, thanks to Lola Jenkins and Thread Art. While stashing away some other fabric, one of the napkins fell out onto the floor. Timing is everything! It came to me that I could sew a portrait on this pale pink piece of fabric.

The subject I have in mind is my grand-daughter, from this photo taken at four weeks.

Awww!

I decided to overlay this image onto one of a daylily. How about this one?

In the thread art process, the photographs are manipulated to size, and then the contour lines of the image parts are marked up. Here is the baby photo after marking.

I enlarged the flower until the baby could settle comfortably into the center of it. Oops, the baby is missing a foot. I manipulated one of the daylily petals to cover the place where the foot should be. After more fiddling, I came up with this.

Bill thinks this looks like an Anne Geddes photograph. I don’t care.

Now to transfer the lines to the fabric. This proved a little trickier than I expected. I first tried the chalky transfer paper used in traditional embroidery transfers. The lines were way too faint and uneven. Then I found, in the deep recesses of my sewing cabinet, an Aunt Martha’s transfer pencil. Using this tool, you mark up the back side of the image, lay the marked side against the fabric and press with a hot iron.

You get bright pink marks that ARE PERMANENT. But I am living by Lola’s slogan today – and Going For It! I will be covering all the pink lines with black thread.

For the best results, the quilt sandwich should include interfacing fused to the quilt top. I did that and then I cut the batting and backing, pin basted and started quilting.

Here she is at close of business yesterday ……………………

…………….And here is the image with all the contour lines stitched.

So far, making this fiber object has been challenging and fun! I’m so happy to have found a use for the damask napkins.

The next steps are to quilt the background and then add color to the subject. Lola Jenkins uses colored pencil. I will start with that medium, but I may experiment also with some fabric markers. After all, it’s time to go for it.

Posted in sewing

Stitch Bible

No, friends, this is not a publication by a religious group. This is an exercise in making a reference guide for your own sewing machine.

Yesterday I took a few hours to document all the stitches that are programmed into my Bernina 1080 Special. I would have done this sooner but for my own impatience to get on with my making.

Basically, you just make a column of stitches, move to the next button and repeat until you have a sample of each stitch. In addition, I changed length and width as I stitched along, making notes in permanent marker along the way.

It wasn’t as boring as I had imagined, mostly because I listened to podcasts while I stitched.

Even though my Bernina only has 28 different stitches, I worked my way through several bobbins of thread. The payout of this exercise is getting to play with different combinations of the stitches that I discovered. My favorite setting is the mirror-image button. This allows me to highlight nice sections of my fiber objects with mirrored embroidery stitches.

I also learned how to couch cord, ribbons and yarn.

If you haven’t made a stitch bible for your sewing machine, I suggest that you give it a go. It may spark in you some creative ideas for future fiber play.