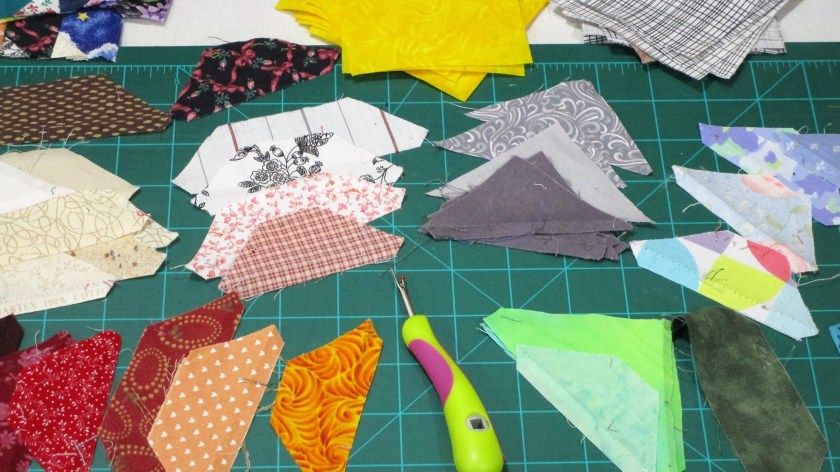
Now I know why this quilt along is called a challenge. Round 5 proved to be the most time-consuming and frustrating of all (so far.) My decision to use recycled quilt blocks turned into a bad idea. You see in the photo above the results of many hours work harvesting suitable fabric pieces for square in square blocks from the pineapple blocks. Oh boy! By Saturday, I had made enough blocks to build two sides.
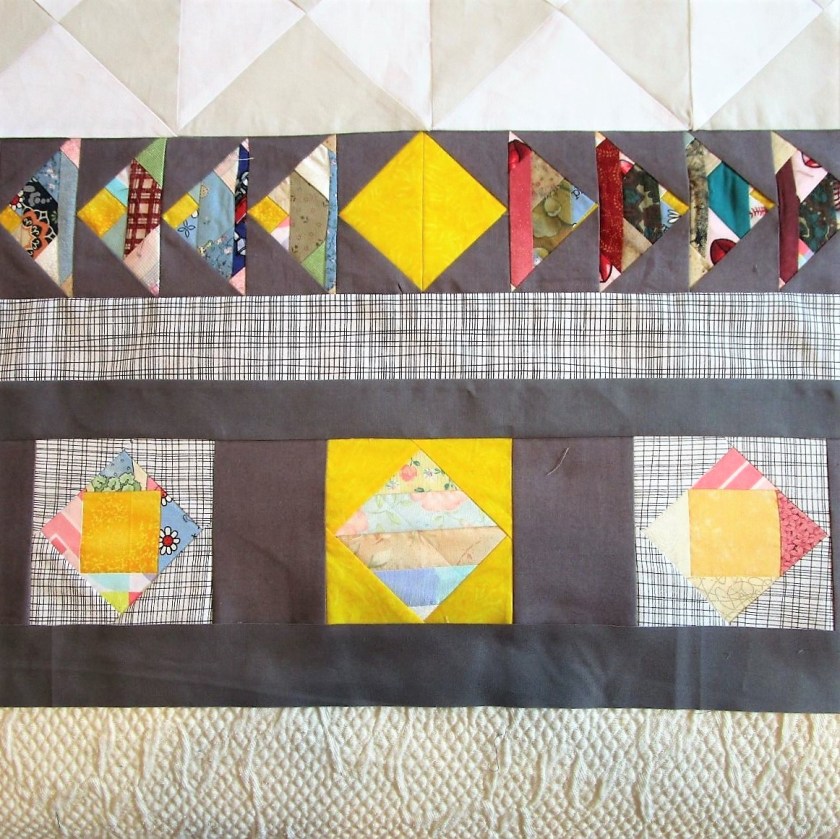
I plan to edge these pieces with gray strips, bringing the finished block size to 7 inches. Six blocks will fill a border, with an additional two at top and bottom points. But first I attached a two-inch coping strip.
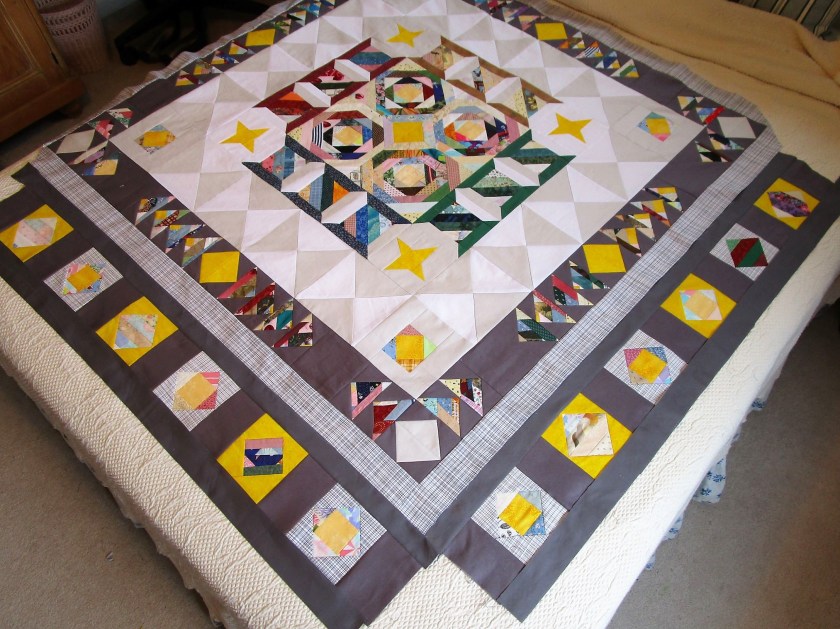
Here is the proposed lay-out for round five.
I bought the squiggly line print because it made me happy, and it looked like a nice transition between the pale grey and dark gray. Next, I assembled my first border.
And here is how it looks attached to the quilt
If you are enjoying the SAHRR Quilt challenge and want to check out the work of other participants, visit Emily’s blog, The Darling Dogwood.
As the snowflakes drift gently down – and blow slightly sideways – across the backyard, I thought I would take some time to review projects I completed in the past year. No, dear reader, I won’t drag out all of them. Instead, let’s focus on the best loved, by you, in each category.
KNITTING
I wanted to start with knitting, because it seems I spent a lot of time doing just that. I even ventured into teaching knitting, just a little bit, for my local arts association.
It seems there was a three-way tie for the best knitting project of 2021. So I have to go with the most charming one. And who better to model it than little LL?
Runners up were Gentle Curves Shawl and Woodsmen’s Socks
DRAWING
I was pleased with the progress I made in this medium. It helped me to take classes from Ross Meyer. His lessons on getting high values using graphite were most informative. I also began to develop a more personalized style with casual portraits using ink and watercolor washes. The winner in this category is my sketch of H as a toddler sitting with Cat.
Also strong contenders: Happy Father’s Day and Hummingbird at Fuchsia.
PAINTING
My personal goal for this year was to improve my watercolor paintings. At the beginning the year, I painted a little bit everyday on paper the size of postcards – a very doable goal, which lasted only one month. I put my money where my mouth was and paid for in-person lessons. This helped me a lot.
Surprising to me, the most successful watercolors were some of these small experimental ones. A post called “Back to My Routine” got the most attention for this 6 x 9 painting of a stormy sky.
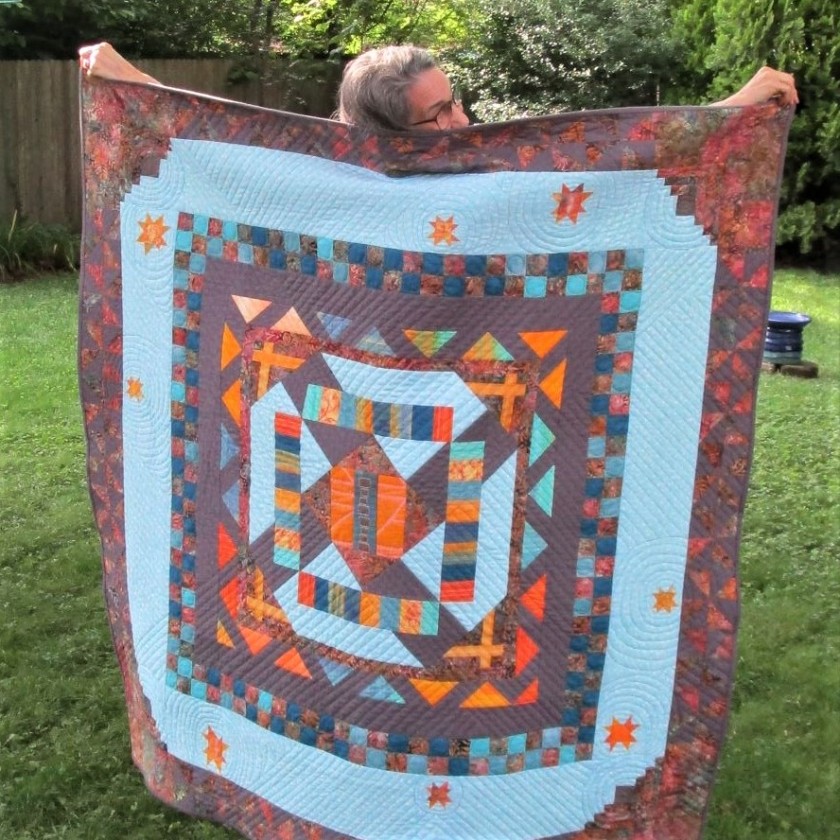
In the early months of the year, I spent time making quilts. I gained skills by following along with a group that was sewing Stay-at-Home Round Robin quilts. Not only did I learn a lot but I was really happy with my finished object.
EXPANDING UNIVERSE LAP QUILT
Two other quilted objects of note were this art quilt……….
CATBIRD SINGS
and a twin sized quilt made for LL featuring dogs and cats.
ANIMAL FRIENDS
And that’s a wrap for 2021. What does the new year hold for me and my art? I haven’t come to any conclusions yet. But whatever I choose, I’ll make it worthy of my time and effort.
Yes, friends, today marks one year since I started experimenting in the fiber arts and posting the results of my efforts. This mini quilt is my most recent object. It’s quite a fitting testimony to my adventures, because it showcases so many of the techniques that I have learned along the way. I have used fabric paint to tint the daisies, then mixed some of my hand painted fabrics with a few solids and prints to fashion the blocks. The whole thing was ditch stitched. I then hand quilted on top of the blocks with embroidery floss. Lastly, I painted enough fabric to border the whole piece. The completed work is sewn over a 16 inch square of artist canvas.
Let’s take a brief look back on how I got here.
Painting fabric with Dye-Na-Flow acrylic paint. Sun print using marbles and rice.
My enthusiasm for hand painting fabric actually started when I took a class on how to do this and then taught a class last spring. It was a big hit with all ages. I continue to experiment and now use this craft as a vital source of uniquely colored fabric.
Embroidered prayer flag.
As a girl, I embroidered my share of humdrum tea towels and pillowcase hems. But today – embroidery artists have moved this craft to new heights. I could never be that good. Or could I? I began to practice some basic stitches and decided that embroidery has a place in my work. For this project, I appliqued, embroidered and wrote with fabric markers to make five prayer flags. Here you see the Earth flag.
My first log cabin mini quilt, using hand-painted fabric
Quilting. Whoa. My mother is the most expert quilter that I know. She generously gave me her Bernina sewing machine. It seemed inevitable that I dip my toe into the venerable art of machine quilting. Any fiber artist worthy of the title needs to have some skill in putting together a quilt. And while I never expect to cover any beds with my quilts, I do see it as a robust art well suited for expressing my ideas.
Improv Mini Quilt with curved piecing.
So by mid July, I was experimenting with improvisational mini quilts. These small gems are fun to do and can be completed in a day. In this one, I have combined applique, machine quilting and embroidery. If the machine stitching looks a little bunched up, it’s because I had not found my machine’s walking foot yet. It’s now in active use.
That about sums up my thoughts on a year of fiber objects. When I began this blog, I expected to use the site simply as a personal diary. My goal was to record my work and my thoughts about the work. But then nearly 100 readers found my site. I have such gratitude to those who choose to read and to comment on my humble posts. Your interaction with me has enriched me and my craft in many ways. I thank you for your time and caring attention.
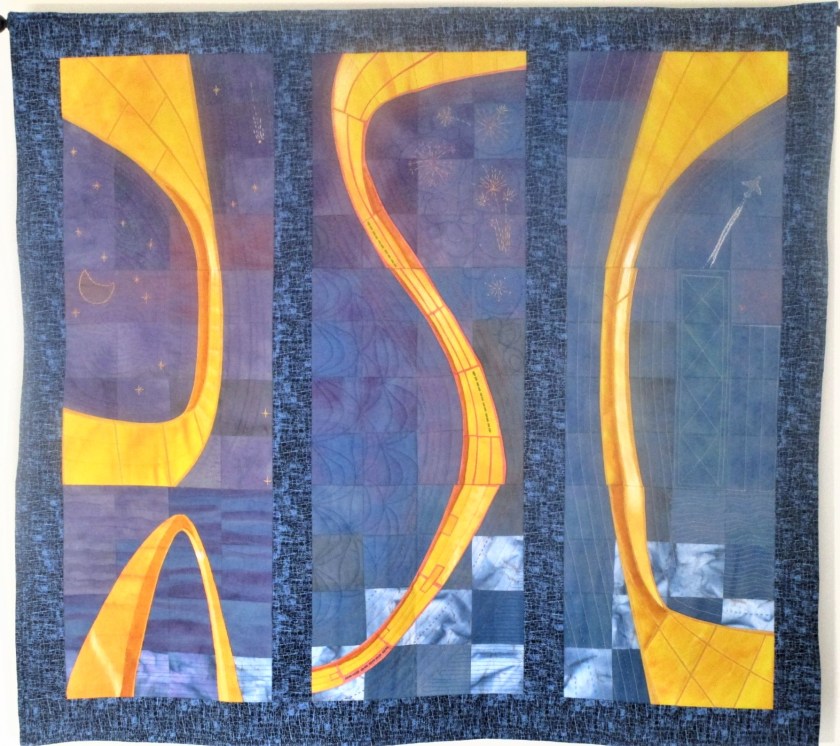
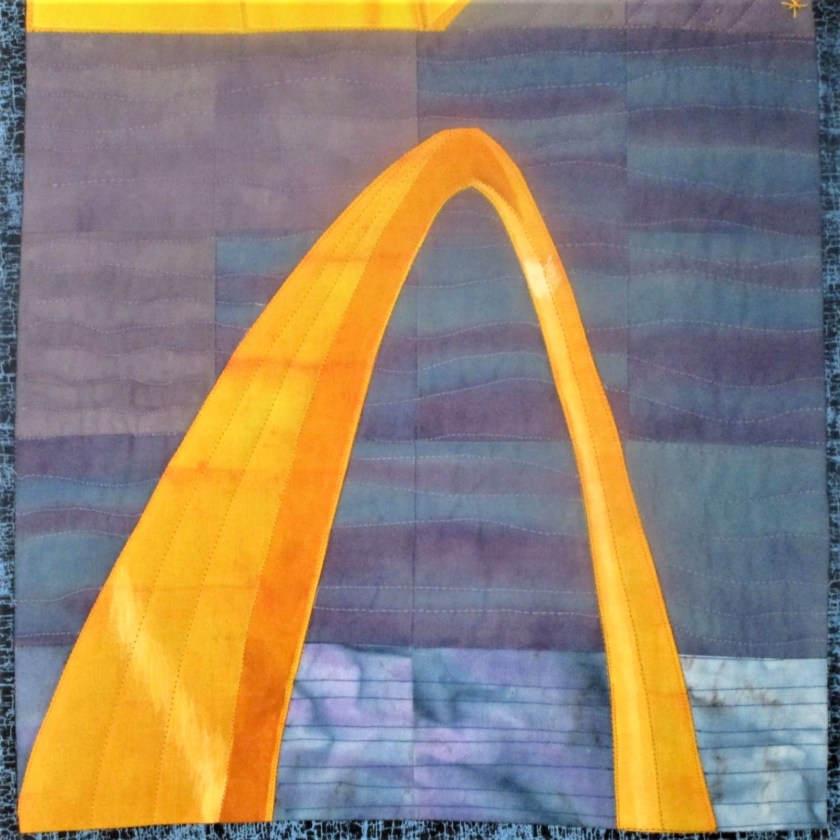
A culmination of six months spent thinking about and working on it, here is the Gateway Arch quilt. I finishing sewing on the binding while watching the Super Bowl (Yay KC Chiefs!) I feel an odd combination of elation, satisfaction and relief. The finished object is largely what I had envisioned.
IMAGE OF UPPER RIGHT PANEL
The colors are wonderful. The curving shapes are a good representation of the real arch. I’m happy with the embroidery.
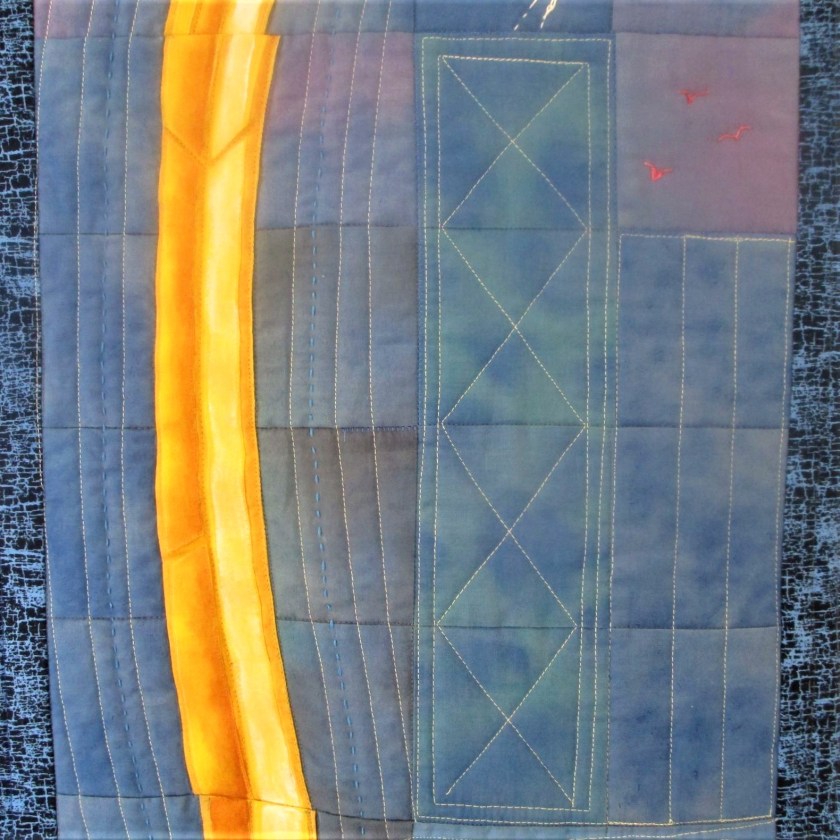
MIDDLE RIGHT BLOCK REPRESENTING CITY BUILDINGS
The construction flaws bother me a little more that I had expected them to, especially the waviness of the right border. How did that happen?
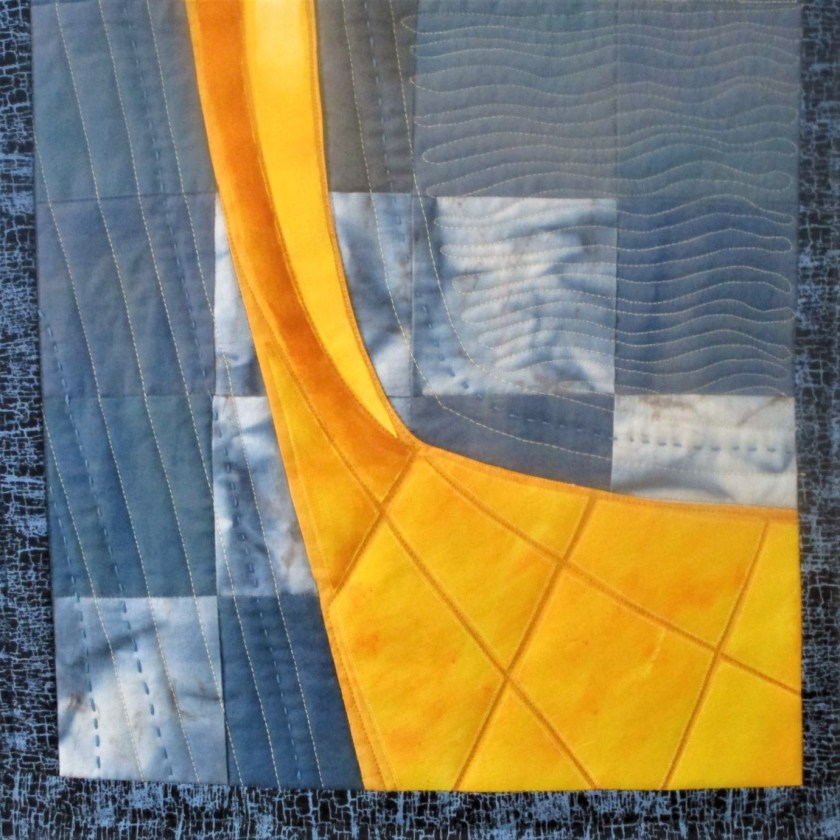
LOWER RIGHT BLOCK SHOWING ONE TRIANGULAR BASE AND RIVER
The arch shapes were made from hand-painted fabric cut apart into shapes that mirrored the arch’s steel panels and then fused to a solid background. This piece was then cut into the sixteen square background block on the left edge and appliqued on the right edge before being top-stitched in matching thread. Shading was painted on with acrylic paints after the block was finished.
THREE BLOCKS OF CENTER PANEL
I had a lot of fun with free motion quilting. I chose patterns to emulate aspects of the landscape or city-scape. I did a lot of experimenting with thread colors, either matching or contrasting with the background colors as the spirit moved me. Eventually I hand painted some thread to get the colors I needed. The idea for the fireworks came from my memory of a July 4th trip when my family stopped in St. Louis for dinner.
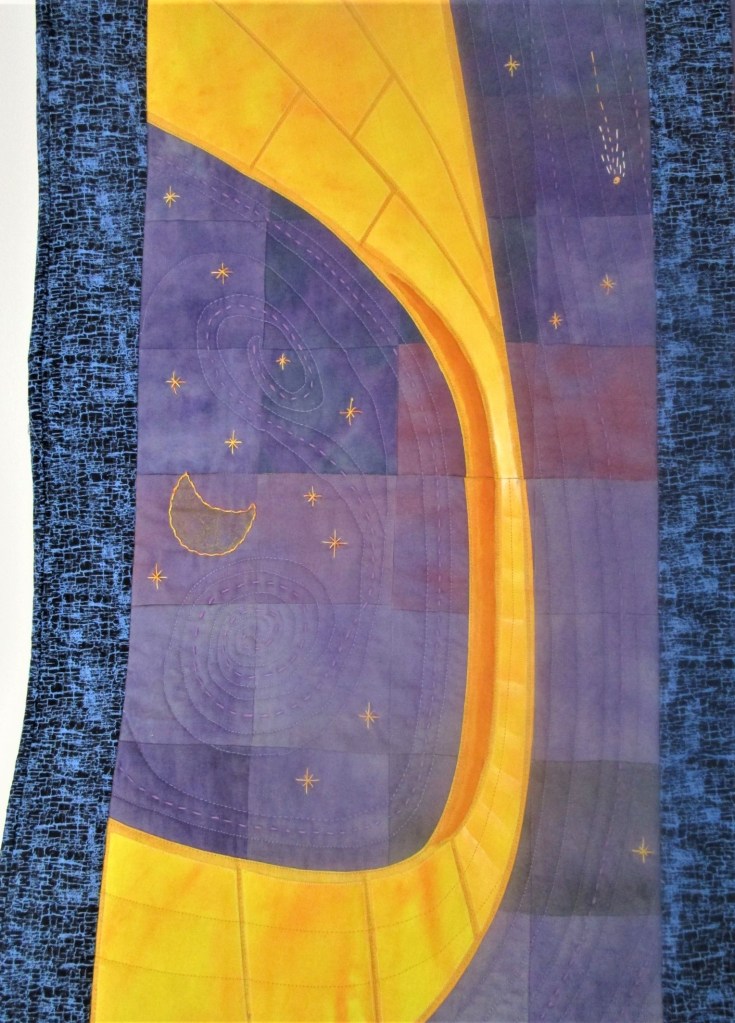
UPPER AND MIDDLE LEFT BLOCKS
This project was a real stretch from the perspective of skills required. Thanks go to Bluprint.com for all the quilting tutorials I accessed. I learned a lot about painting on fabric, matching points, sewing curved shapes and putting the whole thing together. I also learned about the limitations of my current tools and studio space.
LOWER LEFT BLOCK: THE WHOLE ARCH, RIVER AND SKY
What’s next? I have a few ideas. But first I’ll be taking a short break from quilting to focus on painting, knitting and teaching.
INSPIRATION: The idea for creating a fiber object based on the Gateway Arch has been rattling around in my brain for some time. It really started way back in 2012, after my husband and I visited the Gateway to the West museum in St. Louis. At that time, he took a series of photographs showing every possible angle of the Arch at ground level. They are rather remarkable, taken as a group. Here is an example.
Earlier this year, I asked for copies of these images and began to imagine how a series of different views would look on quilt blocks. I printed out nine pictures and pushed them around against each other. In the end, I shelved the project. I decided that I really lacked the necessary technical skills to realize my idea.
GESTATION: Over the summer I completed several on-line quilting lessons and actually made a quilt based on my own design. I now feel ready to tackle the Arch project. So yesterday I pulled the photos back out and arranged them into a nine-block design with a look that pleased me. It took me hours to get it right.
IMPLEMENTATION: Dear me. Thinking about the many steps required to move a quilting project from the idea stage through to completion is giving me pause. Let’s take stock of where I am so far:
I have a design and a layout, pictured above. Each image represents one block at 1/3 scale. I’ve decided that I will need a paper template for each arch image, in order to draw and cut it accurately from the background material. For this task, I have located a pad of giant post-it notes. From it I have cut nine pieces that are 14 and 1/2 inches square.
Block Content: Each block will consist of 16 squares with a finished size of 3 1/2 inches. The flowing arch will be cut free-hand into the sewn blocks and inserted.
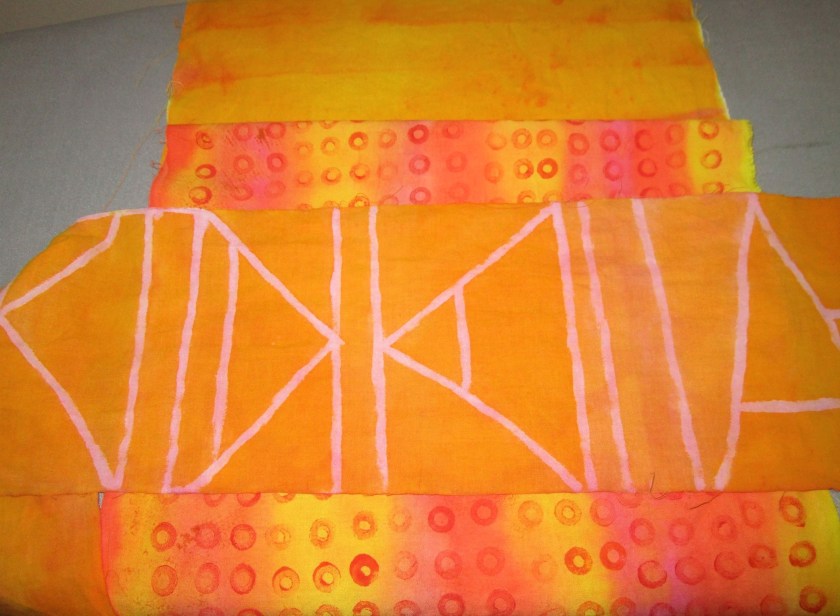
Colors: There will be three background colors in hand painted fabrics, moving from left to right they are purple, blue-purple, and blue. The arch section which winds through each block will be made of golden-orange-pink fabric. Here are some samples that I made earlier this year.
Other design decisions yet to be made: sashing or no sashing, type and number of borders, backing. While I plan to quilt it myself, I haven’t decided on a pattern yet.
Next steps seem to be
Draw to scale the templates for each block
Determine yardage needed for quilt top and purchase fabric
Cut fabric into manageable strips
Hand dye strips according to design plan
Cut out the squares
Practice cutting free-style curves.
A wise woman said, the journey of a thousand stitches begins with one thread.