I was experimenting with an ombre effect. This took a lot of patience because I had to wait for each layer to dry fully before continuing on to the next.
This postcard featured a lot of blues including prussian, Thalo, and Payne’s grey, with burnt sienna added in the final layer.
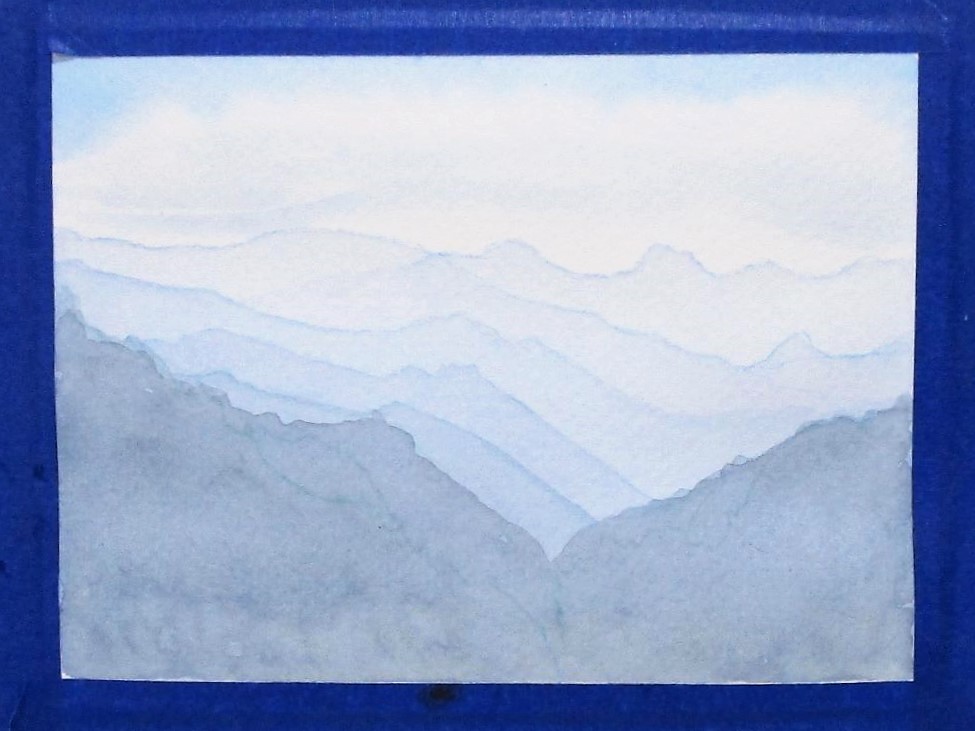
Since Sunday, I have painted several sample palettes for the imaginary Belize waterscape. I have also completed my first watercolor sketch. Its subject is the mountains and sky, including a little of the shoreline.
This type of work helps me learn how the different paints I have chosen behave in the mixing and glazing process. I also have narrowed my choices of colors.
And I’ve come to the conclusion that hot press paper will give a better result with this technique, so I’m off to the art supply store in search of same.
Our flight to Belize was almost due south, as the country lies on the eastern edge of Central America. Its landform is in the shape of a rectangle, with its north border on the Yucatan, the south on Guatemala and the east faces the Caribbean Sea. From the Belize City airport, we traveled more than two hours by car to Hopkins Bay resort. Upon arriving at our lodging, we got our first look at the beach.
Hopkins Bay Resort
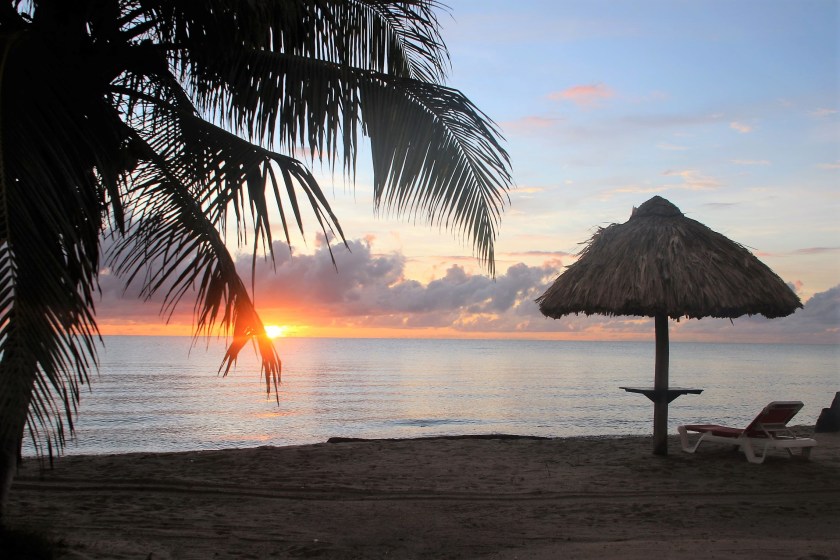
The little geography lesson I wrote above wasn’t just for your information. It was to explain why all of the resorts in Belize face east. This fact brought us great joy each morning between the hours of 5 and 6 am, when the sun cleared the horizon.
Pre-Sunrise, Photo by Bill Riley
Bill was always up and away with his camera well ahead of the key moment. I seldom overslept it as a result of another curious phenomena. With great regularity, around this time of dawn, I heard a mysterious tapping sound, as if fingers on the window – rat-tat-tat-tat. I thought Bill was trying to get my attention. But no one was in sight.
Ah, the sun was just coming up.
We eventually concluded that it was a bird that came tapping, although we never caught it in the act.
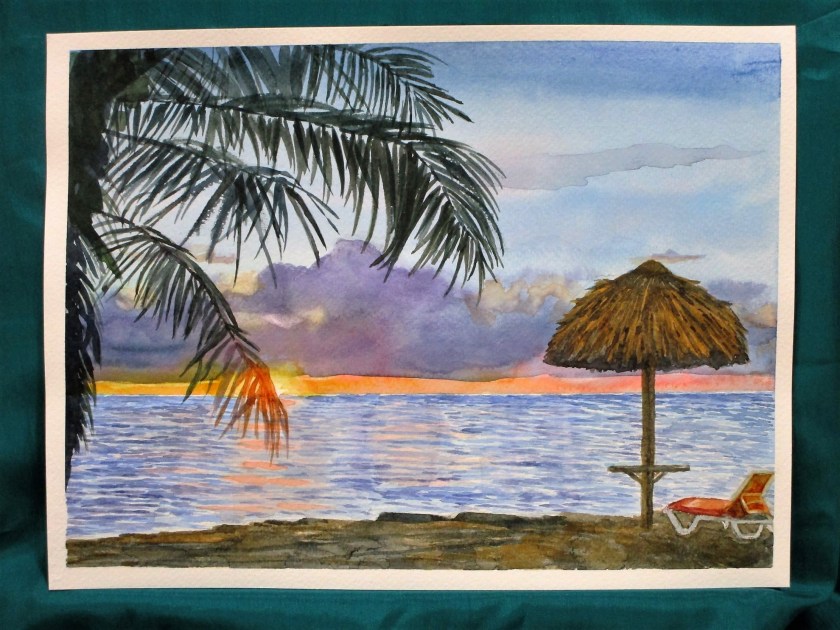
When I returned home, I was keen to paint a Hopkins Bay sunrise. I chose the above photo as my reference, although I had to lighten it up quite a bit to see the colors and the details sufficiently.
Hopkins Bay Sunrise, Belize
It took me two tries to paint the sky to my satisfaction. Pigments were new gamboge, quinacridone red, prussian blue, Thalo blue, carbazole violet, raw sienna, burnt sienna and a little transparent orange.
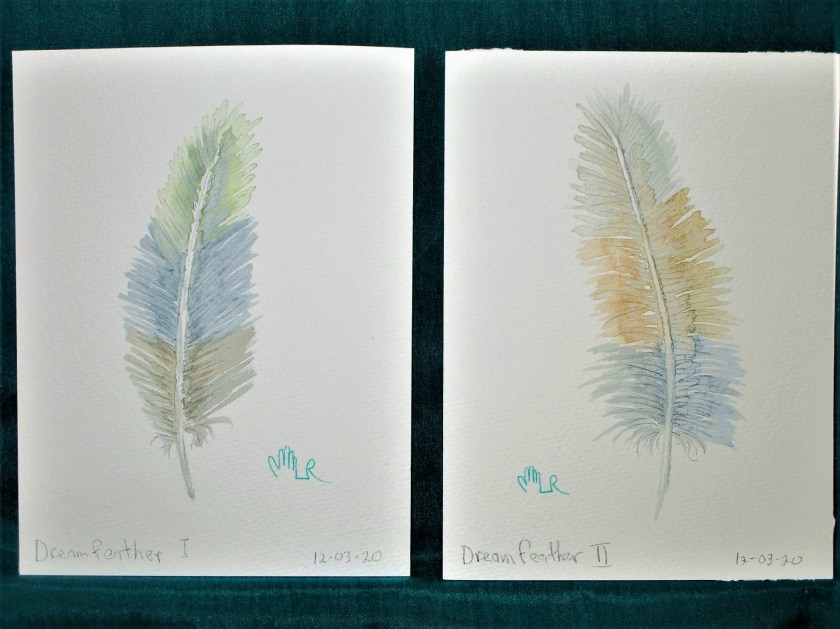
These are fifteen minute improvisational watercolor sketches that I completed this week. I am following the daily practice book “Watercolor is for Everyone,” by Kateri Ewing.
DREAM FEATHERS
Draw a curved line with a pencil. Using three different colors of your choice, paint each side of the feather with quick, light strokes. When the painting is dry, use a pencil to lightly draw lines along the paint strokes and also on the feather shaft.
THREE COLOR LANDSCAPES. Using three colors of your choice, make a quick landscape from your imagination.
Landscape with meadowLandscape with Grasses
Colors for both landscapes: Winsor Yellow, Burnt Sienna, French Ultramarine Blue. In addition to my Sumi brush, I used a no. 2 round and a rigger brush.
Yesterday and today I took a break from sewing to paint with watercolor. I have been following a tutorial by Montreal artist Shari Blaukopf called Sketching Landscapes in Pen, Ink and Watercolor. My goal for this painting was to practice skies. I chose a reference photo that had a very nice sunset and featured clean, simple shapes. This would allow me to make a finished painting but focus on the sky. The photograph also featured a reflected sky (another good subject for practice.) After making a pencil sketch, I jumped right in on the sky and reflection. Next came a few pen marks to guide the rest of the work.
After drying over night I added the other washes – mountains, meadow and trees. Once these had dried, I used my brush to give texture to the trees and shadows to the pond.
So far I’m liking this. But I felt that the painting did not really show the warm glow of morning light that I saw in the photograph. To correct this, I made a wash of burnt sienna and quinacridone red and stroked it fairly evenly over the grass.
Ahh that’s better. I used a dry brush technique to give a little texture to the grass and let the painting dry. For the last step, I followed Shari’s instructions and added pen marks to the trees, grass and pond edge.
This painting gave me a great deal of pleasure. I avoided most of the miss-steps with the watercolor paint and achieved the look I was after. I guess it’s worth signing.
I will put in the link to Shari’s class, but it’s on Bluprint.com Unless you are already a subscriber, you may not be able to open it.