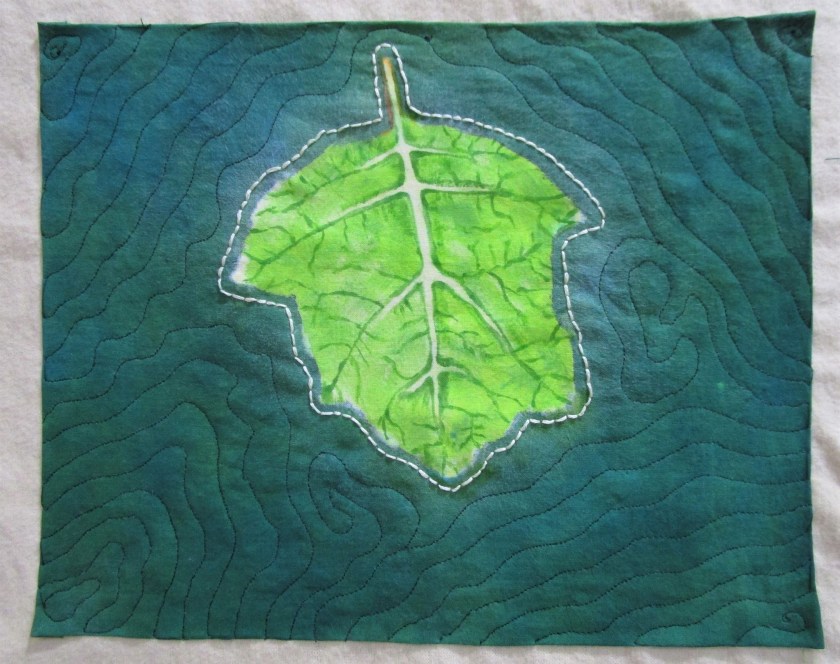
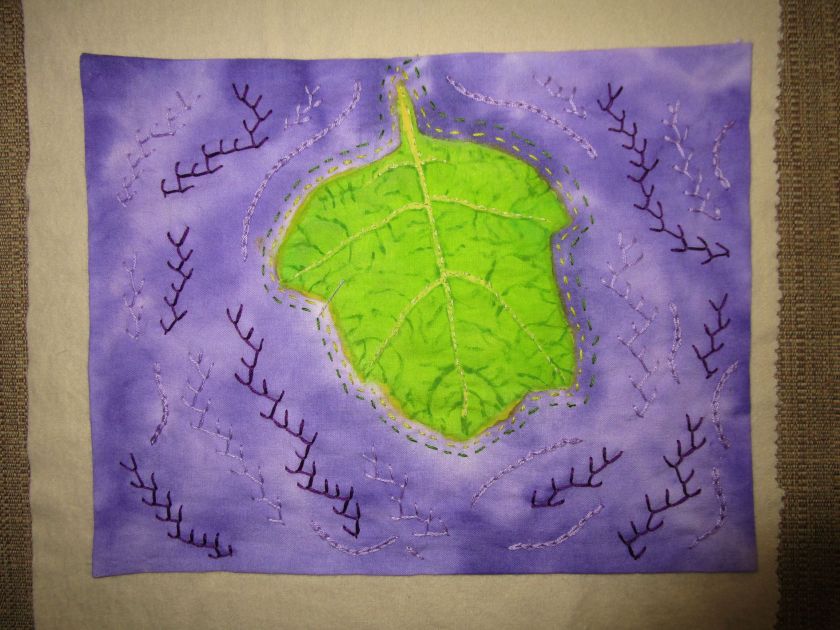
For this panel, I chose to machine stitch the background and hand stitch the leaf outline. This treatment seems to draw more focus to the leaf. Color washed with Jacquard Dye-Na-Flow, hand-painted with Jacquard Textile paint. Free motion quilting on a flannel backing.
Yesterday and today I resumed work on the oakleaf hydrangea fabric paintings. Above you see the reference photo for the first leaf I am painting. I chose to do two experiments. Here are the two paintings after the first round of painting. The color wash – resist steps were complete and the paintings left to dry. In these photos, the water resist medium has not been washed out yet.
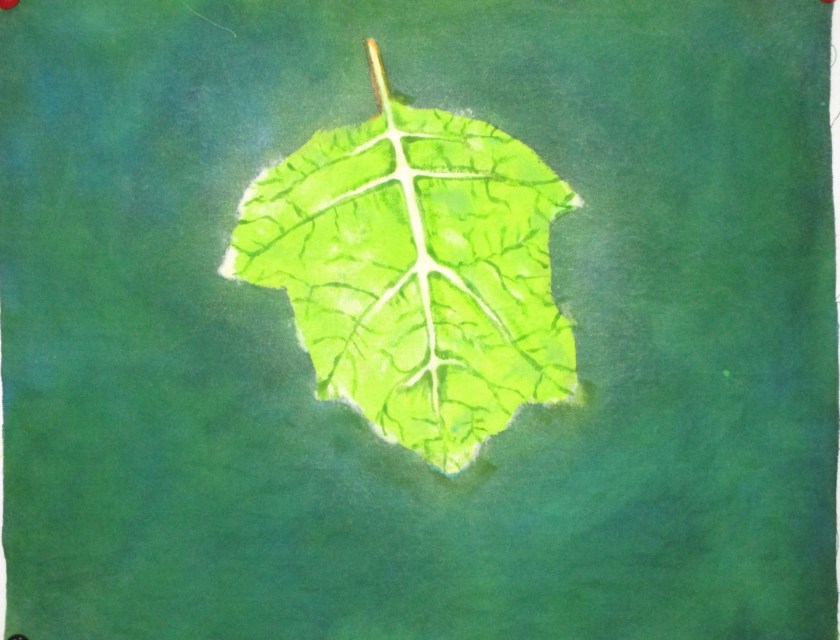
And here are the two paintings, washed, dried and with final details added, using Jacquard Textile paint inTurquoise and Goldenrod, so palette was quite limited.
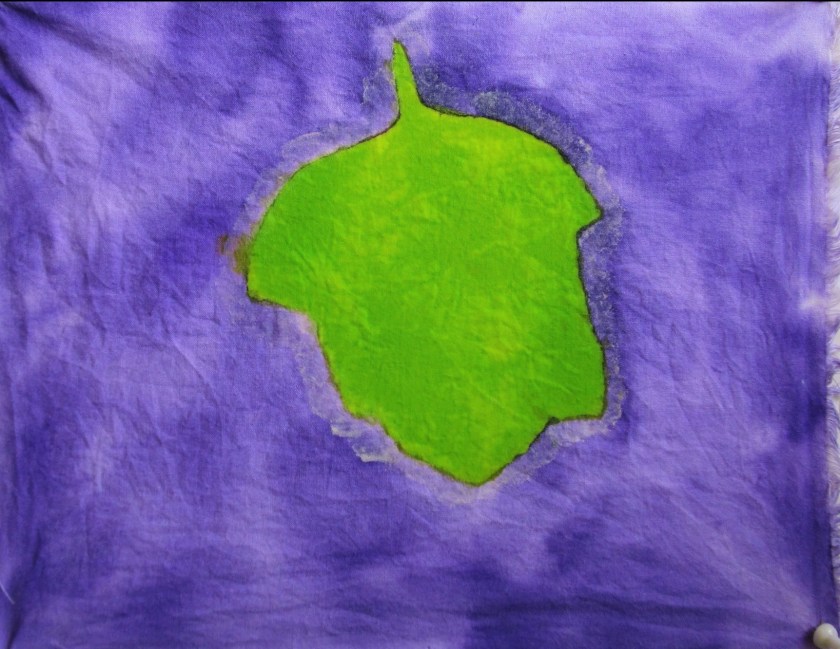
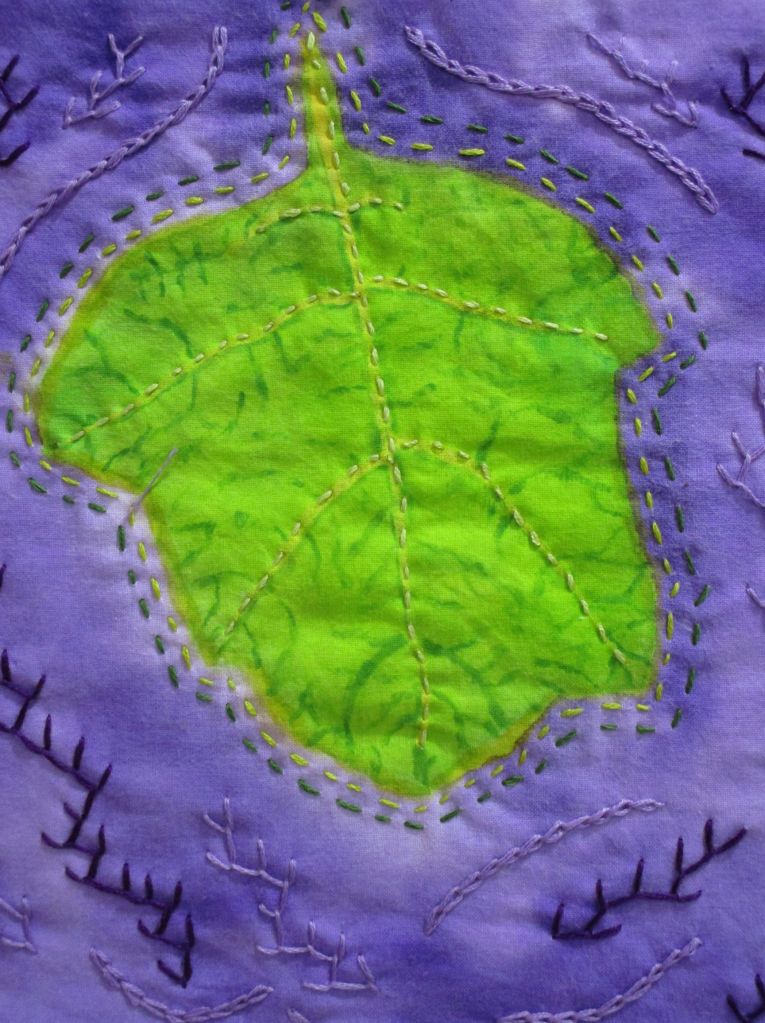
It was a learning experience, trying to paint on dry fabric with thicker paints. I discovered how to add depth to the background by dry brushing. And I learned that my skill in painting delicate lines needs work. After the pieces dried, I pressed them and continued on to the stitching phase. I chose to work with the purple piece first, hand quilting with embroidery floss. Instead of backing with regular batting, I used cotton flannel, since it would be easier to push the needle through.
I carefully stitched over the major leaf veins, and then made two borders around the leaf margin. After finishing the leaf, I just improvised the background, using two shades of purple and two stitches – feather and chain.
So far, undecided about how to stitch down the edges. The choices are blind stitch or use a decorative blanket stitch. Does anyone have a recommendation?
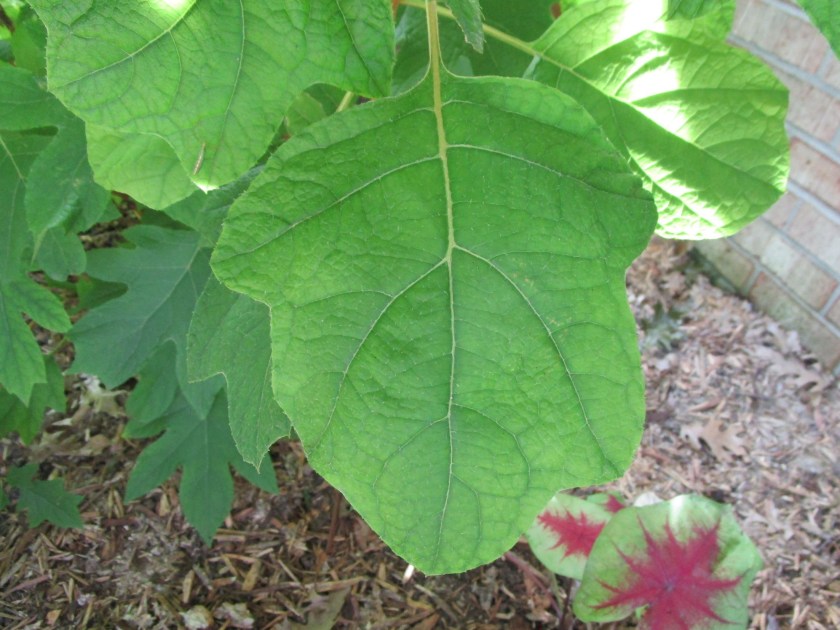
Beside the patio lives a beautiful oakleaf hydrangea. Every morning, I drink my coffee in its shadow and admire the sunlight shining through the leaves. I have been wanting to incorporate these wonderful leaves into my fiber art all summer long.
If you look carefully at the photo, you will notice that there is a variety of leaf shapes presented by this plant. There can be three, four or five lobes on a leaf. It seems that the baby leaves start out almost round and the lobes develop as the leaf matures. I have decided to do a mosaic of the leaf shapes with fabric paint and resist on cloth.
Here are two of the drawings I made of these shapes. I will be using the shape outlined in black ink for today’s paintings.
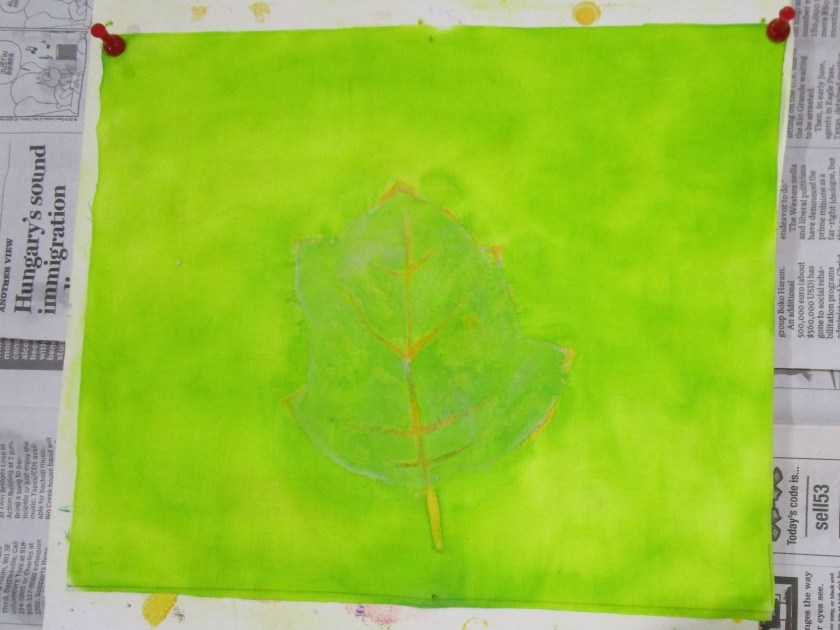
There are two experiments today. In one, I use the water based resist on the leaf shape, paint the background, then remove the resist and paint the leaf. In the second experiment, I paint the entire piece, add resist to the leaf shape and over-paint the background. Here is a photo of both experiments in the first stage. The lines are traced and a yellow tinted resist is applied to both swatches. The left swatch has the whole leaf covered in resist.
Experiment one. I used a violet background.
Wet paintingThis photo show the fabric after the resist is washed away. The yellow leaf veins didn’t stick, but some of the yellow outline is still visible.in this photo I applied resist all around the leaf shape before painting the leaf itself.Paint on leaf still wet. Only a little green leaked out on the lower right side.
Experiment two. I started by applying yellow tinted resist to the veins and outline, then covered the entire fabric with yellow-green paint.
Paint is still wet.Paint has dried. I applied additional resist over the leaf area before painting the background.Finished leaf, still wet.
I am happy with today’s experiments. I like the dark velvety color of experiment two. But experiment one has potential. Both are now ready for additional paint effects.
For the past three days I have been irresolute about making new fiber objects. I haven’t been idle – not a chance of that! But I felt more internal about my efforts than external, that is, not ready to show or talk about them.
Consolidate: (verb) 1. to join together into one whole. 2. to make firm or secure.
Gestate: (verb) to conceive and gradually develop in the mind.
Internalize: (verb) to incorporate within the self as conscious or subconscious guiding principles through learning.
If you ever start to feel you are stuck creatively, I suggest you reframe your status with the verbs above. It could be that you are not stuck at all but are internalizing.
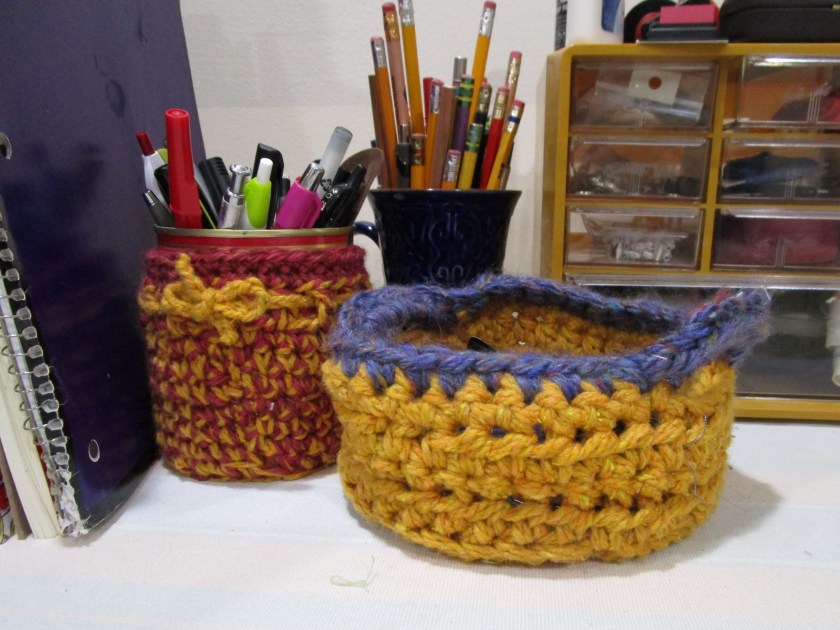
A week ago, I agreed to offer fiber arts lessons again to the local homeschool association. To keep from being overwhelmed, I suggested that I teach project or workshop-type lessons. So part of my time has been spent on writing syllabi for these workshops. The first topic is crochet. I propose to teach crochet in the round.
View of my worktable with two crocheted baskets in use.
I finished the syllabus for this workshop and made this sample.
It has been a while since I’ve created with yarn. It felt good to get back to it.
Secondly, I have been fooling around with pattern and paint on my color washed fabrics. Using foam, felt, cotton yarn and cardboard, I made these stamps.
Stamps sitting on color wash sample
I then proceeded to use them on this sample as well as a dark gray sample. My paint selection included Jacquard Textile paints, which are semi-transparent, Pebeo Setacolor opaque white, and some metallic acrylic paint I had laying around. Here are my doodles.
I’m loving the dark sample, especially the way the white opaque shapes and the glittery bronze shapes jump forward from the brooding background.
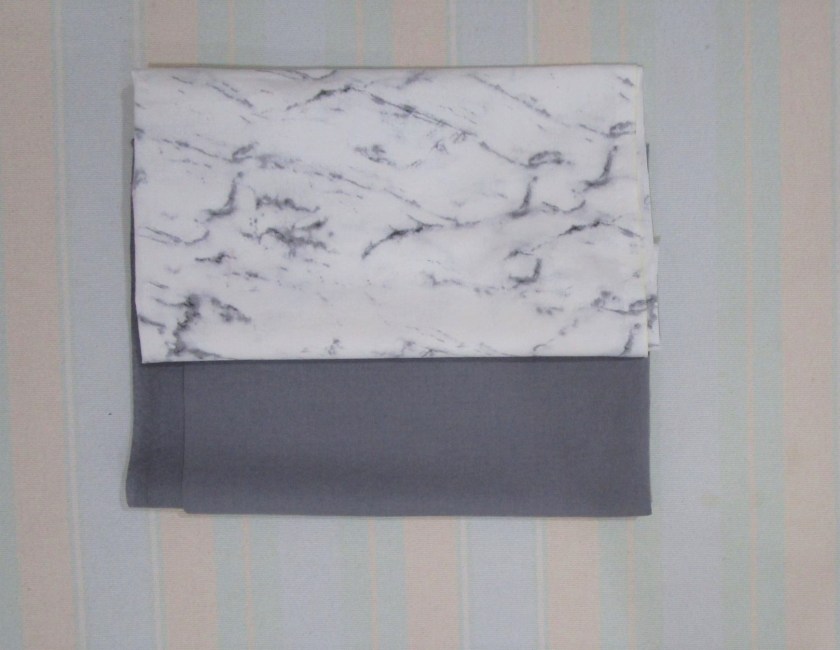
Okay, no Star Wars reference intended – I am talking about painting on a dark solid fabric. This is what I chose to do today. My goal is to make swatches that will represent the night sky in a future fiber object. Here are my chosen fabrics:
The gray solid will be used for most of the work. I chose the white marbled fabric because the black lines are vaguely cloud-like. Here we go:
With the gray fabric pieces cut roughly 13 by 21 inches, I painted one with blue and black and the other with violet, blue and black. I used foam brushes and loose, wavy strokes. Then I blended all the blotches together and lay the fabrics flat to dry. Here they are after drying.
Blue-BlackViolet, Blue and Black
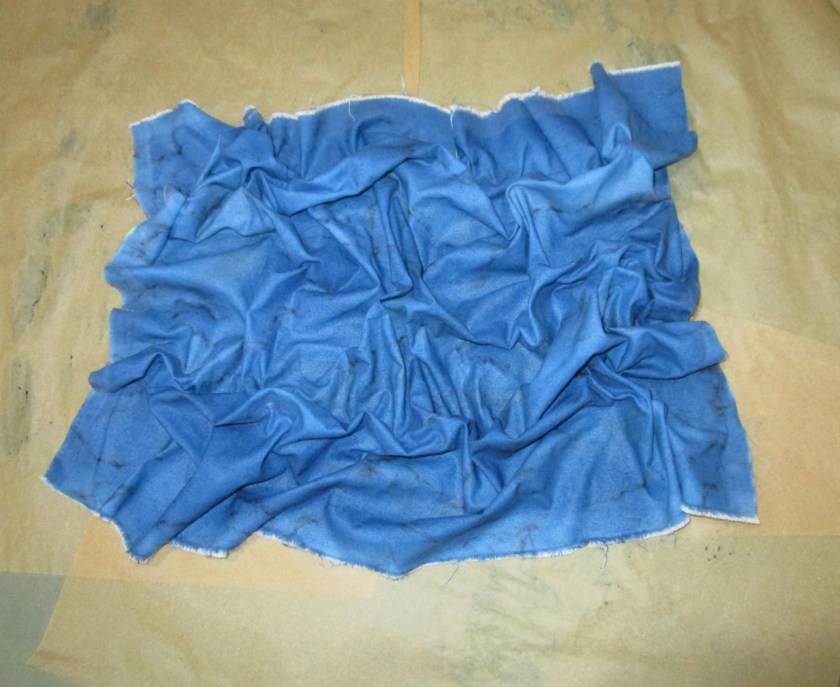
The original gray is still visible, but it just shades the colors into a deeper range. I like the brooding, atmospheric effect. Next is the white marbled fabric.
I stuck with the blue paint, but darkened it by mixing in black for a monochromatic color scheme. At the last minute, I decided to scrunch the wet fabric.
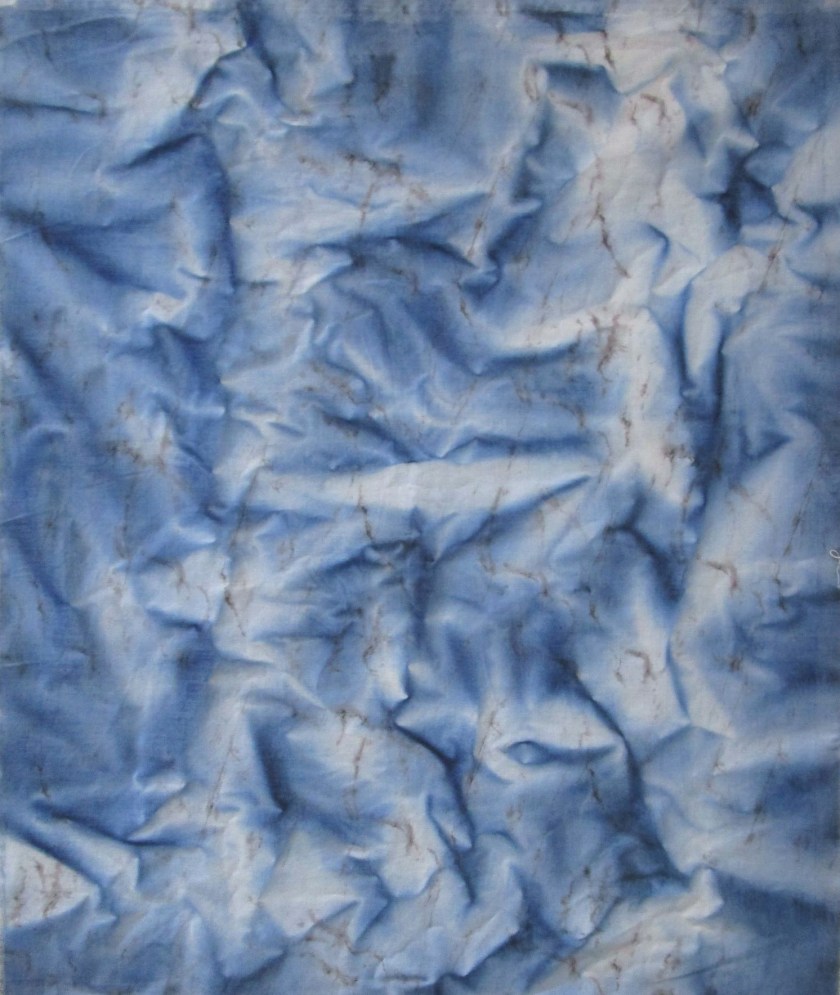
And here is the swatch after it has dried.
Whoa!
This looks nothing like a night sky to me. It more resembles fast-moving water rippling over rocks. This piece could inspire a new fiber object for a later day.