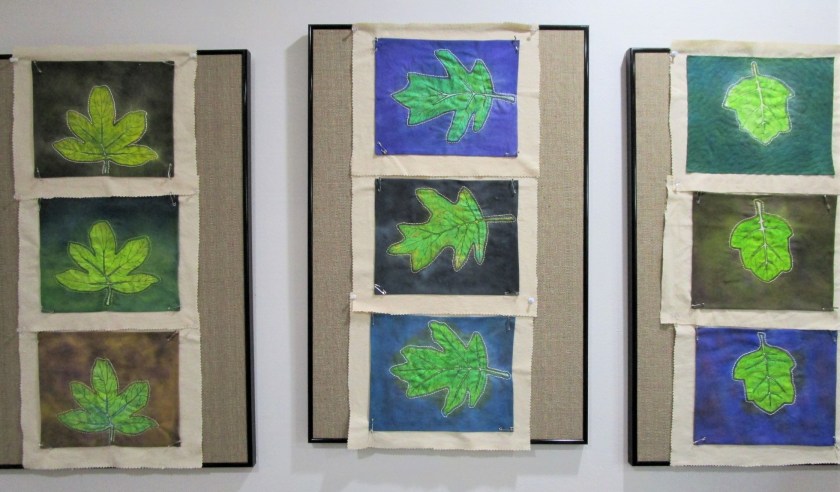
Today I am writing my 100th post on Daily Fiber blog. I am pleased that this milestone arrives at the same time as another mini-achievement: the completion of my oakleaf hydrangea block series. After some consideration I determined that the final block count will be nine, as you see pinned to my wall boards in the photo above.
Decisions still need to be made on how to finish. After consulting with a few friends, I have settled on the arrangement of blocks and the decision to use a dark border around each block as if it were an individual painting. Also, I will add a border around the whole quilt – width and color yet to be determined.
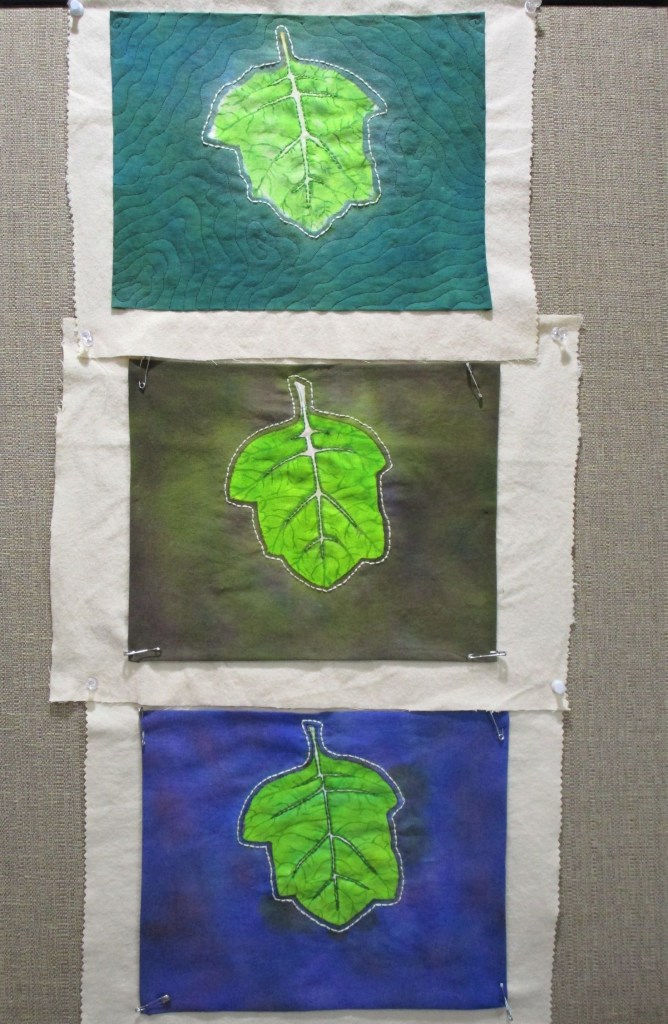
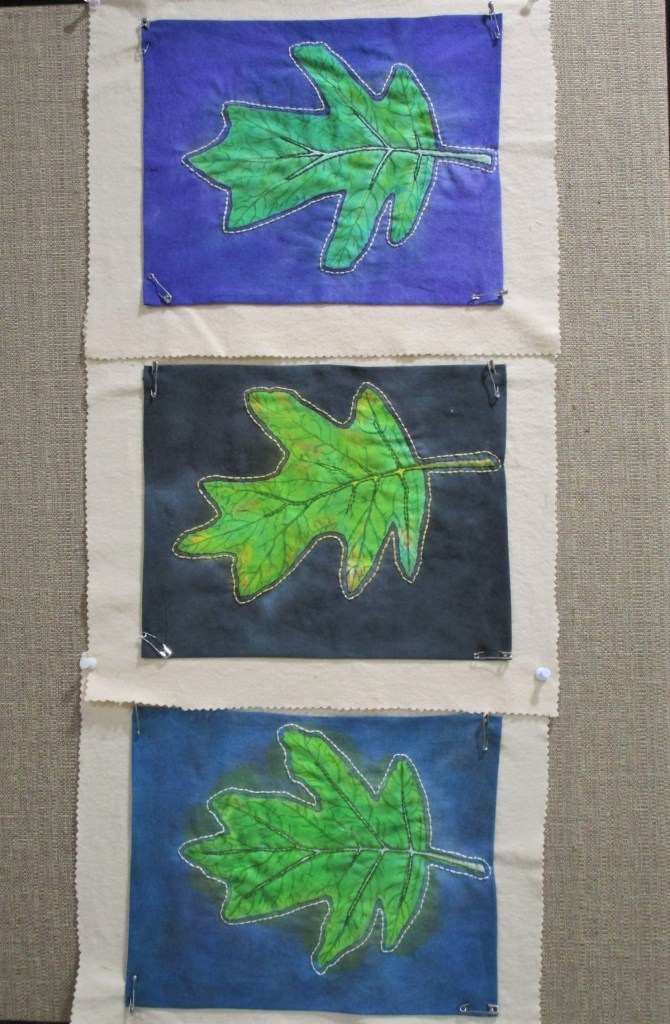
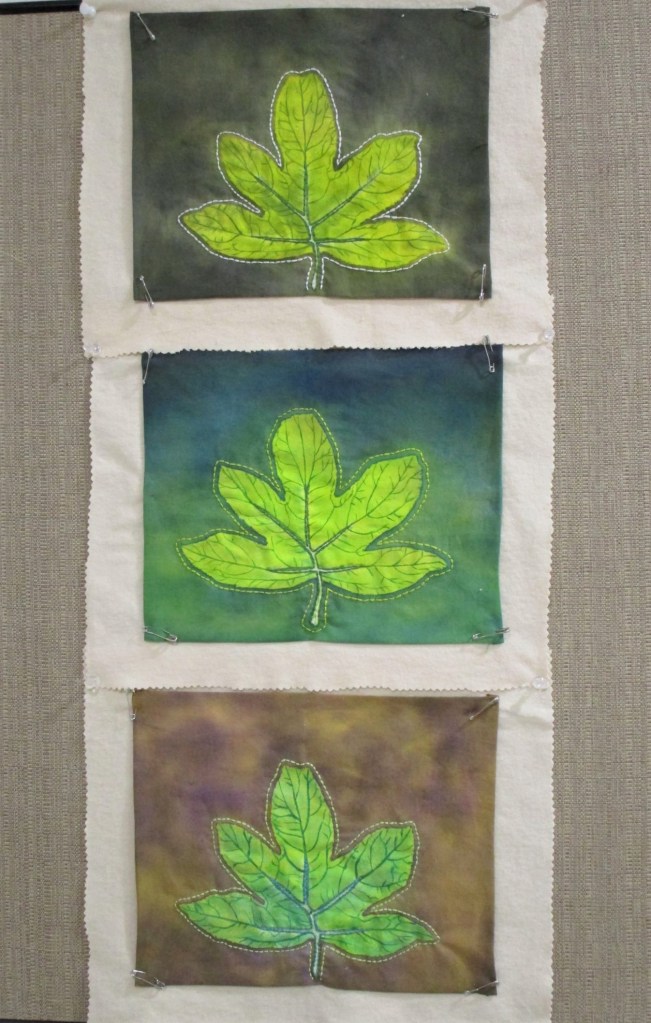
Here are some close-ups of the groups;
As you can see, only the first block is quilted so far. I will finish the quilting after assembling each row.
Hand-painted cotton fabric , hand embroidered with a flannel background. Each block is 10 by 12, including flannel border.
Yesterday, during my daily browse of WordPress blogs, I came across Cindy Anderson’s post announcing her one-woman quilt show featuring her art quilts. These are exquisite little works – no wonder she was invited to display them. After viewing her blog I became energized to make another mojo mini in the same style as the one I made last month. But the inspiration for this quilt actually originated in last Wednesday’s yoga session.
The instructor ran a playlist of music that started with a mantra. After five minutes, those words lodged in my brain and wouldn’t let go. Arriving home later, I quickly wrote down the mantra as a potential inspiration for a fiber object.
So yesterday, when the energy took hold, I reached for the mantra, grabbed scraps of fabric with colors like those in my mind’s eye during yoga practice, and scribbled a quick sketch of interlocking arches.
The structure of this mini will be built up with raw edge appliques and it will also rest on a gray background. But to make things more interesting for me, I decided to start with a paper pieced object.
Okay, I’ve never done paper piecing before. But I’ve watched it! Thankfully, I only made two or three mistakes as I cut and sewed this little section. I had to rip out AND also re-cut a scrap that I had trimmed incorrectly. Here is the finished applique.
After mulling over the top half of the design, I sewed an arch from thin strips of fabric. Here is it.
And that is essentially the design of this mini quilt. After glue basting and stitching down the two appliques, I wrote the mantra on the white arch.
…..machine quilted the strips and hand embroidered the background.
I used a couple of my painted fabrics. The red-orange planet is from a printed fabric.
In March my daughter gave me three garments that were in need of a remake. I have already dealt with the silk blouse and the brown cardigan. The third was a blue wool baby sweater which got machine washed in hot water by mistake. The consequence was that it thoroughly felted and shrank down to the size of a doll’s coat.
I had been mulling over what I can make from a felted sweater. No ideas came forth. Then I shifted my thinking and considered what could be done with the felt itself? Remembering a conversation that I had with my grandson, about the poor performance of hand-knitted mittens in wet snow, I hit upon the idea of felt mittens. Melting snow will rarely, if ever, penetrate a heavy felt garment. Could I make mittens for the baby with this felt?
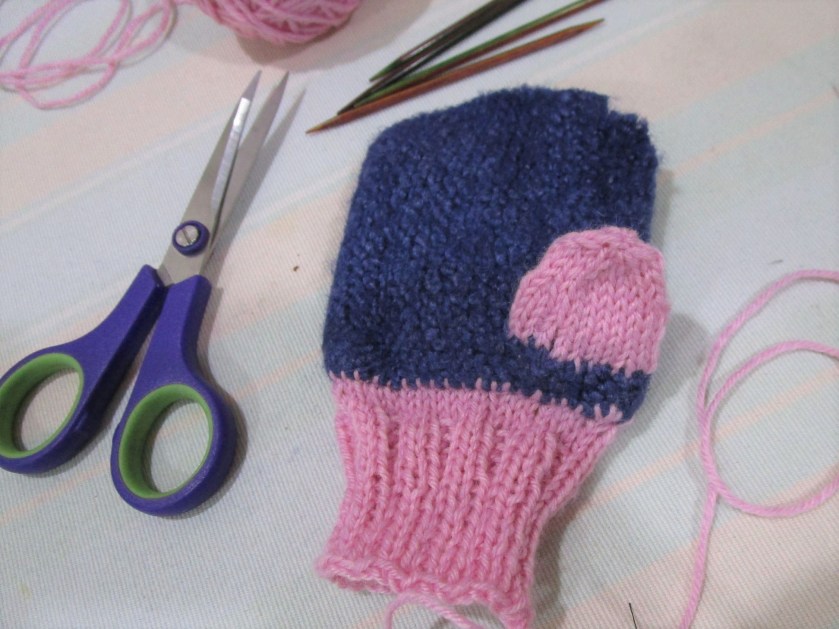
To start with, I cut off the sleeves. They looked vaguely mitten-like.
Using a crewel needle and sock yarn, I blanket-stitched around the lower edges of the sleeves. Then I picked up and knit into the blanket stitches and joined for knitting in the round. I knitted the cuff downward in rounds. After a few rounds, I started 2×2 ribbing for about an inch. Then I decreased, knitting another five rounds and bound off loosely.
Cuff finished. Beginning thumb for right hand mitten.
The process for the thumb was similar, except I had to slice a one-inch gash in the heavy felt. About eight rounds of knitting later, I decreased with k2tog, pulled the yarn through the remaining loops and fastened off.
Here comes the fun part. I cut down the top edge, making the total length of the mitten 5 inches. The upper edge was closed with running stitch and then sewn with blanket stitch all around. Using pink and red yarn, I embroidered a heart on the back of the mitten.
The letter R is for Right Hand Mitten!
Right hand mitten is done. I do hope that this will be a workable mitten. Now to make the left hand mitten to match.
Rainbow Beanie Baby, holding the mitten for me while I make the second one.Right-Hand Mitten’s buddy has arrived.
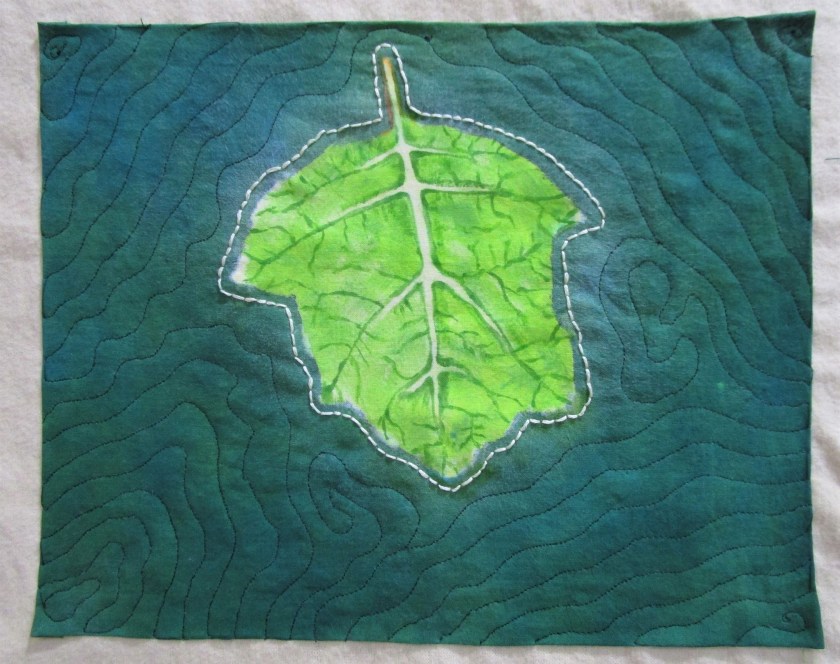
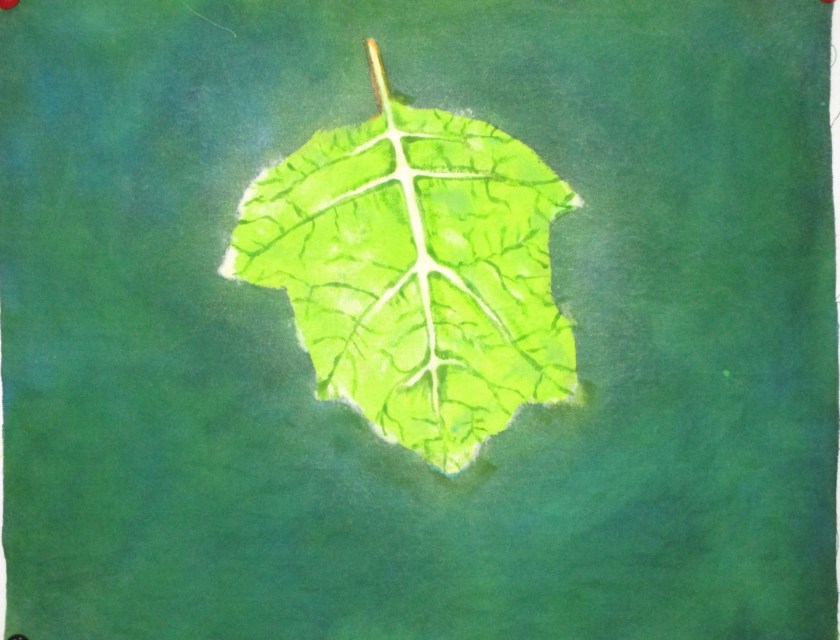
For this panel, I chose to machine stitch the background and hand stitch the leaf outline. This treatment seems to draw more focus to the leaf. Color washed with Jacquard Dye-Na-Flow, hand-painted with Jacquard Textile paint. Free motion quilting on a flannel backing.
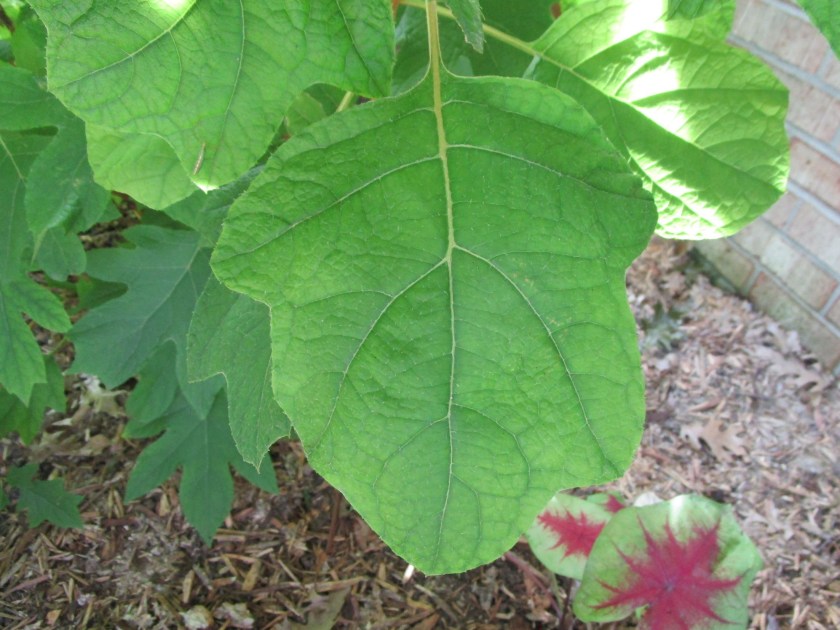
Yesterday and today I resumed work on the oakleaf hydrangea fabric paintings. Above you see the reference photo for the first leaf I am painting. I chose to do two experiments. Here are the two paintings after the first round of painting. The color wash – resist steps were complete and the paintings left to dry. In these photos, the water resist medium has not been washed out yet.
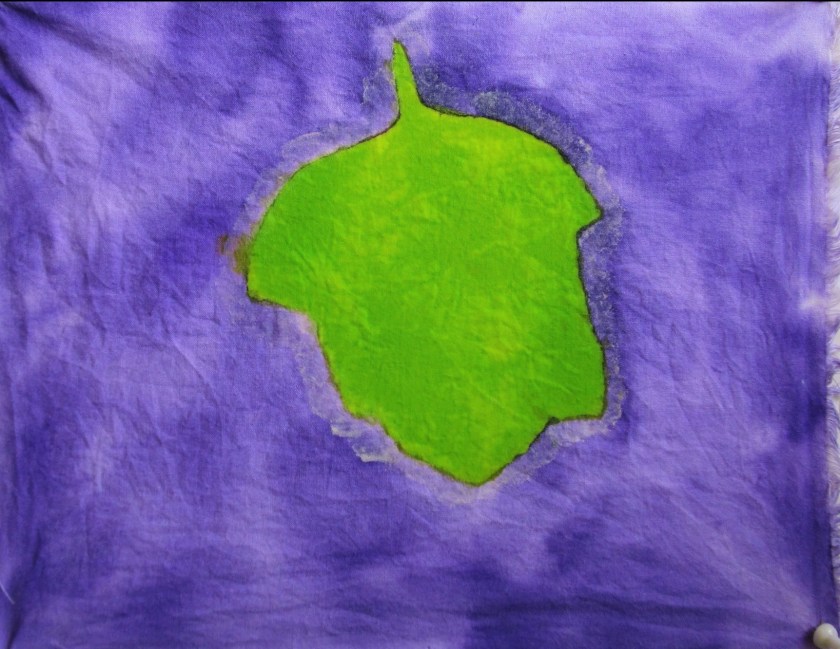
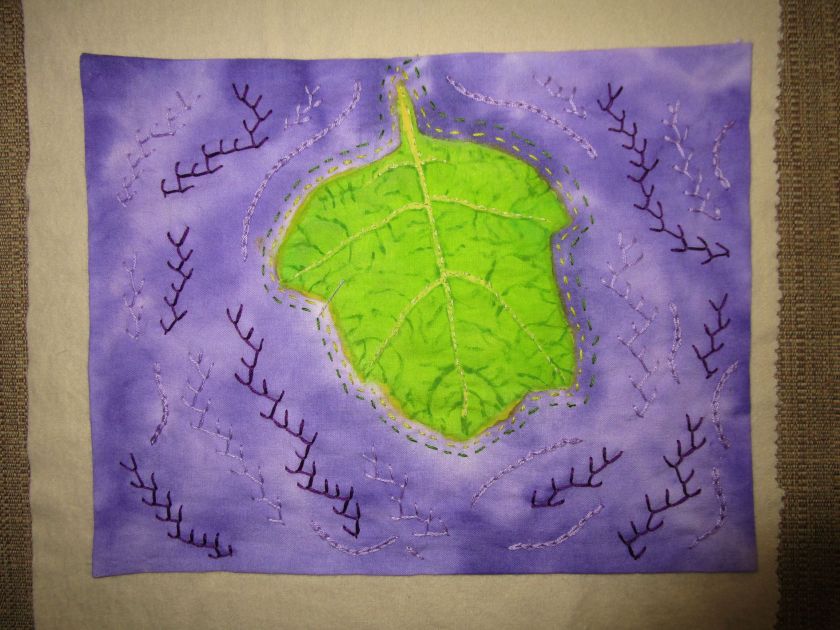
And here are the two paintings, washed, dried and with final details added, using Jacquard Textile paint inTurquoise and Goldenrod, so palette was quite limited.
It was a learning experience, trying to paint on dry fabric with thicker paints. I discovered how to add depth to the background by dry brushing. And I learned that my skill in painting delicate lines needs work. After the pieces dried, I pressed them and continued on to the stitching phase. I chose to work with the purple piece first, hand quilting with embroidery floss. Instead of backing with regular batting, I used cotton flannel, since it would be easier to push the needle through.
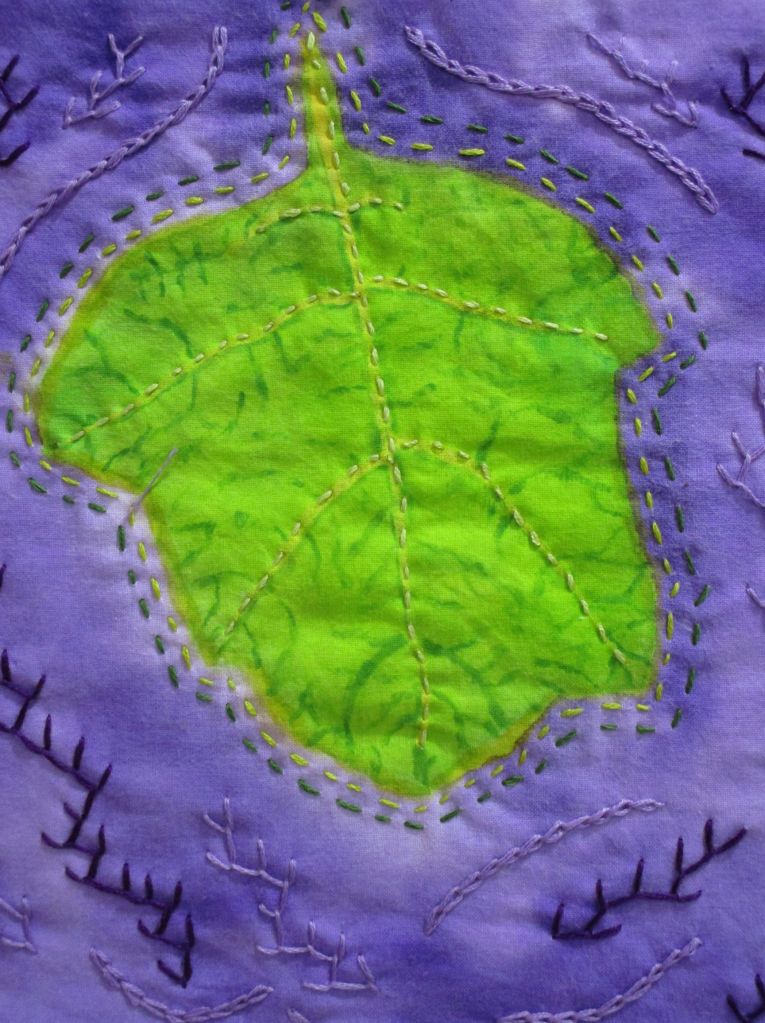
I carefully stitched over the major leaf veins, and then made two borders around the leaf margin. After finishing the leaf, I just improvised the background, using two shades of purple and two stitches – feather and chain.
So far, undecided about how to stitch down the edges. The choices are blind stitch or use a decorative blanket stitch. Does anyone have a recommendation?