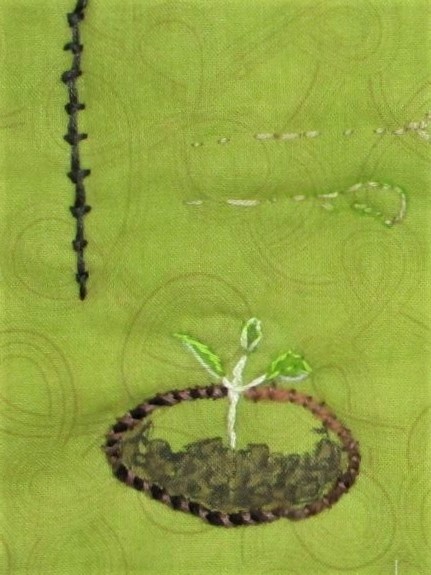
I am in the process of working out what stitches in which colors will be embroidered on to my Spring Green project. The wacky sampler you see above resulted from my random practice.
Just in case you are curious, here are the names of the stitches.
Clockwise from upper right:
Fly stitch worked in columns, Detached chain stitch, French knot on stalks (yellow flower.) I have no idea what the top left stitch is.
The goofy face on the left: running stitch (black) couch stitch (green yarn) woven back stitch (mouth)
The seedling: Stem is stem stitch, leaves are satin stitch tied with back stitch.
Black line is coral stitch. The seedling is growing from a pot outlined in couched yarn and cross stitched. The leaves are chain stitches and stem stitch. I used paint and fabric marker to add the color.
I think that’s enough for now. Time to get dinner.
After working out the details of Challenge #5 SAHRR 2021 (the wonky stars border) I paused before completing that border. My quilt is currently 39 inches square, and dangerously close to being too big to quilt on my Bernina. Therefore, I decided to start quilting the completed sections before adding any more fabric.
First task is cutting and layering the quilt sandwich. Getting the backing and batting smoothed out was a tricky chore since the quilt is too wide for my worktable. After I had managed it, I proceeded to hand baste every three or four inches – just enough to keep the layers from shifting while I sewed.
Yesterday I got about 1/2 way done with parallel rows of quilting. It looks like this on the back side.
I chose to hand embroider the central square, which emphasizes the shapes.
Still undecided on how to quilt those batik triangles.
The gray spokes were quilted in parallel lines about 1/2 inch apart.
Image showing machine quilting and hand basting.
I’ll continue to quilt until the section is finished. Then I hope I have time to sew on the wonky star border before being faced with Challenge #6.
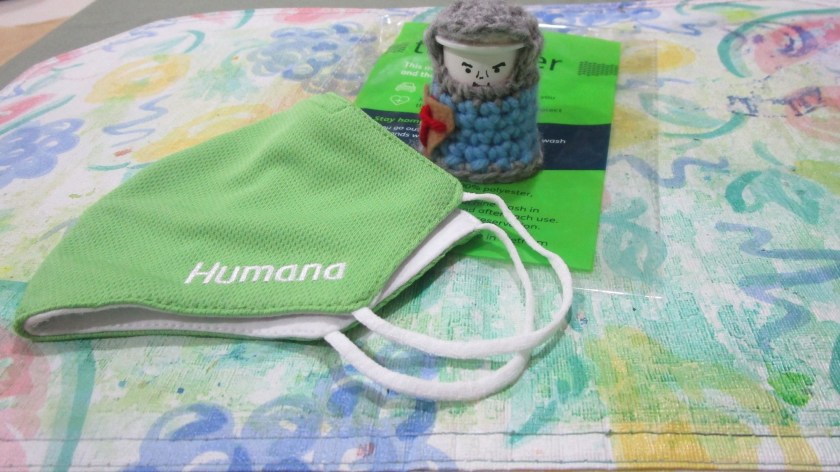
I’ve been struggling along with a pathetic homemade mask that I whipped up quickly. This is a very nice one, but I draw the line at being a walking billboard for some company. I decided to make a few modifications.
Applique fused on and embroidered with cotton floss.
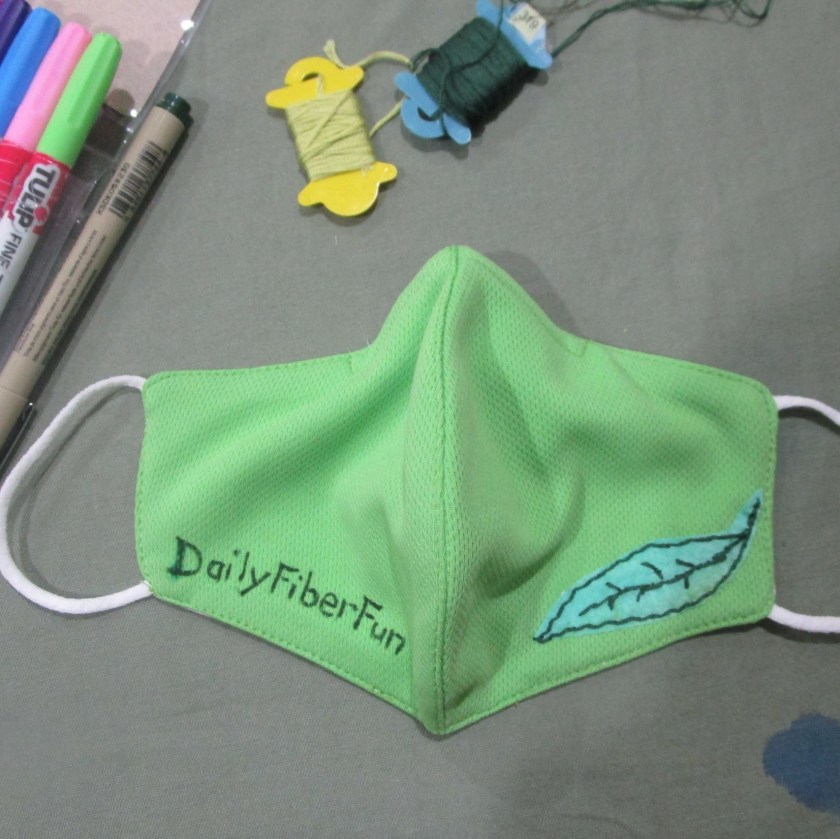
That little motif covered the logo nicely. Then I thought, what can I put on the other side of the mask? It came in a flash – why not advertise myself?
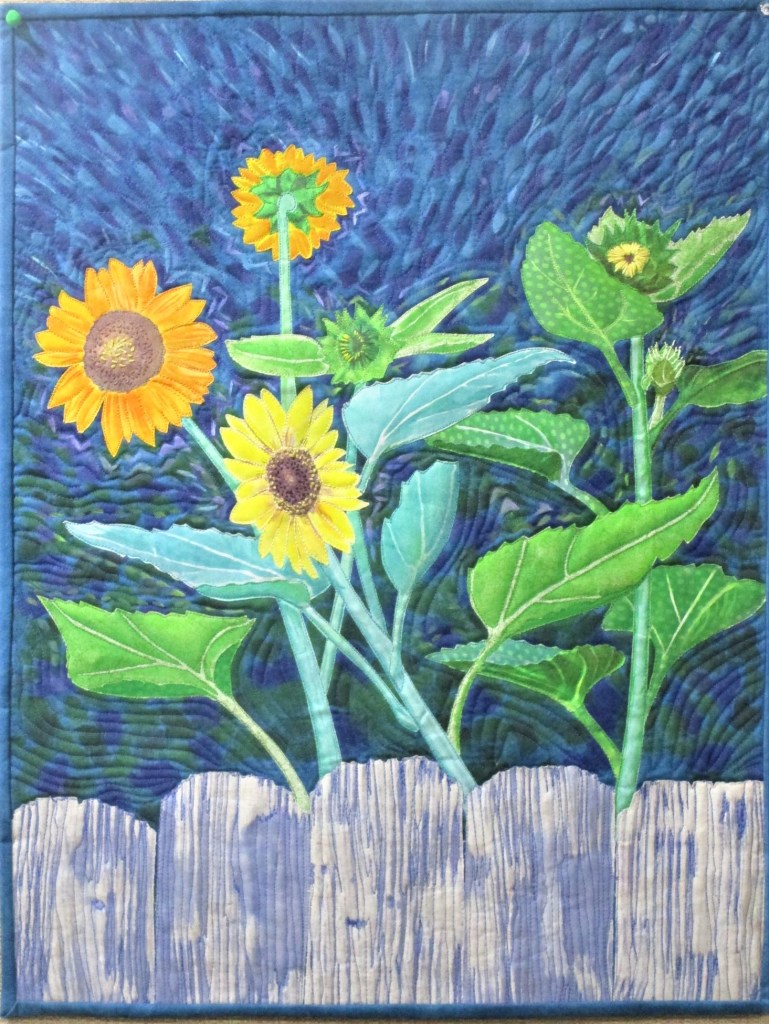
The last time I posted about my sunflower project, I had just finished fusing all the fabric pieces to the background and was beginning to embroider details on the flowers. There are only a few more steps to share.
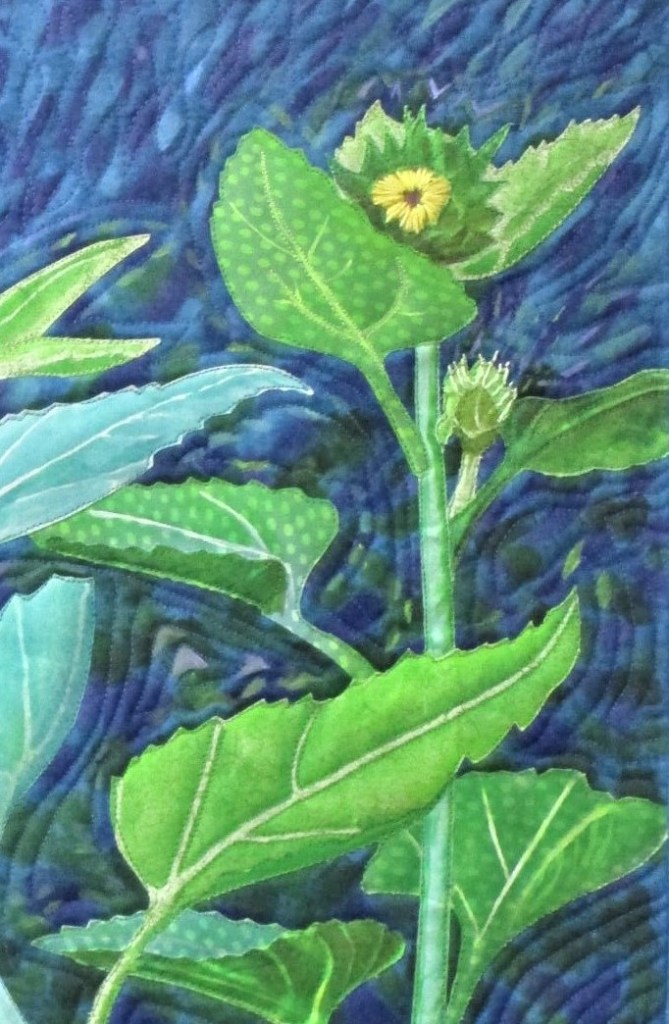
Here is a close up of the embroidery detail, which also shows the machine stitching around each applique piece.
Both of these steps took a good amount of time. I sewed around each piece using my walking foot. It is a great foot for precise work, but it only sews in a straight line. To sew down each petal and each notch in each leaf required lots of adjustments along the way.
Once the outline stitches were finished, I switched to my free motion foot to quilt the background. Now take a look at the Van Gogh painting at the top of this page. You can see, how the artist painted echo lines around the details. The pale dashes around the man’s jacket repeat the line of the jacket, and the edges of the sleeves are echoed all the way up the arm. I wanted to create the same kind of texture in my piece. So I started by sewing echo lines around the flowers and the leaves.
When I reached the sky, I sewed wavy lines around several of the paint dashes and dabs. After finishing the quilting, I bound the quilt on all sides with blue fabric.
For my final step, I mixed some paint. I painted echo lines, focusing on the upper half of the piece, and giving much attention to the flowers. Then I called it done.
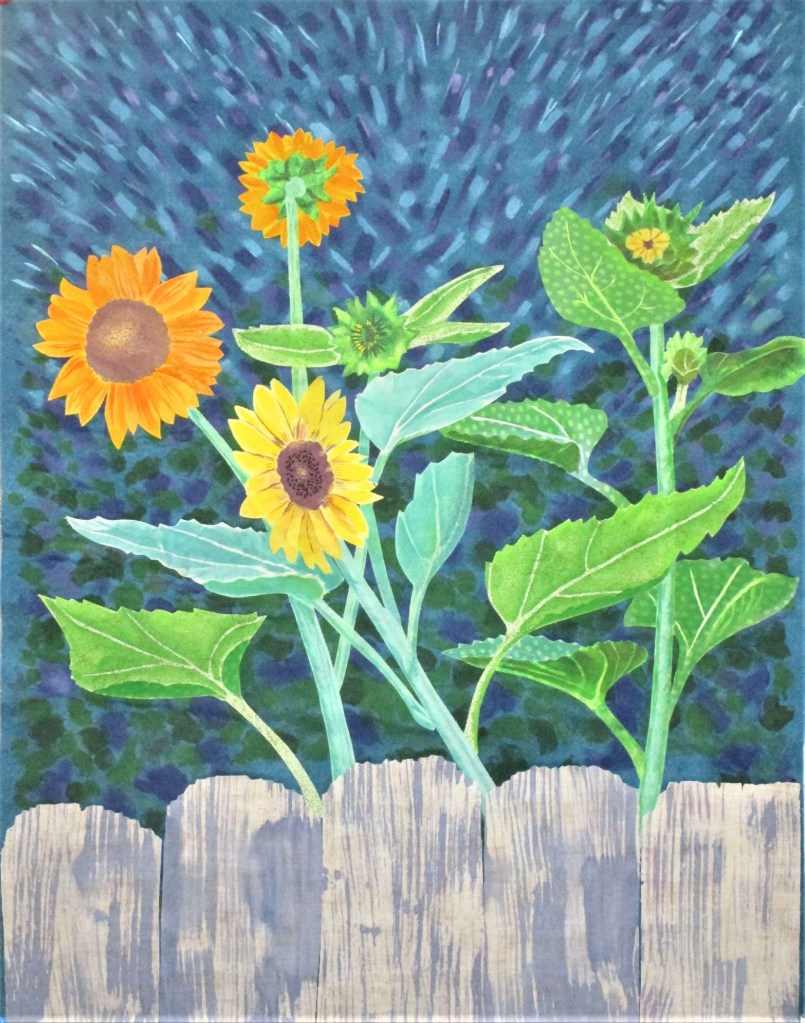
Van Gogh-ish Sunflowers
Detail of painting around flowers and leaves.
I feel really happy. While this project took me many hours to complete, I find it very expressive. The quilting and the background paint lines represent the motion of the sunflowers as they sway in the wind. I like to think the echo lines represent the energy that exists in all living things.
Thank you, Mr. Van Gogh, for everything you taught me.
First of all, everyone said “Keep the fence.” Many of you liked the wine-purple color, but some agreed with me that an adjustment of some kind was needed.
I did try options 1 and 2.
Option 1: Start over with another fabric. Here are the samples I painted on the white fabric. I decided that it was a fun exercise, but just didn’t look too fence-like.
Option 2: I applied a wash of a cool blue color to tone down the strident red violet.
It just plain didn’t work as intended. To my eye, this is worse than before.
In the end, I chose to start again with the original fabric, for the same reason that I picked this fabric in the first place. The print had an earthy, woody texture to it. This time I mixed my violet paint with enough azure blue to create a sort of periwinkle or lavender tone. I also modified my foam brush by cutting notches into it.
The Winner!
Thanks to all who participated in the game. Your encouragement and positive remarks let me feel the community around me. I wish I could give you each a hug.
Now I can move on to sewing. I’ll start with a little hand embroidery on the flowers.