Yesterday my Bernina and I spent some quality time together. I used my Autumnal Equinox square to practice free-motion quilting techniques.
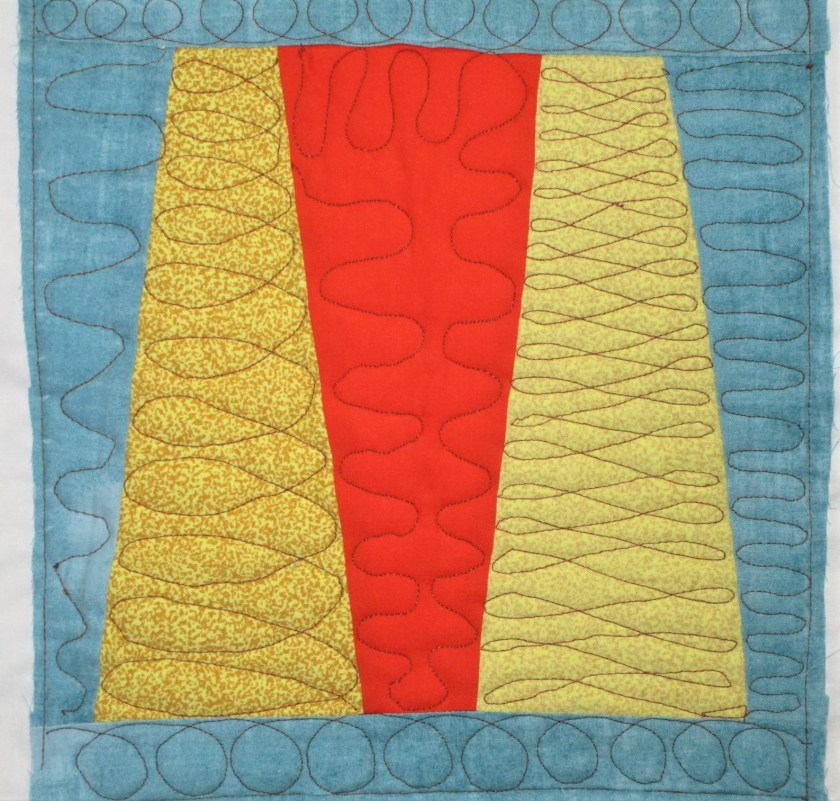
One of the things that gave me more confidence is the discovery of the 1/2 speed button on the Bernina. So far, I have mastered wiggles, loops, lazy eights, dot-to-dot and circles. I still can’t do meander.
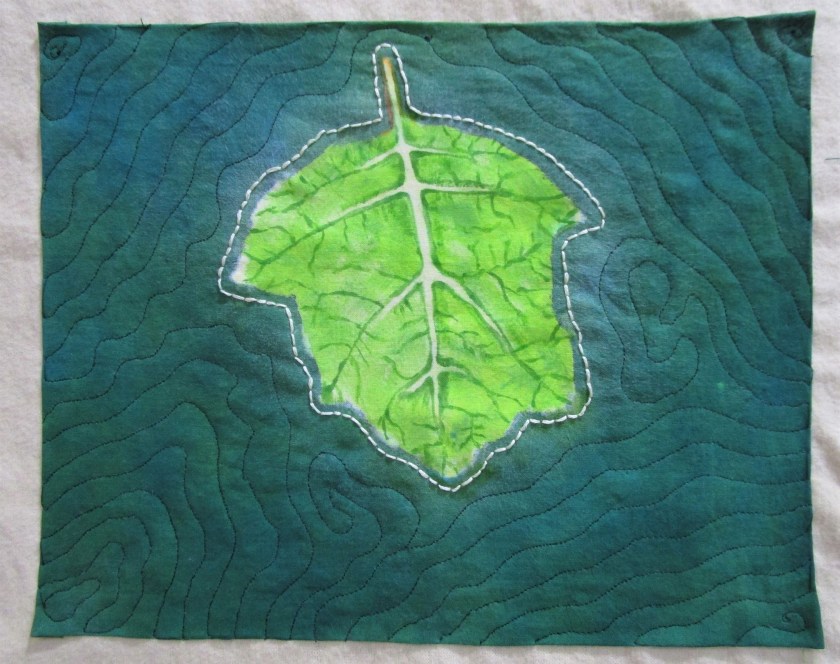
I had fun drawing with thread on my reverse applique picture. Oh, also a few birds and a squirrel were added by hand embroidery.
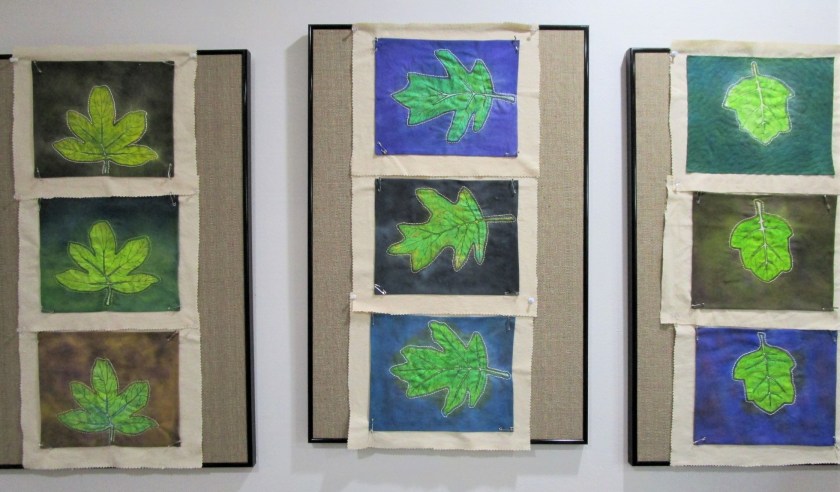
Today I am writing my 100th post on Daily Fiber blog. I am pleased that this milestone arrives at the same time as another mini-achievement: the completion of my oakleaf hydrangea block series. After some consideration I determined that the final block count will be nine, as you see pinned to my wall boards in the photo above.
Decisions still need to be made on how to finish. After consulting with a few friends, I have settled on the arrangement of blocks and the decision to use a dark border around each block as if it were an individual painting. Also, I will add a border around the whole quilt – width and color yet to be determined.
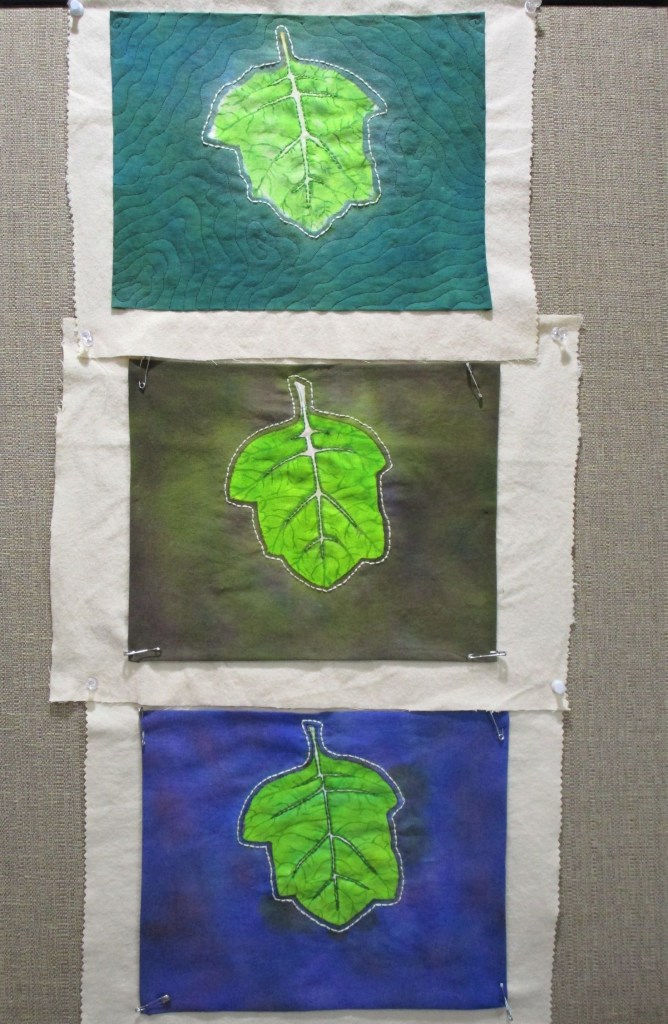
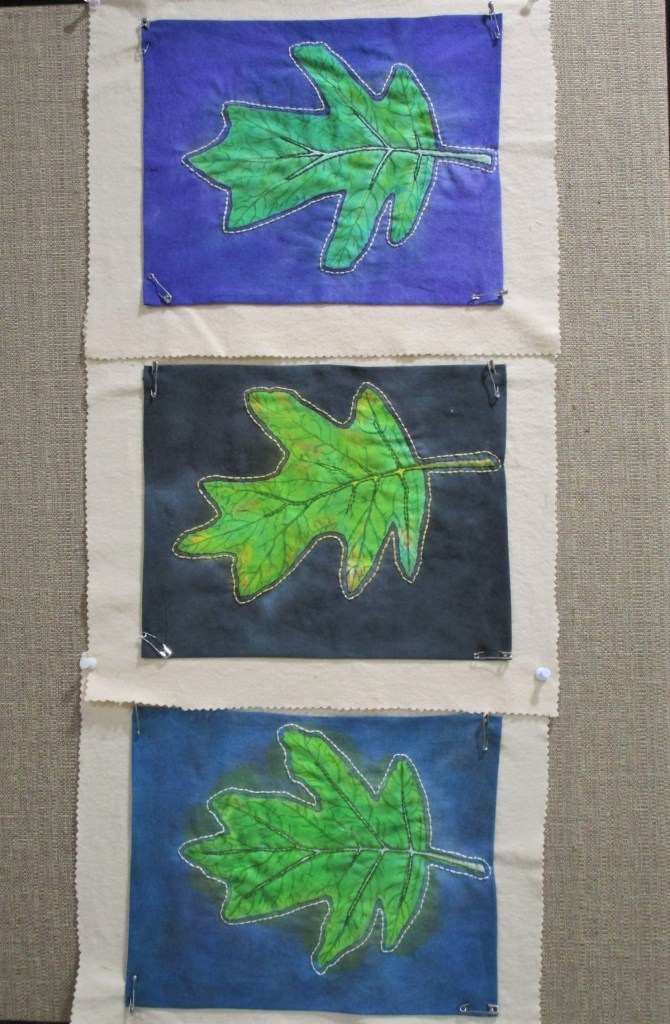
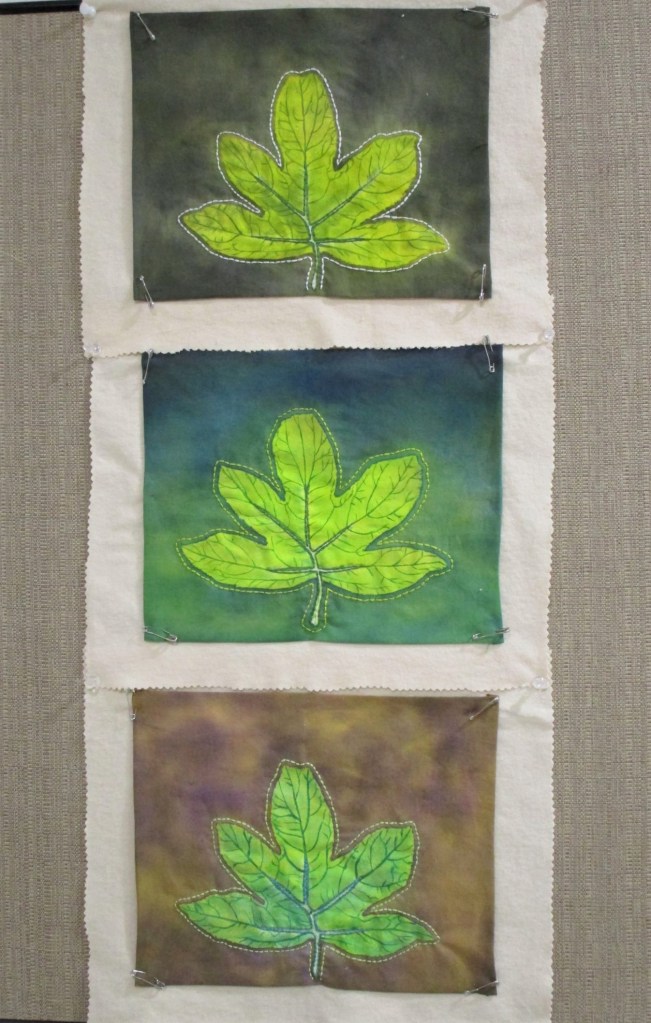
Here are some close-ups of the groups;
As you can see, only the first block is quilted so far. I will finish the quilting after assembling each row.
Hand-painted cotton fabric , hand embroidered with a flannel background. Each block is 10 by 12, including flannel border.
For this panel, I chose to machine stitch the background and hand stitch the leaf outline. This treatment seems to draw more focus to the leaf. Color washed with Jacquard Dye-Na-Flow, hand-painted with Jacquard Textile paint. Free motion quilting on a flannel backing.
So far my quilt-making efforts have been limited and tentative. I have a pretty good grasp of applique technique, and can put together a log cabin block. Now it is time to move on to new skills. To celebrate my decision, I have acquired a few more items.
Twelve inch square blocking ruler, Fisker 45 mm rotary cutter and wash away adhesive tape
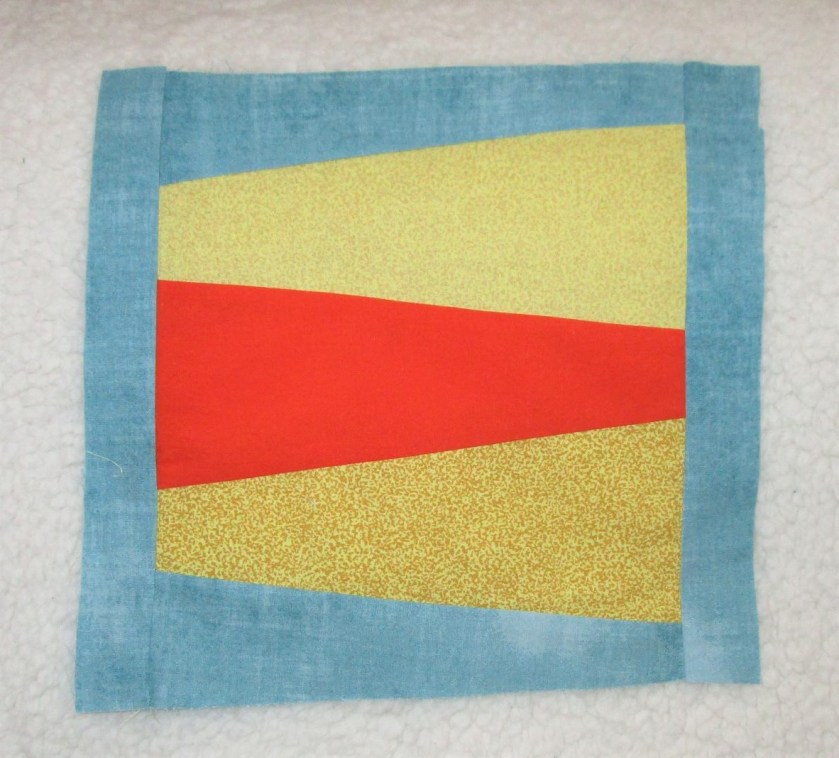
For the past three days, I have been viewing lessons on BluPrint.com and checking out U-Tube videos. Now I am ready to try an exercise in free-motion quilting. The lesson, “Free Motion Quilting Essentials,” was presented by Christina Cameli on BluPrint. First I selected some fabrics to piece together into a practice block.
These remind me of a cheese plate.
Here is the block assembled.
Before I continued on to the quilting, I squared the block using my new Omnigrid ruler. Then I made the traditional quilt sandwich of backing, batting and top. I used a muslin top for the first practice stitches.
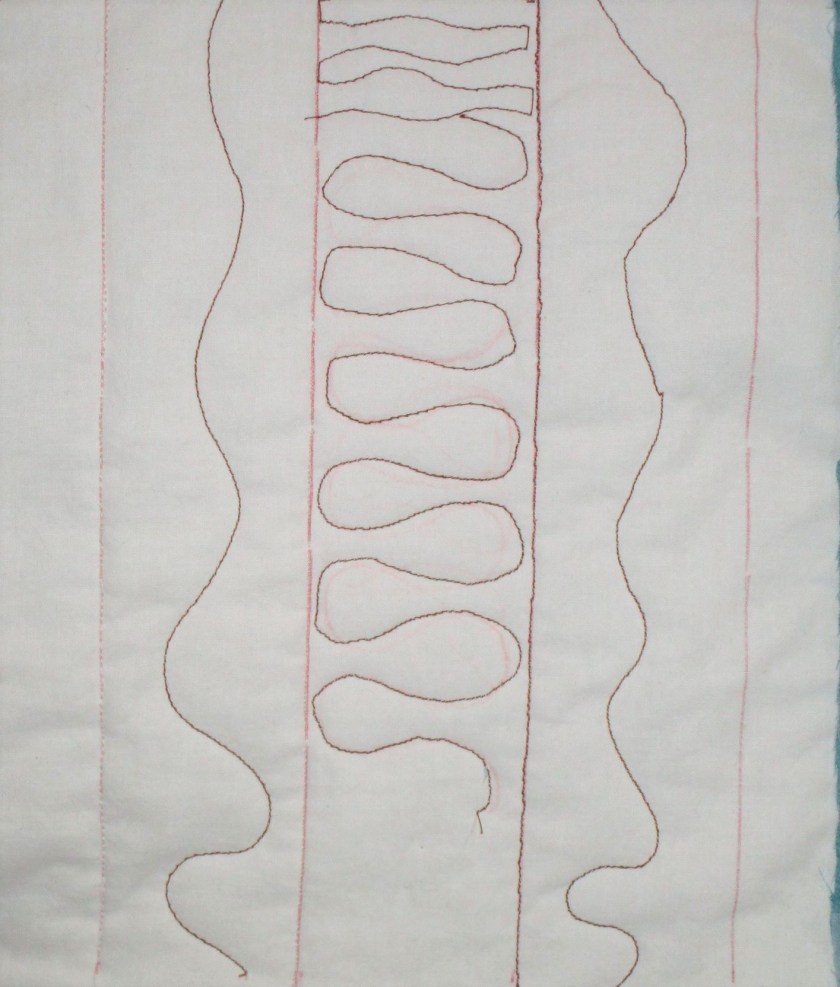
It took a little effort to get my Bernina working correctly. I had to clean out the lint, change needles and try a couple of different threads. Here are my first efforts:
Pretty wobbly. I discovered that I got better results by working from right to left instead of left to right. This may be due to my left-handedness. Whatever the reason, it was a relief to find a method that gave improved results.
WIGGLES AND LOOPS.
The block shows a little more mastery of technique. I do believe that I will need several hours of practice before I am comfortable with free-motion quilting.
Ah, Freedom! Something we long for when pressed with daily obligations. Something we were promised by our founding fathers, along with life, liberty and the pursuit of happiness. But when is freedom not really that great? I’ve discovered in life that a complete lack of restrictions often leads to mental paralysis. If I have unlimited choices, how do I decide what to do? Which way to go?
Okay, enough philosophy. We’re talking free motion quilting today. In this technique, the machine is set up so that all motion is created by the operator. Forward, backward, sidewise, whatever. Even though I have done almost no quilting before, given an opportunity to quilt, I choose the free motion type.
So my experiment today starts with a piece of fabric which was a previous experiment in color:
This was colored by layers of stamping. The dots were created with bubble wrap. The shell motif was printed with a stamp I made. Lines were added with fabric pens. Today I want to quilt on it. My plan is to sew curvy lines around the groups of motifs, then add a center dot in each group of shells. Finally, I will stitch down the ivy stem.
The first step is to make a sandwich, which includes a muslin base, fiber batting middle and the pattern fabric on top. The sandwich is basted with safety pins.
Next is to set up the machine. Sorry, no photo of this. The steps are to attach a little circular embroidery foot and lower the feed dogs. For those who don’t sew, feed dogs are the two serrated plates underneath that move the fabric through the machine. Now I’m getting a little nervous. Better do some practicing:
A little wobbly. This is much trickier than I expected it to be.
Taking a deep breath, here I go.
This isn’t a totally bad result. I liked making the little spirals, and they turned out good. The lessons I learned are
I should have chosen a fabric with no pattern on it for my first attempt.
A thread color with higher contrast to the background would have been a better choice.
It’s important to let up on the foot control when you slow or stop moving the fabric with your hands.
With greater freedom comes greater responsibility.