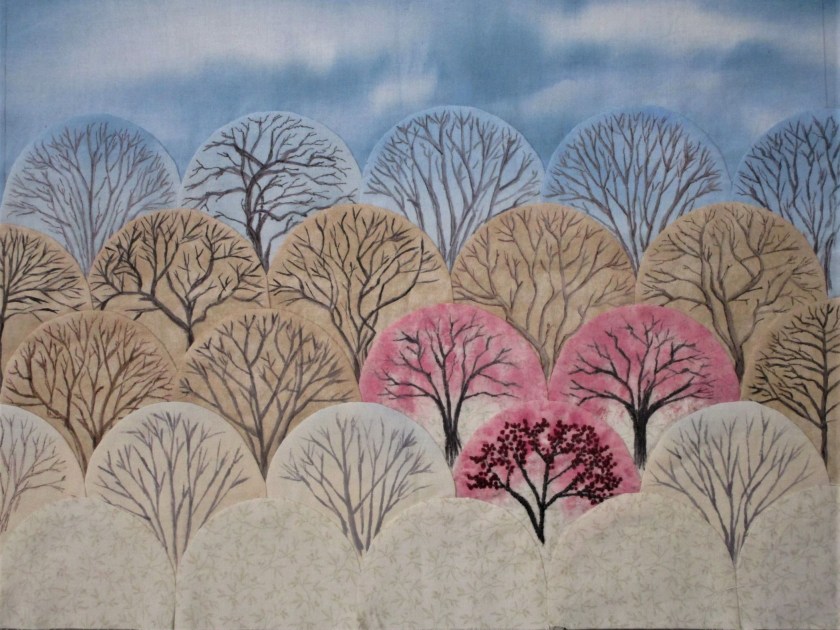
Yesterday was spent finishing up the Just Trees miniquilt. This project was inspired from the way treetops look in the winter. As spring started to move it, I had to add some color in the form of blooming redbud trees. New skills practiced: paper piecing, hand applique of clam shell shapes, using textile paint mixed with floating medium on fabric. This last technique allows a more precise line by slowing the flow of the paint into the fibers. The floating medium is made by Folk Art. Here is my miniquilt all pieced together and painted, but not yet quilted:
I decided to improve my focal point by embroidering details into the lowest redbud tree.
French knots for the magenta buds and stem stitch for the trunk and large branches.
And here is the piece fully quilted, with a border of commercially printed fabric. I used my walking foot to stitch around the applique. I free motion quilted the sky and around the border.
JUST TREES
I’m happy with the results of this fiber object. It reminds me of the view across the floodplain in my little Oklahoma town.
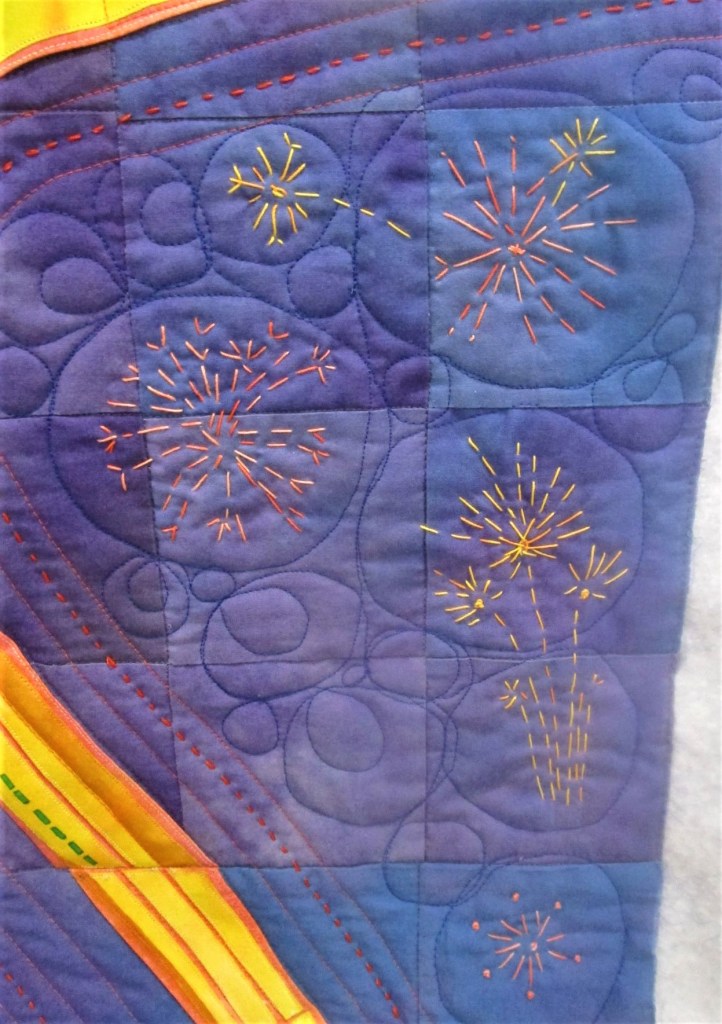
Last week I wrote about painting heavy weight DMC thread with fabric paint. Just now, I finished embroidering my quilt with the thread. Before I do a “reveal” of the finished quilt (it isn’t quite sewn together yet) I want to show how I used the thread.
Essentially, I created little scenes that tell a story of looking up at the Gateway Arch.
The moon and the stars.Falling StarJet airplane and flock of birds over downtownFireworks over the Mississippi river on July 4th.
I had no real difficulty embroidering with the threads. They do not appear to be bleeding color at all. I wish I could say the same for the quilt fabric, some of the paint rubbed off on my quilting gloves.
The important thing right now is that the End Is In Sight! A little assembly and sewing on the binding and it will be done.
I hadn’t planning on ditch-stitching the Arches quilt. But I have been a bit stuck – uncertain about how to proceed and wary of my skills (or lack thereof) to quilt free motion. Hence, I partook of another tutorial. This one, taught by Susan Cleveland on blueprint.com, promised to teach me some alternatives to free motion quilting.
But first, here are a few views of the panel that I have already quilted.
This block pleases me. I was able to free motion quilt around the color waves in the background which imitate the sky and river. Using the walking foot I quilted the arch itself around the perimeter and also along the color breaks. I then stitched two lines up the side, which give a sense of the way the stainless steel panels are attached.
I quilted around the arch in the top two blocks the same way. In the background to the right of the arch, I chose to echo the arch shape. On the left side I stitched free motion in big swirls. These did not turn out well. I guess I will rip it out, but that kinda scares me.
Susan recommended that I stitch in the ditch between the squares. This is said to stabilize the piece. I am having a problem with fabric stretching out of shape. The ditch stitching and the basting of the panel edges should solve this issue. Once this step is done, decorative stitching can be applied. Some techniques I plan to try include top-stitching with big thread and hand embroidering areas of the quilt.
Now I need to decide which thread to use for the top-stitching and which designs to embroider. (sigh.) The completion date for this project is rather uncertain.
I’m taking a break from knitting and painting to do a little sewing. Some may recall my brief panic the day I realized what happens to my studio as a consequence of quilting.
After spending time perusing other quilt blogs to find out how other quilters deal with this situation, I found part of the solution in the form of quilted buckets. This lesson comes to us from Christina Cameli and Bluprint.com.
So yesterday I started on my first of three fabric buckets that (I hope) will contain my fabric-waiting-to-be-used. This project is also an opportunity for me to practice free motion quilting while adding color and style to my studio. Her are my fabric choices for the first bucket.
Pink for the outside and gray for the lining.
I’m quilting dimensional triangles for this bucket. Here is the first step done.
I had to use a chalk pencil to keep my row straight.
The next few hours were spent happily quilting. Eventually the first basket was finished.
Some inch-wide grosgrain ribbon I found became the basket handles.
I have to admit that I sewed up the wrong sides of the baskets, so my basket is actually two inches longer than the one in the lesson. This turned out to be fortunate. The revised dimension held lots of fabric and fit nicely into the allotted space on my shelves.
I used the Kon-Marie method of folding the fabric and filled the bucket with the folded fabric pieces inserted on edge. It was amazing to see how much fabric this little bucket holds. Each fabric piece remains clearly visible and easy to grab.
So my plan now is to make three more buckets to use in storing 1 yard and fat quarter size pieces, and to make some smaller baskets for the various colors of scraps.
I highly recommend Christina Cameli’s class. She is delightful instructor. Each of her projects can be made in an afternoon and would make wonderful gifts.
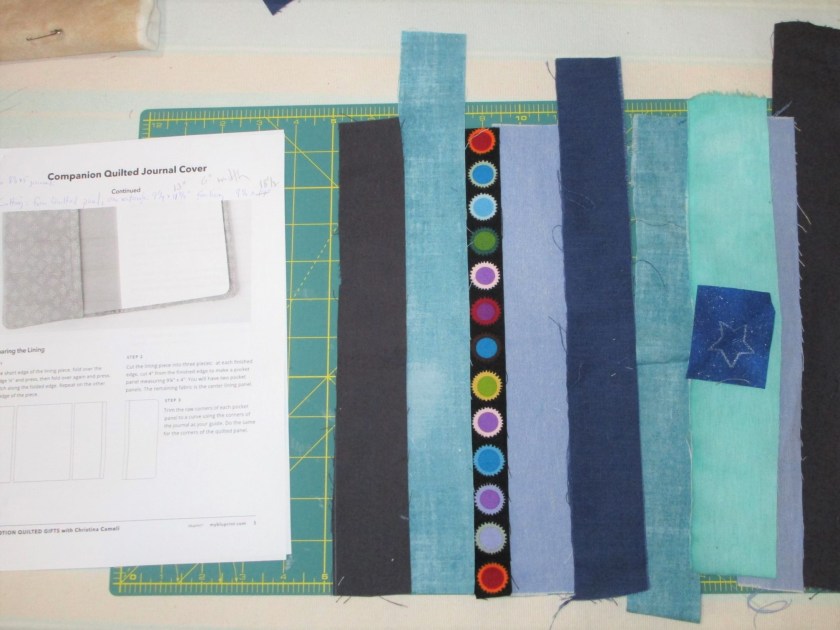
To those of you who are still following my blog, thank you! November has arrived and I am back on track with fiber and a plan to make some holiday gifts. This is the first year that I have had plenty of time. It’s gratifying to apply some of the skills I have developed since beginning Daily Fiber! Today I am going to share with you a sweet gift for all the creative types on your giving list. I learned to make this little journal cover in a class at Bluprint.com taught by Christina Cameli. Her craft is quilting, and she excels at working her stitch magic in free motion.
Materials are cheap and readily available: fabric, quilt batting, some foldover elastic and a paper bound journal that you can get at craft, big box, or office supply stores.
Here are the strips I will be using today:
After cutting out all the pieces, the first step is to stitch together enough strips to cover the journal. In this case, I needed a piece that was 9 1/4 in. tall by 13 in. wide. Make it a little bigger than required. Then put together a quilt sandwich with batting and backing (muslin will do.) Using the free-motion technique you like (or one you want to practice) quilt away! I chose to use my walking foot this time.
Pick a lining fabric to go with your theme. It will need to be about eight inches wider than the cover and the same height.
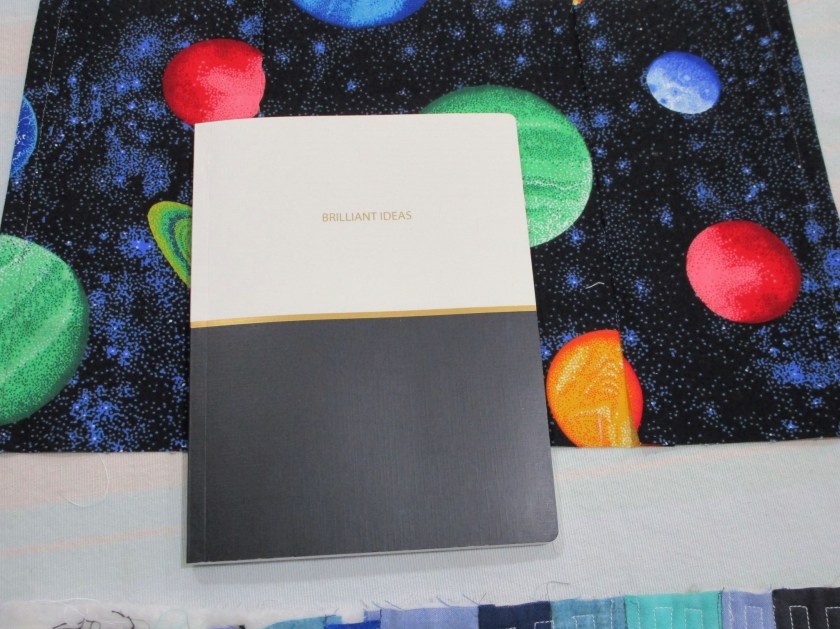
Here’s the lining and journal insert I chose.
Cut to dimension and sew the lining to the cover, right sides together, per the class instructions. The wrap over elastic will be sewn to the back panel with right side down. Trim the corners, turn the piece right side out and press. After you checked that the journal fits inside, top stitch the cover very, very close to the edge. (Be careful to keep the elastic free of top stitching, or it will be too tight.) You’re done.
And here is my finished gift.
Left to Right: Front Cover showing elastic, Back Cover
Really fun. I’ll be making more of these , and plan to try out some interesting free-motion designs.