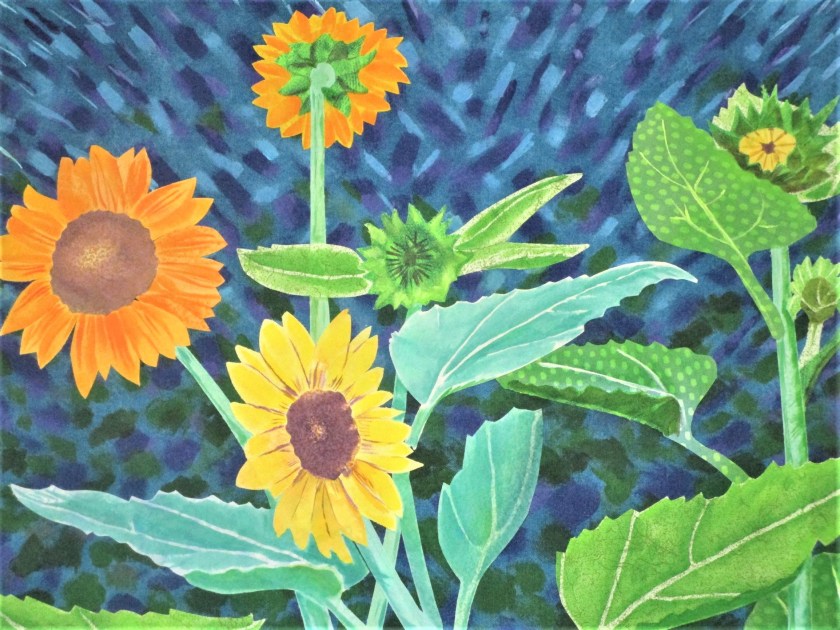
Today I finished painting the Van Gogh-ish sunflower scene.
Close of up the flowers.
I’m very happy with my work. I also applied a wash of paint on the fabric that will become the fence. But I’m just perplexed about whether the fence works with the rest of the piece. Here it is:
I like the texture – it’s quite true to the real thing. I even like the violet color. It’s the tone of the violet that I’m not sure of. And I don’t think the light tan base color works well with the rest of the palette.
There are a few options:
Start over with new fabric. I have white and a white on white print that might work.
Apply another light wash over this fabric. Since the paints are transparent, a cool shade of blue would blend with the background and make the violet areas look blue-purple.
Stick with what I have and modify the fence color by painting highlights in an opaque paint and stitching texture with thread in colors that fit the palette.
Omit the fence and let the sunflowers float on the background.
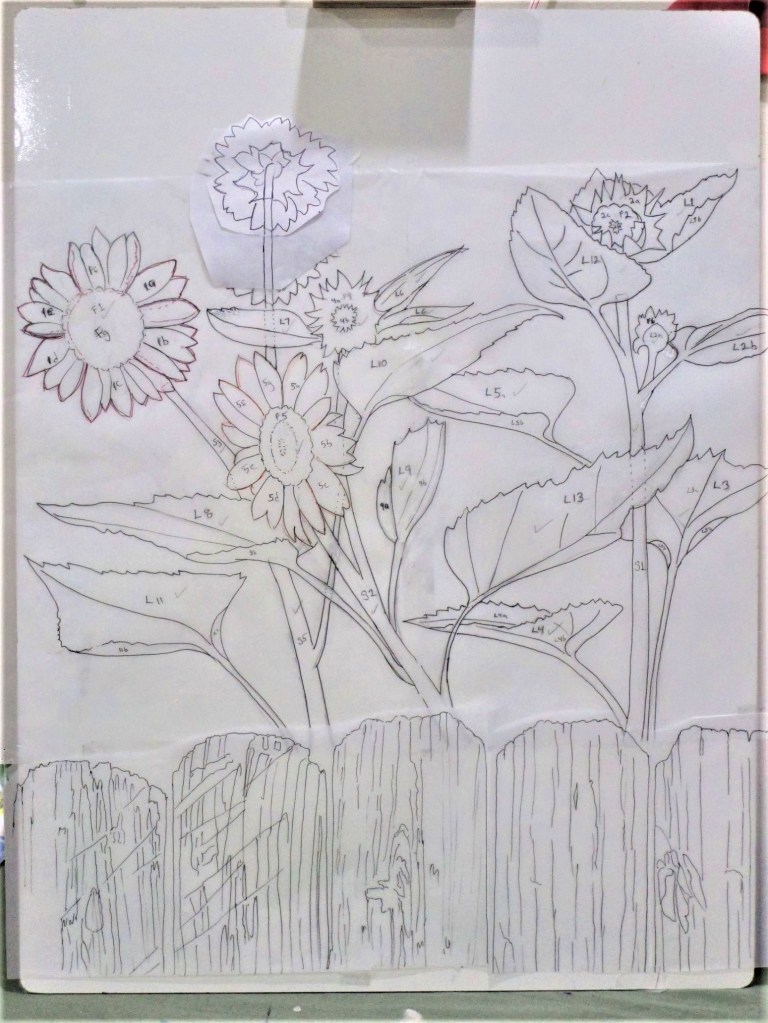
For the past three days I have been working steadily on the small art quilt that was inspired by the sunflowers in my garden and influenced by Vincent Van Gogh. I’m about half way through. Today I want to share a bit about the process I am using.
While the technique I have chosen to use is applique, the design process for most art quilts is similar. Start with an image. I used a photograph, but drawings are also good choices. Decide on size and dimension. Then enlarge the image to fit.
This enlargement is about 18 x 24. I have printed it in black and white because eliminating the color makes it much easier for me to judge relative values.
Using a tracing paper overlay, trace the image. During this stage many design decisions are made. You want to eliminate any visual clutter that doesn’t support the overall design. You can manipulate the different elements to strengthen your main thesis. For example, I altered the position of one flower and the tilt of the stems to accentuate the diagonal lines. It took me a long time to draw the pattern but I enjoyed the process.
Final Design
This pattern will be the map from which the entire assembly is guided. I drew in some directional lines that suggest details for painting on later. You see that I assigned numbers to every element. This will help me trace and cut out all the pattern parts.
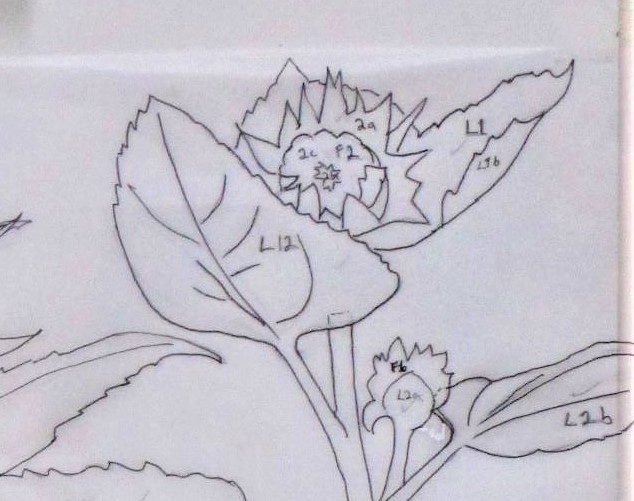
Detail of sunflower in upper right of pattern
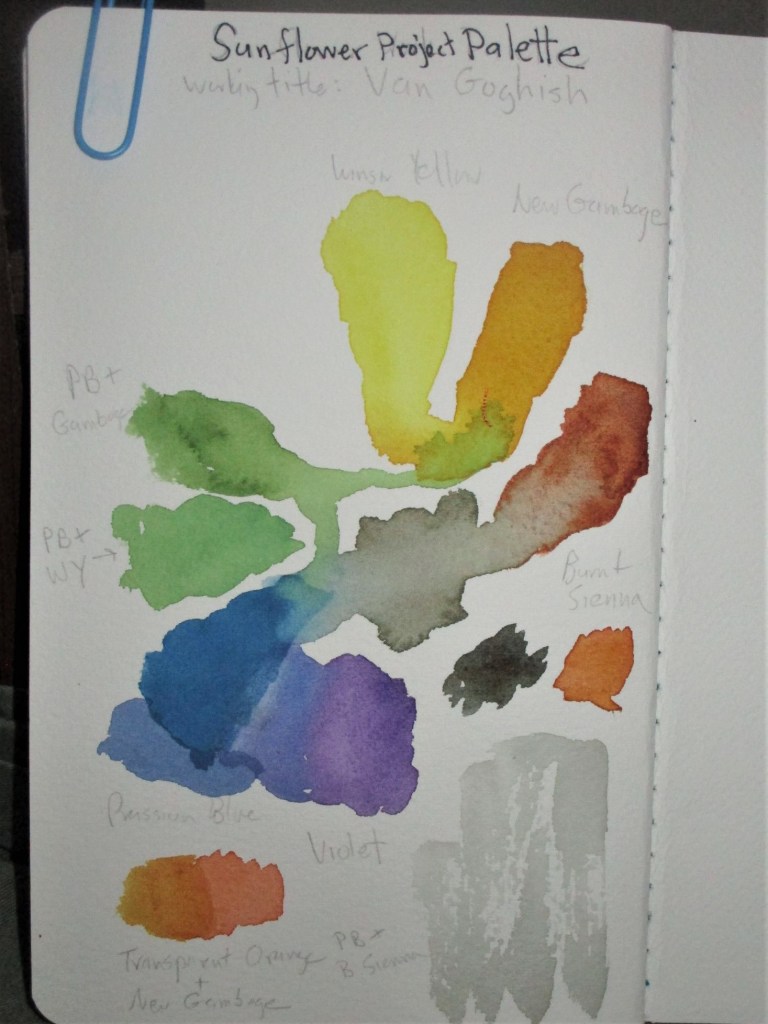
Now the part that every quilter just adores: Choosing colors and fabrics! Since I am a budding painter, I made a quick color chart in water color paint.
I’m trying to use an analogous color scheme. But my parameters are pretty wide, extending from violet through to yellow-orange. For this quilt I will assign the darkest colors to the background and the lighter ones to the elements .
Even though I did go shopping, in the end I chose fabrics mostly from my stash.
Next I traced each element onto freezer paper, cut them apart and pressed them onto the fabrics. Following the drawn lines, I cut out each pattern piece. Keeping them organized and up off the floor is the main challenge!
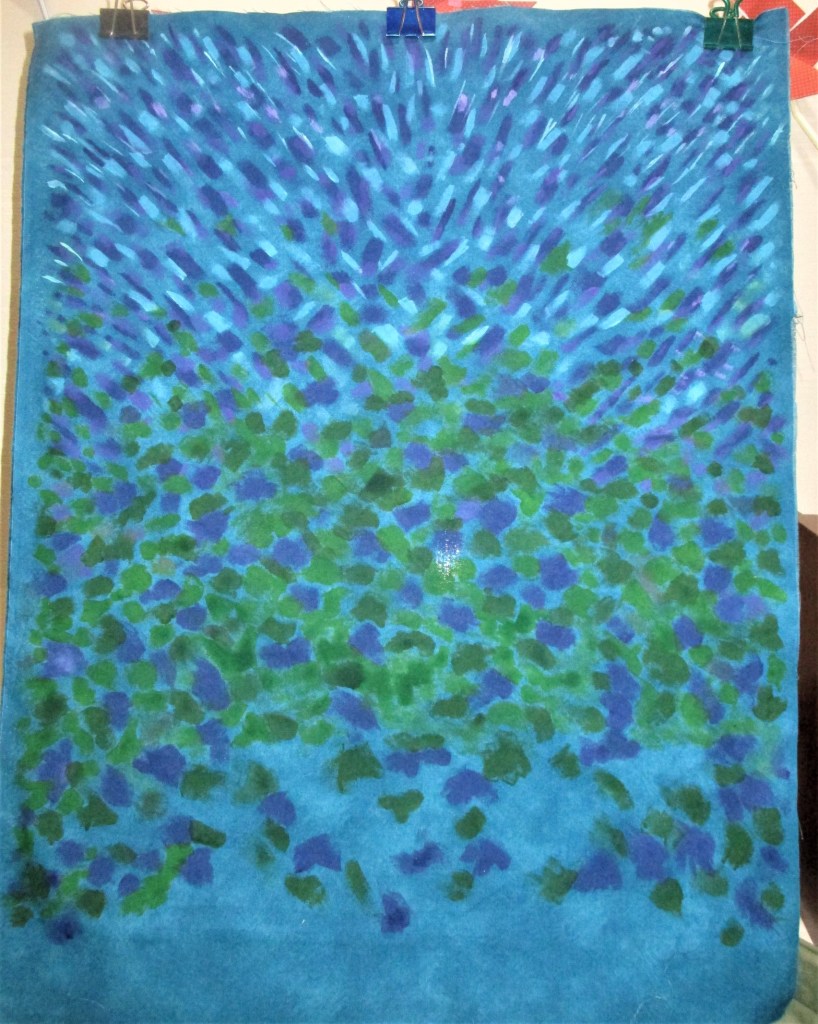
In my last post, you saw how I painted the background fabric. Here is the background again, up on my design wall and ready to accept the fabric appliques.
I use a fusible webbing called Wonder Under to glue the appliques to the background. I won’t go into detail on that step. The product’s packaging tells you what to do.
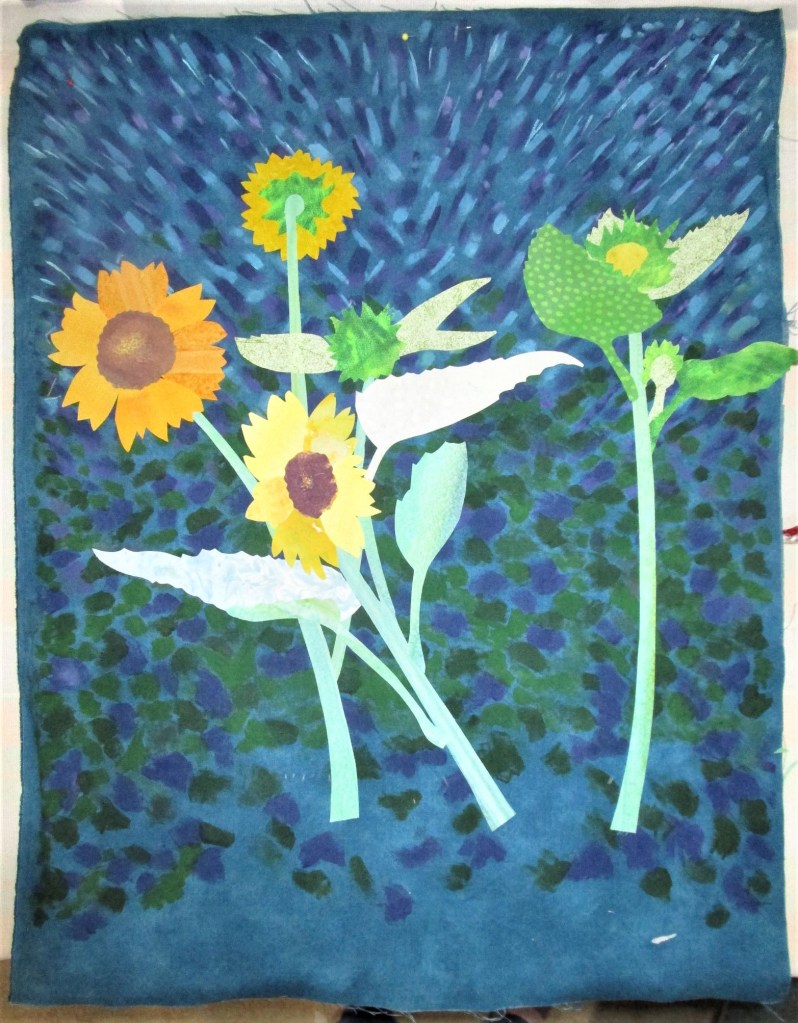
First I assembled the flowers, each of which had several fabrics. Once that was done I started attaching appliques to the background. Any pieces that lie behind another piece go down first. I started from the top. Here is a photo with about half the appliques on:
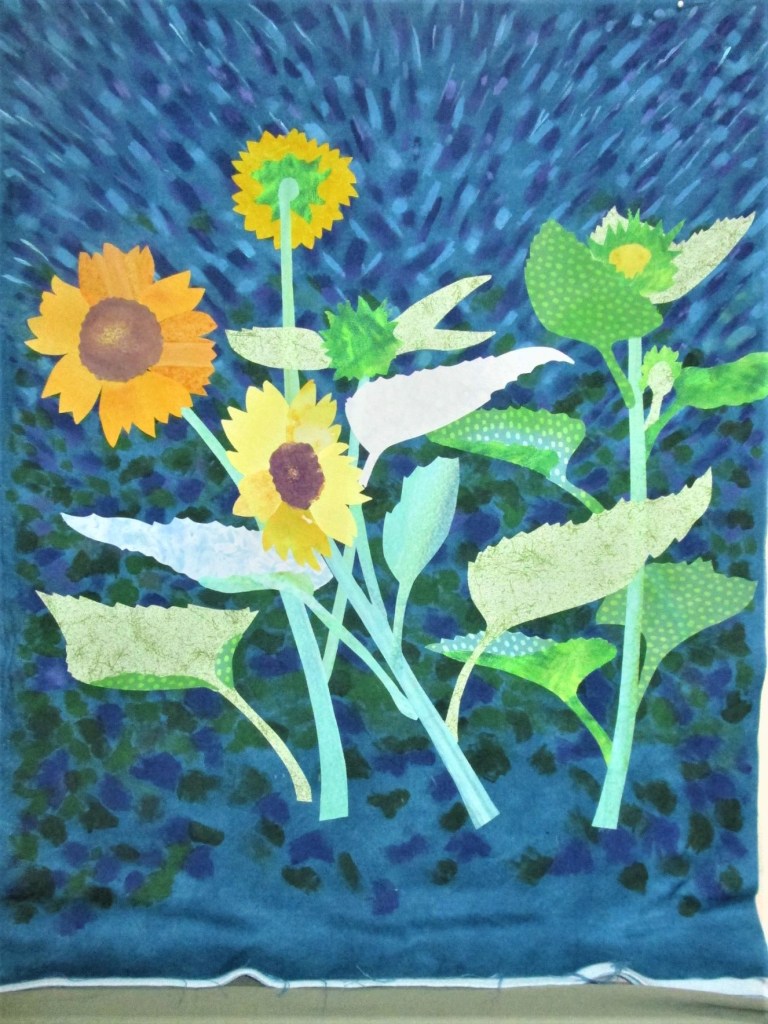
Here you see all of the flowers and leaves attached. This is where I left it yesterday.
I’m pleased with the result. I like it so well I may not even attach the fence applique – just let the flowers float in mid air. What do you think?
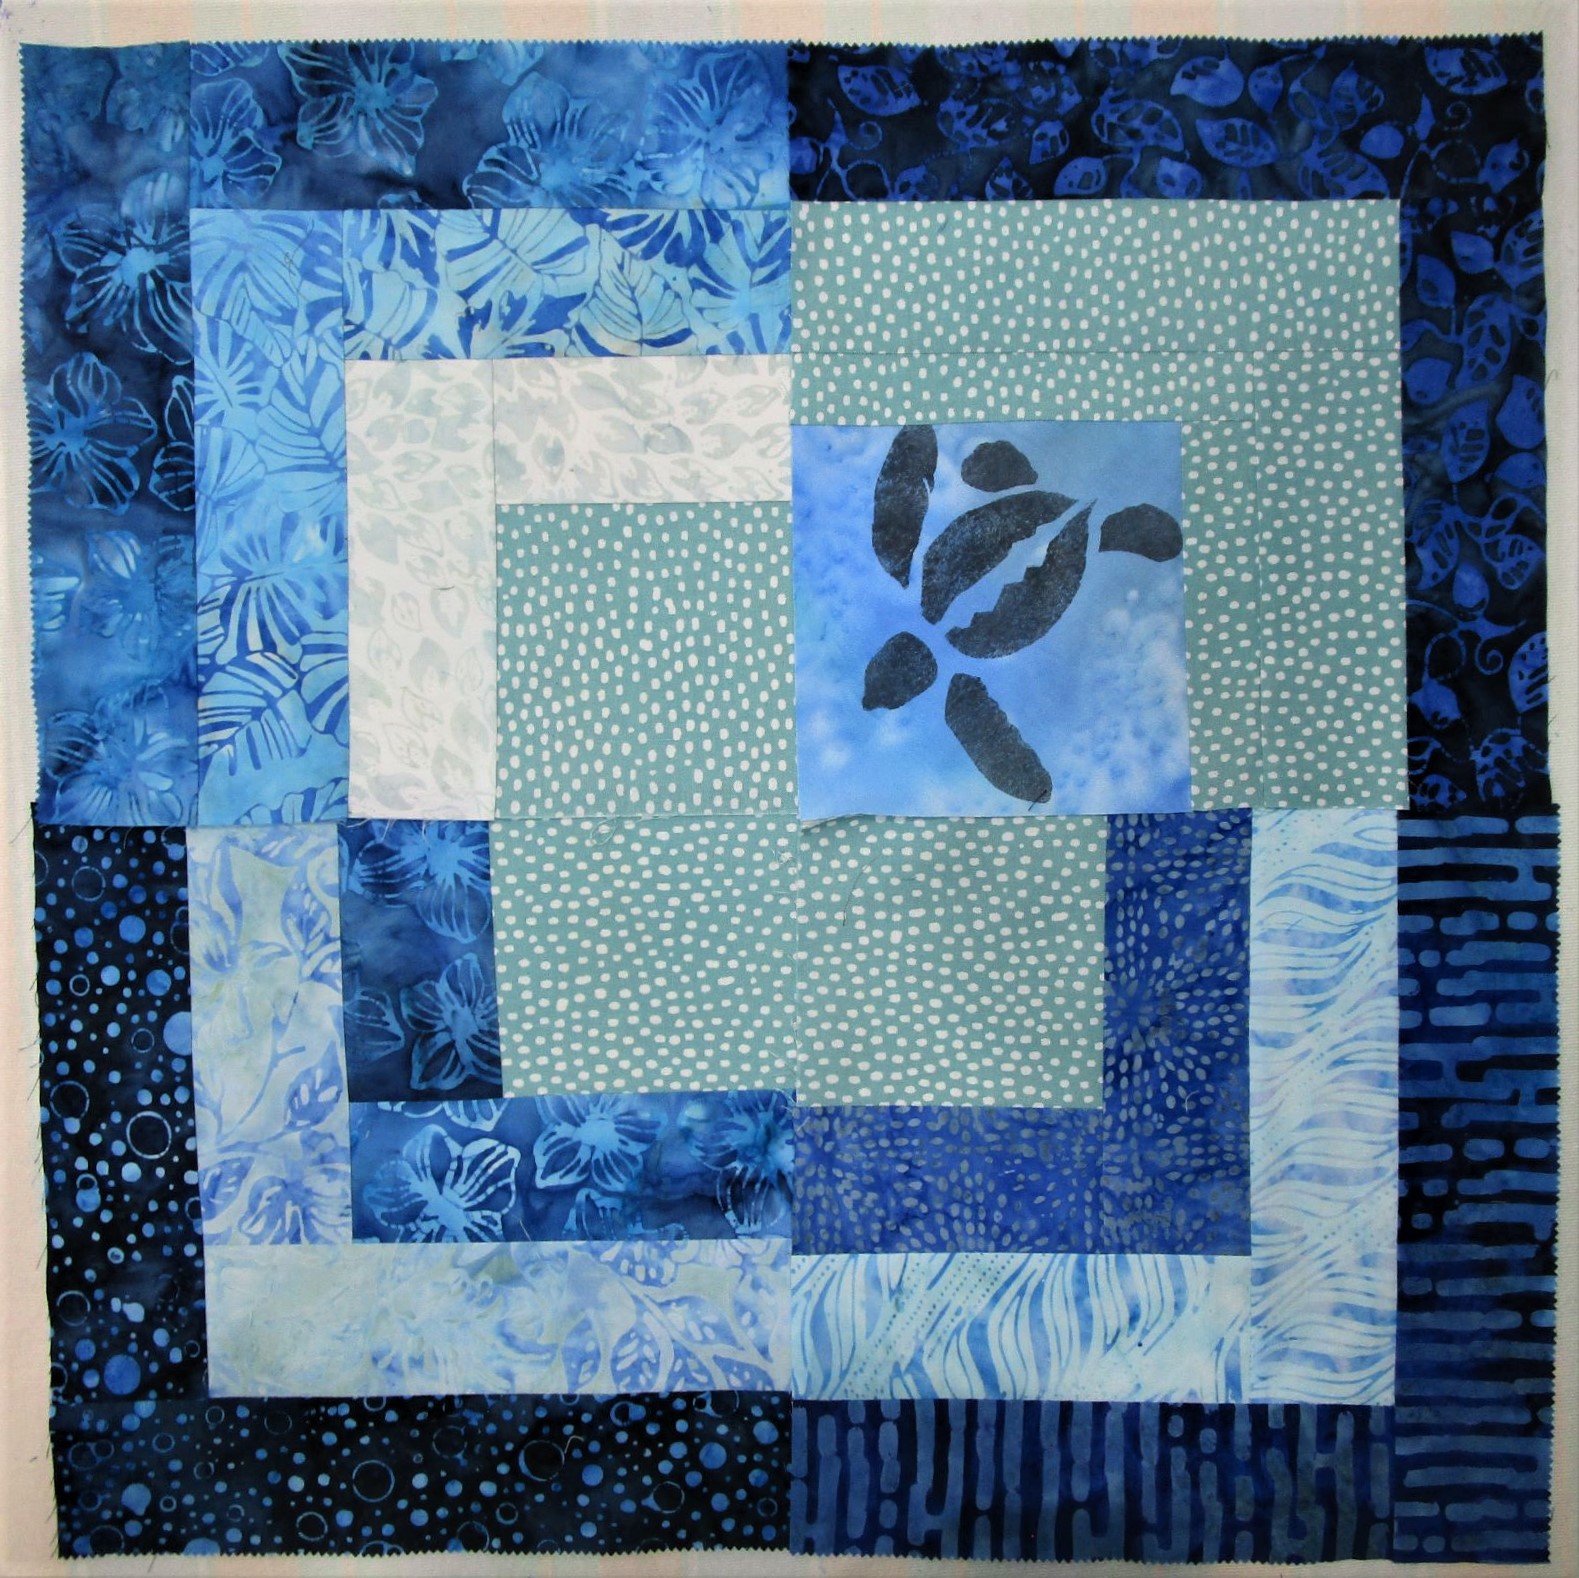
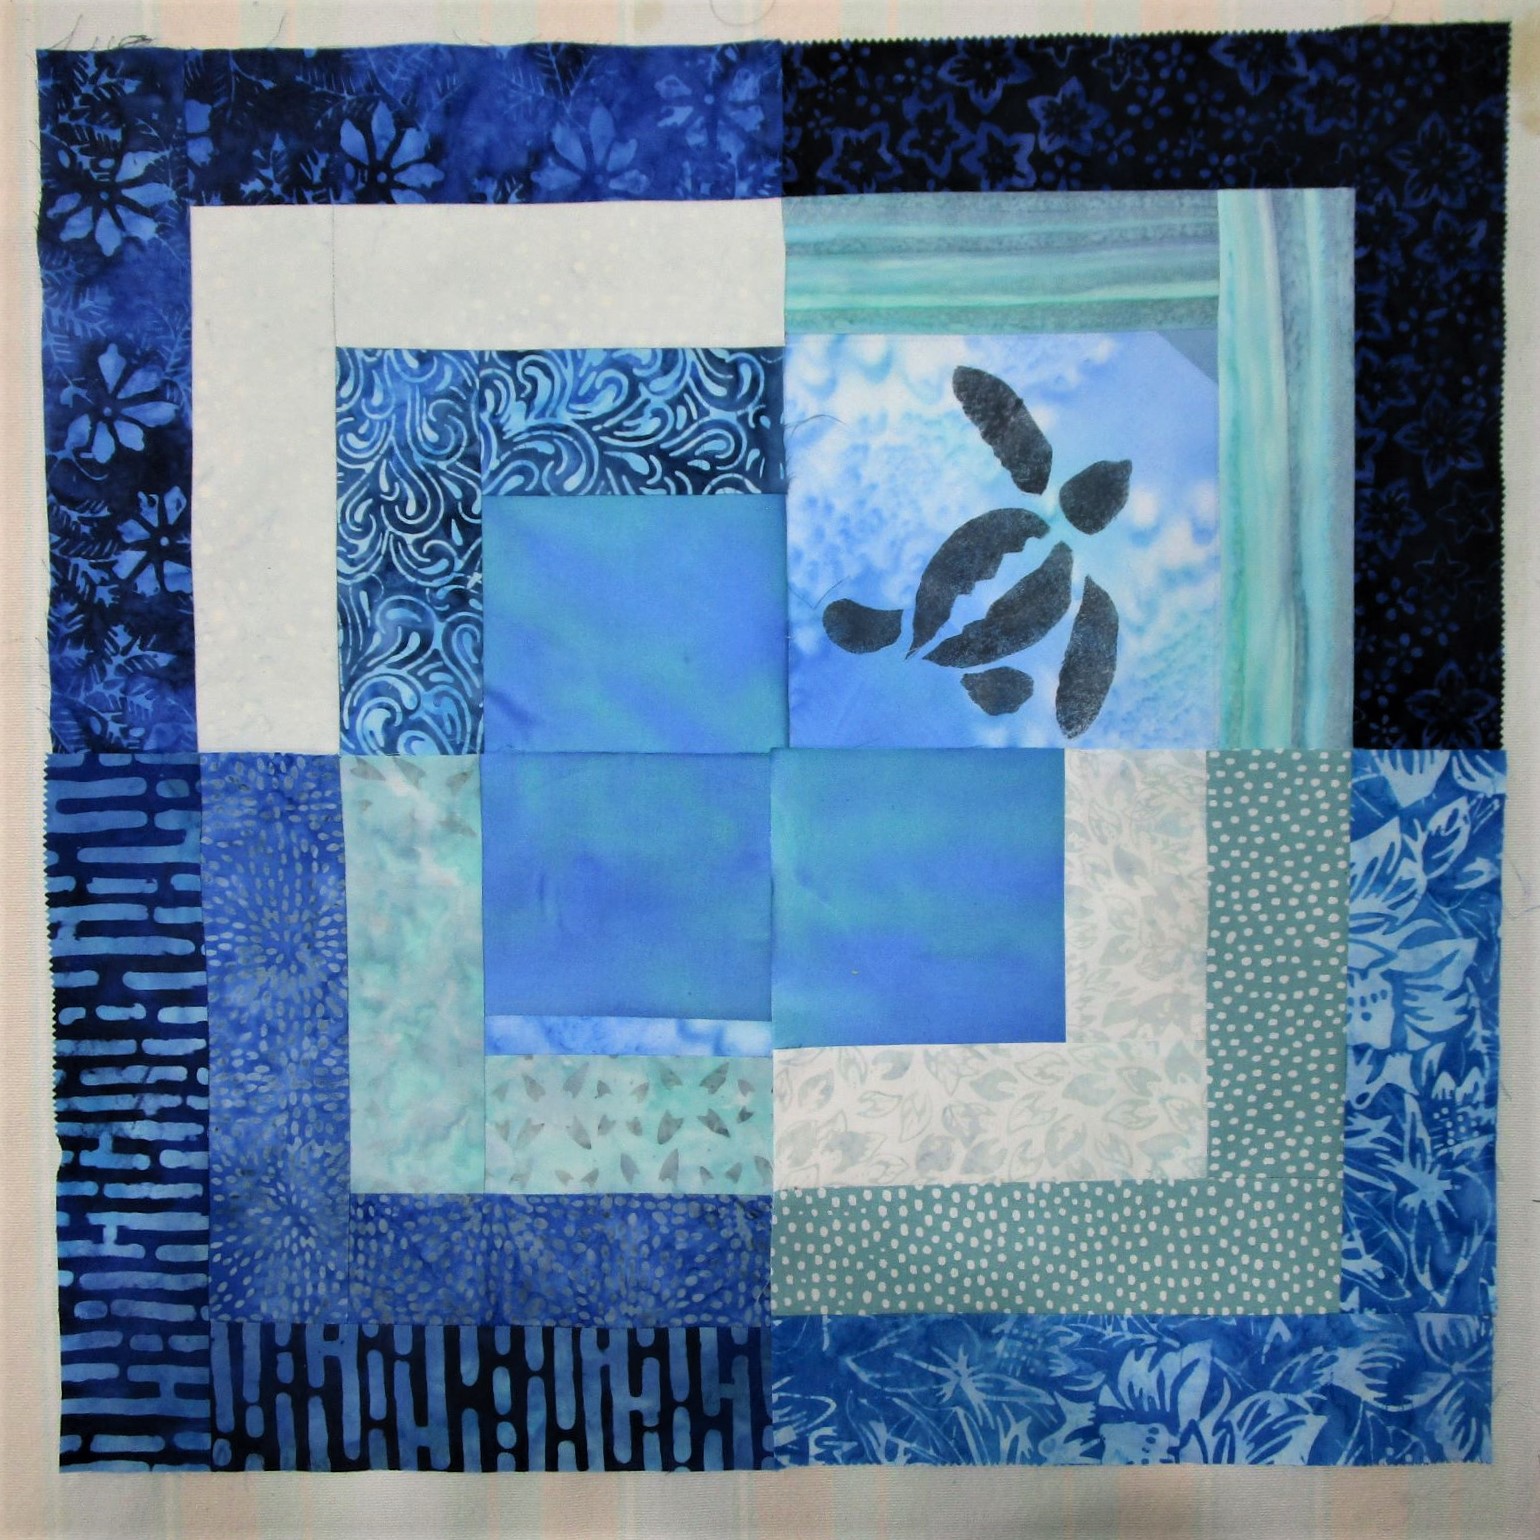
Today I finished assembling all of the log cabin blocks for Under the Sea quilt. While arranging the blocks in groups, I quickly realized that my original plan did not serve the overall design. So I switched to a layout in which each group of four blocks is rotated with the center squares touching. Now I have ten groups surrounding a central panel with the large sea turtle in the middle. Here is an overhead view.
This image excludes the top three groups.I couldn’t fit it all into the photo.
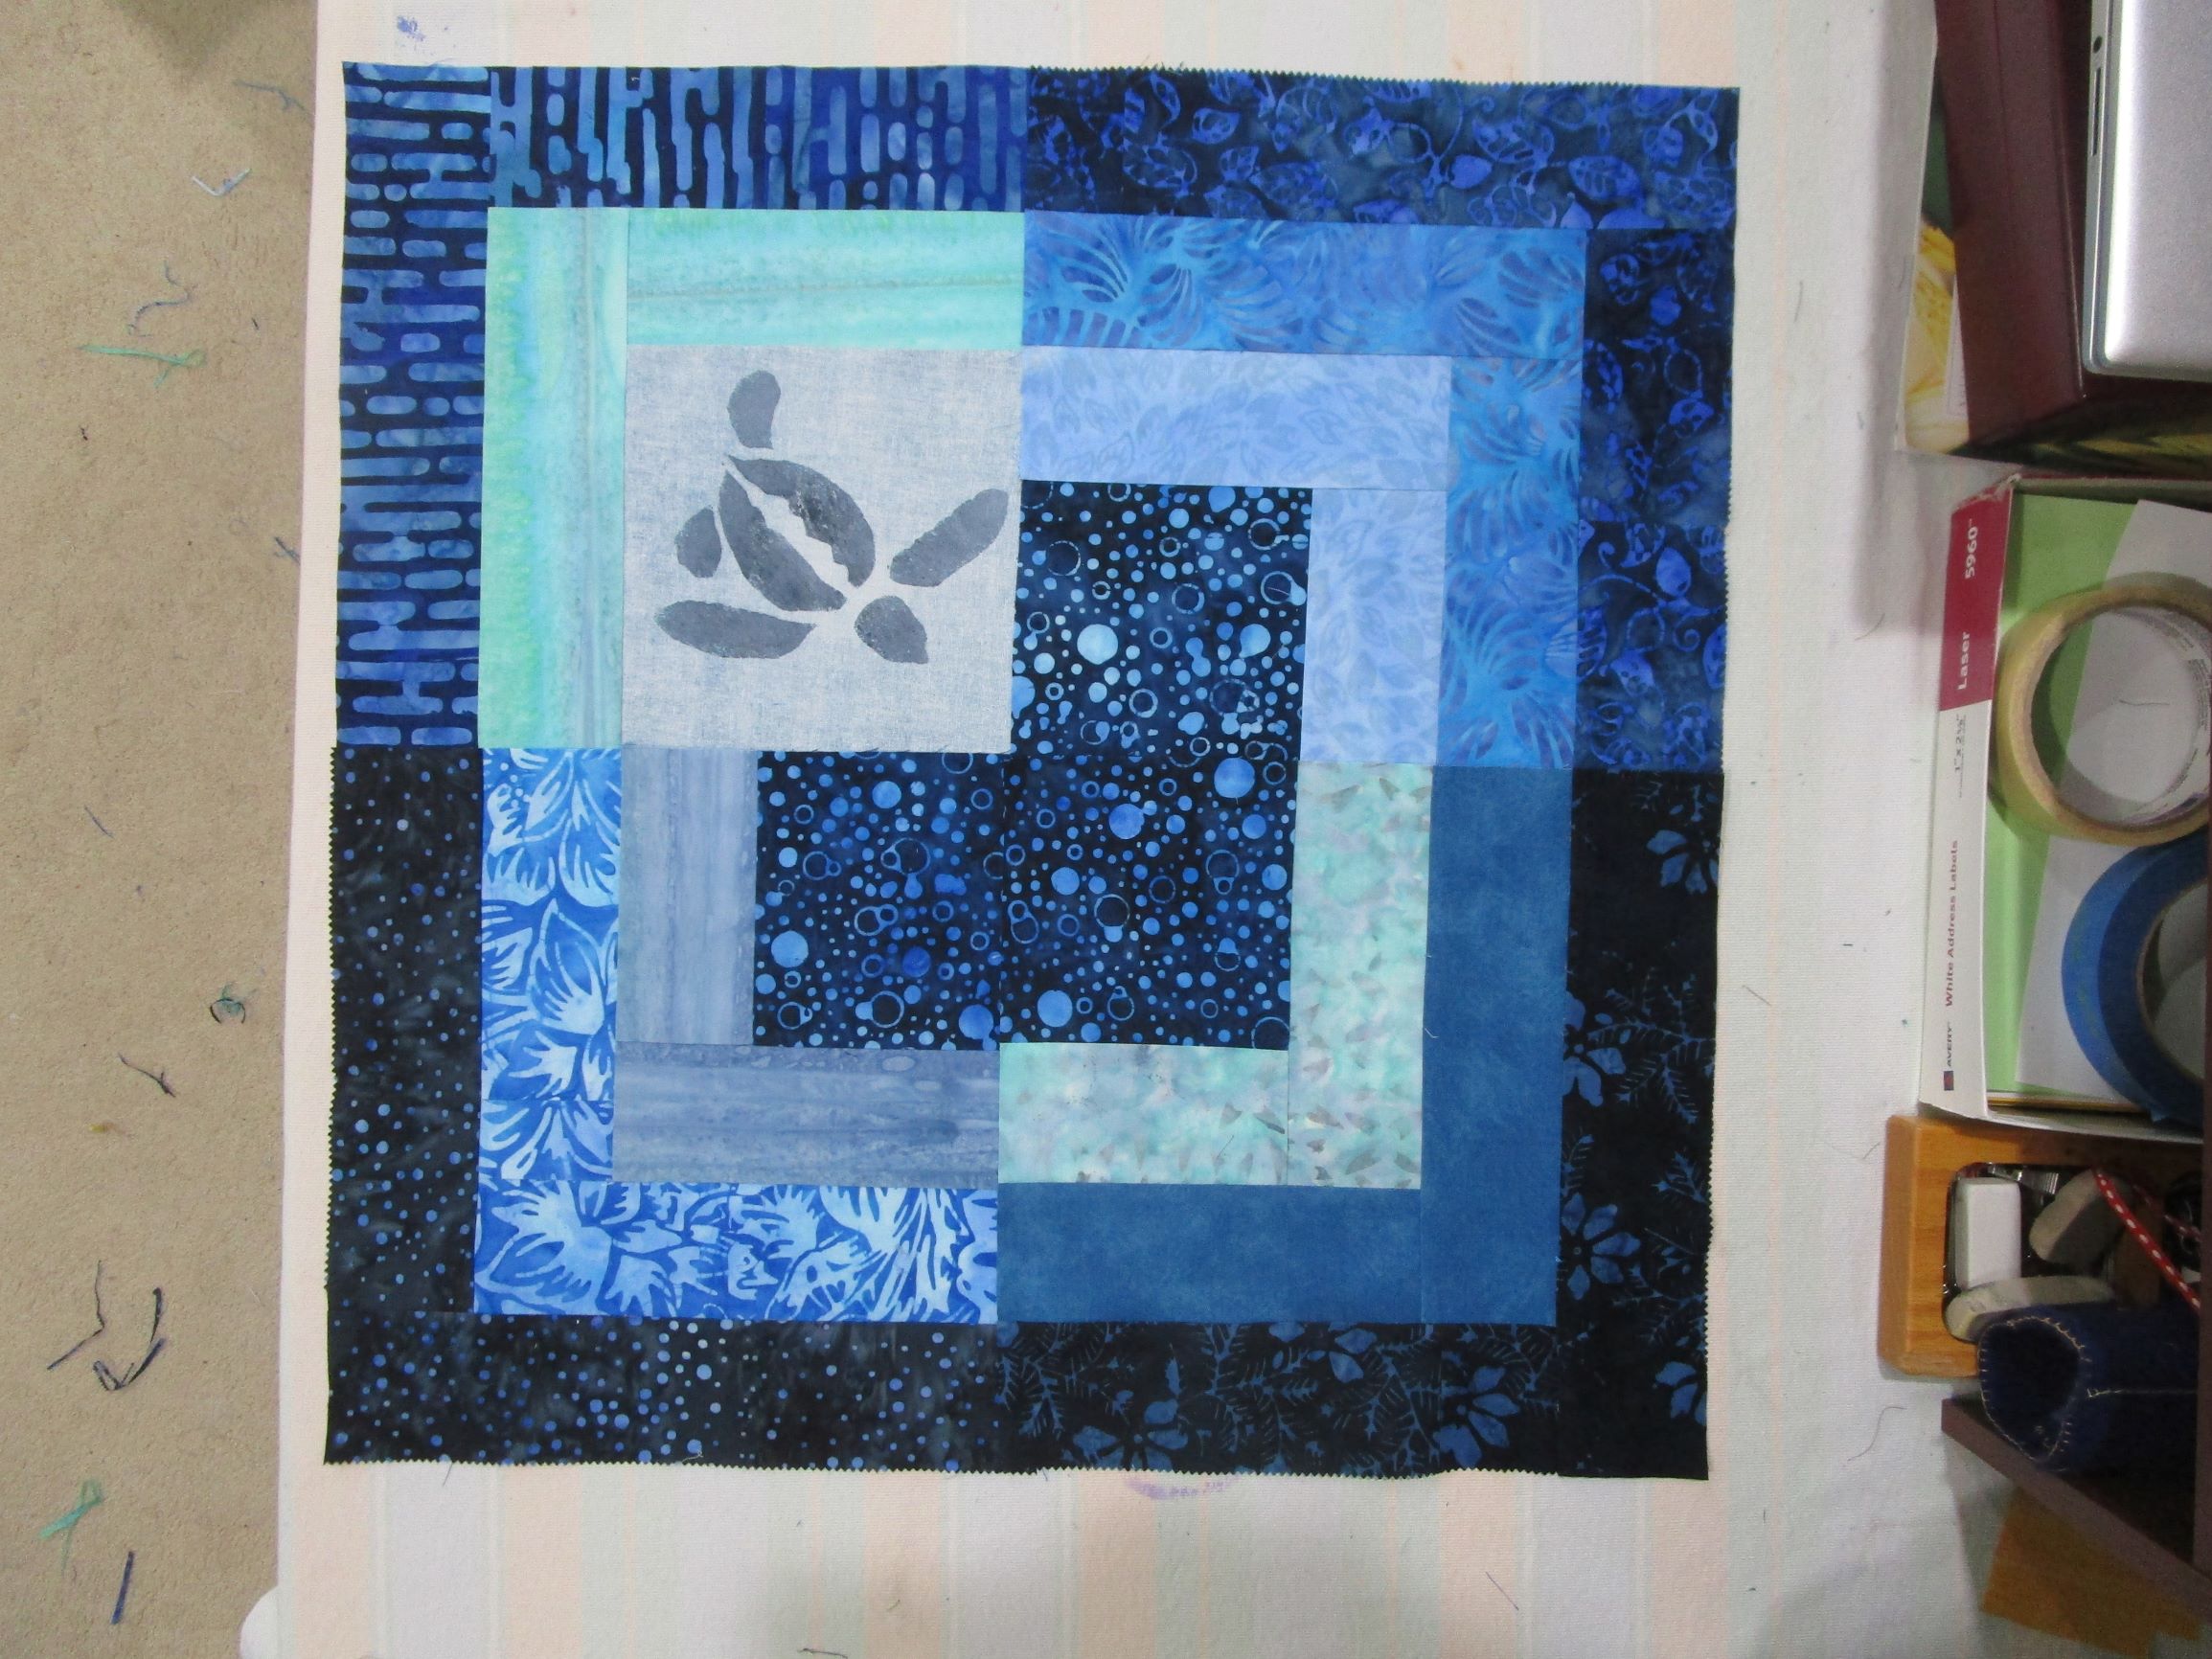
I’ve had so much fun coming up with images of underwater creatures. Ultimately, I decided to make my focus life found on a coral reef. Here is the center panel with some tropical fish, big and baby sea turtles, and an assemblage of sea horses…..
Next to and surrounding the panel can be found some jelly fish
The stinging tentacles will be added after the block is assembled.
… a living sand dollar (did you know that this animal is a type of sea urchin?)…..
….. a group of starfish, more tropical fish, and four additional baby turtles swimming across four different sections of the quilt.
Working with the batik pre-cut strips was such a pleasure. First of all, hey, I didn’t have to cut them. Secondly, the front and back of the fabric is the same, so you never end up with the wrong side on front. And finally, the fabric was so tightly woven that no twist or stretch happened while under the needle. This made the boring parts of piecing go quickly. I could spend time designing and painting my little sea creatures.
Next up will be sewing the blocks together, choosing a backing fabric and the actual quilting. There is a long way to go before this project can be put to bed. (Ha!)
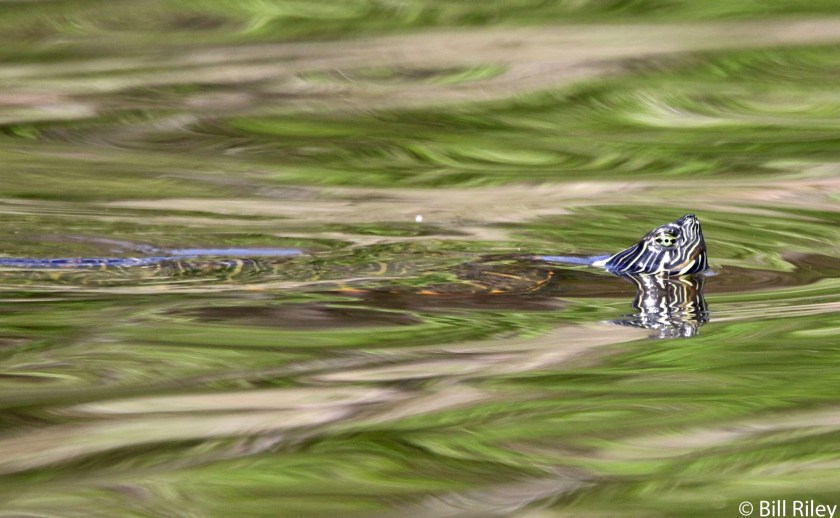
The past five days have found me in a creative slump. Having got my turtle idea started, I am mulling ideas and fiddling with techniques for the next steps. As a reminder, here is my inspiration photograph.
There are two tricky parts for me: 1. How to portray the reflections, and what other elements should be included.
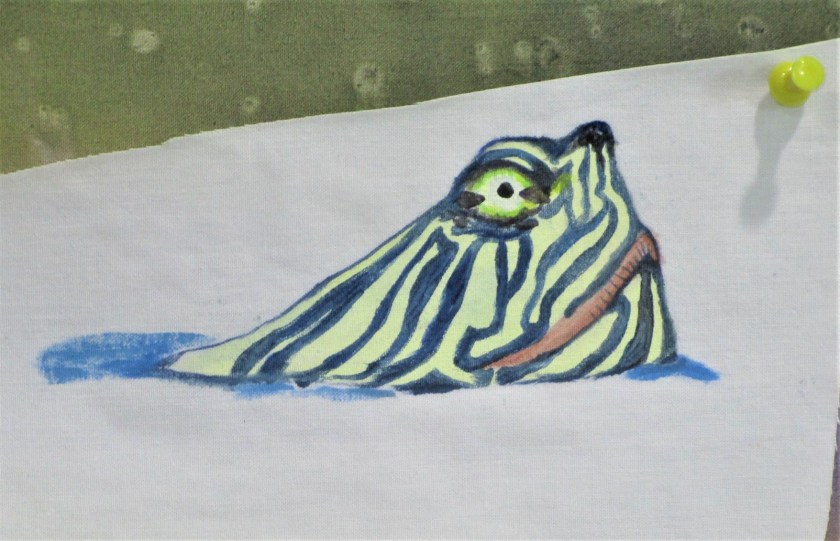
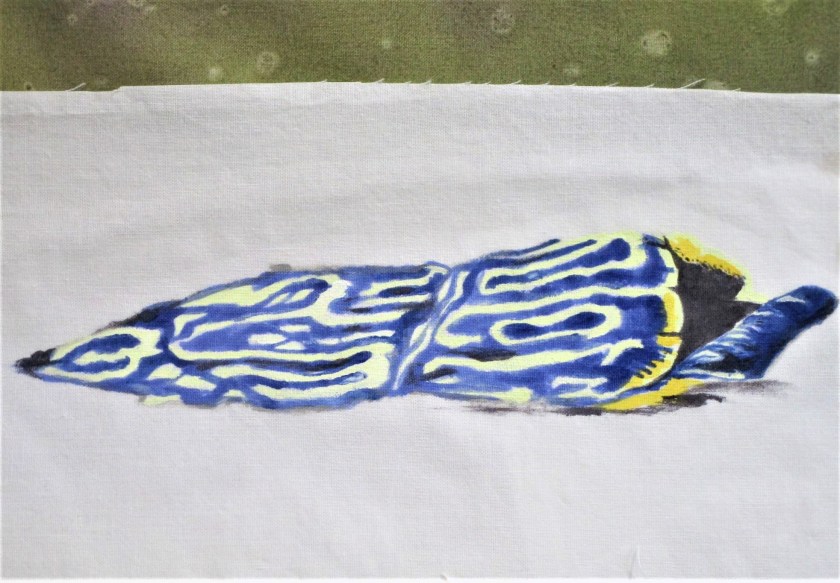
I did get the subject-turtle painted onto to white fabric, in two pieces.
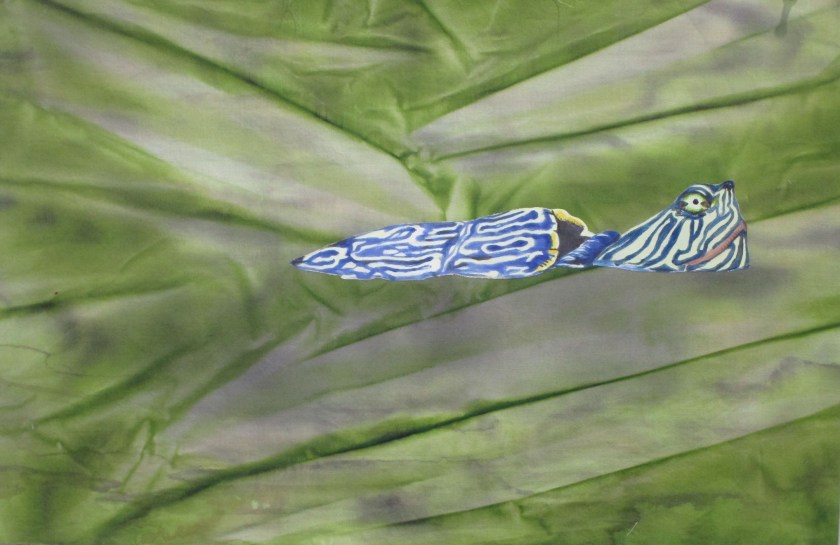
I also added more wash to the background. My goal was to achieve some depth of color and depict some of the swirls and waves in the pond. That didn’t happen but I did achieve some nice shadows. Next I fused the turtle in place with Wonder-Under.
After practicing on scraps, I decided that I have enough skill to machine quilt the reflections. The advantage of this technique is that the thread can be very light colored, even shiny, against the dark background.
For additional elements, I may go with pond grasses….
… and damselflies. Maybe a willow branch or two. But I have yet to work out the specific images and techniques.
This morning when I entered the studio, I felt momentary pleasure at seeing my recent work. Maybe it’s a sign that today I will get my mojo back.
Lately I have been so inspired by the fresh green-ness of springtime. I am eager to make fiber objects that memorialize what I see. While viewing some of Bill’s photographs from our recent camping trip at Lake Montgomery, I was amazed by his images of red-eared slider turtles. They were paddling around in a quiet inlet. The colors of the surrounding trees were reflected in the water and bent by its ripples. That water surface reminds me so much of silk moire. I would love to re-create the image in fabric.
To get started, I reach for my old stand-by medium: Jacquard Dye-Na-Flo.
I’ve mixed up a leafy color by blending yellow, green and a bit of orange. Black will be dabbed on in small quantities.
I think that I can manipulate the paint into ripples by sewing the fabric into pleats – much like a Shibori technique. Studying the photograph, I organize the pleats by direction and number to match what I see.
The fabric is wet thoroughly. I don’t want any of the fabric inside the folds to remain white. Then I sponge the green paint onto the top and bottom sides of the fabric. A little extra paint, including dabs of black, is applied to the edge of the folds. Here is my piece after the painting is finished.
The fabric will need to remain tied up until it is thoroughly dry. This technique works because the parts of the fabric that dry fastest hold the most color. The slowest drying sections will be the lightest in color.
And here is the finished, pressed cloth:
It may be difficult to tell from the photograph, but yes, this fabric is completely flat. I was pleased. There is an uncanny resemblance to the lake water in the photograph.
My next step will be to imitate the ripples by brushing on thicker textile paint. It will be interesting to see if I can do it.