Posted in knitting

Finishing the Baby Fern Sweater

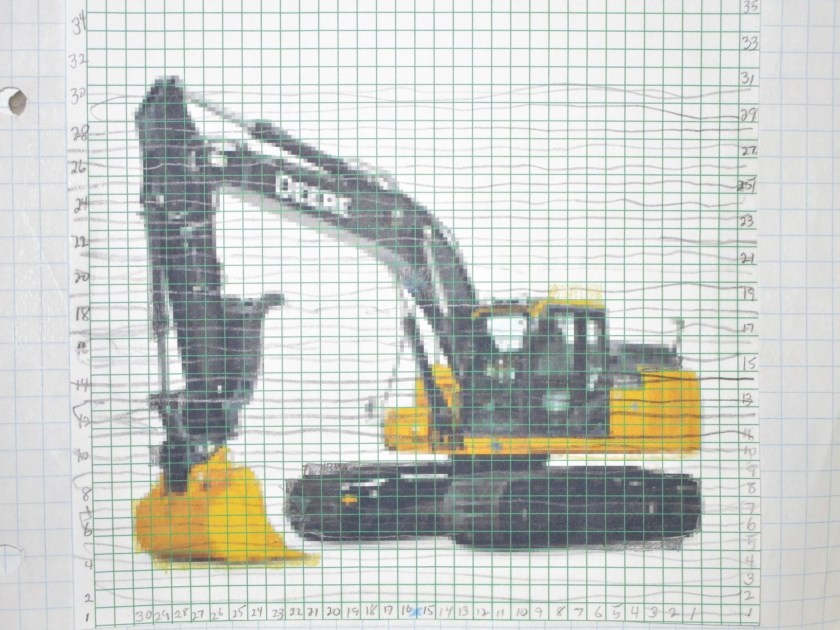
I had stopped working on this project until I could verify the baby’s arm length. My original design allowed for an 8 inch sleeve. To learn the truth I took a tape measure to the lake house. While she attempted to evade measurement by considerable wriggling, I won the battle, and determined her arms were 7 inches long. In the interests of planning for growth, I made the sleeves 7 1/2.

Finally moving on to the yoke. Remember, Elizabeth Zimmerman’s battle cry: Knit body to underarm, sleeves to underarm, unite! Here is the sweater after the yoke was worked as far as the first round of decrease.

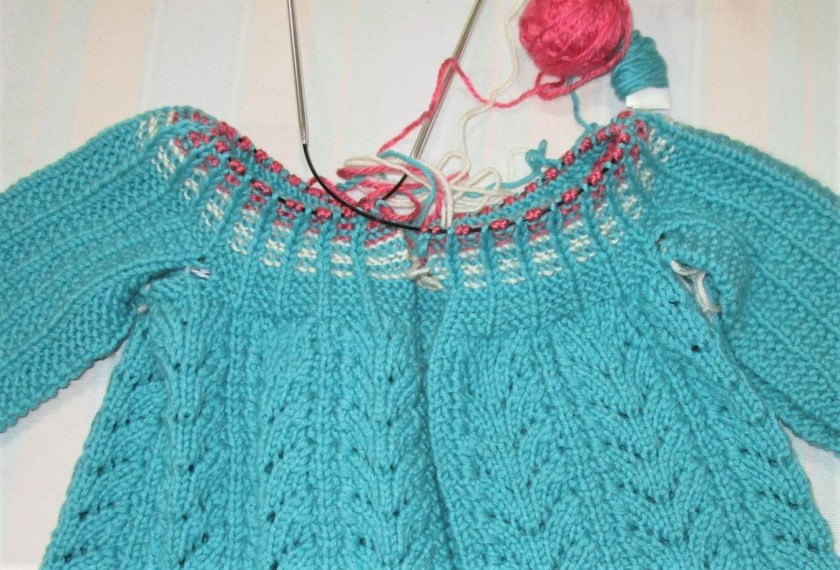
My plan to keep the stockinette stripes evenly spaced worked out well. As I began to run out of yarn I added the white and pink stripes. The blue ribs were carried through by slipping those stitches in the white and pink stripes.

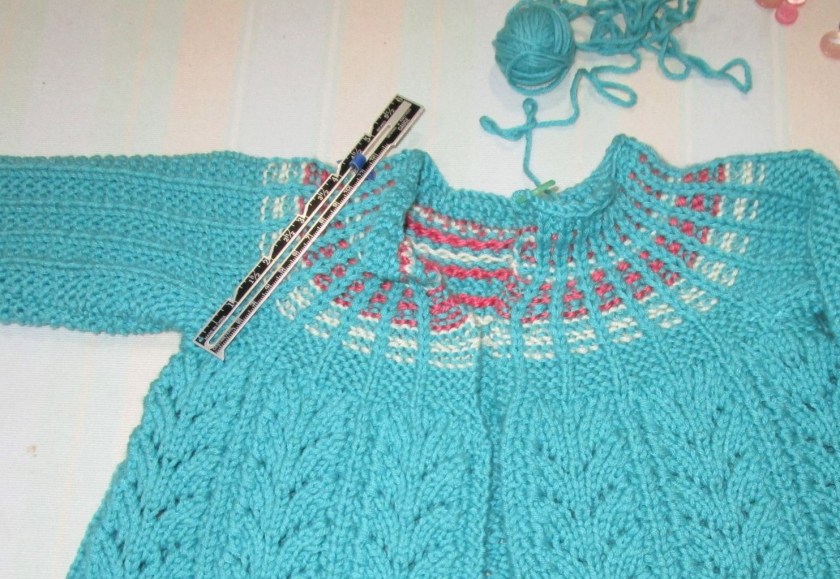
Yoke worked to 4 inches in depth. Per the EZ method, three rounds of decrease happen at 1/2hf, 3/4th and 4/4th of the yoke, or in this case, 2, 3 and 4 inches.

After sewing up the sleeve seams and grafting the underarm seams, I decided to use single crochet to finish the front edge including six button holes – 2 in the yoke, 4 in the body. Here is the sweater, knitting complete.

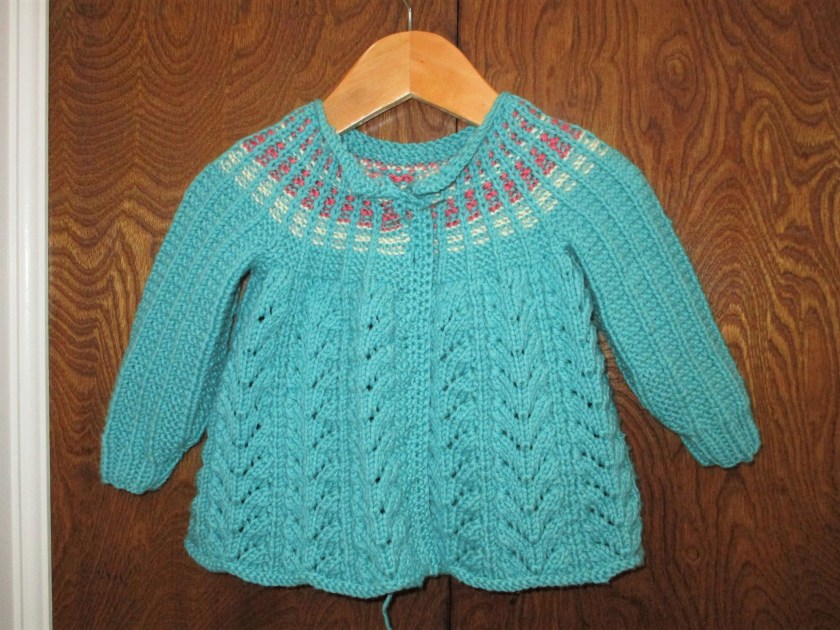
Now I’m off to my LYS to buy the buttons.

Posted in knitting

From the Design Idea folder

Dear Fellow Makers,

Over the past few days I have been engaged in work on fiber objects that take a lot of time to complete, such as painting the hydrangea leaves for a wall hanging and knitting a sweater. So I don’t have anything new to share on the blog today.

In perusing my design book, I was reminded of a project that I made in 2013. It has an interesting story which involves knitting sweaters for a little boy.

Have you ever worked hard on a hand-made gift, only to have it rejected on the spot by the recipient? I have! As a new grandmother, I was joyfully knitting sweaters annually for my grandson. One year it was an Elizabeth Zimmerman design (the modular Tomten Jacket described in The Opinionated Knitter.) After unwrapping it, said grandson simply cast it aside. (sigh.) I resolved never to let that happen again. For his birthday sweater the following year, I chose soft, brightly colored acrylic yarn and came up with a design that no little boy could resist.

Like all boys, my grandson loved trucks – BIG trucks and BIG earth-moving equipment. I decided to make a rugby style sweater with the image of a John Deere digging machine on the back. This project required a custom chart and my husband gleefully helped me to create it.

The picture was downloaded from the JD website, but the grid required a little adjustment. In knitting, the number of stitches per inch almost never matches up with the number of rows per inch. To avoid compressing the image, the squares of the grid need to be fatter than they are tall. I gave husband my gauge (stitches per inch and rows per inch.) He calculated the ratio and used spreadsheet software to adjust the grid to match. From this chart it was relatively simple to knit using a combination of stranded and intarsia techniques.

Upon receiving his gift the following birthday, my grandson jumped for joy.

“It’s an excavator, it’s an excavator!!”

This sweater was happily worn for several years in all kinds of weather.

One final note: If you try this technique, you may find it helpful to outline the details of the image in black yarn. This will help the image come together.

Posted in knitting

July Knitting

The wild storm that blew through here Sunday night left behind the most glorious, cool and dry air. With early morning temperatures in the upper 60’s, it’s just fine for knitting en plein aire. What better project for summer knitting than baby sweaters?

The knitting you see in the photo is the body of a sweater for Baby L. By the time real sweater weather arrives, she will be one year old. So I have sized this sweater in the 12-18 month range. This design is a yoked and button cardigan with a very full body slightly gathered at the chest. Here is my schematic.

I feel excitement at my future of making many knitted garments for a little girl. So many design elements to choose from – the head spins. I would call this one a vintage style, which is built upon a 12-stitch lace pattern sourced from Barbara Abbey’s The Complete Book of Knitting (1971 by Viking Press.) I will use Elizabeth Zimmerman’s percentage system and instructions for the Fair Isle yoke sweater found in The Opinionated Knitter (Schoolhouse Press) to fashion the yoke. The sweater is constructed from the hem up. As Elizabeth writes, “Body to underarm, sleeves to underarm, UNITE, which … sounds rather like a rallying call.”

Below please note the instructions from Abbey’s book and accompanying chart for the baby fern lace pattern: FYI, my gauge in pattern is 20 stitches = 4 in.

Now what to do with the sleeves? I decided that they would be bloused sleeves, not tapered, so as to match the body. In studying the lace pattern, I noticed that the lace panels are separated by a 3-stitch mini pattern of garter – stockinette – garter. If I expand this slightly and add two more garter stitches between the stockinette, I will have a 7 stitch pattern that works well with the lace. Here is how it looks:

Knitted outdoors this morning, enjoying sixty-seven degree air.

So that’s all the major decisions made. I will use the same 7-stitch pattern on the yoke. I only have two balls of this Berroco “Comfort” yarn. If I run low of yarn at the yoke, I will throw in some contrasting color rows. Oh, this is going to be fun!