Posted in hand embroidery, painting, quilting

Return to Lake Montgomery

It’s been a while since I shared the turtle in the pond fiber object. As a reminder, it was inspired by a photo taken by Bill on a recent camping trip at Lake Montgomery.

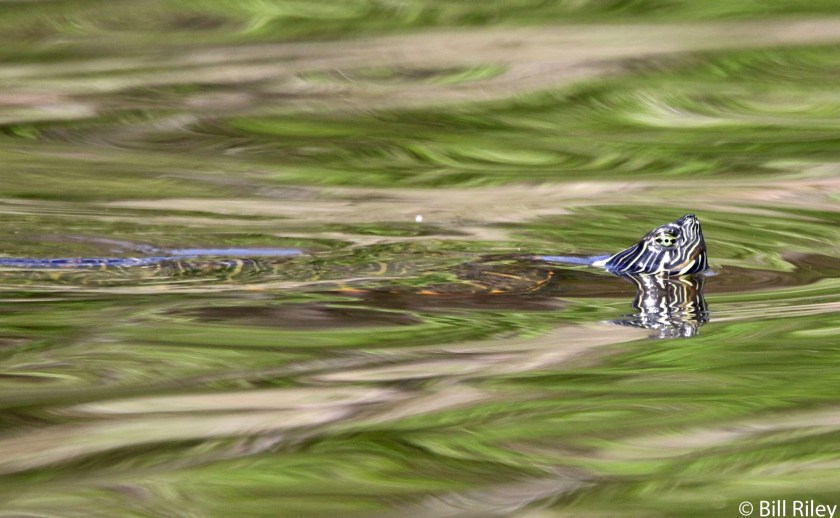
I loved the light, the colors and the texture of this image. I knew right away that I want to create my own version in fabric.

Here is a recap of how I processed this inspiration. First of all, I used fabric paint and the Shibori technique to render the background on cotton fabric.

The piece is about 15 by 20 inches.

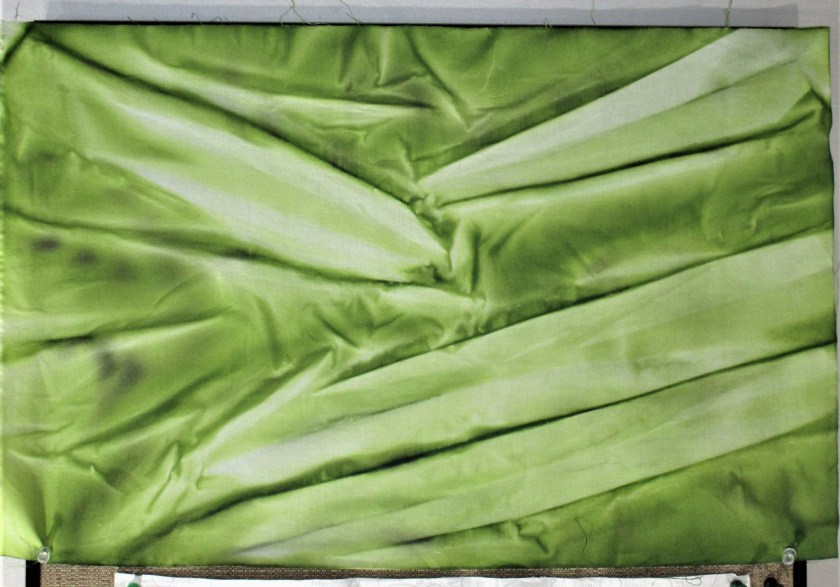
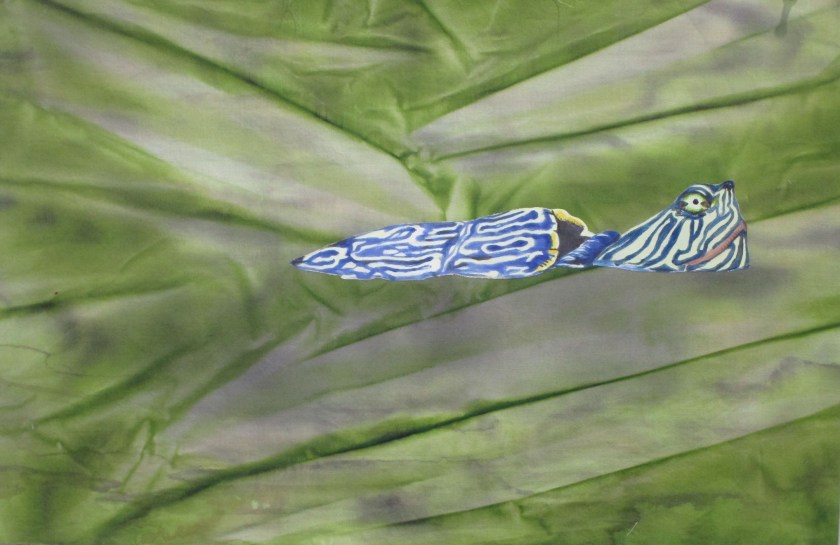
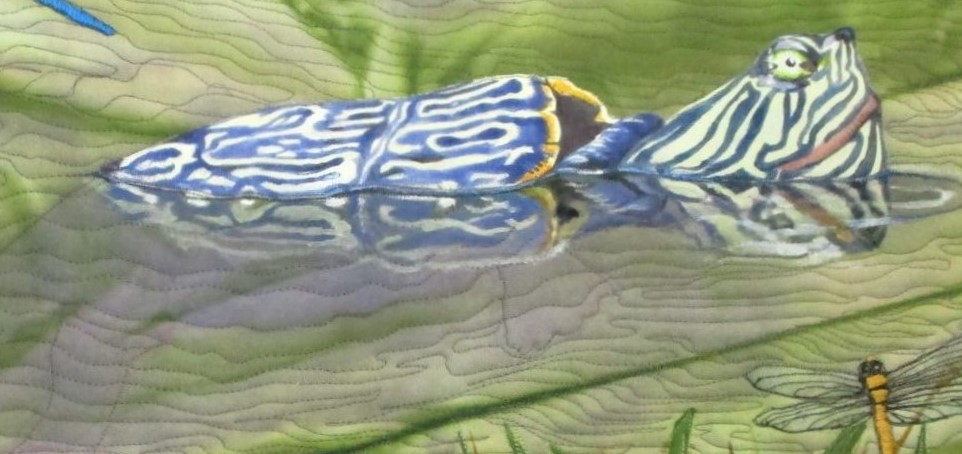
After the paint dried, I added another layer to render some shadows. Next I painted the two halves of the turtle onto white fabric…….

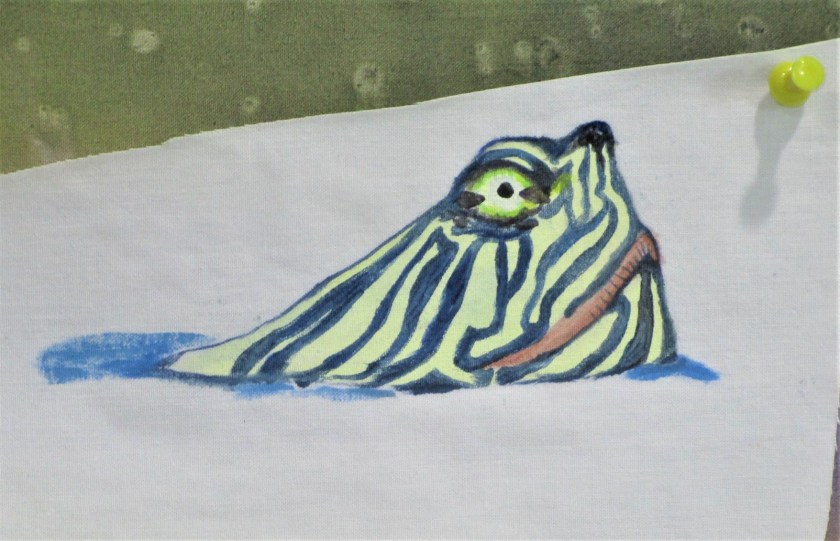
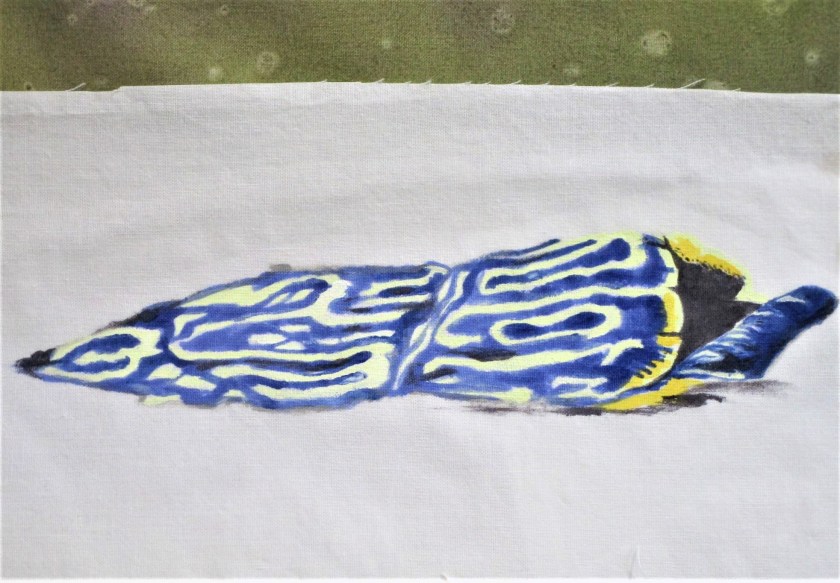
……………..… and appliqued them to the background using fusable interfacing.

This is how things stood while I pondered what other elements would enhance the image.

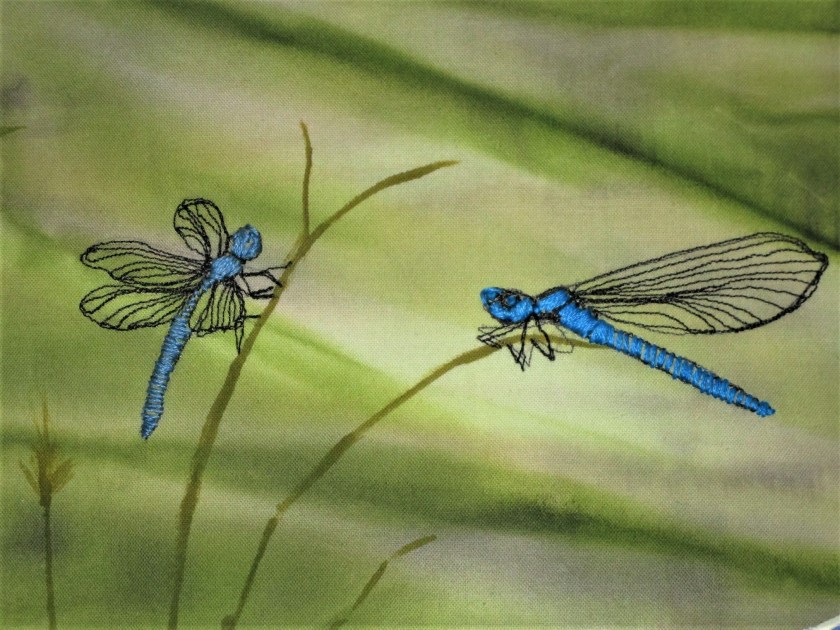
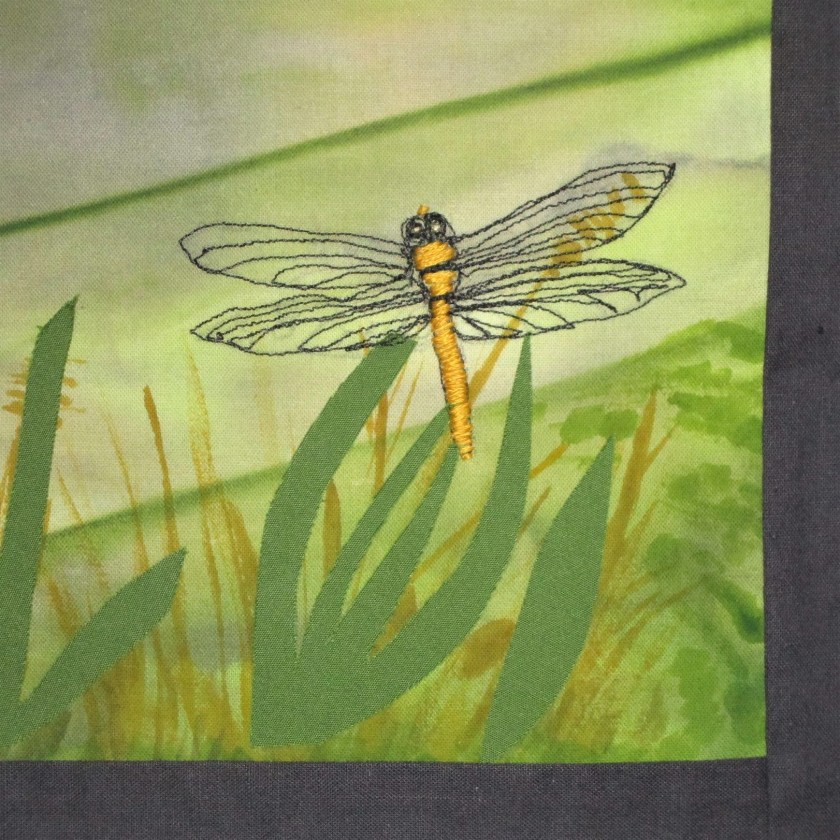
I decided on a few damselflies. More images by Bill were consulted. I picked three beauties, hand embroidered the bodies with floss and machine stitched the wings.

You can see the water plants I added in the foreground using applique and paint.

I sewed on a black border and then paused. This week I finally got around to quilting. My intent was to make the stitch lines look like pond ripples.

How did I do? Are they watery enough?

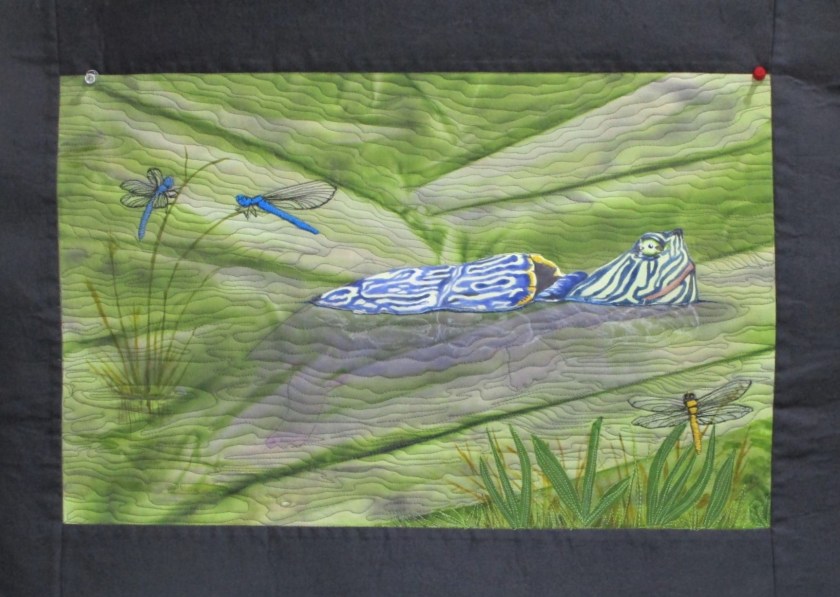
It took a lot of pondering and a dose of courage to add the turtle’s reflection. The only real option was to hand paint it using opaque Setacolor. So I did.

And here is the finished project.

Springtime at Lake Montgomery
Detail of reflection

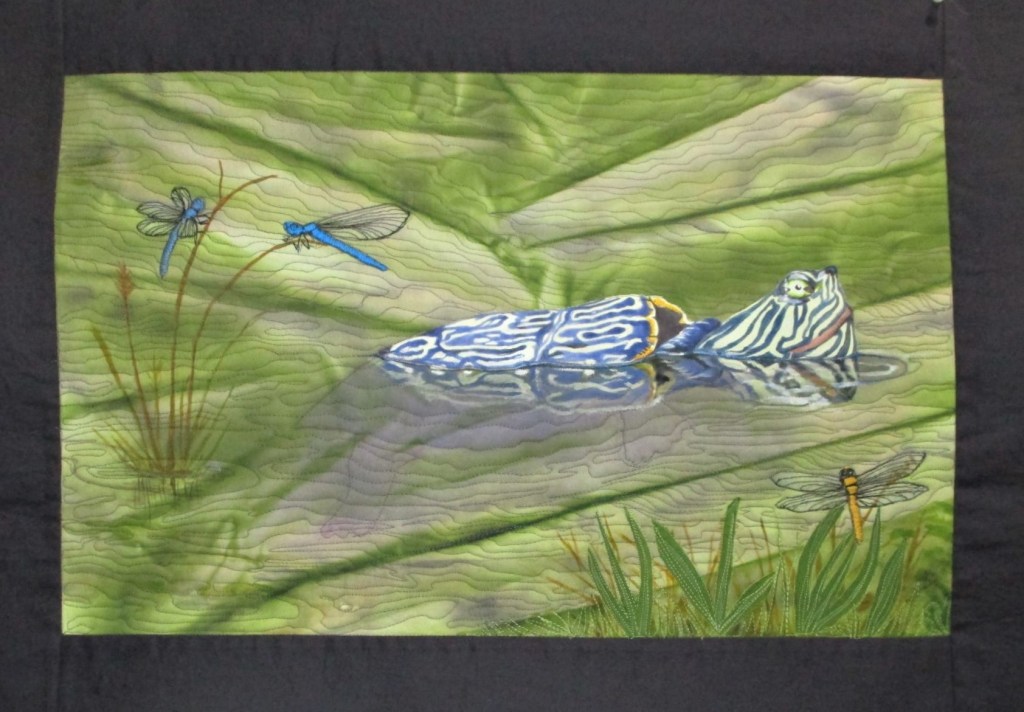
This fiber object is now a wonderful reminder of a very special camping trip.

Posted in sewing

Stash-busting: Open Wide Zip Pouch

Okay, so I’m making this zip pouch because Chris at Chrisknits can’t stop making them! They are just so darn quick and useful. You can check out her blog here:

https://wordpress.com/read/feeds/32776

Do I have what I need? Let’s see. The project requires about 1/4 yard of fabric each for the outer shell and lining as well as a zipper. This one is about ten inches long.

I also required the better part of a cup of coffee to get started.

The gold cotton damask on the left is left over from a bedspread I made about 15 years ago. This scrap has been used in an experiment with Dye-Na-Flow fabric paint. I applied the paint to the back side of the fabric, to see if the color would seep through the woven vines but not through the shiny gold parts. It sort of did that. Now I have a use for it.

I also have this scrap, printed with shiny gold dillweed stems. I’ll use it for the bottom section of the bag.

Instructions for this project come courtesy of Anna Graham, at Noodle-head. com. You can get the details here:

open wide zippered pouch: DIY tutorial

My first attempt took about an hour or so to complete, with only one rip-it-out moment.

This is very girly looking, with the pairing of flowery and metallic prints.

Here’s a peek at the inside. It does indeed open wide.

This will be a nice item for gift-giving. I think I will make the next one with a wrist strap.