For the second week of the Stay at Home Round Robin challenge, Chris asked us to make piano keys.
NOPE – THIS IS INCORRECT
In the world of quilting a piano keys border is one with narrow rectangles in assorted colors sewn together. Oh, I get it, this is like string piecing!
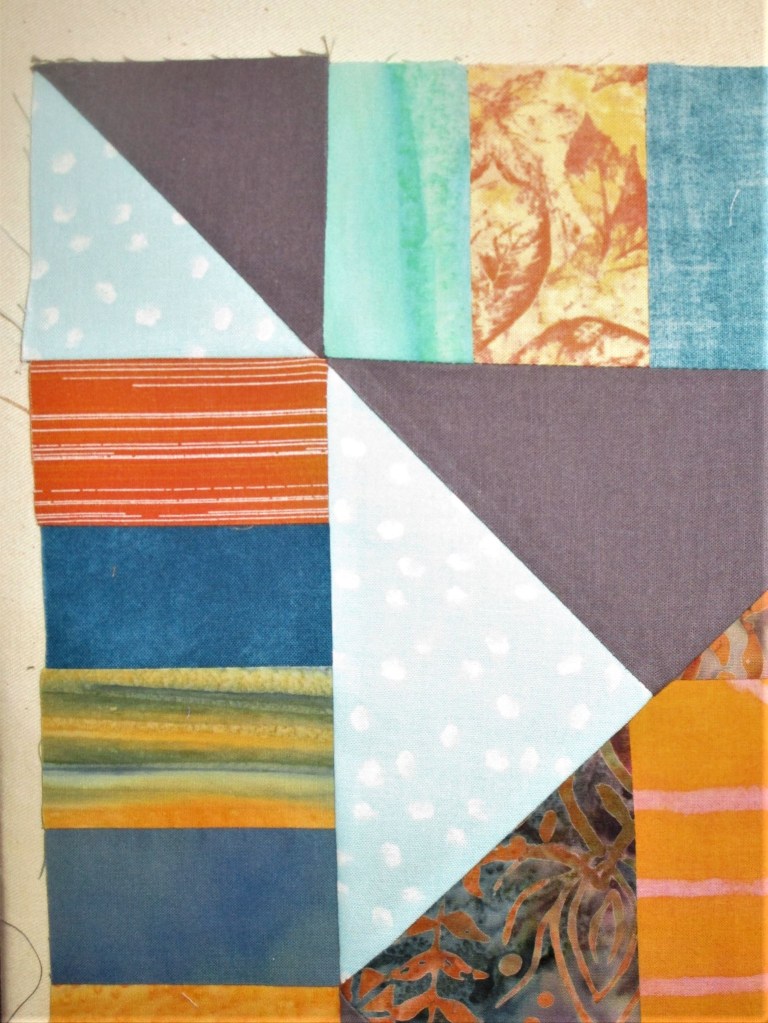
After looking at the other participant’s interpretations, I came back to my own center panel. I decided that my main objective for this round is to continue the outward thrust of the corner triangles. Using the same fabrics, I made half square triangles to use as corner posts.
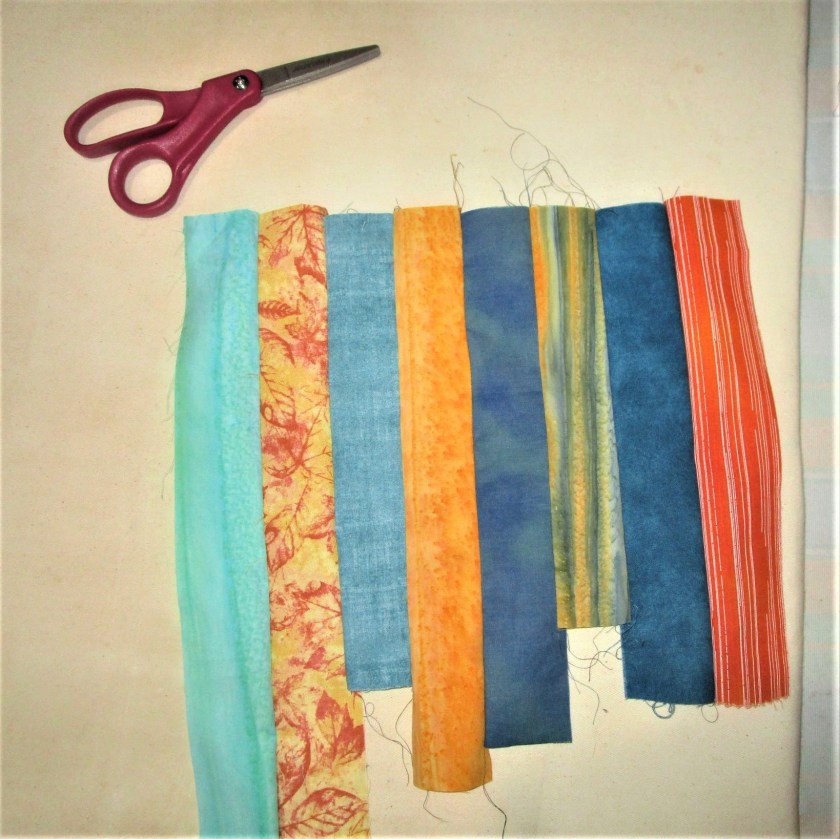
Then I got out my orange and blue-green fabric scraps, cut them into two inch wide strips and sewed the strips together on the long edge. I alternated the two hues and arranged them from light to dark in shade.
These were cut cross-wise into three inch strips, which I then attached to my panel, adding the corner posts as I went along.
Half Way Done
Showing a corner with color continuation into the border.
ALL DONE!!
This post is linked with the group Stay At Home Round Robin. If you would like to see the work of other members….
While we were in Wisconsin last month, we visited the Northside Farmers Market in Madison. My daughter was eager for me to meet the local yarn vendor who had a stall there. Yorkshire Rose Farm offers lamb and chicken products, and at this market, wool products including yarn. The proprietors, as suggested by the name, came over from England and have been farming in Wisconsin since 2008.
To my chagrin, I failed to get any photos of the stall or the couple, due to my need to corral the toddler. But I discovered that the farm had a blog, so you can read about it here:
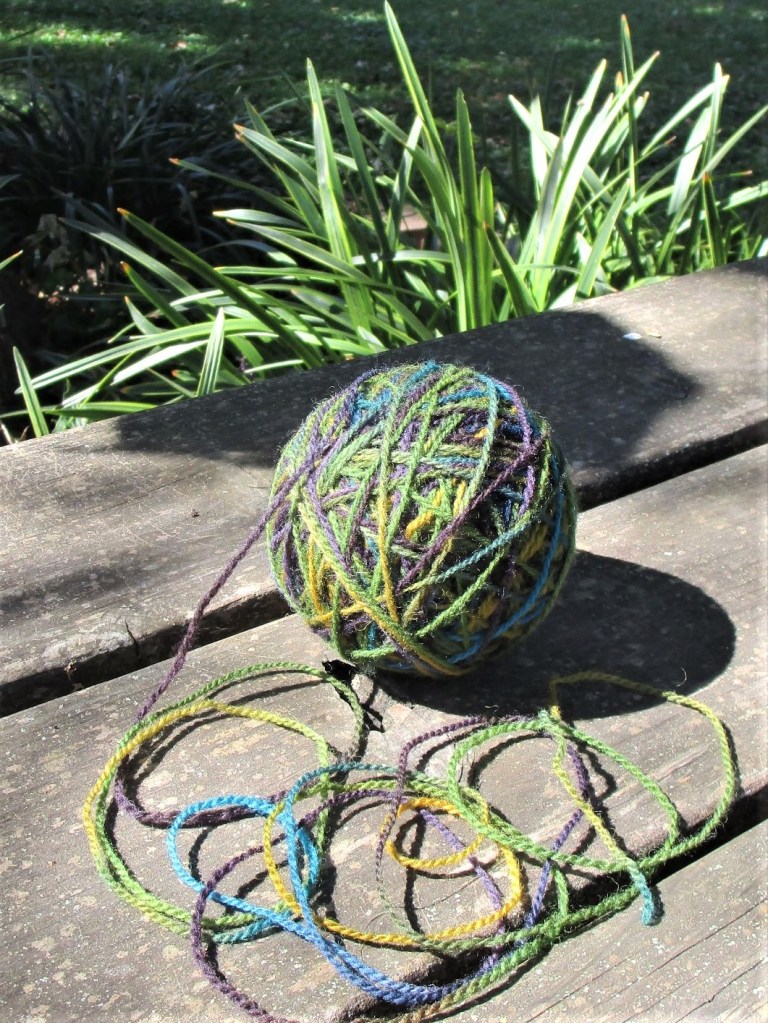
The yarn was displayed in groups by weight. I focused on the fingering weight. It was made from the wool of the Tunis breed. As expected in a natural yarn, it was a bit scratchy. I chose the colorway Peacock and Turquoise. It has short color repeats.
It seems to be a 2-ply yarn, in my mind very comparable to Knitpicks Palette. I found it combined beautifully with a grass-colored fingering twist yarn I had in my stash. Since the Tunis yarn has no nylon reinforcement, I decided not to use it to knit socks. Instead it will be made into a hat and/or gloves.
Here are the two yarns knitted in stripes.
And here they are in a stranded pattern called Rose Window.
Another option would be a mosaic stitch.
So, what do you think of the two yarns together? And should I work them in stripes or Fair Isle pattern?
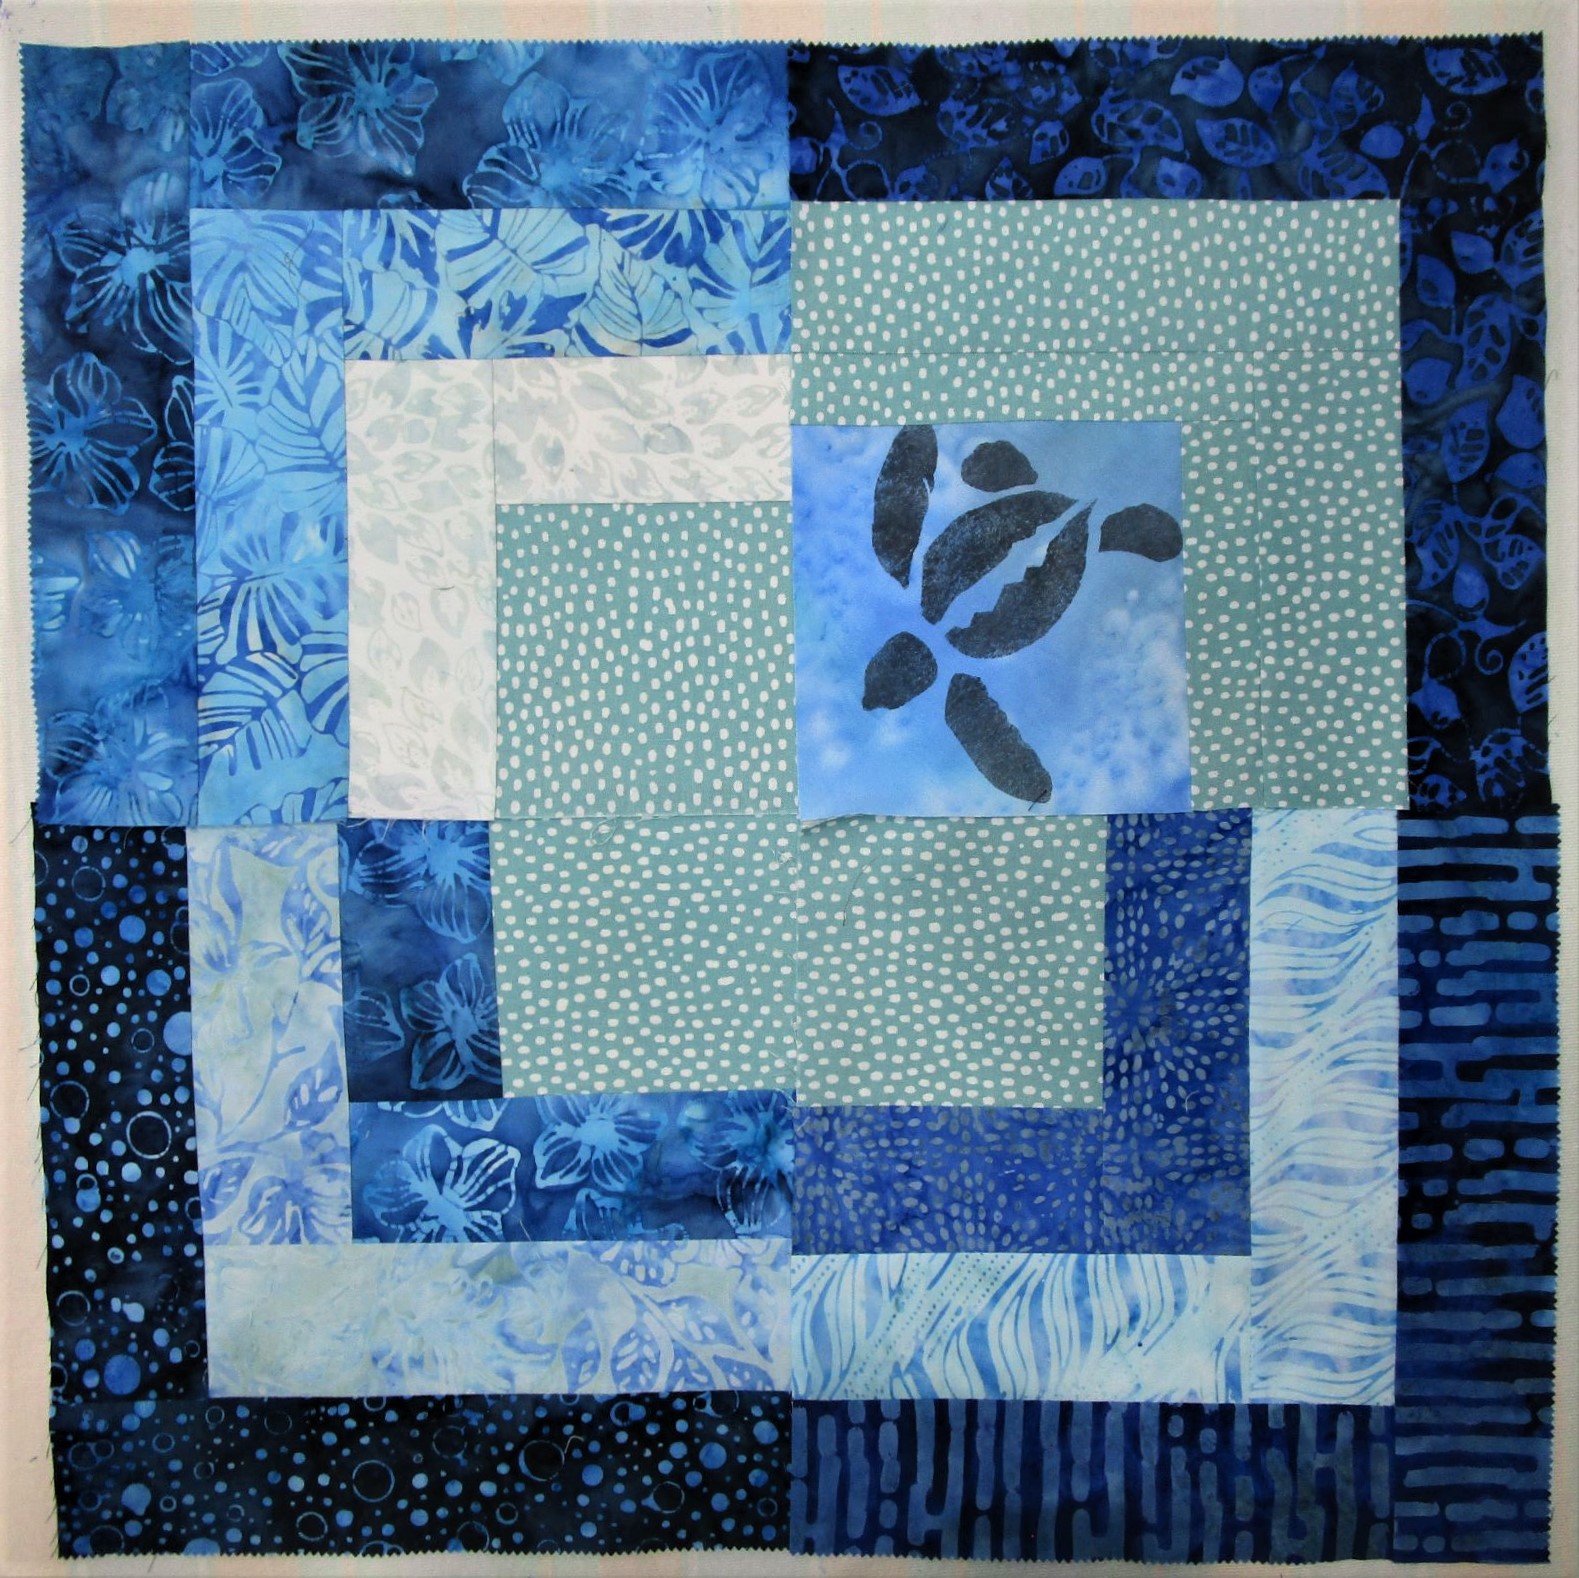
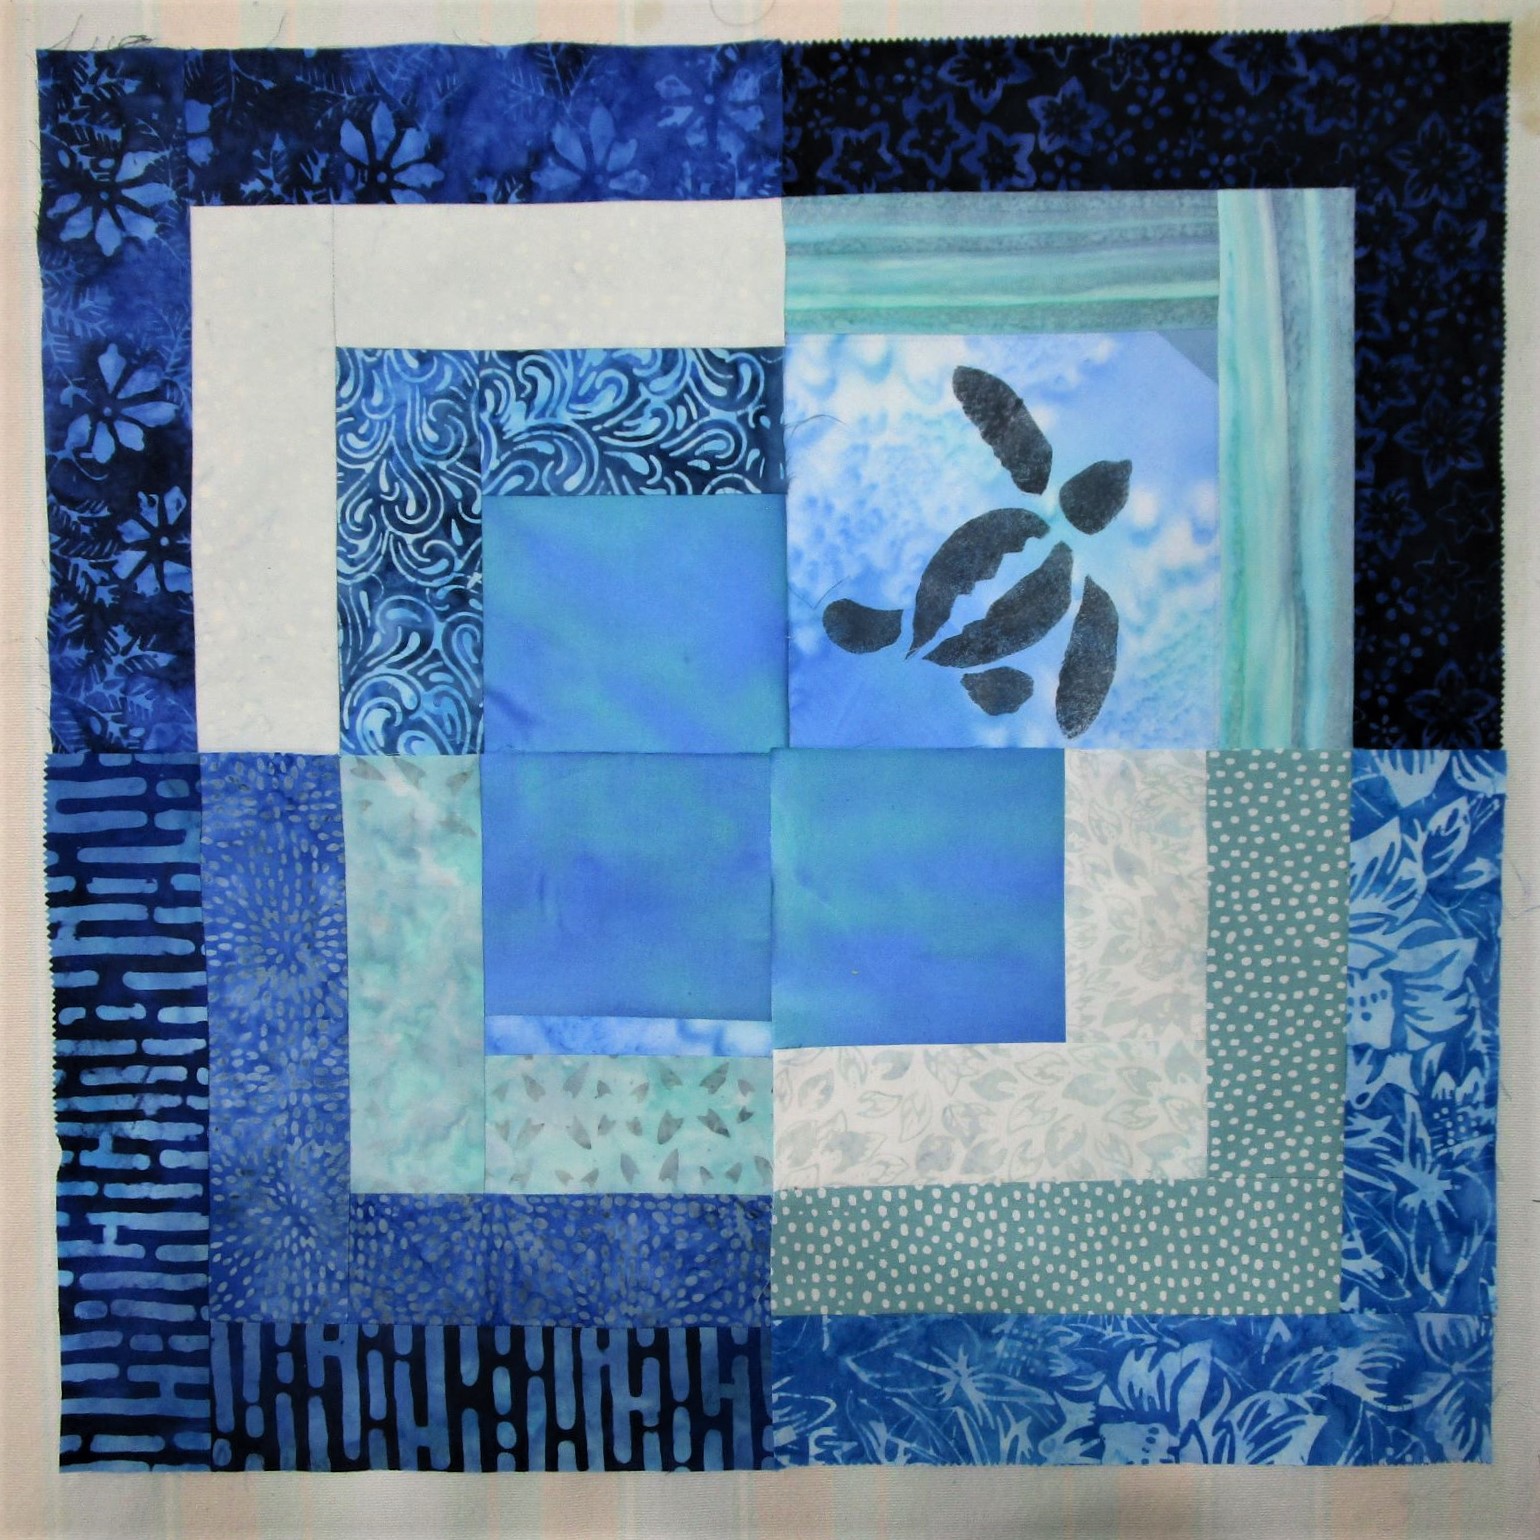
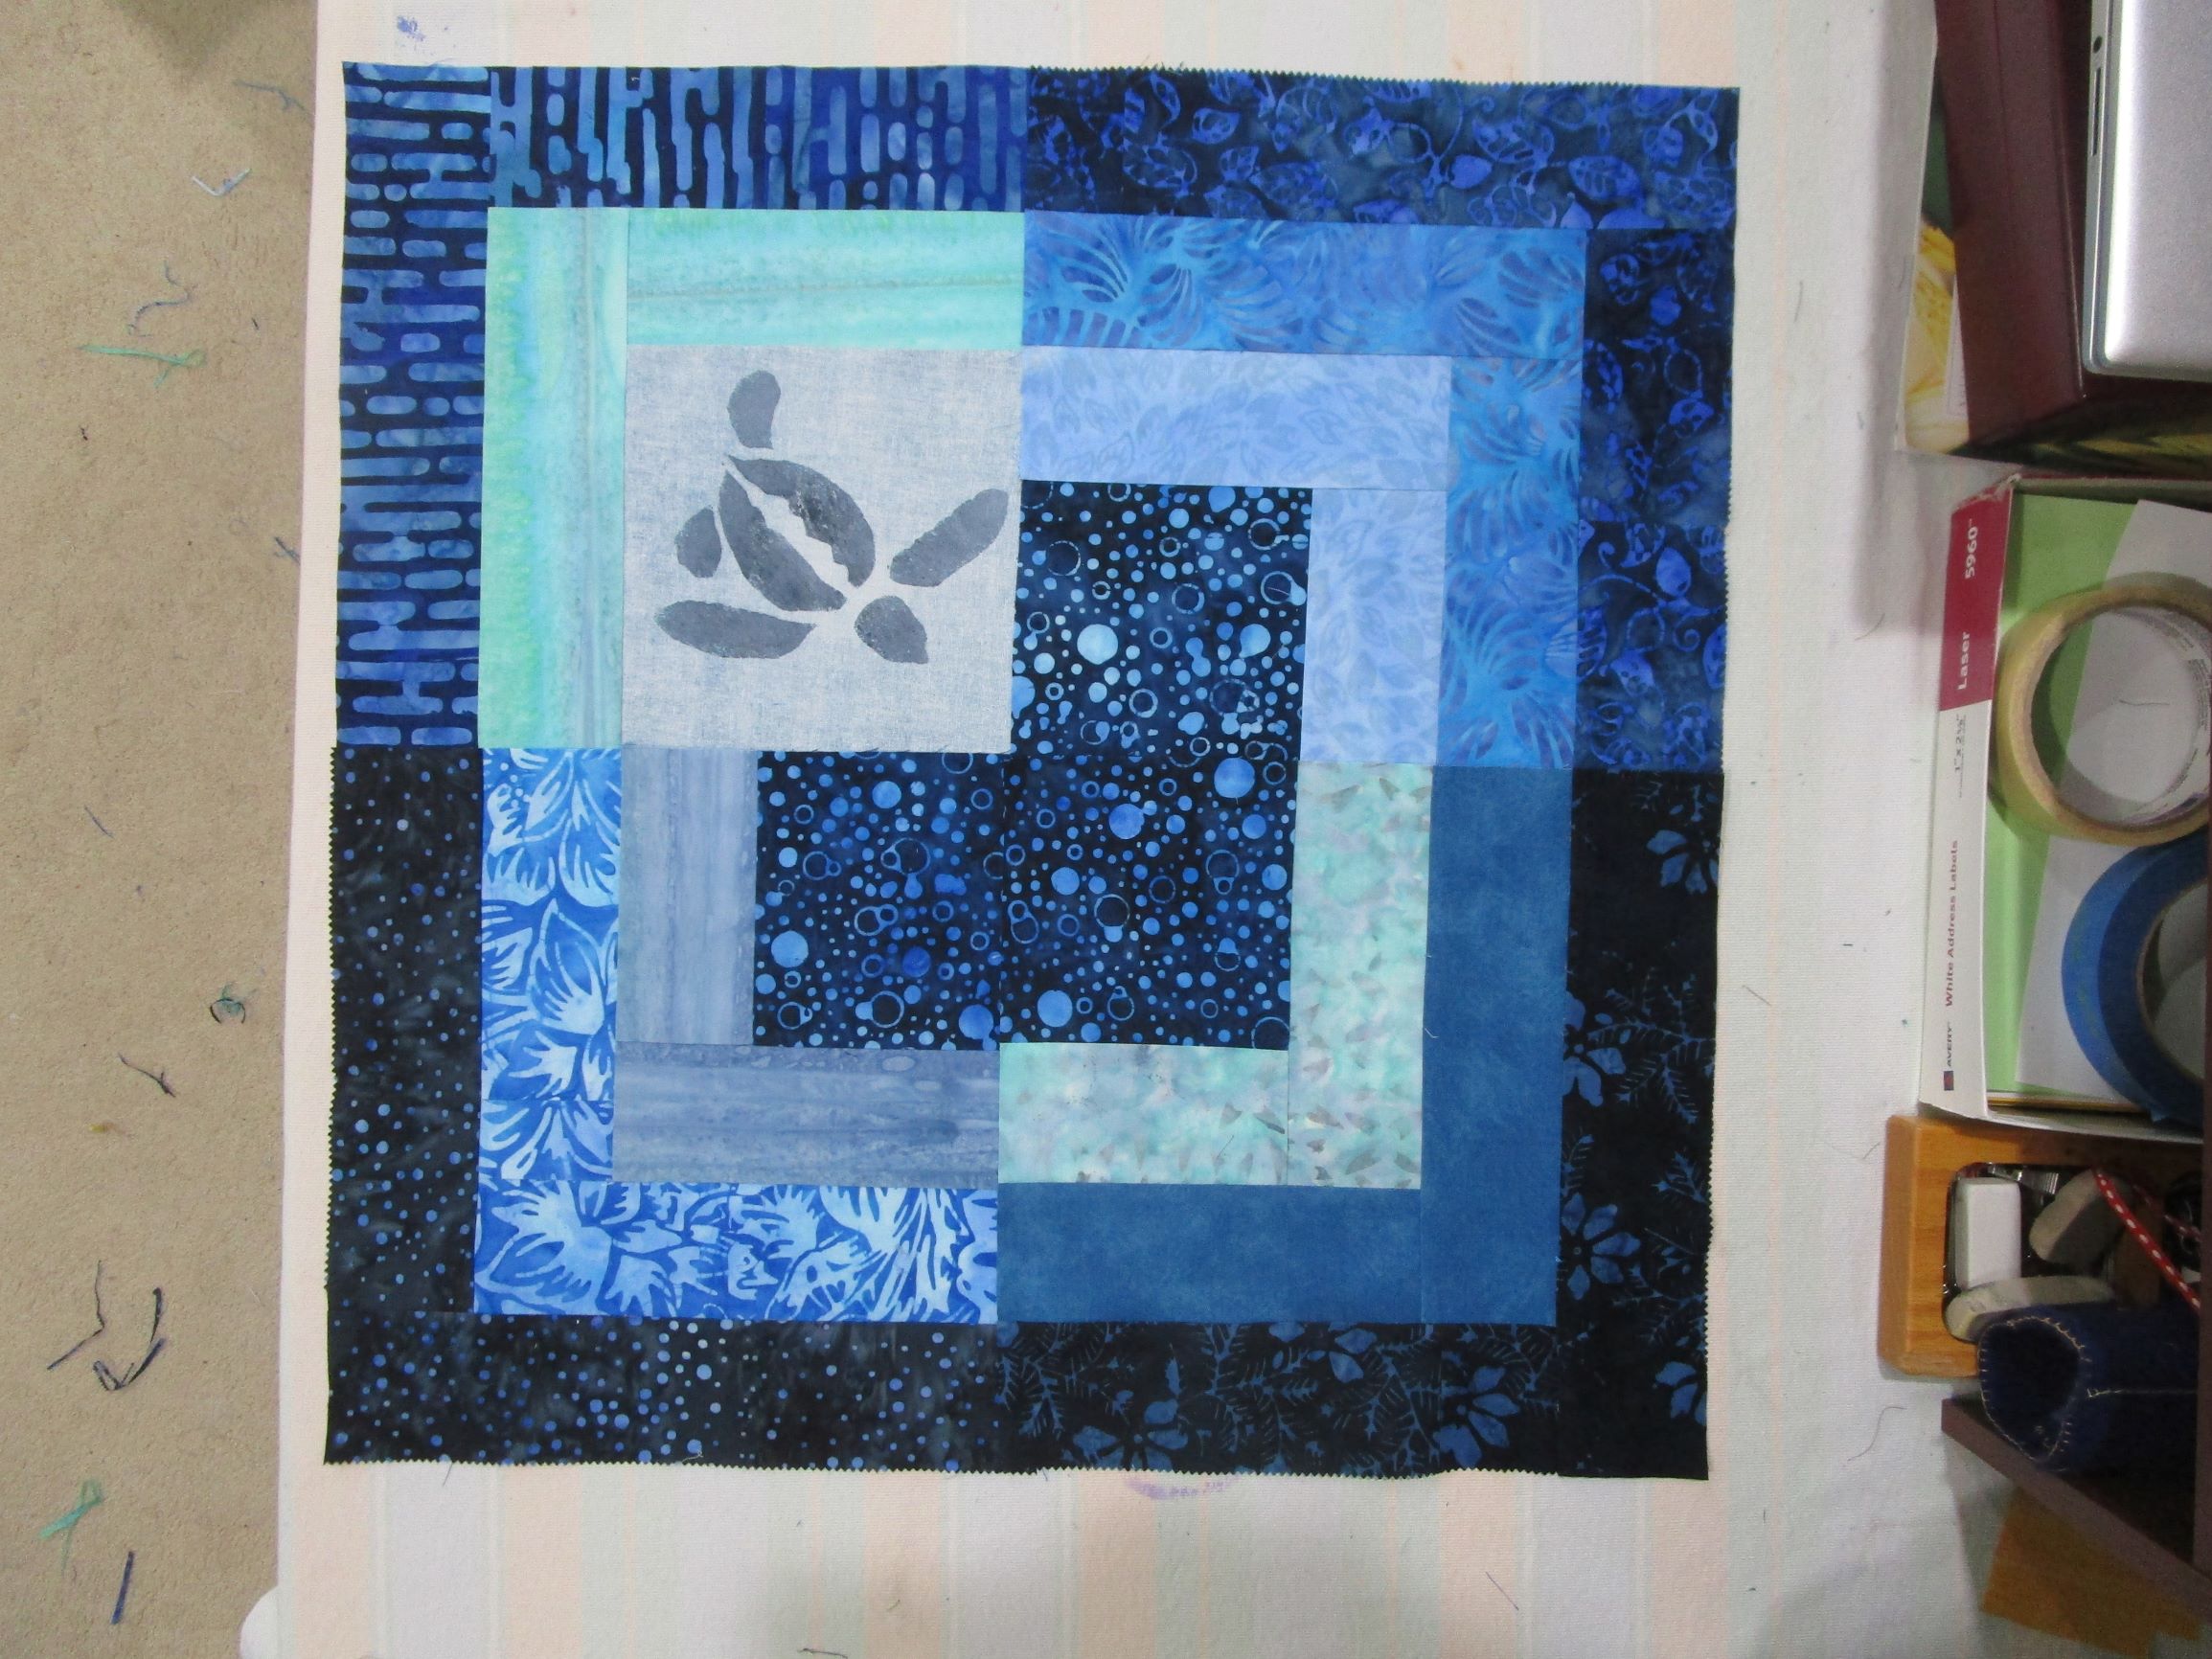
Today I finished assembling all of the log cabin blocks for Under the Sea quilt. While arranging the blocks in groups, I quickly realized that my original plan did not serve the overall design. So I switched to a layout in which each group of four blocks is rotated with the center squares touching. Now I have ten groups surrounding a central panel with the large sea turtle in the middle. Here is an overhead view.
This image excludes the top three groups.I couldn’t fit it all into the photo.
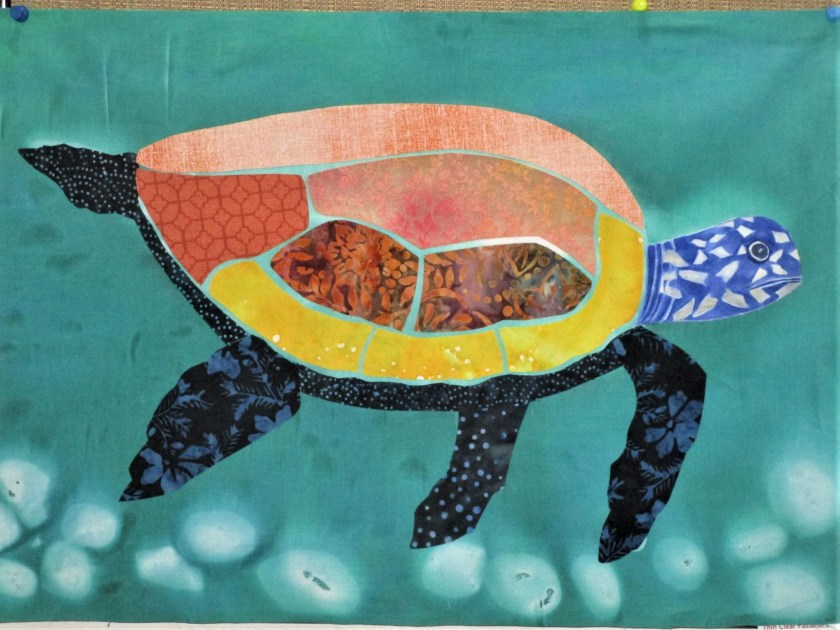
I’ve had so much fun coming up with images of underwater creatures. Ultimately, I decided to make my focus life found on a coral reef. Here is the center panel with some tropical fish, big and baby sea turtles, and an assemblage of sea horses…..
Next to and surrounding the panel can be found some jelly fish
The stinging tentacles will be added after the block is assembled.
… a living sand dollar (did you know that this animal is a type of sea urchin?)…..
….. a group of starfish, more tropical fish, and four additional baby turtles swimming across four different sections of the quilt.
Working with the batik pre-cut strips was such a pleasure. First of all, hey, I didn’t have to cut them. Secondly, the front and back of the fabric is the same, so you never end up with the wrong side on front. And finally, the fabric was so tightly woven that no twist or stretch happened while under the needle. This made the boring parts of piecing go quickly. I could spend time designing and painting my little sea creatures.
Next up will be sewing the blocks together, choosing a backing fabric and the actual quilting. There is a long way to go before this project can be put to bed. (Ha!)
Today’s weather was quite remarkable, for August. Upon rising, the air was 66 degrees and winds were calm. It stayed so cool all day long that the A/C didn’t even turn on until early evening. I enjoyed the backyard for an hour or so and did a modest amount of gardening. It was almost 11 before I resumed work on my current project.
Appliqueing the turtle was really fun. After some fiddling about with the shapes and color choices, my center medallion looks like this:
Combination of batiks and hand-painted fabrics.
More dimension and texture will be added when I stitch it. I painted the turtle’s head Very Slowly, using Jacquard Textile paint mixed with floating medium. I rather like the primitive-like quality resulting from the bright colors and blocky shapes. This piece is roughly 20″ by 14 and 1/2″. To make it into a square, I made a strip with my baby turtle stenciled blocks and added it at the top.
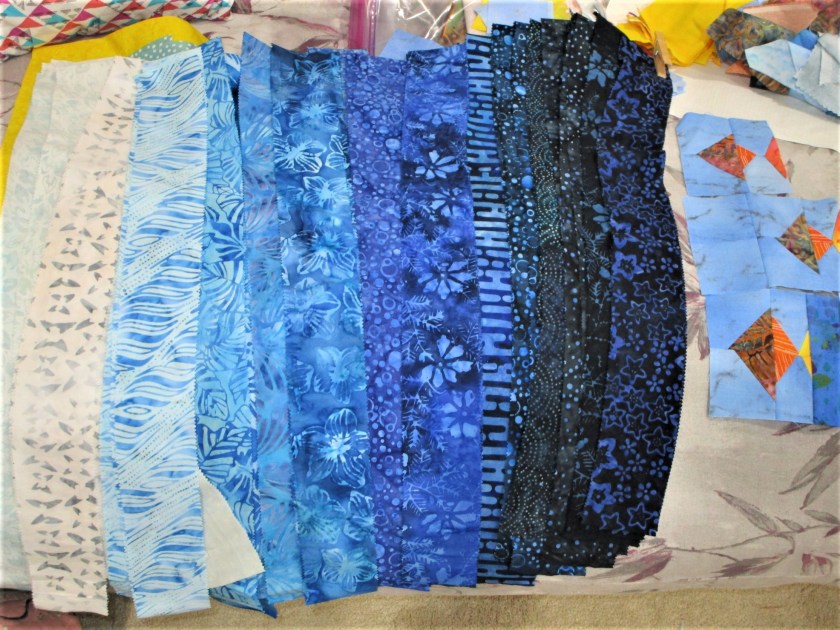
I like what I see so far. But now, the hard part. I will need to build a quilt around it. I’m thinking about log cabin blocks, mostly because I purchased a package of pre-cut 2 and 1/2 inch strips. Here they are:
These are all so pretty. And a nice range of tones.
You can see also see a few fishy blocks that I made months ago using the stitch n flip technique. These could become log cabin centers……..or I could group them into a block of their own. That would make a school of fish.
Okay, quilting bloggers, this is an invitation to weigh in on this design. Any thoughts?
I came to learn quilting almost as an afterthought. As I started to get ideas for making fiber objects, I became aware that I lacked the skills I needed to realize them. Thus started my quilting education. There are some things about quilting I like – choosing fabrics, developing my design, adding surface details and actually doing the quilting. The things I dislike are cutting many identical pieces of fabric, squaring up blocks and especially matching corners.
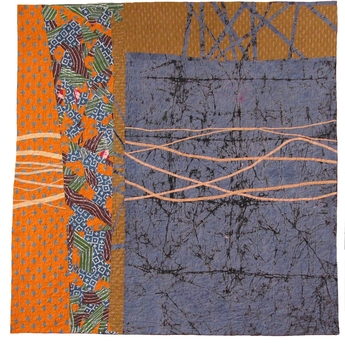
So naturally I am drawn to improvisational piecing. Joe Cunningham (aka Joe the Quilter) and his process were a revelation to me. He offers the promise of freedom. Freedom from all the dull parts of quilting, which leaves more time for fun. The quilt featured at the top of my post is one of his. His website can be found here:
Joe Cunningham has been a professional quilter since 1979. His philosophy is unique. He doesn’t use patterns. He designs out of his head, adjusting things as he goes along. He has no specific end in mind. He explains that as the quilt approaches the finish, he finds out what it will look like. He practices randomness, chance and serendipity. To this end, his method relies on chance from the first cut.
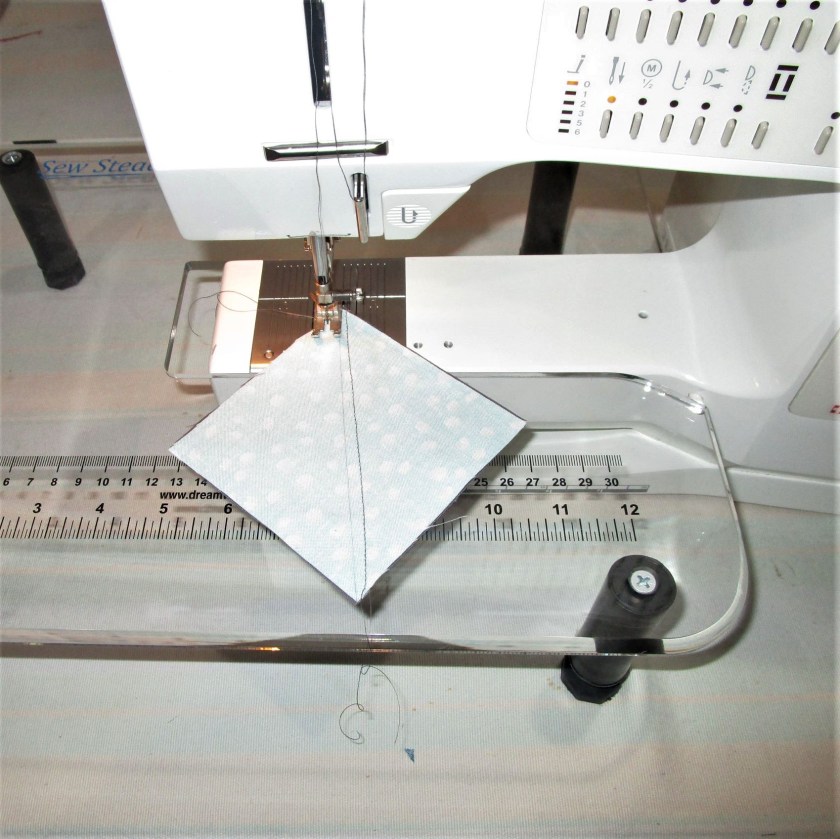
As an example, the class I took with Joe featured a quilt called “Rock the Block.” Here is how to make it:
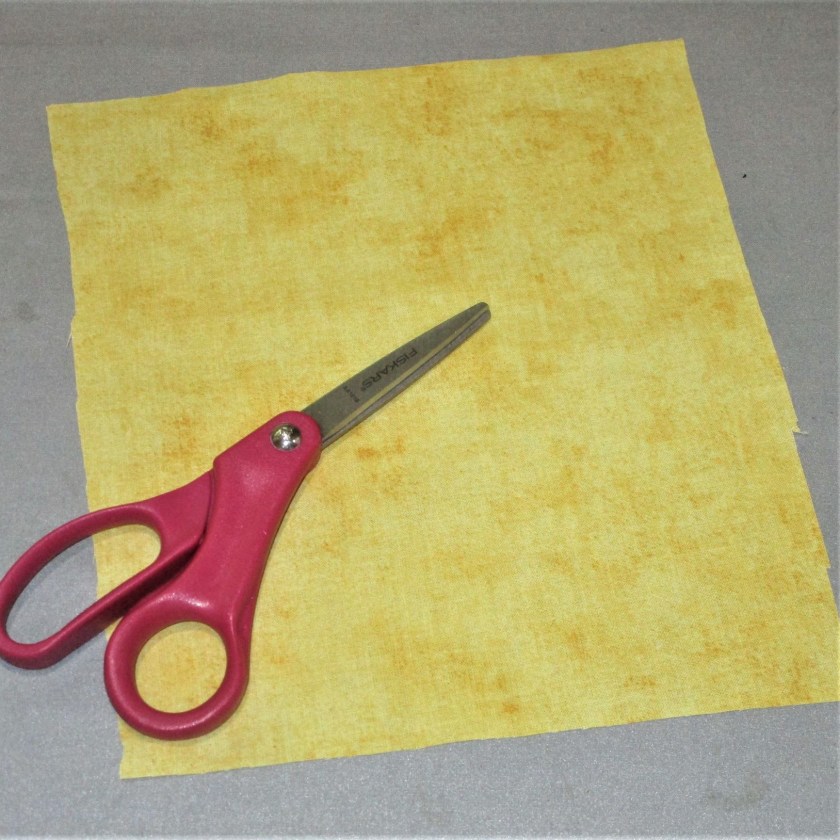
Step 1: Choose three fabrics. Include one big print. The other two can be prints that don’t necessarily go with the big print. Also choose a solid color that you will cut into narrow strips, which Joe called “sticks.”
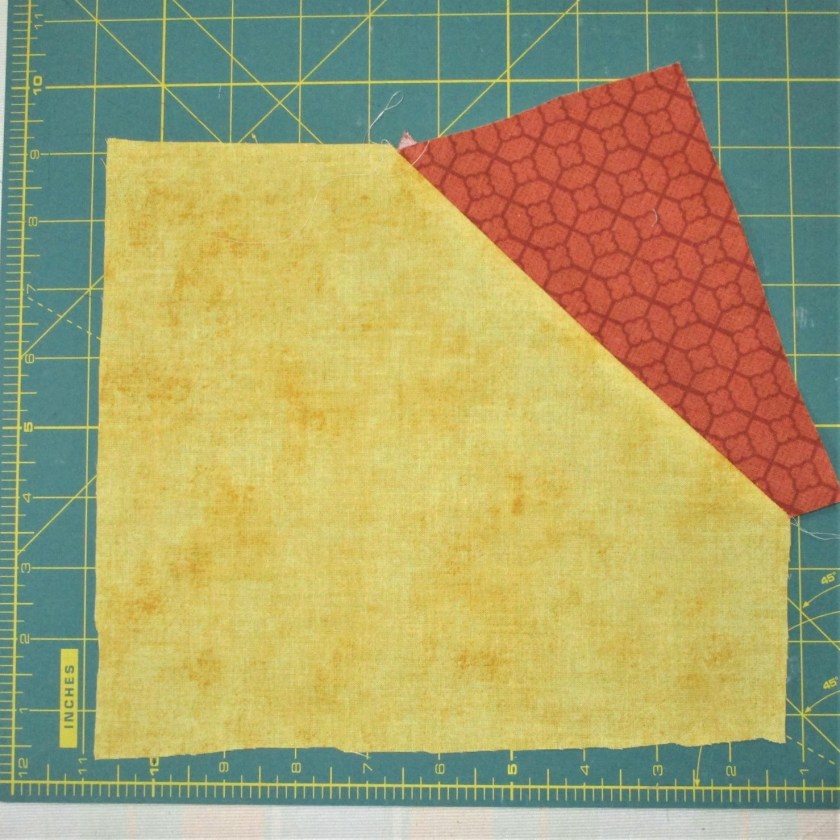
Step 2. Cut out a square. It doesn’t need to be perfect, but does need to be bigger than 7 inches.
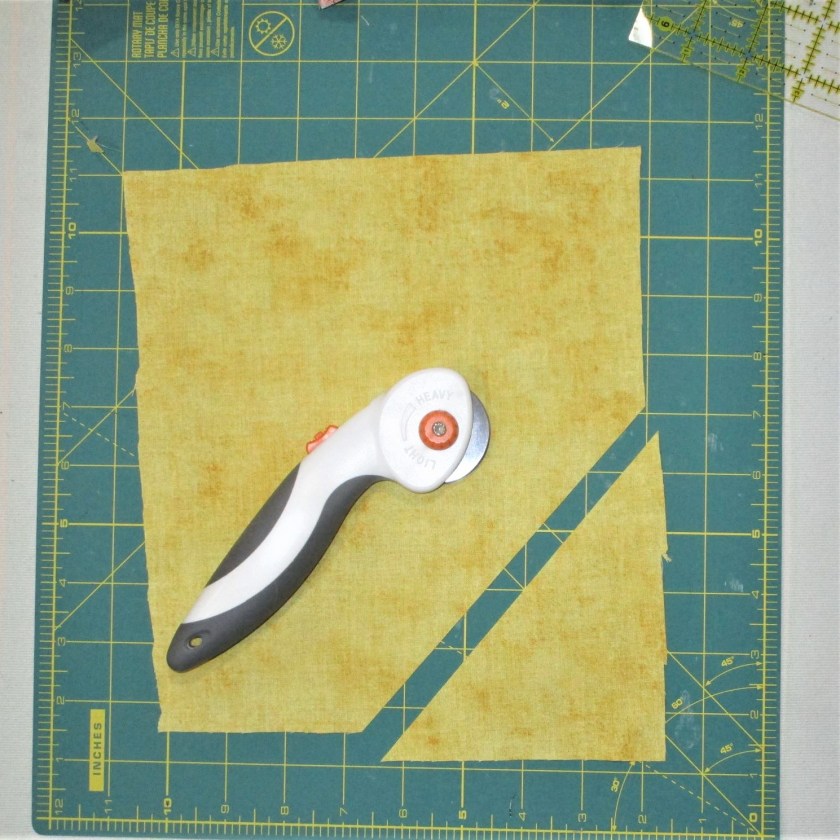
Step 3. Cut off a corner.
Step 4: Cut out a triangle from one of the other fabrics. Sew it to the square at the cut edge.
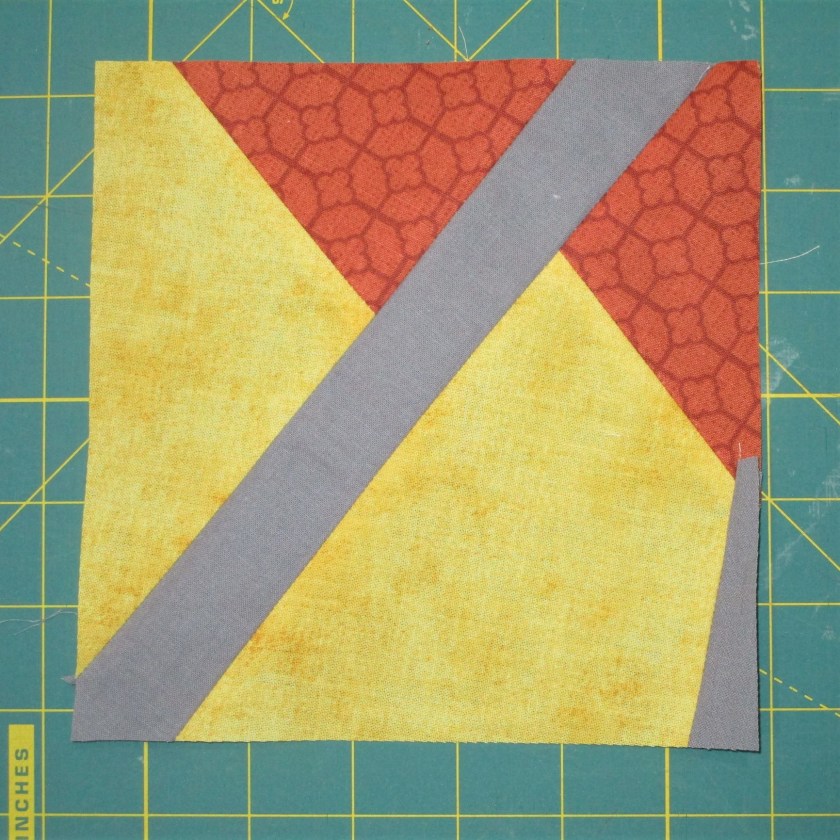
Step 5: Cut through the square, across both pieces of fabric.
Step 6: Sew in a stick.
Step 7: Press seams open and trim the block with a 6 and 1/2 inch square ruler.
Repeat steps 2 through 7 until you have enough blocks for the size quilt you want to make. Use all the different combinations of your three fabrics. Your blocks might look like these.
Or they may look entirely un-like these!
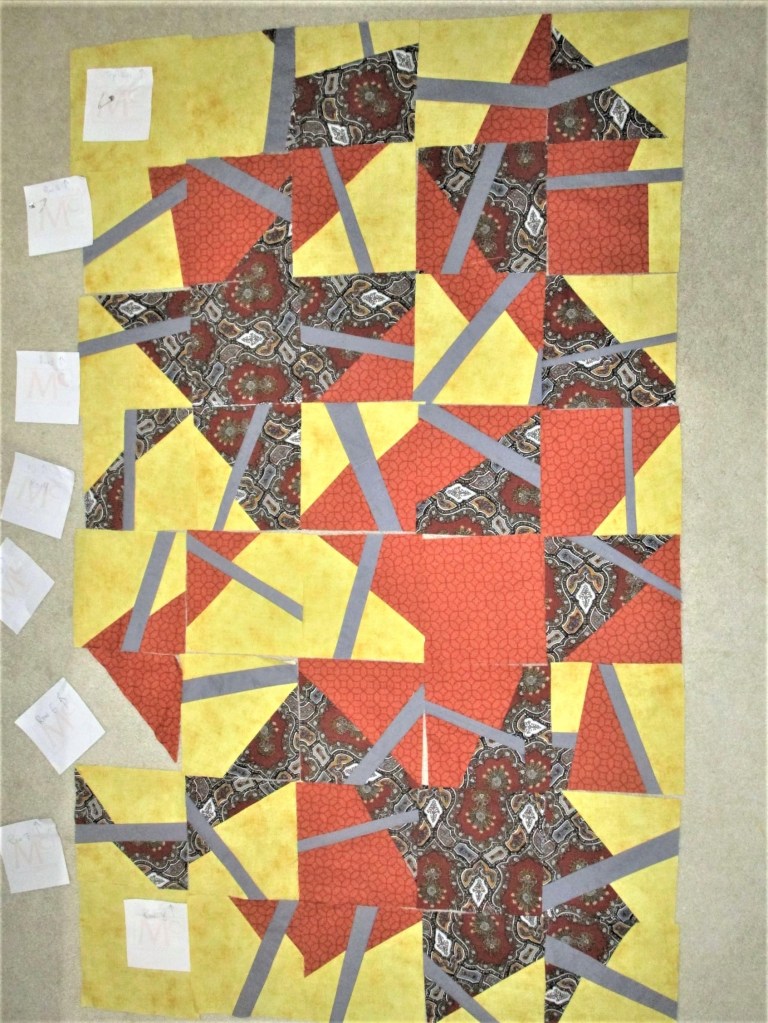
Now the fun begins. Lay out your blocks in rows. Move them around, arranging the blocks until they look “pleasing to you.” Lacking a design wall, I laid mine on the floor.
This arrangement is pleasing to me.
So far, this has been painless. Nay, it has been truly pleasurable. I plan to add more yellow blocks around all sides. Some of them will have patterned fabric crumbs and a few “sticks” sewn into them. Some may not.
While I acknowledge there will be corners to sew, I plan to adopt a laisser-faire attitude about the matching part. If this sort of design process is intriguing to you, I suggest you check out Joe the Quilter’s website to see more of his quilts.