Posted in collage, painting, quilting

Friday Finish: Badlands

The inspiration for this art quilt came to me during our trip to Roosevelt National Park in July of 2021. I was captivated by the sandwich layering of rock, running in parallel lines that eroded down over thousands of years. It suggested to me a string pieced quilt. For the next several months I thought about my concept and puzzled over how I could bring it to life in fabric.

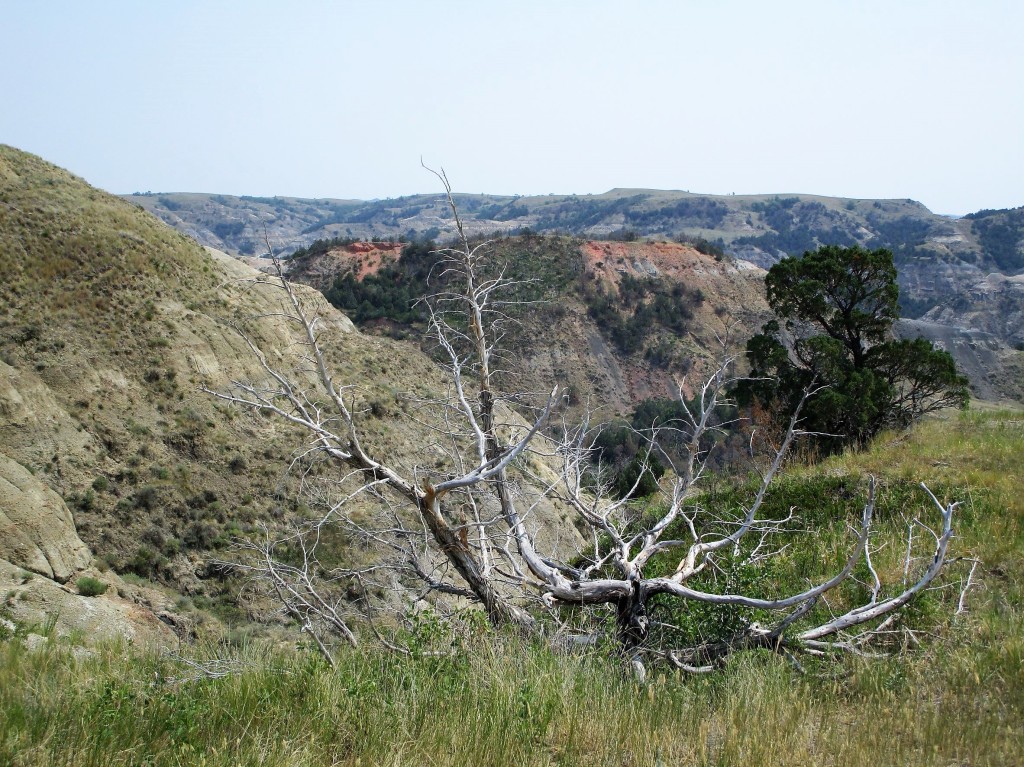
Our photographs were disappointing. It was high noon, and pervasive smoke dulled the light. No shadows were in evidence and the colors were muted. I decided to rely on an internet image for my working reference photo,

Photo from vangorentalmn.com

To get from concept to finished art is a long process. I started by making a value sketch. Next, I drew a pattern to scale, identifying major segments and eliminating excessive detail.

Here’s the part all fiber artists (including myself) find extremely creative: choosing fabrics. Since I like to use watercolor, I painted my swatches. After assigning a hue and value to each segment on my pattern, I picked out the fabrics to best achieve my color scheme of orange, blue-purple and blue-green.

Here’s an aside about the fabric I chose. Ultimately, I couldn’t find fabrics that had the colors and textures that I needed. To get there, I painted on printed fabric for most parts of the quilt. I also selected a few batik prints that were close enough, with only minor adjustments to color.

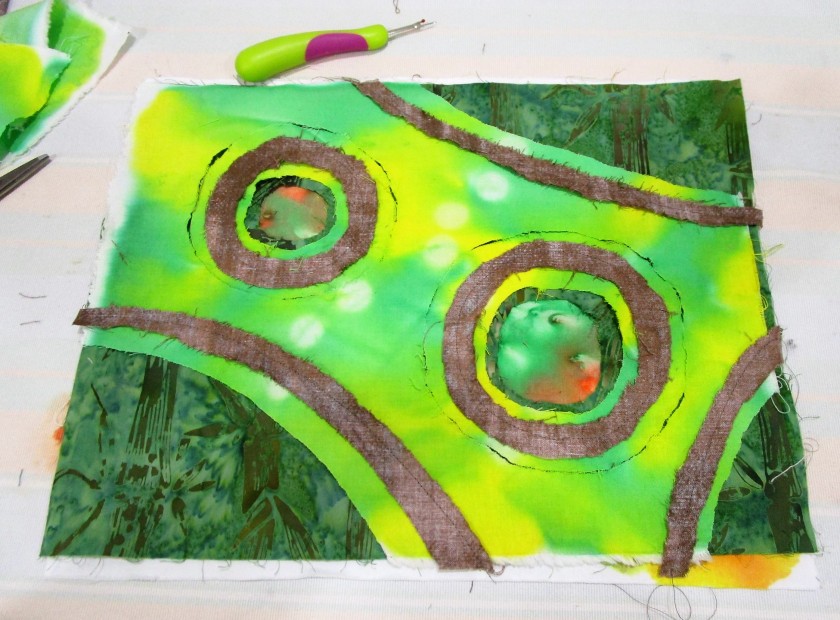
With the design decisions made and fabric selected, I began to assemble the quilt. All of the techniques that I used in making this quilt I learned from two fiber artists: Annette Kennedy and Gloria Loughman.

http://annettekennedy.com/about

https://www.glorialoughman.com/about

I thank these artists for giving me the skills I needed at the time I needed them.

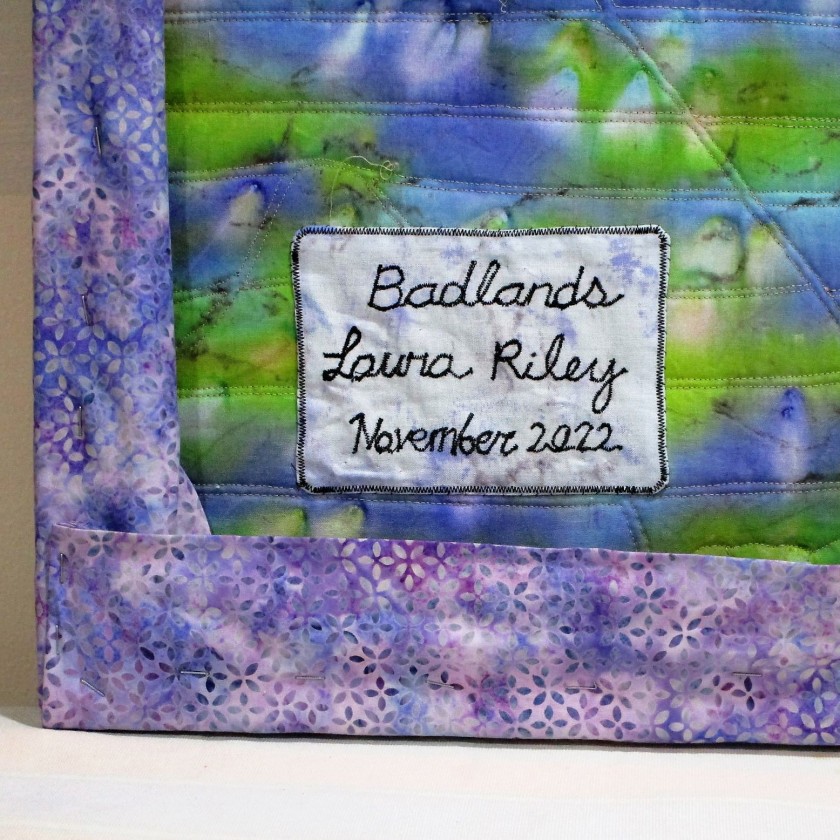
And here is Badlands in its final form:

The design is invigorated by lines running in parallel diagonally and horizontally. Where the diagonals meet, triangles are formed. These shapes lead the eye to the center where two focal points have a quiet conversation across the river valley.

As a final note, I want to acknowledge the influence on my style of pop artist David Hockney. A print of his painting, Garrowby Hill, hangs over our fireplace.

My imagination has traveled that blue road countless times over the past twenty years.

Posted in painting

Using Paint to Create Depth

This past week, I completed the sewing phase of Badlands art quilt. All segments are sewn in, and all but one is quilted.

Quilt lines are not visible in this photo.

The next step in my workplan has me using textile paint to add shading and lines. I learned the technique from a tutorial by Annette Kennedy through Craftsy. Annette is known for her realistic landscape quilts. She is an award-winning fiber artist.

https://www.craftsy.com/class/painted-pictorial-quilts/

So, I have a lot of trepidation about slathering a perfectly nice quilt with paint.

The paints I use are Jacquard Textile Color. I will mix them with a floating medium recommended by Annette. It dilutes the paint, making it lighter and keeping it from drying too fast.

Before painting:

In this photo, I have started shading the large mountains in the foreground. You will also see the applique I have made for my focal point, painted and ready for fusing.

I’m still nervous, but I am trusting that everything will come together in the end.

Posted in embellishing, painting, quilting

Experiment with Stitch and Slash

While perusing available art quilt technique tutorials, I discovered another use for my hand-painted fabrics. Carol Ann Waugh teaches a modern take on reverse applique in her class on Craftsy. She calls it Stitch and Slash. It was inspired by the traditional molas made by the Kuna women of Panama.

In Carol’s interpretation of the mola, four pieces of fabric are selected and layered together. Then a design is chosen, marked on the back of the pile and stitched into layers. The similarity with the traditional molas stops here, when Carol gets out her seam ripper and slashes away at the assembled fabric Instead of nice, neatly stitched edges, she ends up with frayed, textured ones.

Okay, I thought, I have the perfect set of fabrics to try this out.

The two painted pieces are layered with a dark green batik print and a brown textured print. You see here the back side of the brown fabric, which I will be using for the top layer. Nearly all of the this layer will be cut (or torn) away.

Here is the back of my piece, showing marks stitched through.

Getting started with the slashing: You see in this photo all the top layer is gone, part of layer two gone, and the center of the circles showing the bottom layer.

This ripping took more time and was a little trickier than I expected.

All the excess fabric is now removed.

I was excited by how well the painted design is showcased.

The next steps are really just embellishments. To start, various ribbons and yarns are couched down over the seams. (Couching is just a zig-zag stitch worked over the ribbon/yarn/cord.) After that, it’s time to explore thread and machine embroidery options. I went with metallic yarns and threads in warm colors and dark shades.

To finish up, I made a quilt sandwich with batting and backing and stitched it together using free motion quilting.

My Stitch and Slash sample suggests to me how much the trees are suffering from drought and temperatures above 100 degrees. I will call it Heat Wave.

You can find Carol Ann Waugh’s class here:

https://www.craftsy.com/class/stitch-slash/

Posted in quilting

WIP Wednesday: Shell Lake Quilt

For the past two weeks I have been laboring slowly but surely over this quilt. The first week was spent sewing blocks together and sandwiching the quilt. Because I plan to do the quilting in sections, I assembled the quilt in three pieces.

I dithered about for what seemed like forever to come up with a quilting plan. Many hours were spent viewing various classes on Craftsy. Christa Watson’ class “The Quilters Path” is one that gave me some guidance.

https://www.craftsy.com/product/the-quilters-path-plan-it-stitch-it-quilt-it-dvd-streaming/

By Monday, I had come up with a plan.

I started with the Around the world block. First I worked stitch-in-the-ditch every three inches to stabilize the section. Next came the free motion pattern. All of those straight lines needed to be softened and quilted down.

I worked gentle curves across the straight lines.

What remained to be quilted in this block were two large sections of background fabric, including the part with the whirligig. Christa’s all-over motif of loops with random flowers and leaves came to the rescue.

Here is a photograph of the completed sections of an adjoining block.

This is very pleasing to my eye. Having now completely quilted one of the three pieces, I feel that I will likely finish the other two by week end. Then I can move on to final assembly, binding and the Big Reveal!

Posted in knitting

Farewell to Craftsy

Two years ago, NBC Universal purchased Craftsy, the on-line service offering classes in all sorts of arts and crafts disciplines. It re-branded the site as Bluprint.com and continued to make Craftsy classes available on a subscription basis. I resisted buying the subscription for a while. But eventually I did, and was very glad to have it. About a week ago, I, along with other subscribers, was notified that Bluprint.com would be closing its doors and winding down business. This is quite a blow for me. Over the past year I have taken dozens of classes. While working in my studio, Craftsy has been my daily companion. So many talented instructors have shared their valuable knowledge, allowing me to master skills as I need them and when I need them.

Today I want to pay tribute to the Craftsy knitting instructors. Knitting was the first craft that grabbed my attention nearly twelve years ago. I knew from the start that I wanted to be the kind of knitter who designed her own patterns. And it was by watching Craftsy classes that I gained the necessary knowledge and skills to reach this level.

Let me introduce you to four women who helped me get here.

Shirley Paden

It’s just my way to start at the complex and work my way back to the simple. Shirley Paden is a NYC based knitwear designer whose work has appeared in Vogue. I took her class “Handknit Garment Design” during my first year as a knitter. Her careful, thorough and detailed design process dazzled me at first. This class was not for the casual viewer. Eventually I mastered her technique and was freed from the tyranny of purchasing patterns every time I wanted to knit something new.

https://www.shirleypaden.com/about

Clara Parkes

Getting to know your materials is a crucial step for artists and crafters. Clara is the guru of yarn. Her class walked me through the many characteristics of both protein and plant fibers, and what to expect from the resulting yarns. I learned about staple, crimp and ply. This knowledge is so important when purchasing yarn. And when you live in the middle of the country, forty miles from the nearest yarn shop, on-line shopping is a necessary evil. I avoided many poor choices because of what I learned from Clara.

http://www.knittersreview.com/

Eunny Jang

No knitter can avoid lace stitches forever. Well, she can, but if a knitter wants to master the craft, lace is part of the story. This lady gave me the information I needed to succeed with lace patterns. Okay – here is the biggest tip Eunny taught me about knitting lace: Never, ever attempt to knit a lace pattern that has a repeat longer the four stitches and four rows from written-out instructions. ALWAYS USE A CHART. There were several more important bits in Eunny’s class. But the chart was the break-through moment for me. After taking this class I proceeded to chart out all of the lace stitches that I wanted to try.

https://www.ravelry.com/patterns/library/print-o-the-wave-stole

Laura Nelkins

Now that you know how to knit lace, what are you going to do with it? Laura is the one who gave me the key to making amazing lace shawls. In addition to offering four different patterns, she also taught me how to produce many different styles and shapes of shawls. By using Laura’s shawl shapes and any charted out lace stitch, I can design my own shawl patterns with ease.

https://www.nelkindesigns.com/

I hope you enjoyed meeting these instructors. The links I embedded to their websites, (when they were available), will allow you to learn more about them without relying on the now-defunct Craftsy platform.