Posted in collage, embellishing, quilting

Catbird Sings Reveal

In his Guide to Birds, David Sibley describes the gray catbird’s song thusly:

” …a rambling, halting warble with slow tempo…low hoarse notes with high sharp chips and squeaks interspersed….little repetition and little mimicry.”

…..which is, while accurate, a rather dry and technical explanation for what I heard that day:

Catbird Sings

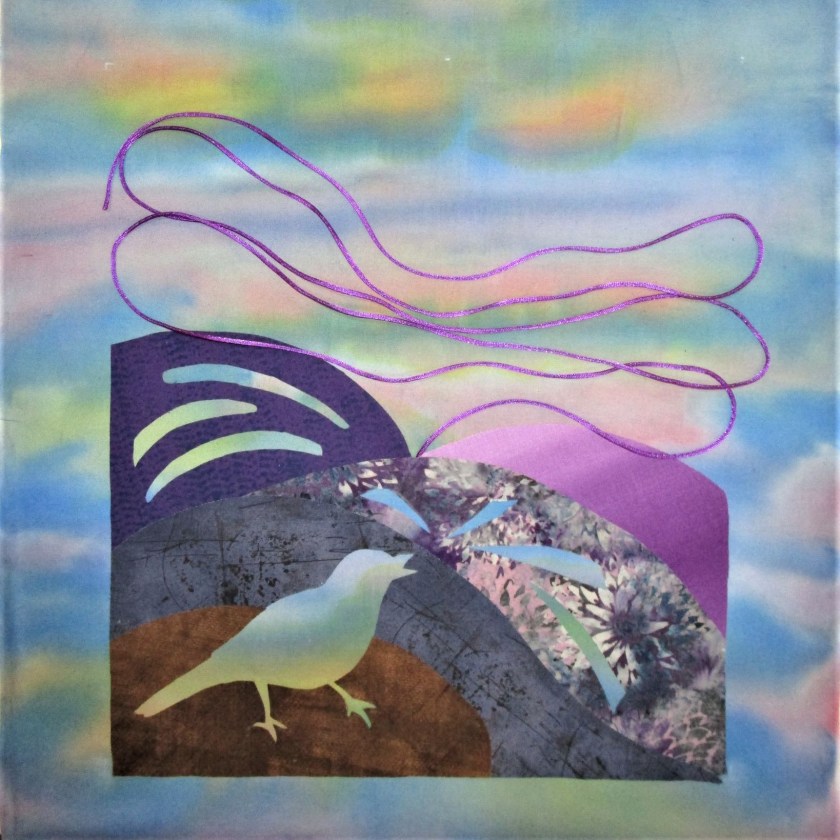
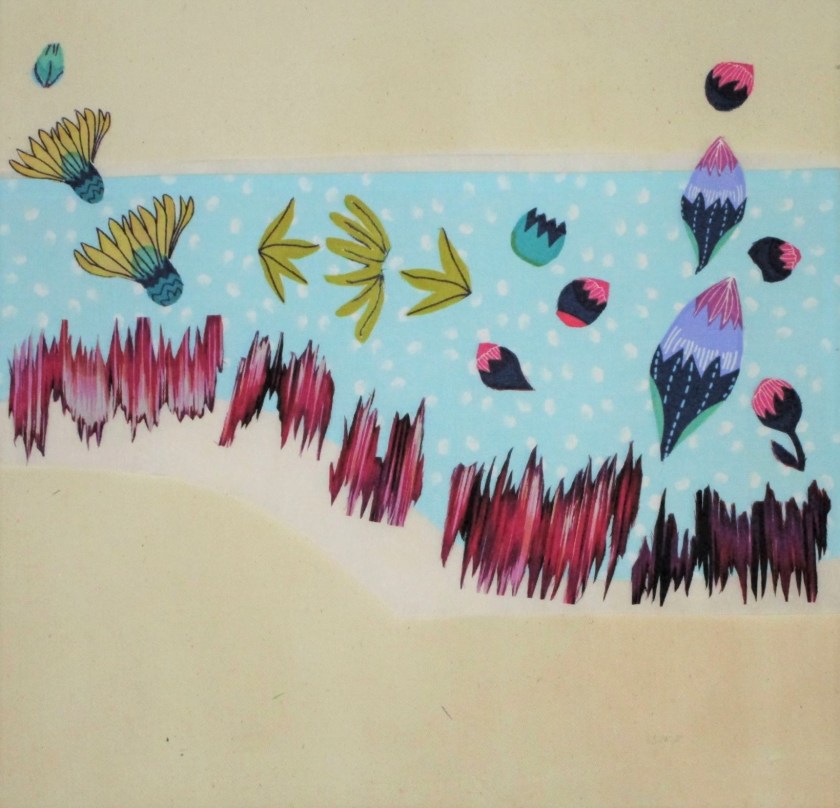
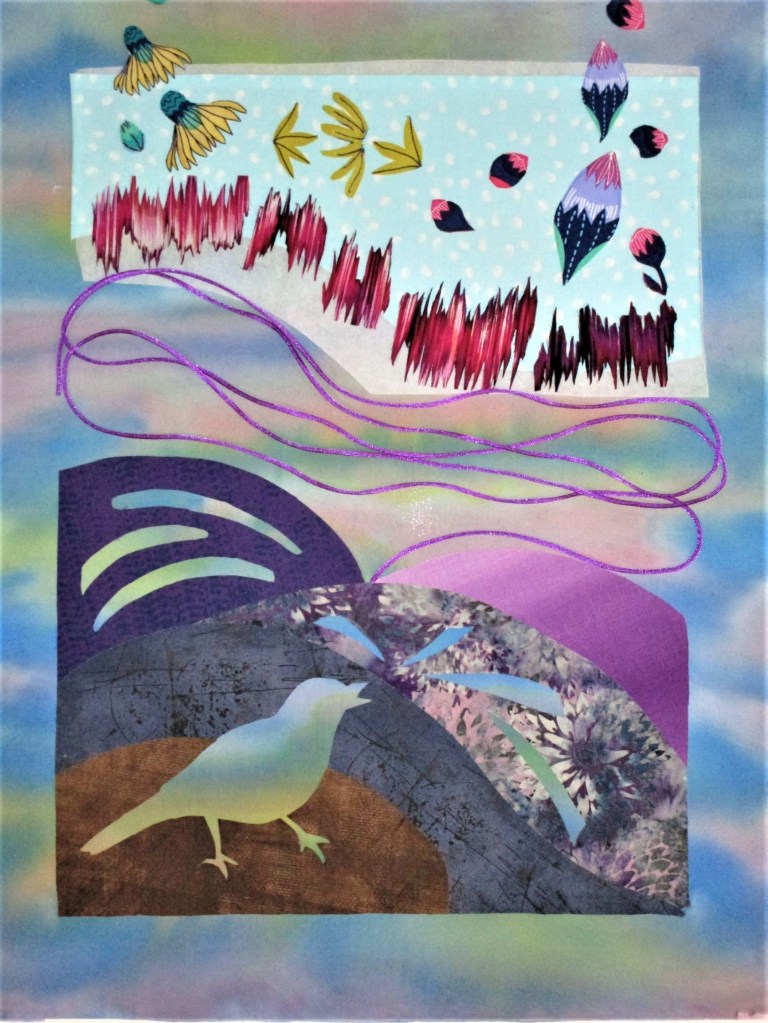
In my final arrangement of this fiber object, I ditched the blue fabric which I was going to use as a framework for the “notes and chips.” Instead, I let the purple satin cord act as a highway for the eye to travel to each vocal outburst. I also unified the color of the lower section by overpainting the batik print using violet.

Close up of bird hidden in purple shrubbery

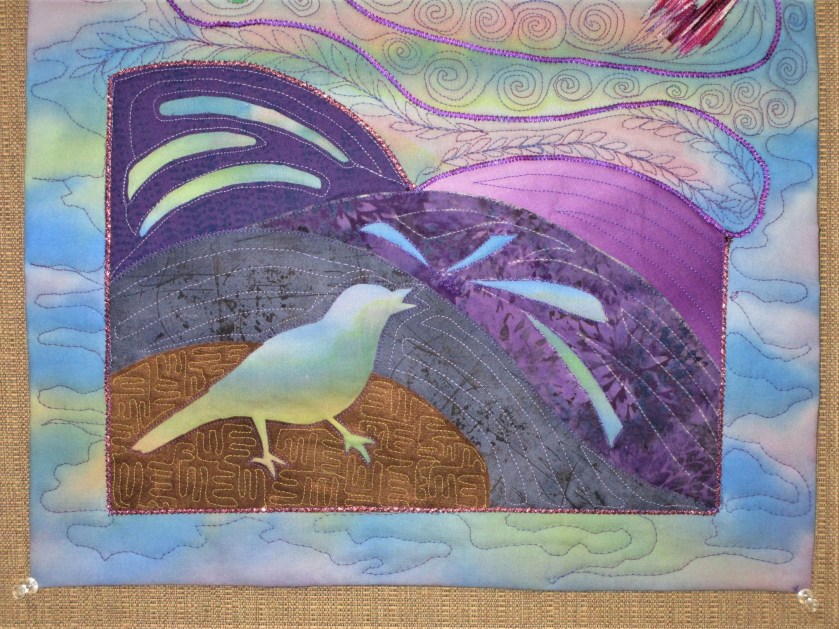
The free motion stitching wasn’t overly planned. I mostly just followed the clues given by the appliques and the color changes in the background.

Upper section finished with closely spaced stitching and pearlescent paint

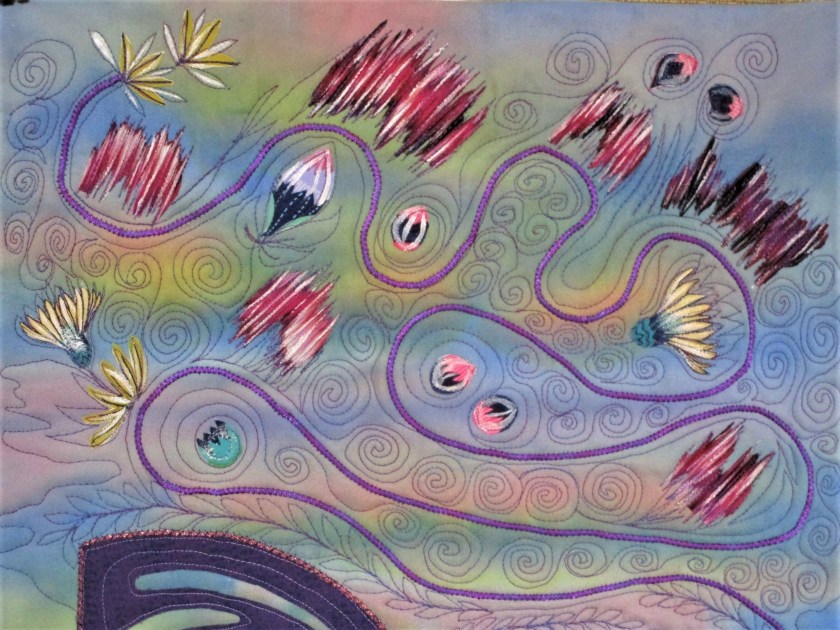
I hope you enjoy “seeing” this catbird’s song, as much as I enjoyed listening to it.

Posted in collage, quilting

Wednesday WIP – Art Quilt

Yesterday I spent some time working through the design and material choices still facing me with regard to “Catbird Sings.” I settled on the arrangement for the lower half of the work, tacking it into place. The violet satin cord will serve as a transition device linking the lower to the upper half of the piece.

It will be couched into place when I start sewing. Next I chose and cut out various bits and bobs from two printed fabrics to represent his varied “cat calls”.

The colors all link well to the palette chosen. The wavy lines will represent the loud squawks. Before proceeding to the next steps, I treated all the edges with Fraycheck.

Those wavy pieces in particular will shred massively if not treated.

I was ready to test some layouts for the upper half:

I like this grouping. But do I use the daisies with petal sides up……..

….or petal-side down. Hmmmmmmm….. I like the line created by the upside daisies.

TENTATIVE FINAL ARRANGEMENT

And here is how I left the work. Before I finalize, I will need to decide on how I will quilt all of the different sections. It won’t do to fall in love with a layout and then struggle to quilt around it.

I’ll sleep on it and see how I feel the next day.

Posted in colorwork

Wednesday Color Experiments

While perusing Bethan Ash’s book on quilt collages, I suddenly realized something.

I have been experimenting with fabric paint on quilt cotton for the past two years. And yet I have never used the most basic of all paint techniques: Spatter!

I decided to remedy that omission today. First, I went to my fabric stash and picked up some muslin.

This most basic of all fabrics is lightweight and inexpensive. I cut a width of fabric piece, dividing into three rectangles to match the size of my work surface.

I decided on three color schemes: primary colors, secondary colors and artist’s choice option. For my spatter tools, I chose a 2 inch brush, 1 inch foam brushes and a toothbrush.

After pressing the muslin, I laid the first piece on my white board. Then I spritzed it lightly with water. Working from lightest to darkest shade, I dipped the brush into the paint and then shook, jiggled, and tapped it over the muslin until the drops reached all areas of the fabric.

Yellow, Red and Blue

Since it was a sunny day, I took the first one outside so it could dry quickly right on the board. Once dried, I moved on to the secondary colors.

Orange, Green, Violet

This is a very pretty combination.

For my last combination of colors, I chose magenta as the first color. I had purchased this paint recently and hadn’t even opened the jar. To accompany the magenta, I mixed the left-over violet with the left-over blue to get a cool purple. The third color will be black.

I like this sample the best.

You may be wondering how I plan to used these samples. Well…….I’m not exactly sure. But since I am pondering improvisational collage quilts today, odds are good that they will get fusible adhesive attached to them and cut up into smallish pieces.

Then I will play.

Posted in collage

Collage 101

I am standing firmly at the nexus of art and craft this week.

On Tuesday I attended an introductory class at my local art association’s studio. About ten of us were there to learn how to do collage technique. Our instructor was Debbie Finch

Here she is giving us some preliminary instruction.

After selecting a subject and tracing it onto a canvas board, we spent a lot of time hunting through magazines to find images with colors that we wanted to use.

Debbie offered the option to use a pattern of a peacock for our design.

Some chose to use it,

Others brought an image or improvised from what they pulled out of the magazines.

There was one artist who clearly came with an idea in mind. She worked swiftly and finished her collage in about an hour.

Note the googly eyes, which she must have brought to class.

Kerry told us this was to be a gift for a grandchild. I was impressed – very impressed.

Me – I started out pretty well. I was prepared. I had brought a copy of my hummingbird drawing, and had pre-selected magazines and torn out several pages in advance. But after three hours of struggling with paper and glue, I had barely finished the background.

Debbie was kind enough to compliment my ” blending of soft shades.” Hm.

I took it home, and have been fussing over it for the last two days.

I soon realized that the collage technique does not lend itself to realism. As I worked through my magazines, I was taken by some appealing images unrelated to my original design. In the end I inserted a woman’s face, a tree frog and a trio of flies onto the surface. I’m going for Whimsy.

To finish up I added a little metallic paint and a few pen lines.

MAGICAL HUMMINGBIRD

Before I can seal the collage with top coat, I will need to buy a wide flat brush. I have no desire to ruin my 1 inch flat watercolor brush by using it to spread glue.

Posted in collage, drawing

Kente Kat

Paper Tiger prowls the jungles of Ghana

Here is my little collage, inspired by the Kente cloth of West Africa. I learned about this form of weaving while doing research for my fiber classes. It has captured my imagination. The Asante weavers work in narrow bands on a horizontal loom. The finished weave is under five inches wide. To make the cloth, long strips are sewn together, giving the artist much scope for juxtaposition of colors and patterns. I had the naïve idea that I could learn to make this cloth for myself. Ha! After reading about the process and watching videos, it is clear that Kente can only be mastered by years of practice under the guidance of a master weaver. So I have confined my enjoyment of the medium to collaging (is that a word?) with photographs of Kente.

If you would to learn more about Kente cloth, check out this site: https://smarthistory.org/kente-cloth/

This cat appears to be floating in mid-air, but I assure you she is solidly on the ground. The jungle is dark, but shimmers with heat and light. A sassy bird perches above her head. To make this image I used photographs of my color wash fabrics, adding black and silver markers, and sequins for eyes. Here is a nice close-up: