Posted in knitting

Cast-On Monday: Spring Sweater

The weather is so glorious this morning that I moved outside for this photo shoot.

Today I am starting a coat/sweater for my granddaughter. You see my swatch, which turned out with the correct gauge on my first attempt. (I was lucky.) I wanted to make a big sweater, with cables, pockets and a hood – all the design features that a northern girl needs to keep warm while playing outside in early spring. I was fortunate to find the perfect pattern by Elena Nodel on Ravelry

Photograph by Elena Nodel

https://www.ravelry.com/patterns/library/lavanda

For the yarn, I chose Wool of the Andes Superwash by KnitPicks. Just last year I used it in the Weaver’s Square vest knitted for my daughter. It has become a favorite of mine for hard-wearing garments.

https://wordpress.com/post/dailyfiberfun.wordpress.com/1559

The color here is a bold one.

The sweater is worked from the top down. It features ribbed and cabled sections, with a knitted in seed stitch button band. All of these features are set up in the first 12 rows. When you take into consideration knitting raglan increases on either side of the sleeves, it makes for a somewhat complex start to the knit.

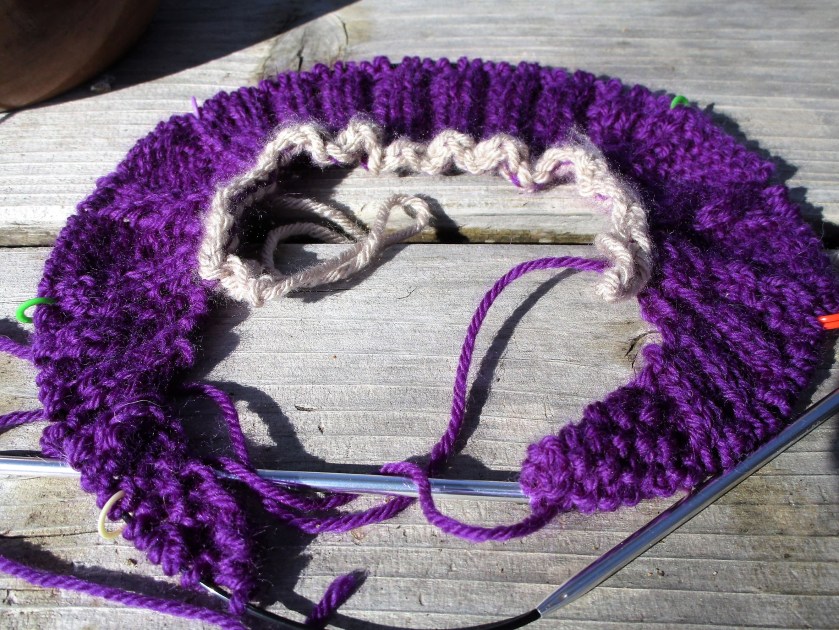
Oh, I forgot to mention the provisional cast-on. I used the crochet chain method. This allows for the hood to be added by knitting up from the neckline.

Whew! Now that I have established each section, the next couple dozen rows should follow without incident. I’m so happy to be working on a big, size 7 cable needles, after what seems like months of working with sock needles.

Posted in sewing

F.O. Friday – Sewing

This week I got all ambitious to make some pants for L.L. I haven’t sewn clothes in years and years. But I wanted to respond to my daughter’s righteous indignation on the options provided by the clothing industry for little girls shorts. She complained that every pair she found were tight and very short – effectively sexualizing toddler girls. “Boy and girl shapes at this age all identical, yet the boy shorts are loose, comfortable and several inches longer than the girls.

She ended up purchasing boy shorts for her daughter.

So I wanted to make a fun, colorful garment that I knew LL would enjoy wearing.

As a maker, I also had the goal of using materials that I have on hand.

In the end, I did purchase a pattern, since I don’t have knowledge or skill in pattern-making.

I chose this one, because. along with the pants, it provided patterns for tops and dresses and sizes up to 4 – leaving the door open for me to make additional items of clothing in the near future.

Here’s the crazy fabric I chose.

It is a sturdy 100% cotton, leftover from a valance I made for my laundry room window. How about those zig-zags!

To challenge myself, I decided to match the zig-zag lines in the hems.

Here they are, all finished this morning.

Construction details I added were faced hems and a cotton jersey casing for the elastic at the waist.

I was happy that the fabric includes some of Lu’s favorite colors: blue, pink and green. I’ll bet that she already has several T-shirts to match.

Posted in knitting

Who Needs Pockets?

My first reaction is to say everybody needs pockets. But that is not necessarily true. Many grown-up persons carry bags, satchels, pouches and other accessories to ferry about their cherished possessions. But those persons young in age and close to the ground generally don’t have that option.

If so, these little ones need someplace to stash all the treasures they find along the way. And when you are that close to the ground, there are So Many Treasures to pick up: shiny pebbles, feathers, a snail or two, marbles, bottle caps and pieces of Lego.

Especially Lego People.

Little Lu will agree. So I made some pockets to insert into her summer vest.

I chose not to seek out a pocket making pattern. Come on, this can’t be very hard.

Cast on 40 stitches, leaving a 6 inch tail, then distribute stitches over three double point needles. Join together to work in the round. Work in stockinette stitch until piece is 3 inches tall. Flip the work inside out so the purl stitches are on the outside. Now move the first 20 stitches to one needle and put the second on waste yarn. Using the tail, sew the cast on edge together with whip stitch. Make a second pocket to match. Your pockets will be about three inches square and look like this:

When the body of your garment is longer than 3 inches, you can insert the pockets. Place stitch markers at the point where the pockets will go, marking 20 stitches between markers. Work to first marker. Holding the pocket against the back of your knitting, knit together each stitch of the garment with a stitch of the pocket. When you get 20 stitches knitted, turn work. Bind off the twenty stitches you just knit. Now slip the remaining 20 pocket stitches on to your left needle. Working in your pattern, continue to the second set of markers. Repeat to insert the second pocket. That’s it!

Here’s how the pockets look in the vest I am making:

Outside of vest:

Inside of vest:

This is an experiment. I promise to report back to you on how well this vest held up under vigorous, treasure-hunting use