Posted in collage, quilting

Sunflower Fiber Object Progress Report

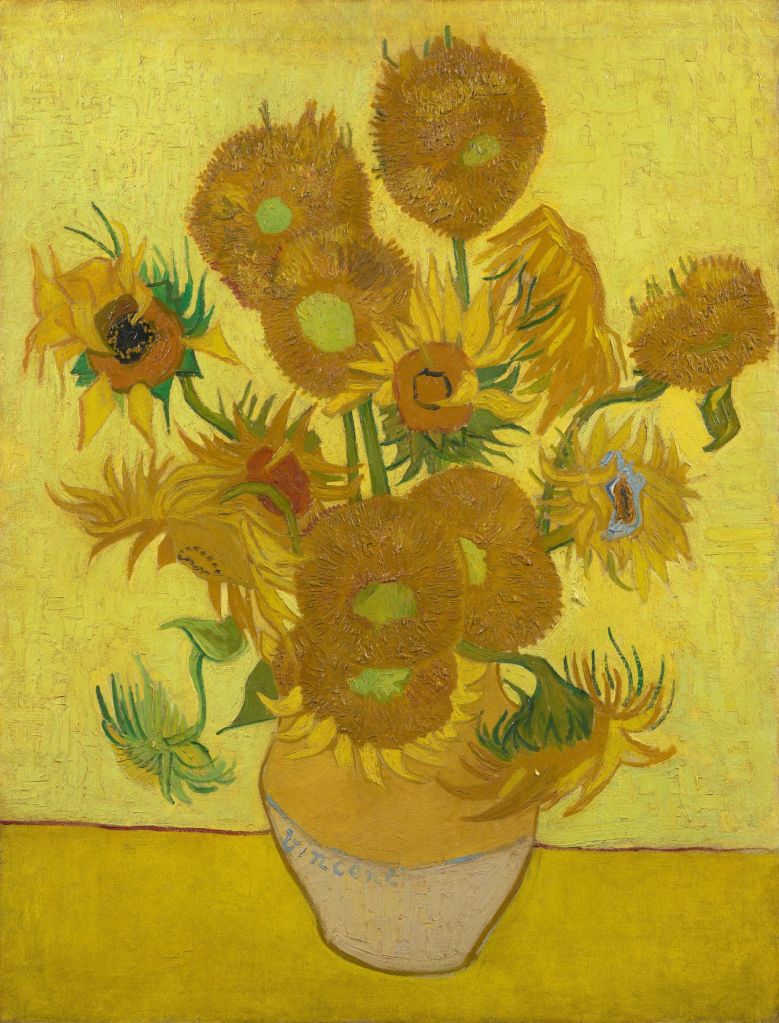
For the past three days I have been working steadily on the small art quilt that was inspired by the sunflowers in my garden and influenced by Vincent Van Gogh. I’m about half way through. Today I want to share a bit about the process I am using.

While the technique I have chosen to use is applique, the design process for most art quilts is similar. Start with an image. I used a photograph, but drawings are also good choices. Decide on size and dimension. Then enlarge the image to fit.

This enlargement is about 18 x 24. I have printed it in black and white because eliminating the color makes it much easier for me to judge relative values.

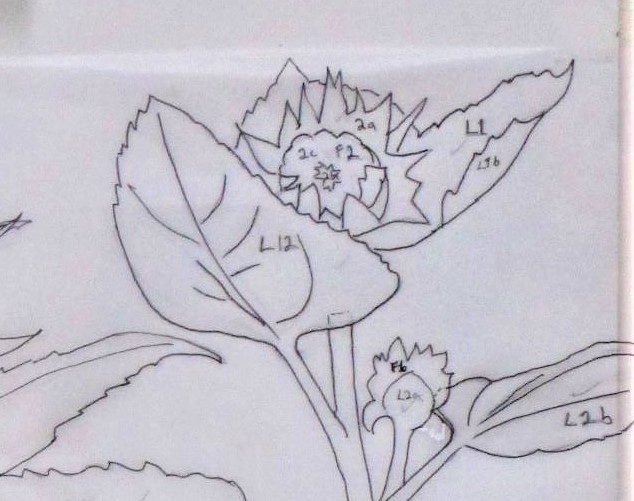
Using a tracing paper overlay, trace the image. During this stage many design decisions are made. You want to eliminate any visual clutter that doesn’t support the overall design. You can manipulate the different elements to strengthen your main thesis. For example, I altered the position of one flower and the tilt of the stems to accentuate the diagonal lines. It took me a long time to draw the pattern but I enjoyed the process.

Final Design

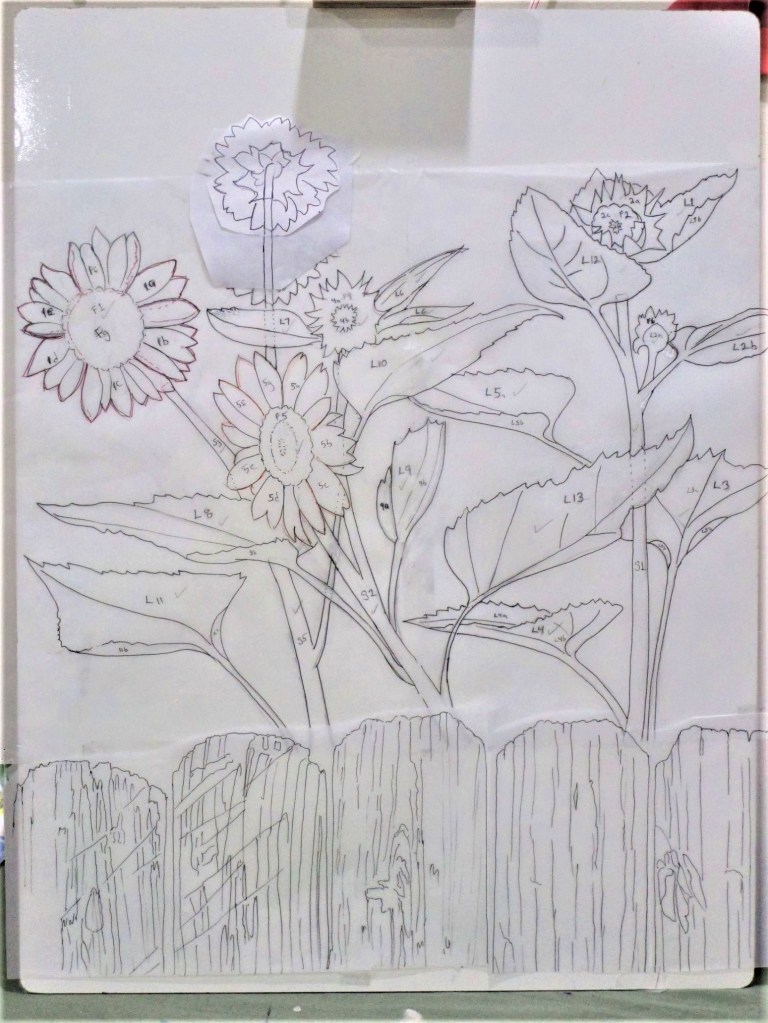
This pattern will be the map from which the entire assembly is guided. I drew in some directional lines that suggest details for painting on later. You see that I assigned numbers to every element. This will help me trace and cut out all the pattern parts.

Detail of sunflower in upper right of pattern

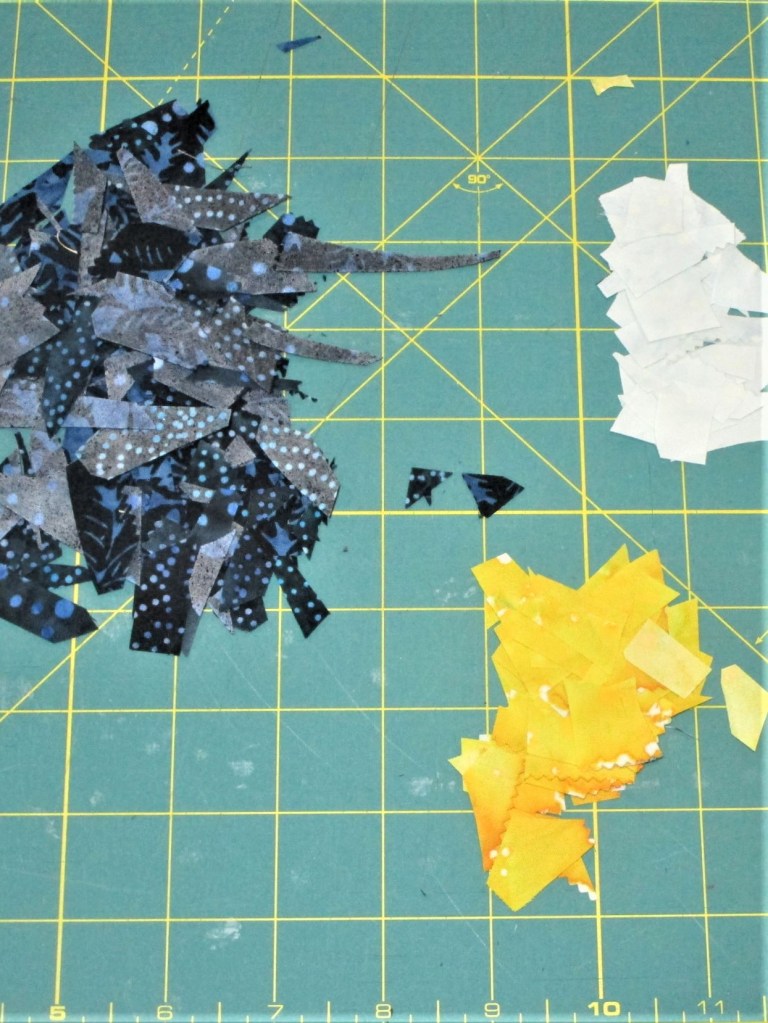
Now the part that every quilter just adores: Choosing colors and fabrics! Since I am a budding painter, I made a quick color chart in water color paint.

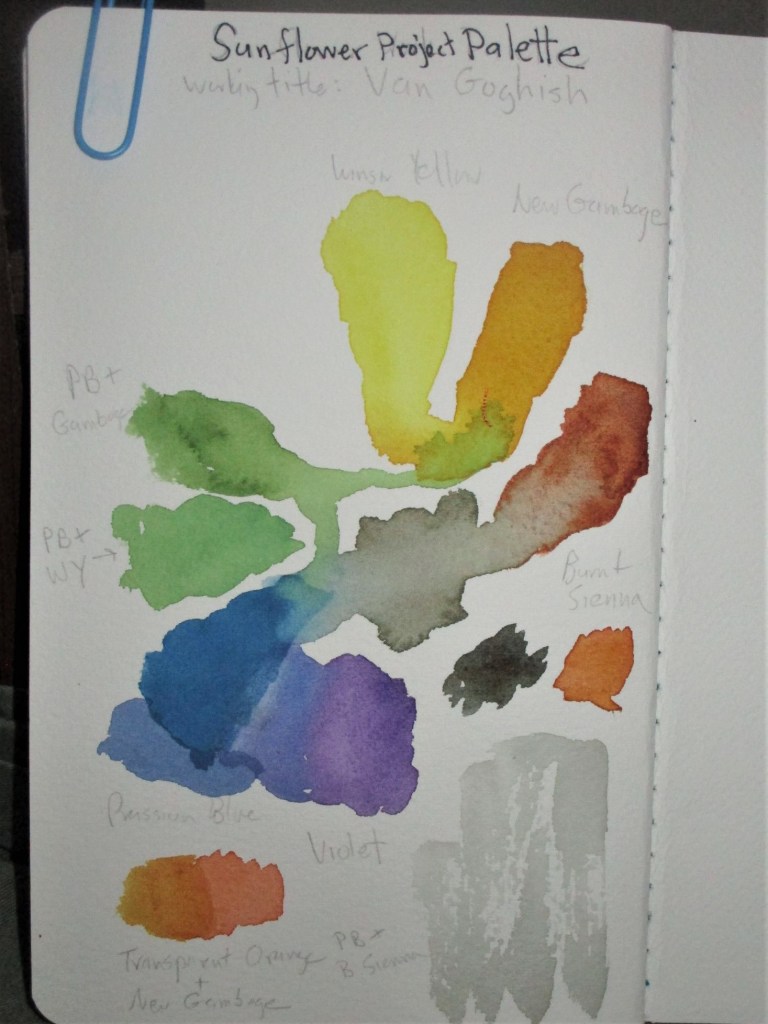
I’m trying to use an analogous color scheme. But my parameters are pretty wide, extending from violet through to yellow-orange. For this quilt I will assign the darkest colors to the background and the lighter ones to the elements .

Even though I did go shopping, in the end I chose fabrics mostly from my stash.

Next I traced each element onto freezer paper, cut them apart and pressed them onto the fabrics. Following the drawn lines, I cut out each pattern piece. Keeping them organized and up off the floor is the main challenge!

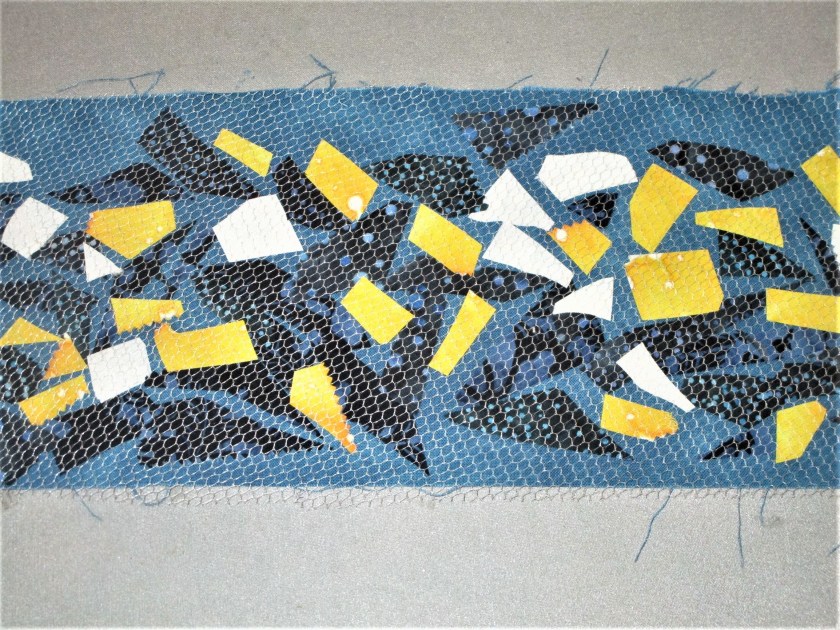
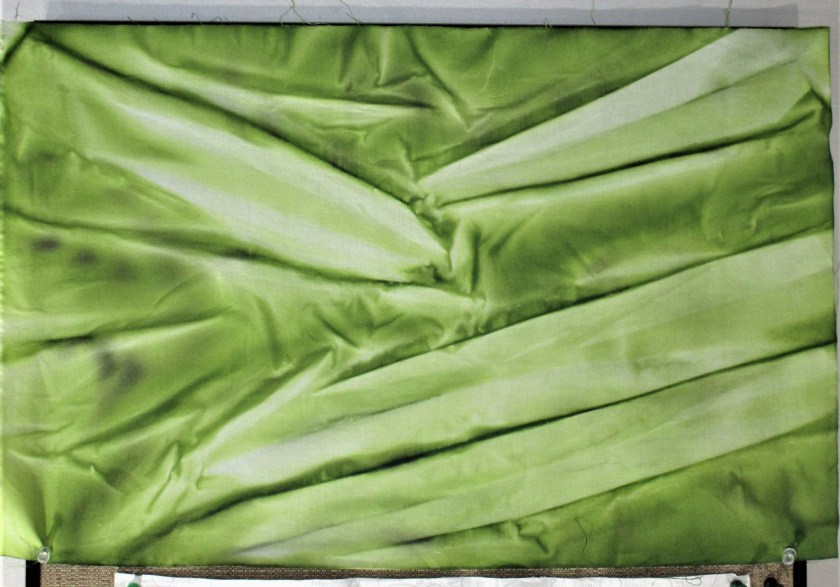
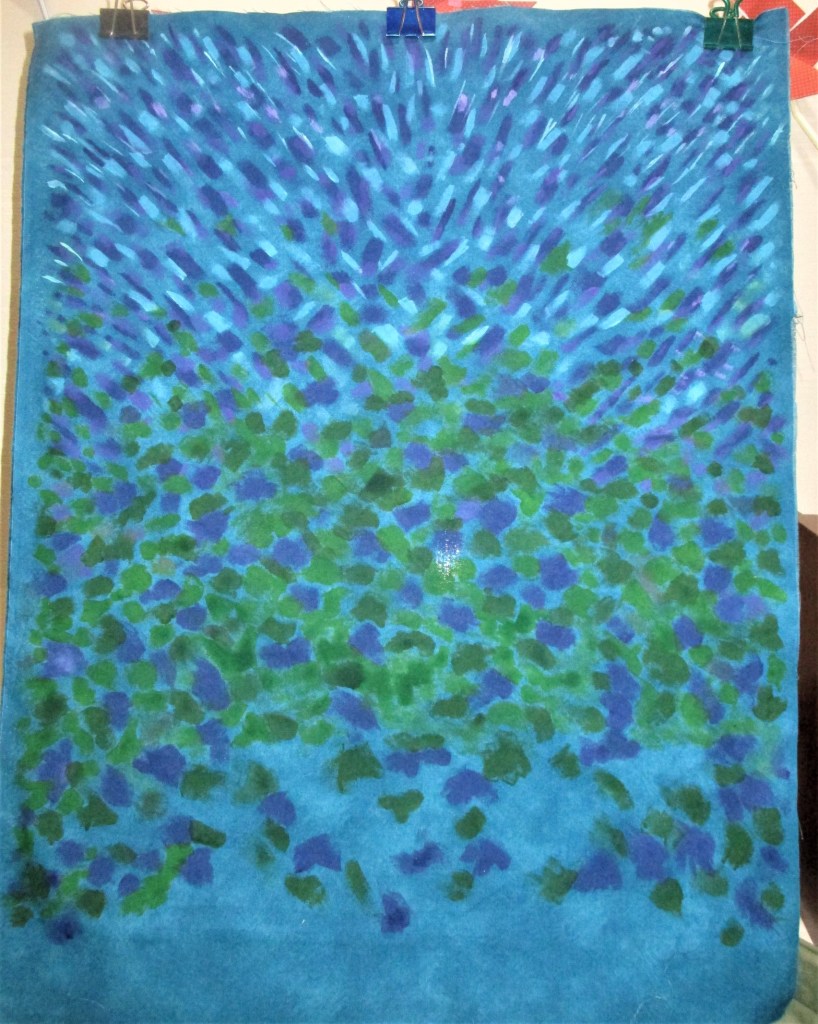
In my last post, you saw how I painted the background fabric. Here is the background again, up on my design wall and ready to accept the fabric appliques.

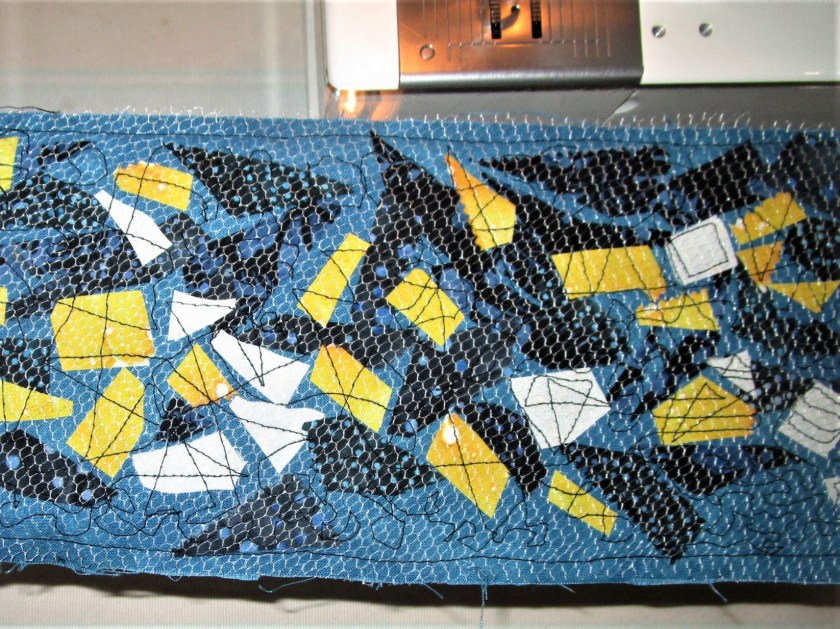
I use a fusible webbing called Wonder Under to glue the appliques to the background. I won’t go into detail on that step. The product’s packaging tells you what to do.

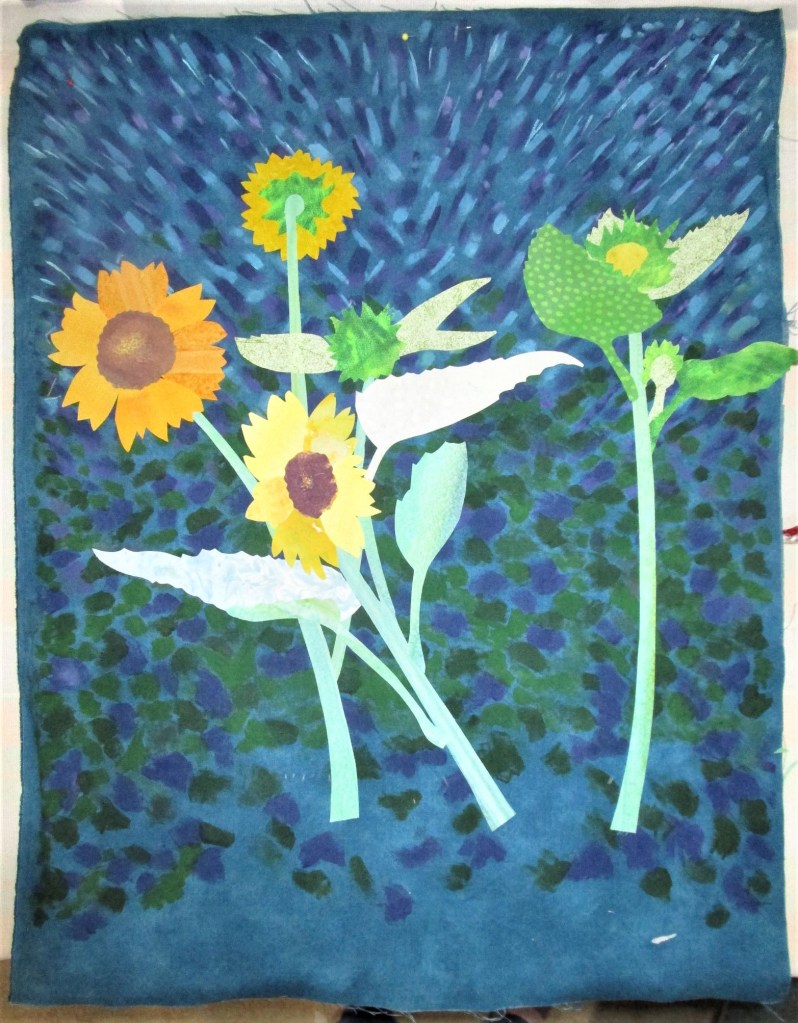
First I assembled the flowers, each of which had several fabrics. Once that was done I started attaching appliques to the background. Any pieces that lie behind another piece go down first. I started from the top. Here is a photo with about half the appliques on:

Here you see all of the flowers and leaves attached. This is where I left it yesterday.

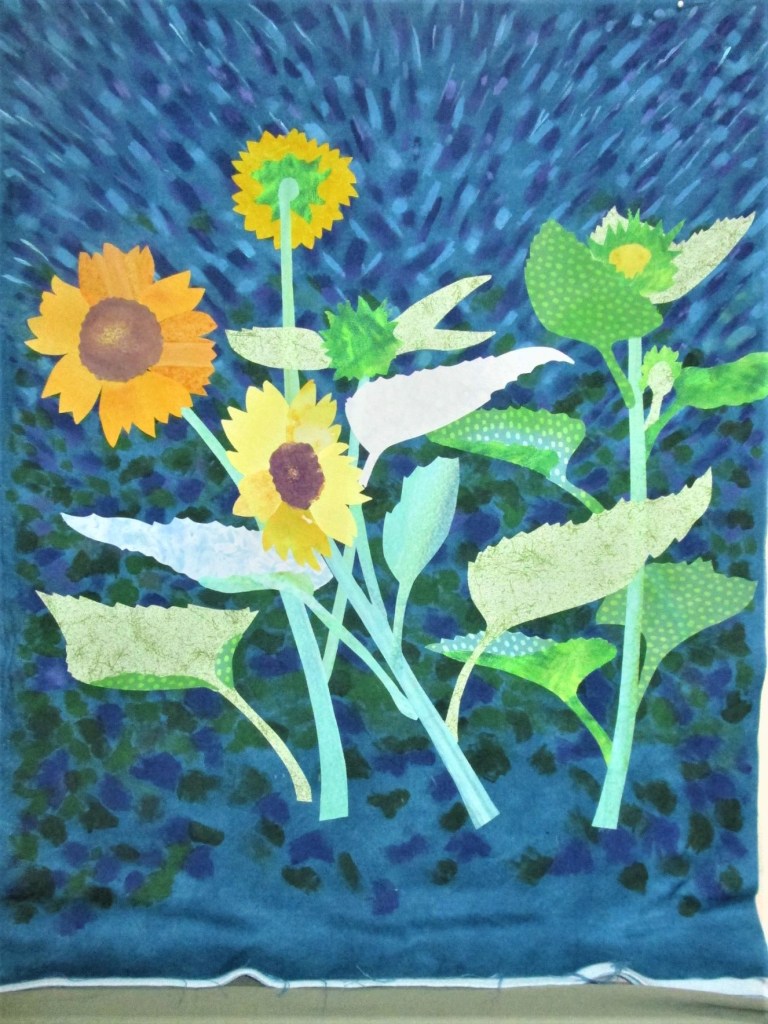
I’m pleased with the result. I like it so well I may not even attach the fence applique – just let the flowers float in mid air. What do you think?

Posted in drawing, quilting

In the End – Confetti

My creative bent took an unexpected turn today. I started the day by thinking about Van Gogh. You see in the photo the sunflowers I planted this year. I took this image over my garden fence with the idea that it would make a good reference photo for artwork. To further this end, I made a sketch of the photo this morning.

This is a simplified image that I thought would work well for either water color or fiber. Since I am currently up to my eyeballs in reference photos suitable for water color painting, I decided to make a small art quilt featuring sunflowers.

This is what led my brain to Van Gogh. Sunflowers were a favorite subject of the artist. He liked to paint them as still life images, cut and arranged in a vase.

https://www.vangoghmuseum.nl/en/art-and-stories/stories/5-things-you-need-to-know-about-van-goghs-sunflowers

I intended to portray them growing in the garden. But I wanted to create a “Van Gogh” like background – full of color, motion and energy. Think of Starry Night as an example.

During my blog browsing today, I came across a post from the group 15 by 15. This is a very creative group of quilters who like to work challenges. One of the members mentioned that she used the “confetti technique” to create the background of her new work for the current challenge.

My brain started firing up! What is this “confetti technique?” I must learn more!

Of course You-tube came to the rescue. I found an explanation on how to add confetti to a quilt. There are several techniques, but I watched this one by Gail Hunt.

The rest of the afternoon went like this:

Find a bunch of scraps. (I used several from my Under the Sea quilt, because they already had adhesive attached to them.) With your rotary cutter, slice them to bits.

Arrange on a background fabric and press them down with your iron.

Cover the piece with a bit of tulle or netting. Glue or stitch it in place.

With sewing machine and free motion foot, stitch over the piece like crazy. (I used black thread to meander on the background and sew straight lines over the pale bits.)

I then switched to white thread and made swirls into the dark areas.

Just like Van Gogh’s “Starry Night.”

Posted in hand embroidery, painting, quilting

Return to Lake Montgomery

It’s been a while since I shared the turtle in the pond fiber object. As a reminder, it was inspired by a photo taken by Bill on a recent camping trip at Lake Montgomery.

I loved the light, the colors and the texture of this image. I knew right away that I want to create my own version in fabric.

Here is a recap of how I processed this inspiration. First of all, I used fabric paint and the Shibori technique to render the background on cotton fabric.

The piece is about 15 by 20 inches.

After the paint dried, I added another layer to render some shadows. Next I painted the two halves of the turtle onto white fabric…….

……………..… and appliqued them to the background using fusable interfacing.

This is how things stood while I pondered what other elements would enhance the image.

I decided on a few damselflies. More images by Bill were consulted. I picked three beauties, hand embroidered the bodies with floss and machine stitched the wings.

You can see the water plants I added in the foreground using applique and paint.

I sewed on a black border and then paused. This week I finally got around to quilting. My intent was to make the stitch lines look like pond ripples.

How did I do? Are they watery enough?

It took a lot of pondering and a dose of courage to add the turtle’s reflection. The only real option was to hand paint it using opaque Setacolor. So I did.

And here is the finished project.

Springtime at Lake Montgomery
Detail of reflection

This fiber object is now a wonderful reminder of a very special camping trip.

Posted in hand embroidery, quilting

Finished Object: Sunset Abstract

Oklahoma Sunset

It took only a few days to determine and apply the surface decoration on this piece. And I have stretched the truth a little in calling this one finished. I have sewn on a wide border that still needs machine quilting, and the whole thing needs to be mounted to an artist’s canvas. Since I can’t purchase that item until pandemic restrictions are lifted, I am content to call this object finished.

This is a detail I altered from the original image. In my photograph there was a road in the foreground. I changed it to a stream and depicted it with sunlight glinting off its waters. I achieved this with metallic yarn sewn on with couching.

Here is my trick to get my running stitch straight. By using painter’s tape to mark my fabric, I could hand stitch while watching TV. Also I don’t have to remove marks.

Close up of lower right section showing sun. Clouds and stream are reflecting the sunset. The triangles were stamped onto the fabric using metallic paint.

I feel pretty good about this fiber object. It communicates well the idea of sunset and its color range. I like the balance between the elements and the level of detail. And it allowed me to practice my piecing and embroidery skills.

Posted in quilting

Abstract Sunset Progress

By the end of Monday’s work, I had finished the piecing the fabric to my abstract. Rummaging through my spools of trim, I found some bronze colored satin cording. I couched it into the location of the sun, making this round object disrupt my perfectly angular image.

The next step is to decorate the surface. I always have to take a long pause at this stage. There are just too many options available to me – paint or embroider, hand or machine quilt, add more trims?

And how about all those embroidery stitches on my Bernina?

While I ponder my options, I will just enjoy the wonderful geometry and colors of my work in progress.