This week was moderately productive. I finished several more blocks for the Oregon Baby quilt, including two feature blocks. There are now four features finished, except for any finishing embroidery touches.
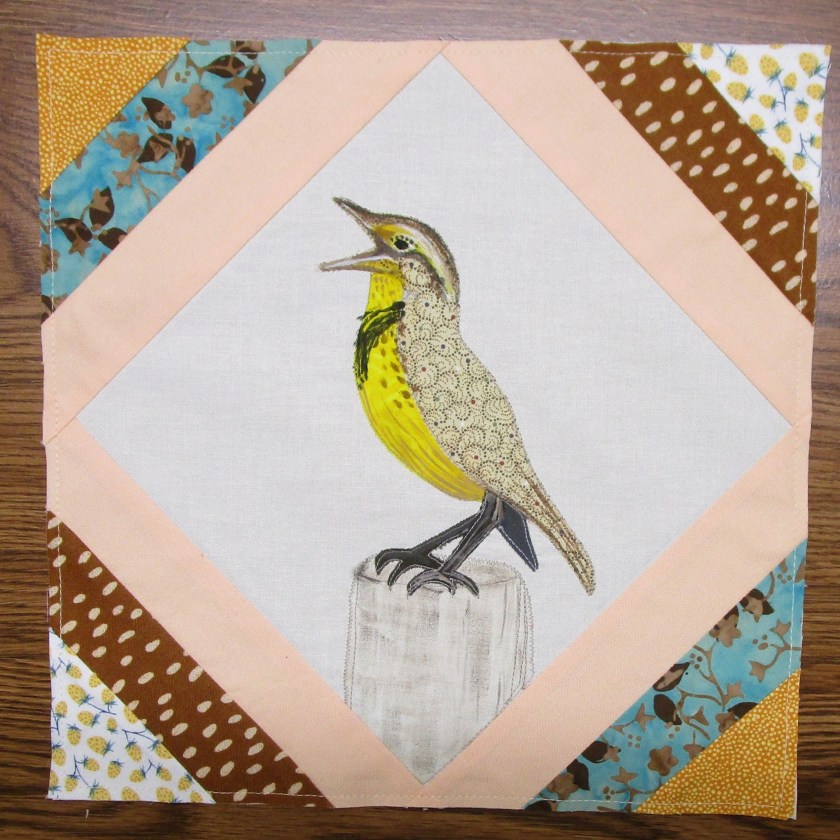
I made the western meadowlark and baby rabbit blocks.
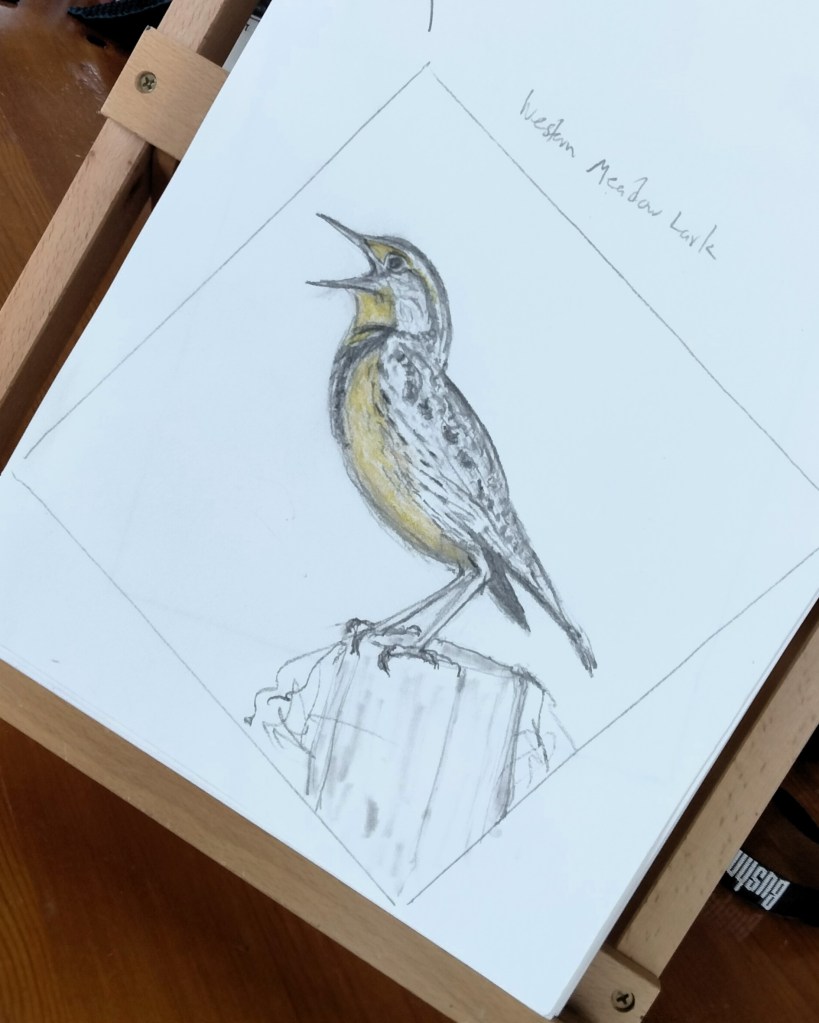
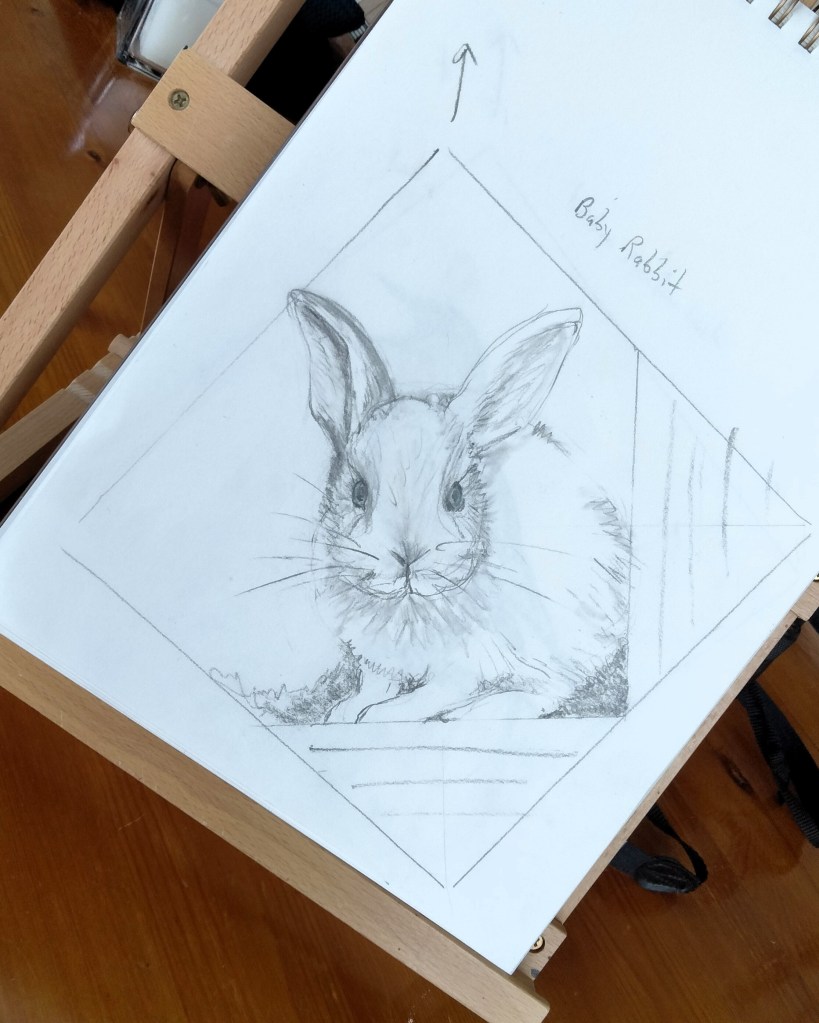
Beginning sketch for meadowlark:
Western Meadowlark
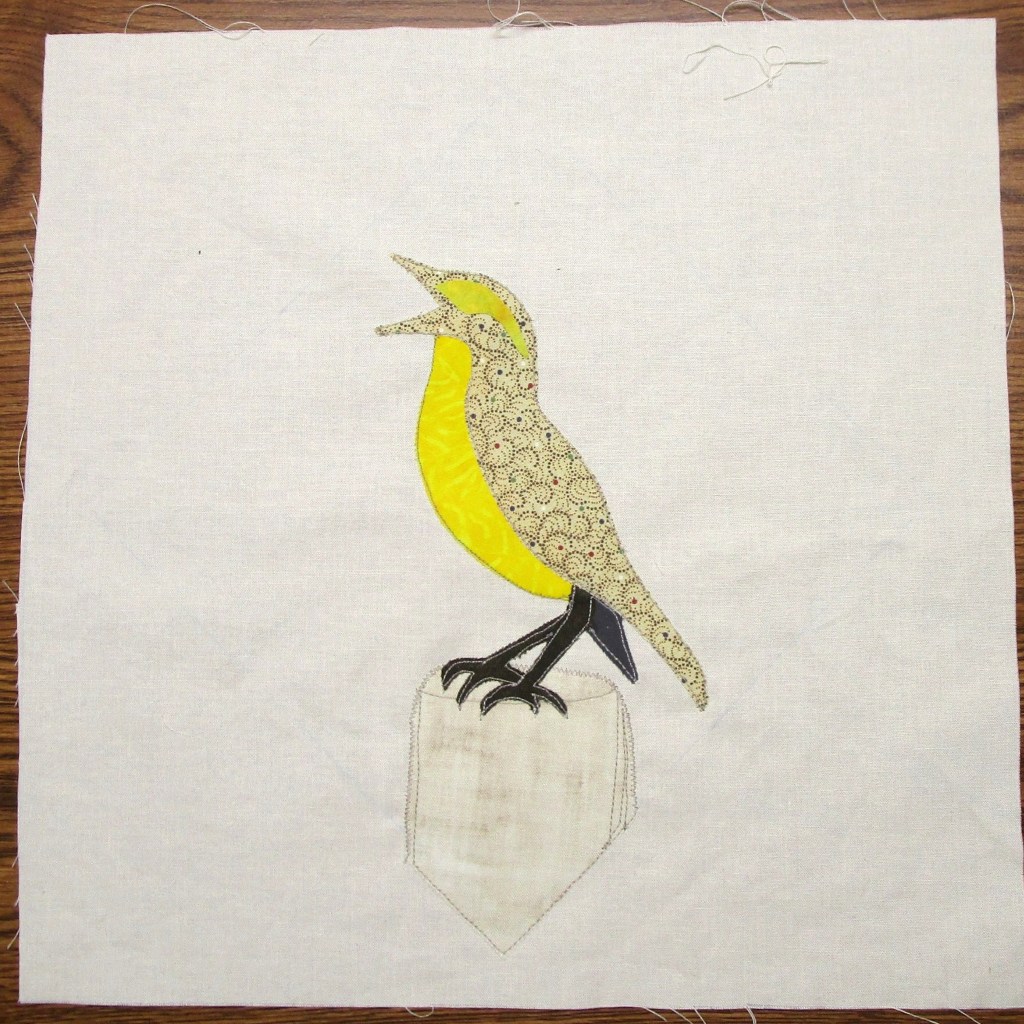
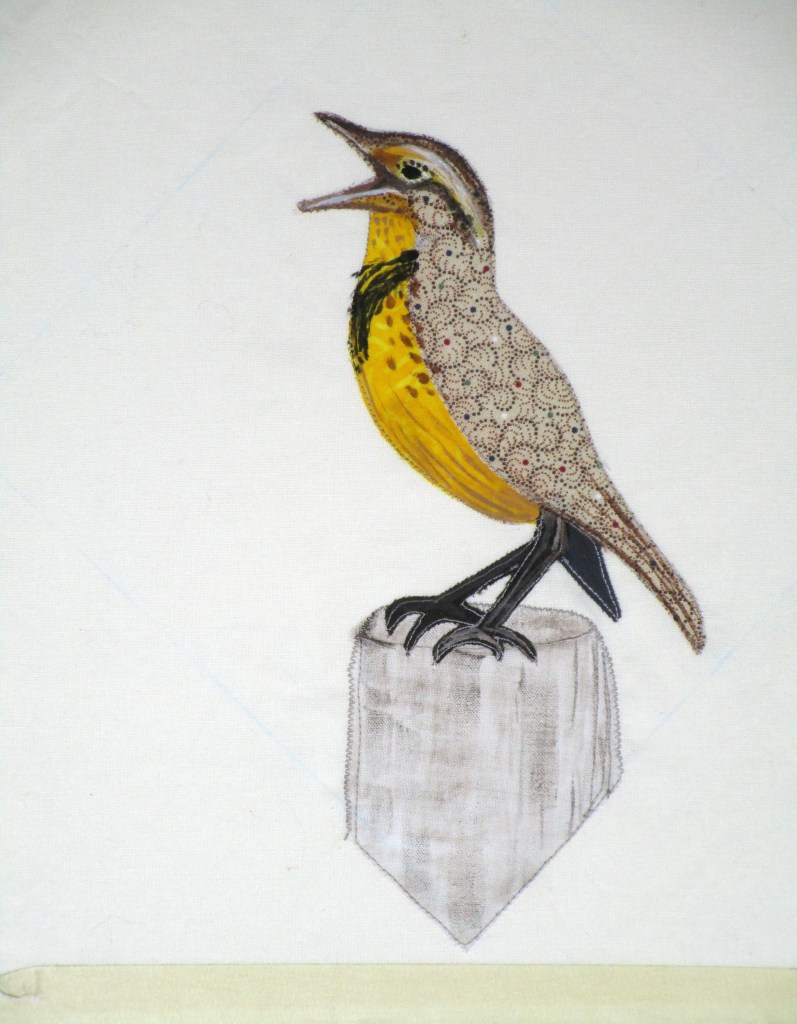
Progress photos and finished block:
AppliquedPainted and stitchedStrip piecing added
Beginning sketch of rabbit:
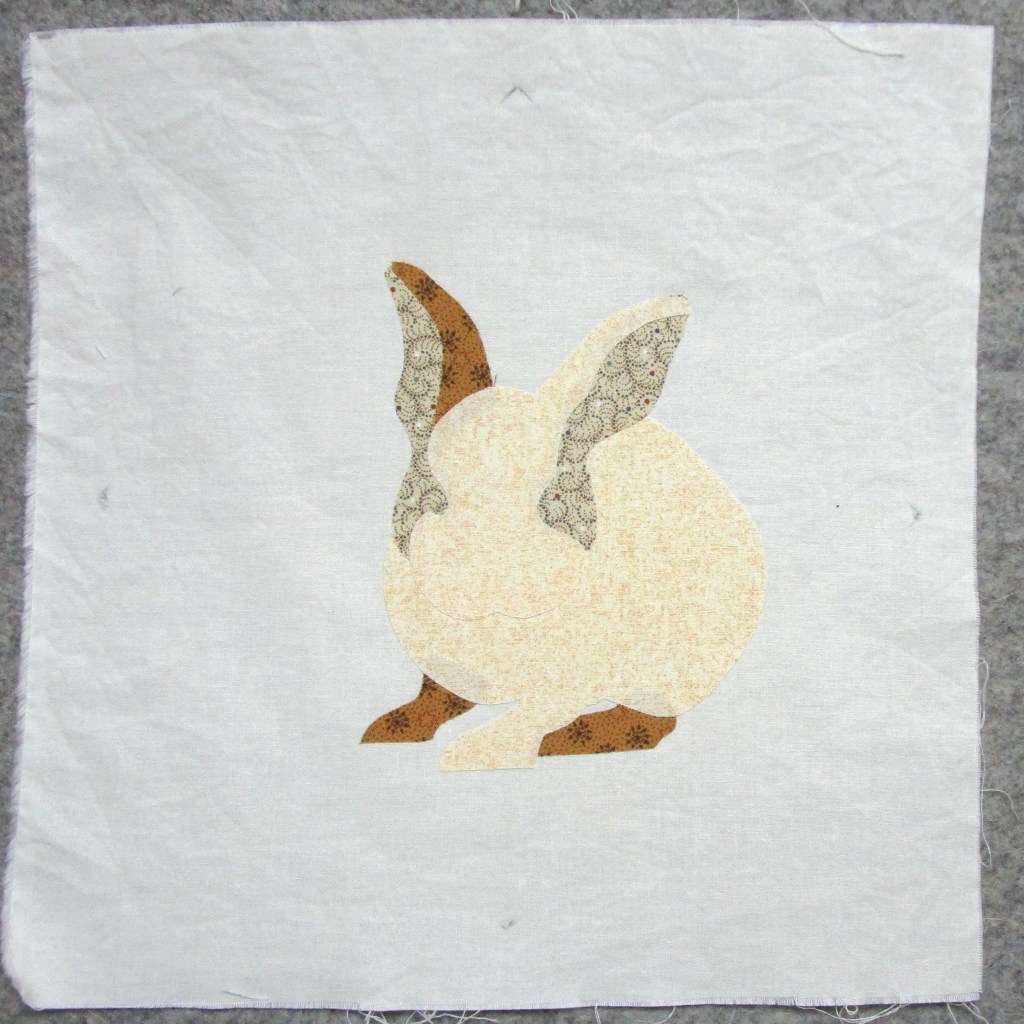
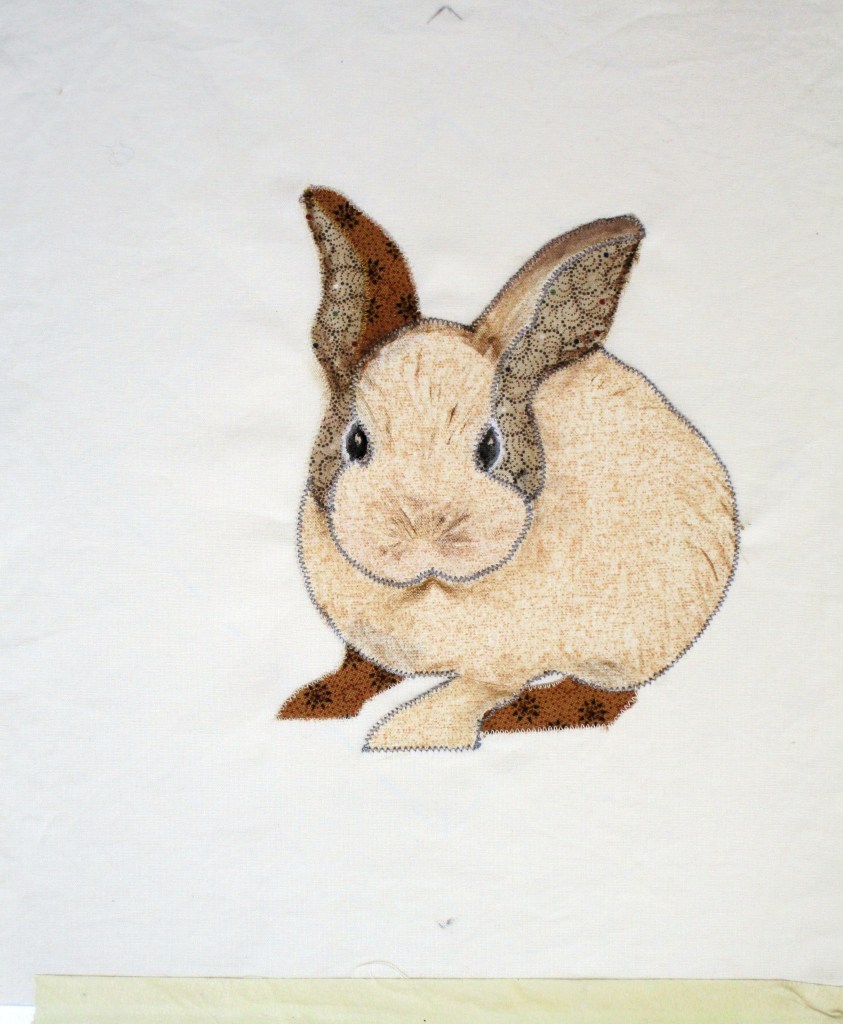
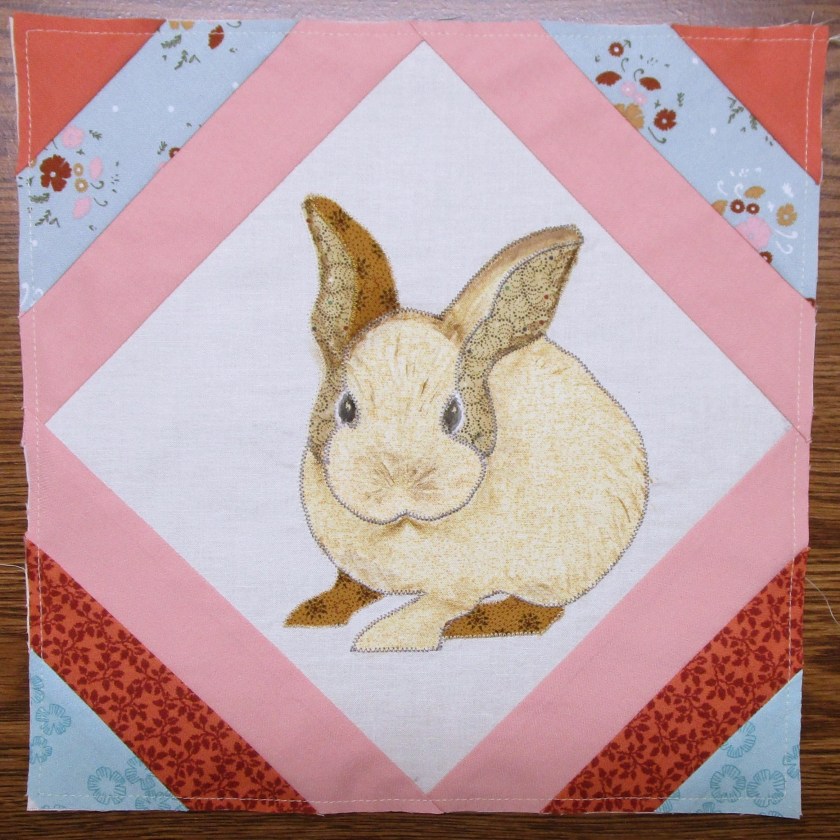
Baby bunnyAppliquedPainted and StitchedStrip piecing added
Some additional remarks about the rabbit: The original photo was of a hybrid rabbit – white fur and brown patches, pale blue eyes. I’ve been observing many wild rabbits that hop about the garden here in my new home. Their coloration is more earthy and the eyes appear jet black. So that is how I made this rabbit. Also, the poor bunny has no nose or mouth yet. Those details will be added with embroidery floss. And maybe a few whiskers to boot.
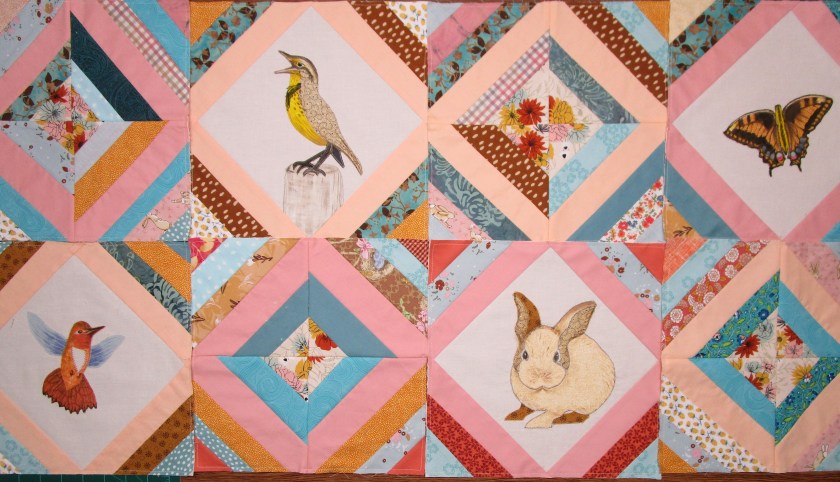
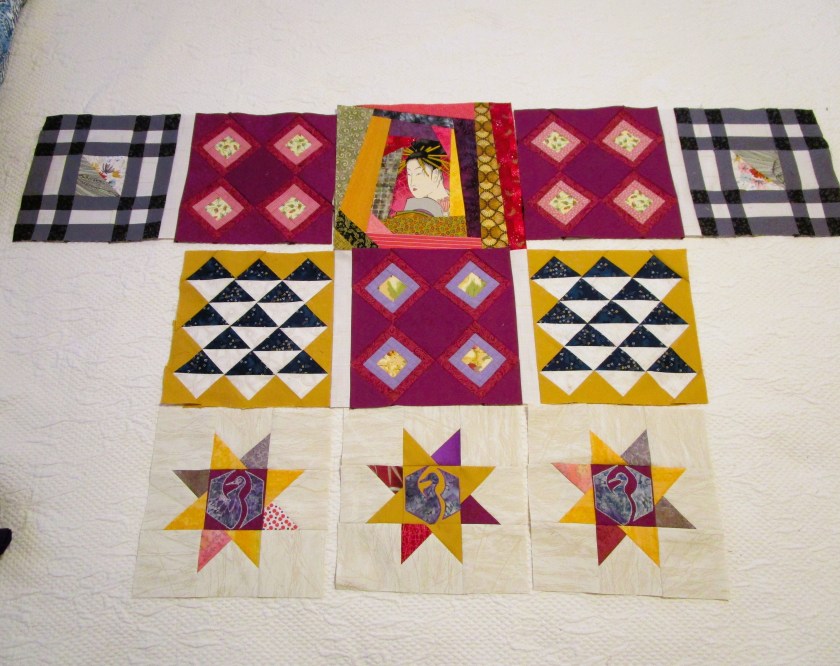
Now when I line up the completed blocks, the quilt looks like this:
Two rows out of five. The big picture is coming into focus.
Thanks for stopping by. I hope you are enjoying your long week-end (U.S. readers) Please drop me a word or two about your current project. I’d love to know what feeds your creative impulses.
Almost two weeks ago, I started work on a baby quilt that will be a gift for my niece who lives in Oregon. Her baby is due in August.
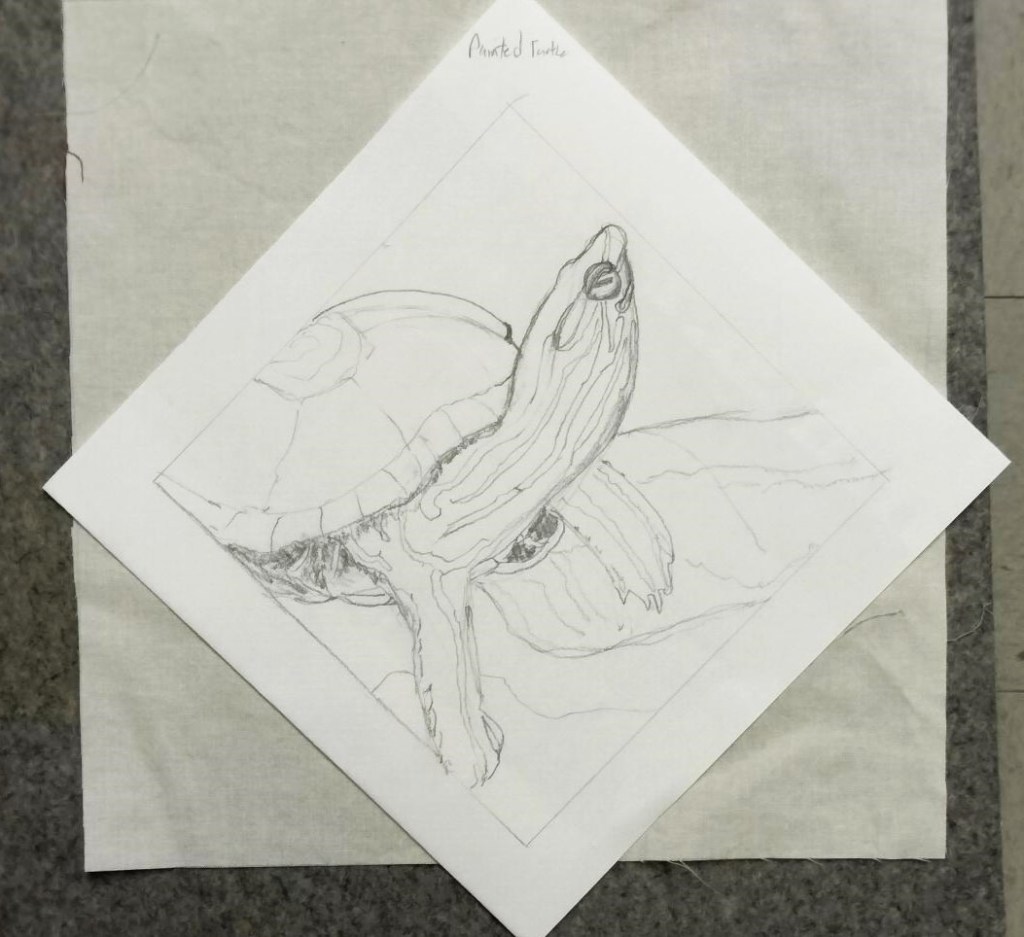
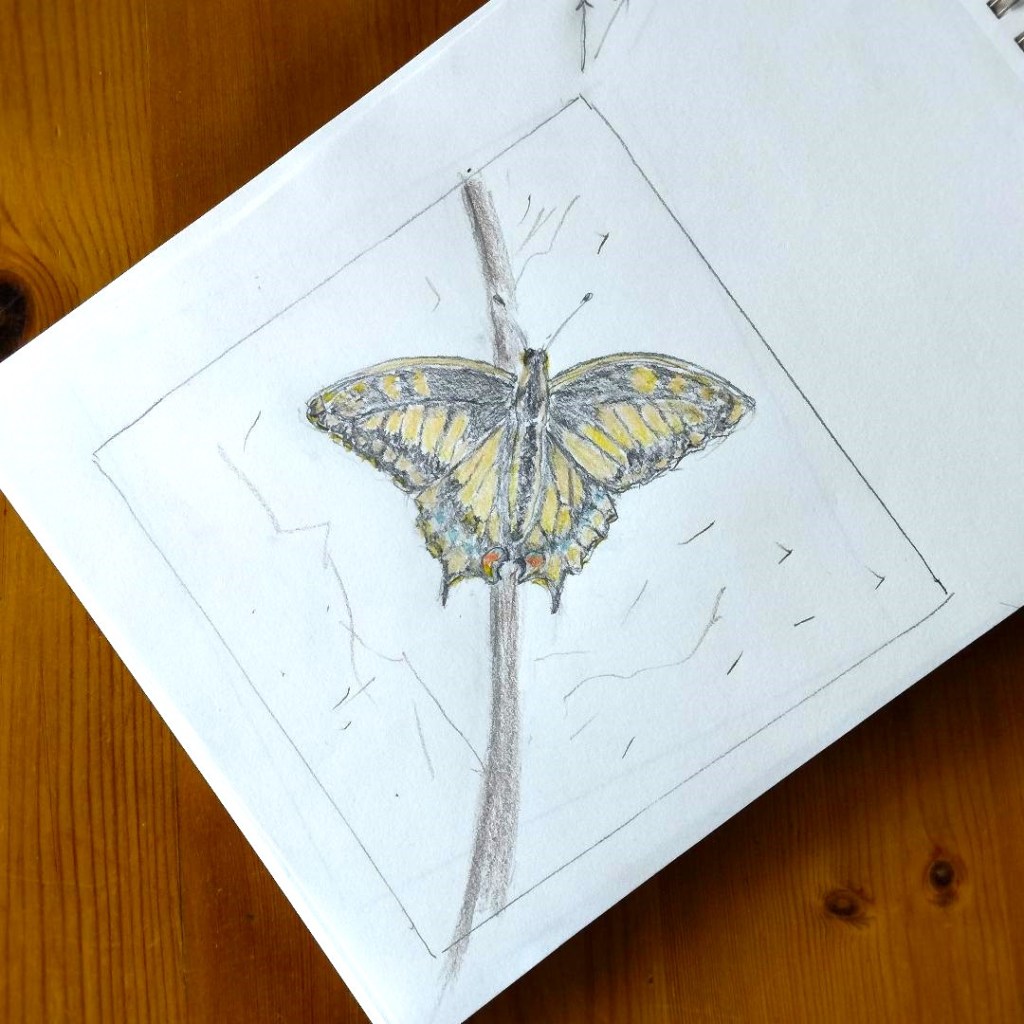
I have no title for this project, so for now I will call it the Oregon Baby quilt. In my first project post, I shared sketches under consideration as subject matter. They focus on animals and plants native to Oregon. This week I added two more:
Painted TurtleOregon Swallowtail
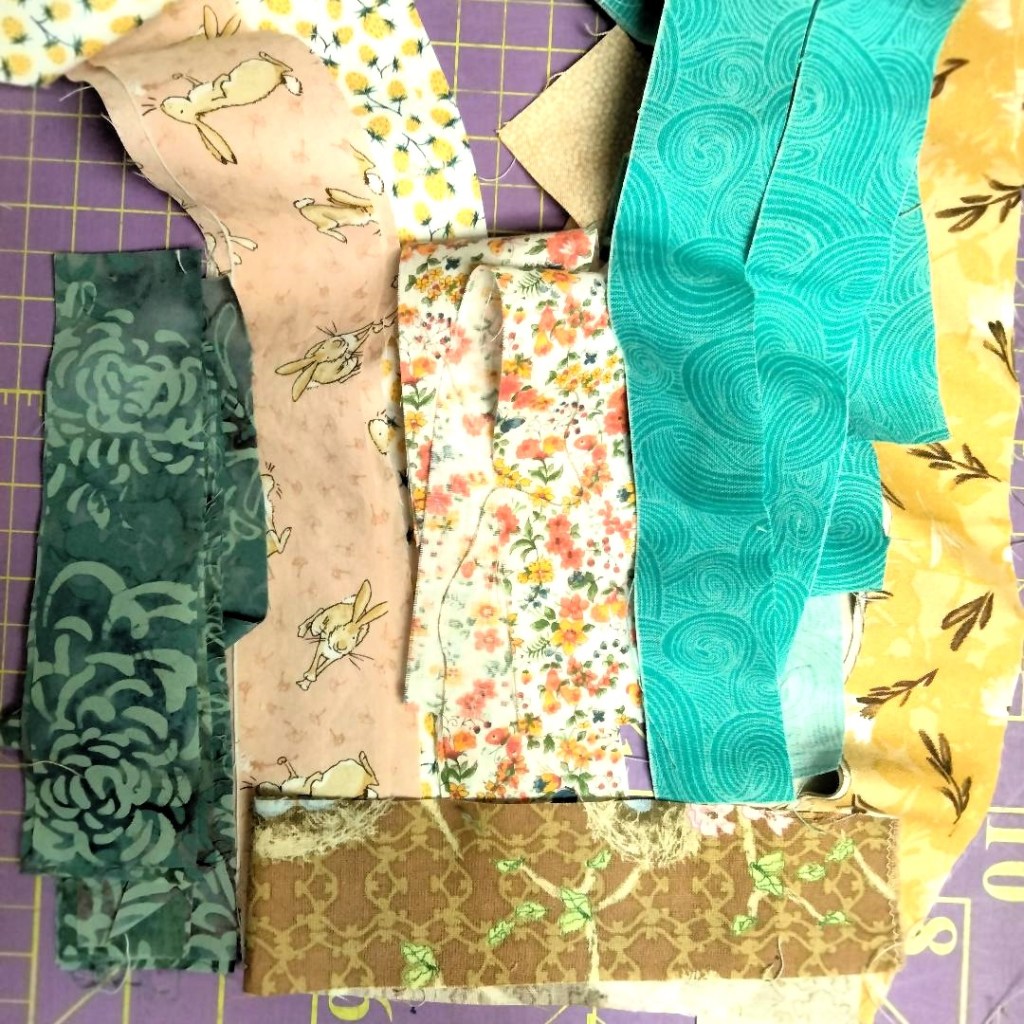
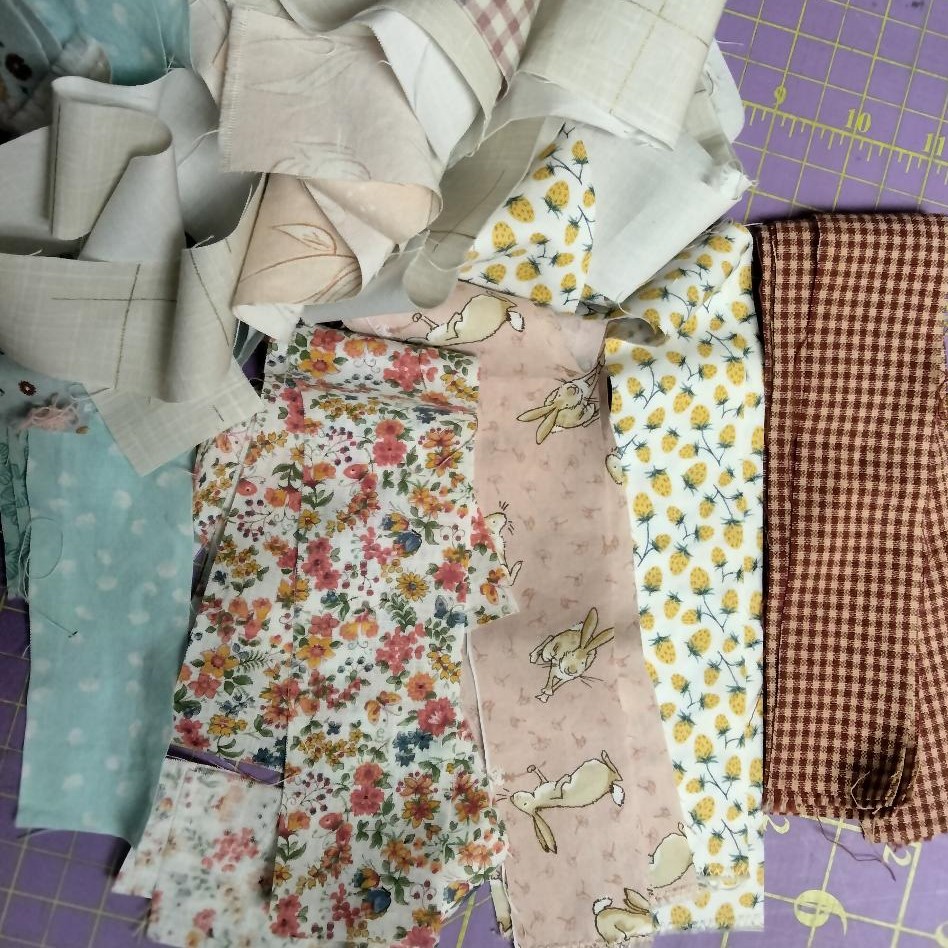
Having received a lovely bundle of fabrics from Connecting Threads, I have proceeded to cutting and sewing. Here are a couple of images of strips. They are not cut precisely, but range from 1 1/4 to 2 inches in width.
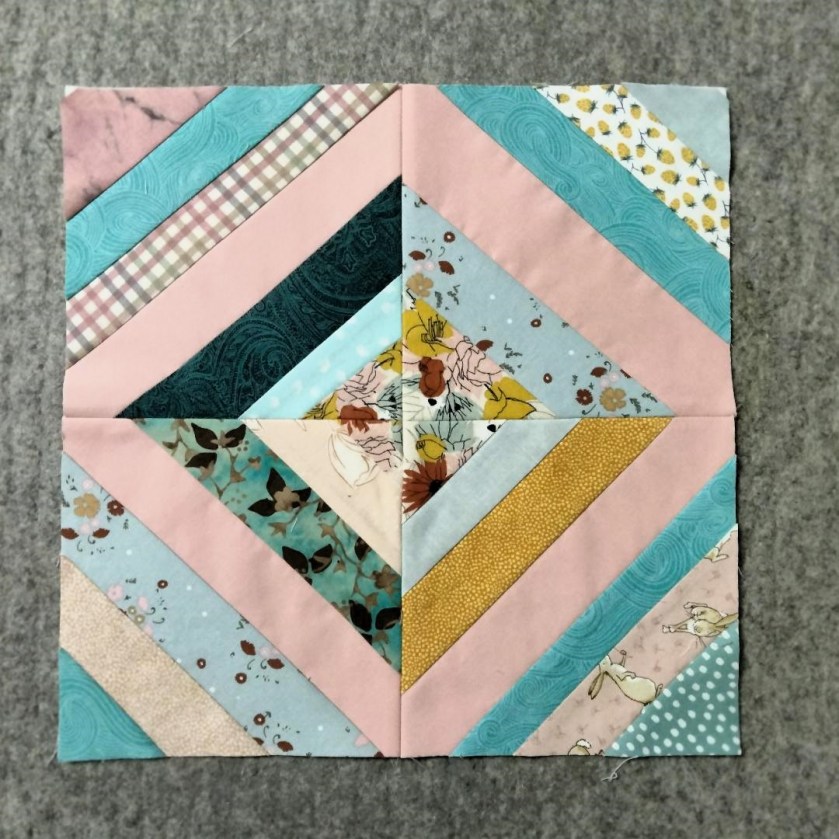
After cutting, I shoved the strips into four baggies: Solids, lights, mediums and darks. My plan is to alternate the strips, not so much by color as by value. Forging ahead, I completed the first block, which is assembled from four strip-pieced squares.
The solid 2 inch strips (In this block, the pink strips) will be placed consistently at the widest point on each square. I chose a brightly colored floral fabric to act as a mini focus point for the block. These two elements should serve to unify the multitude of fabrics that will be used in this quilt.
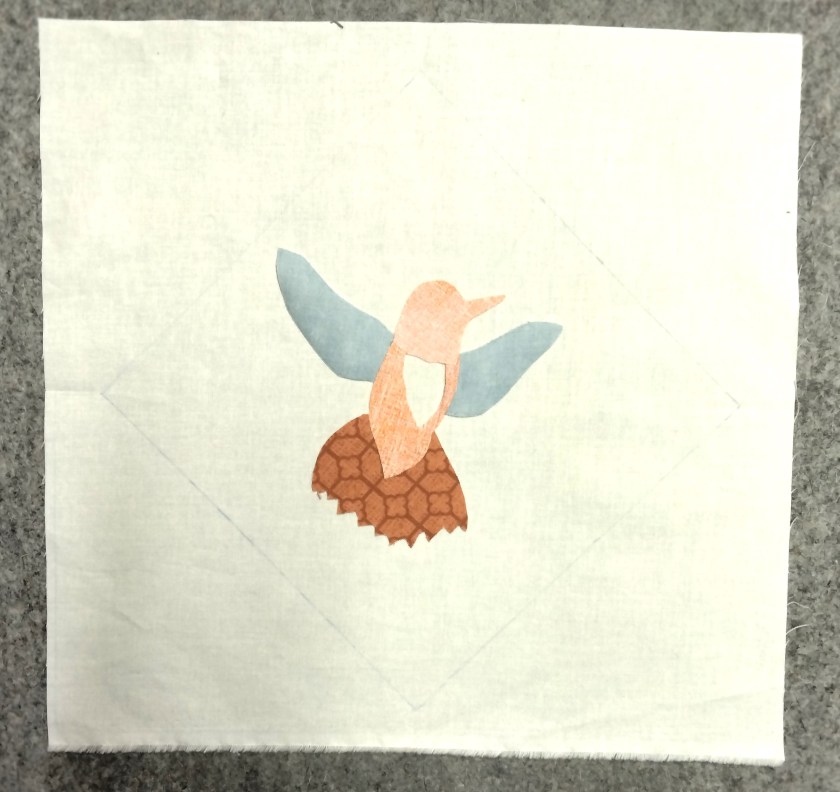
Moving on to the first feature block: I chose the rufous hummingbird. After making a pattern from my sketch onto tracing paper, I cut out the parts to be appliqued and fused them in place onto background fabric.
Eventually, shading and details will be painted on, the applique edges will be machine stitched and hand embroidery will create finishing touches. That’s secret code for I don’t know for sure what I will do next.
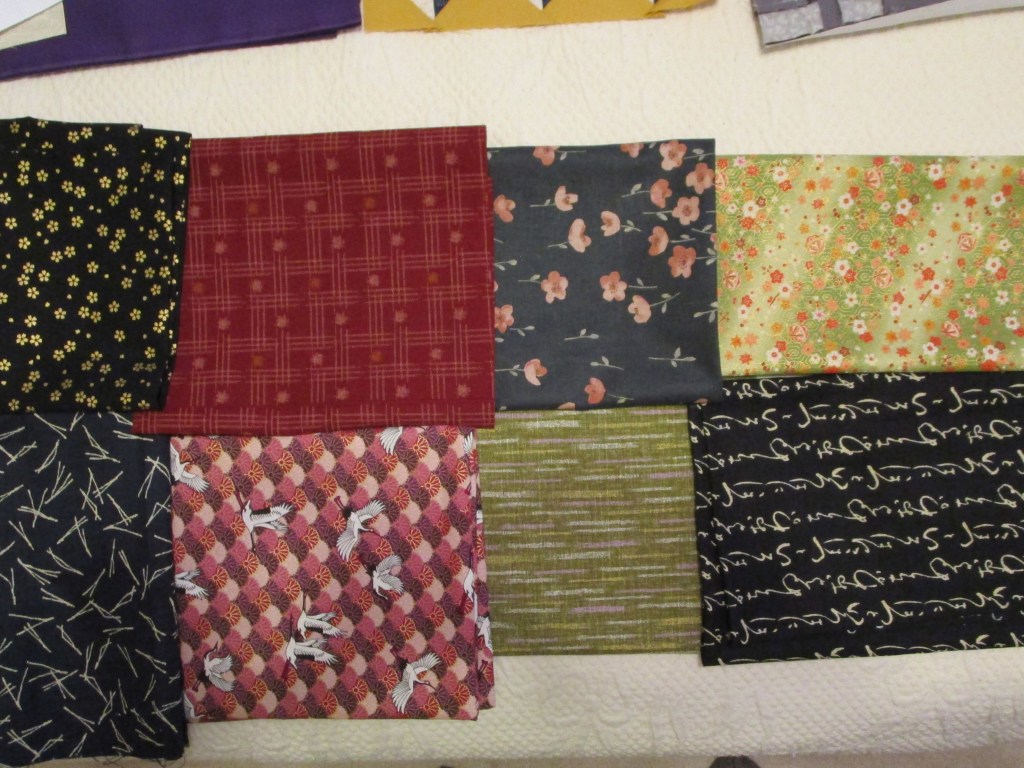
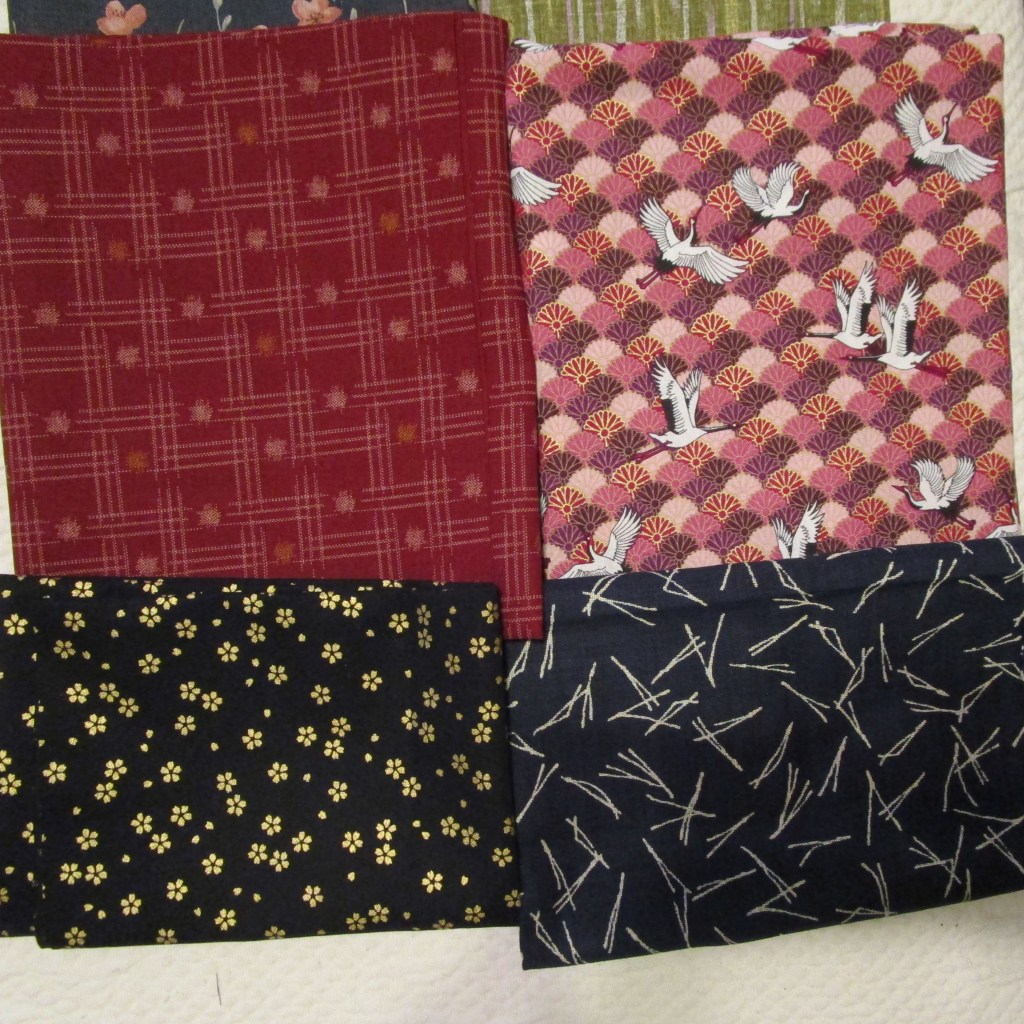
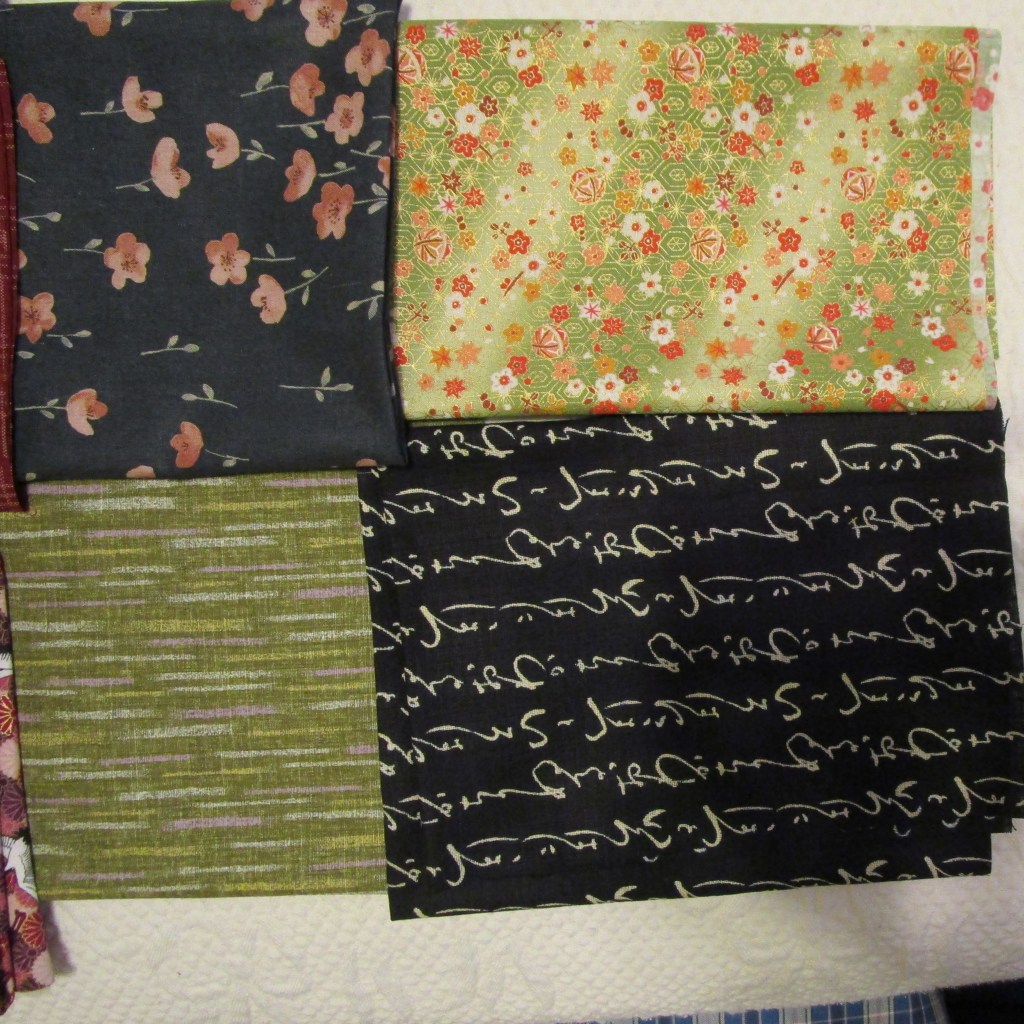
It’s all Japanese quilt blocks all the time around my house these days. First of all, let me show you the fabrics that came yesterday from kimonomomo on Etsy;
They are all types. There’s smooth cotton and homespun, shiny metallics and quiet two-color prints. What I forgot to buy was fabric in light colors. So my completed squares are about to get darker.
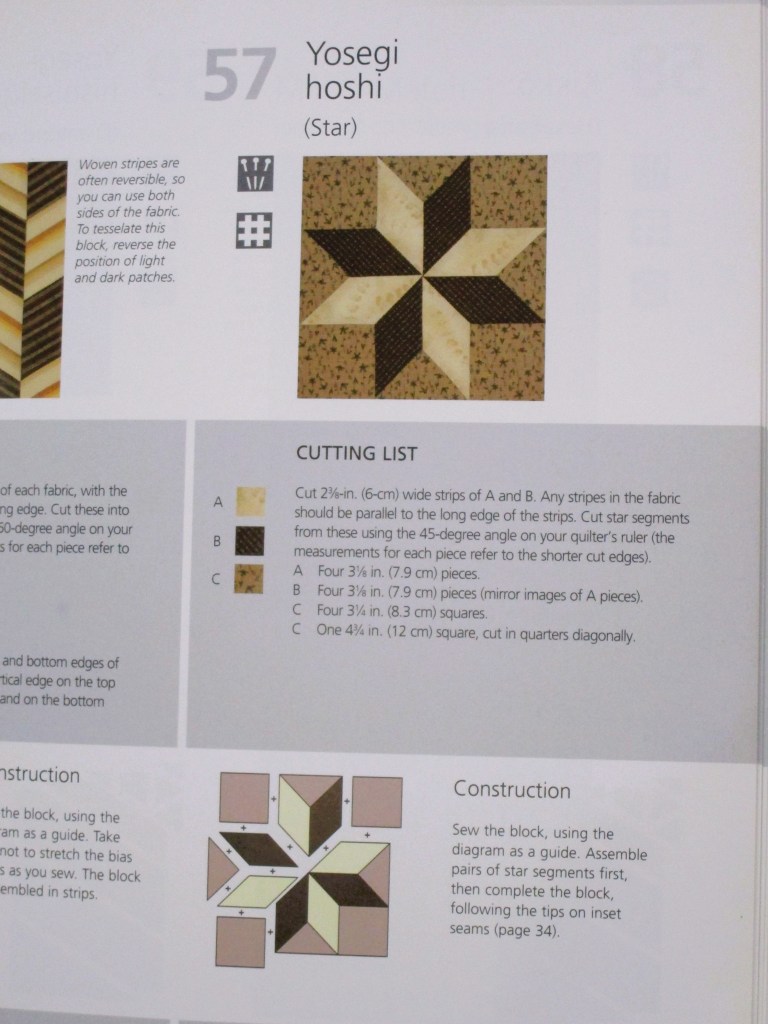
But not this week. Quilting Gail asked us to make star blocks for round 3. I found only one Japanese star block in Susan Briscoe’s book. The Japanese word for star is hoshi.
This is a basic eight point star assembled from diamond shapes. But it is not an easy one. The directions are rated difficult and the technique includes sewing lots of Y-seams. No thank you.
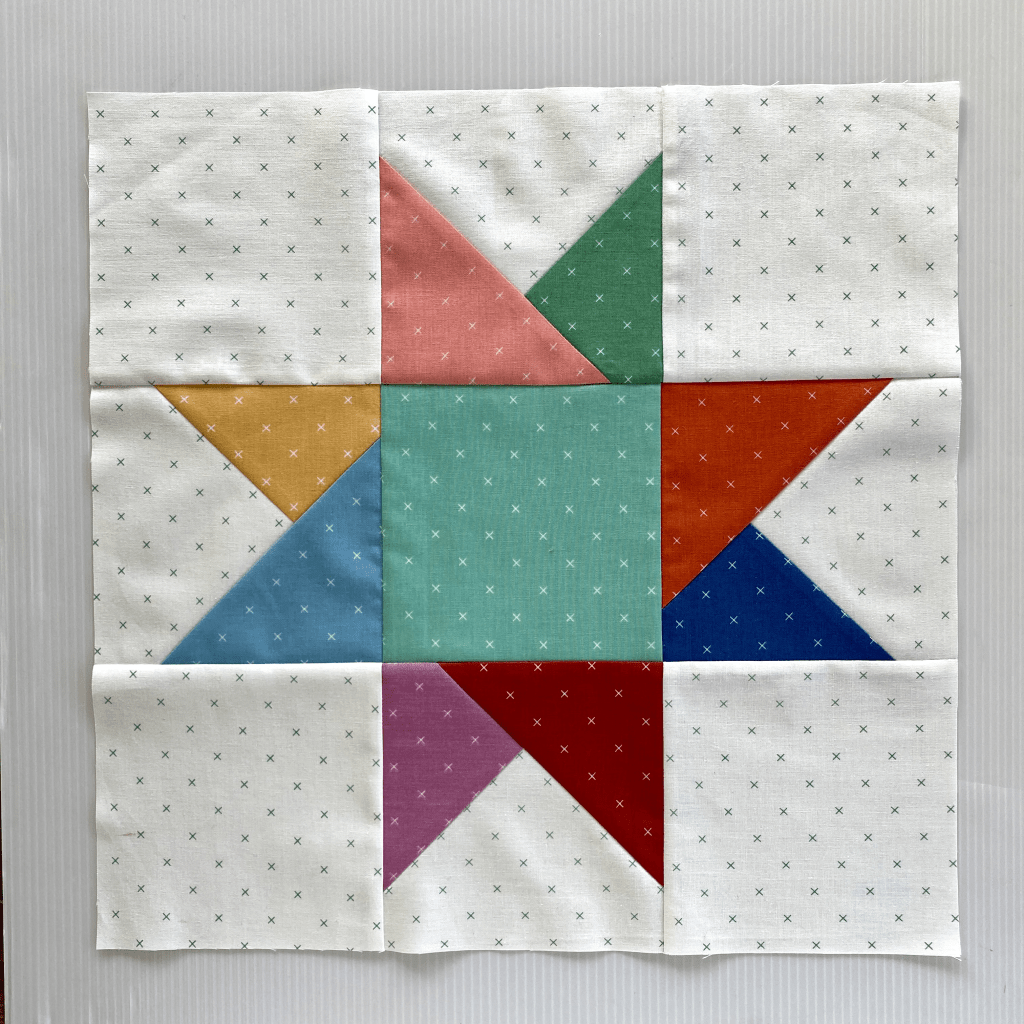
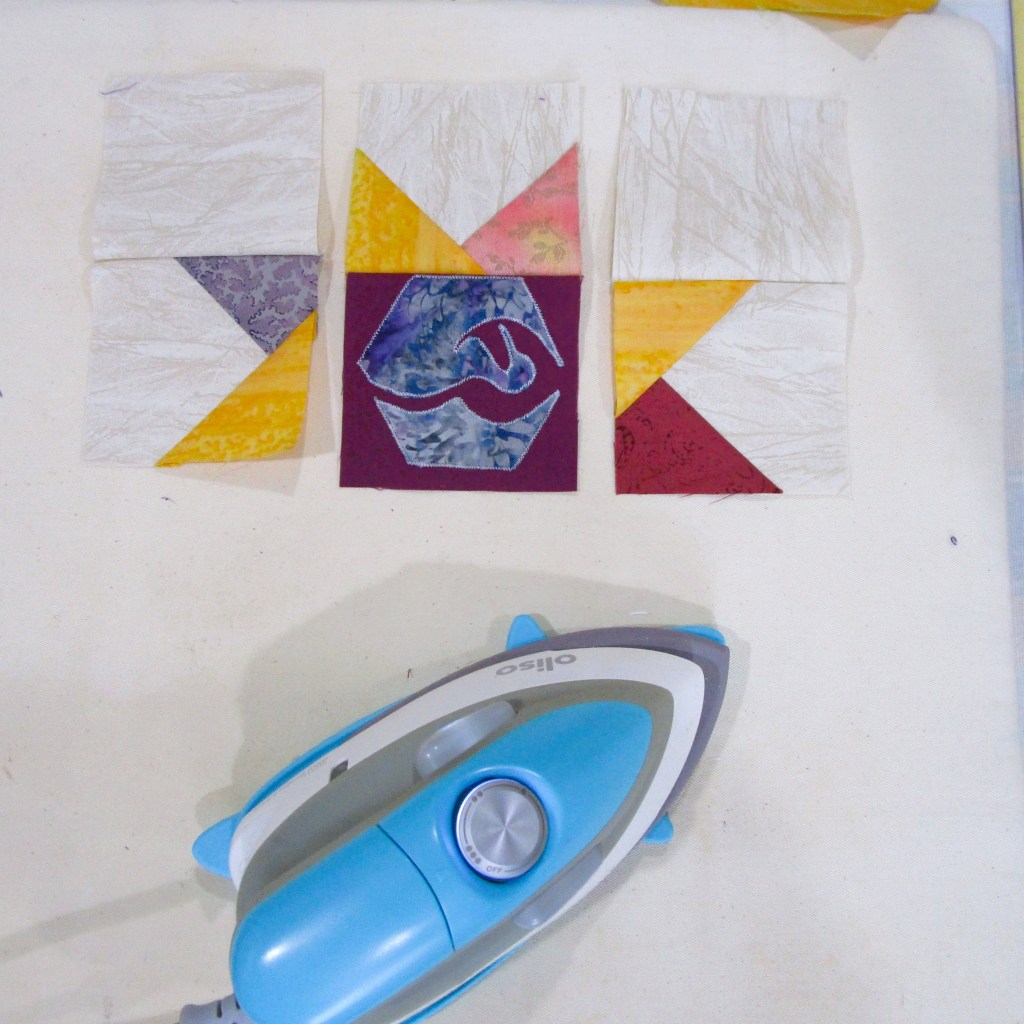
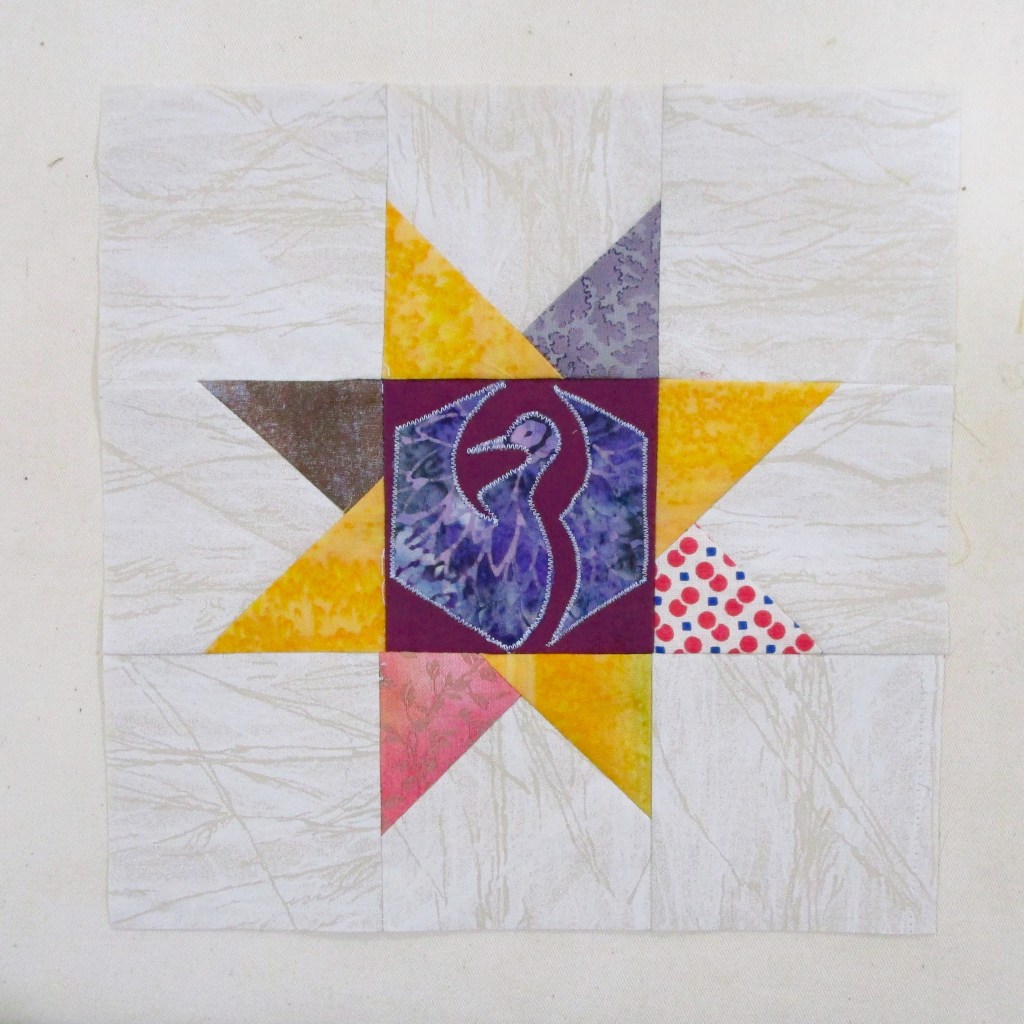
A google search helped me get out of this assignment. I discovered many Japanese quilts that incorporated hoshi blocks in different techniques and styles. So I decided to use this criss-cross star block as described by Anorina on sameliasmum.com
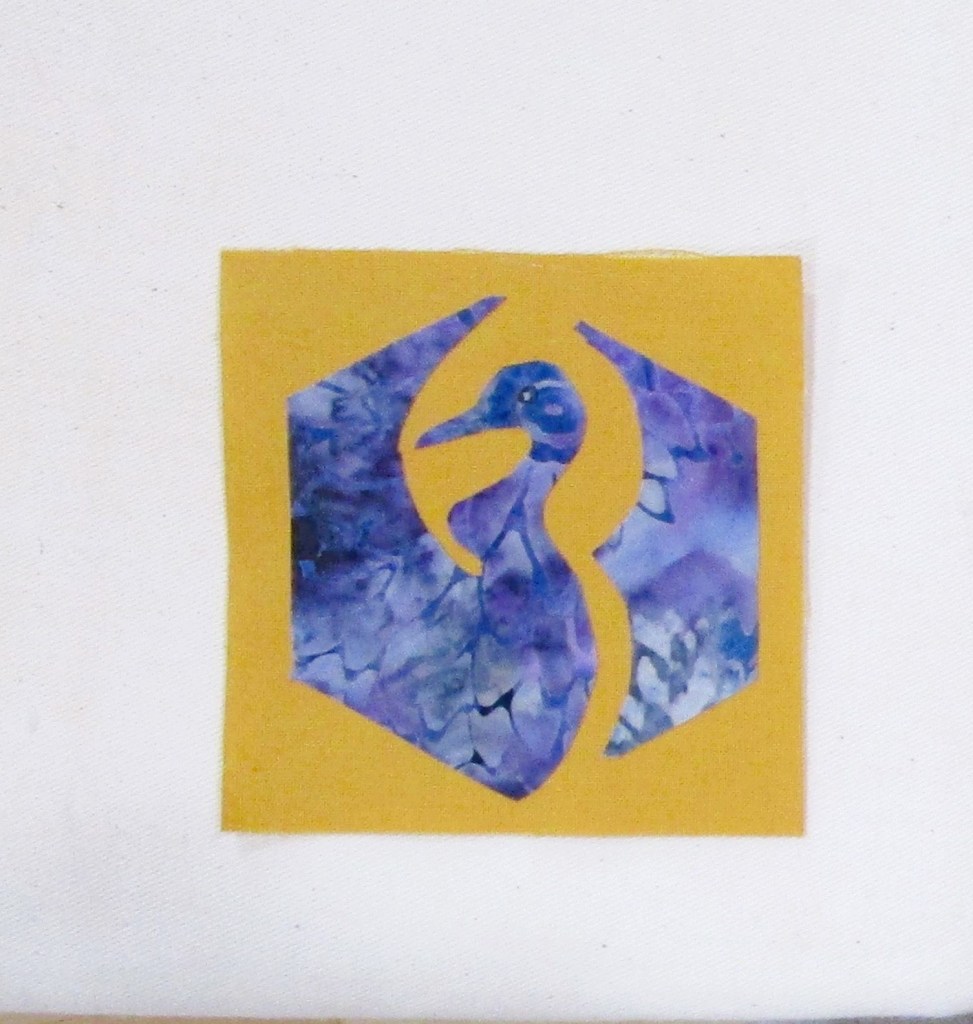
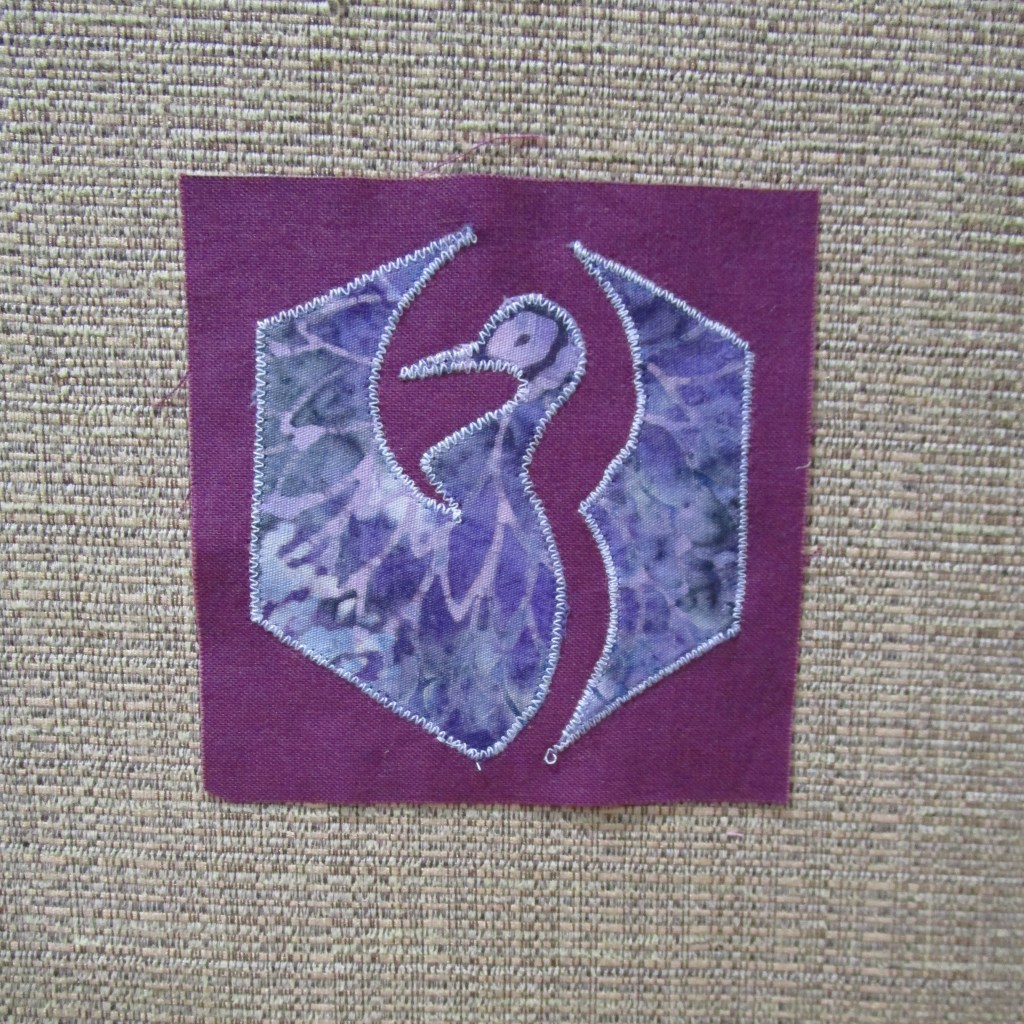
To give the block a little Japanese style, I made the center square with an appliqued crane, which symbolizes longevity for the Japanese. This applique is included in Susan’s pattern book and described as a crest.
Crane on gold squareCrane on dark square
I sewed three criss-cross blocks in all. And here is my quilt at the end of round 3.
I will be continuing to stagger the placement of blocks. That means I need to wait for Round 4 to finish this row. Two blocks from Round 4 will replace the outside stars in this row. They will be moved to row 4.
I hope you are enjoying my little adventure in international quilting. Be sure to visit the Linky party. It can be found on Quilting Gail’s site.
Here is the line up of all 2025 SAHRR designers.
January 13: The links for the Centre blocks are on THIS POST.
Using my new watercolor pencils, yesterday I painted the final two panels copied from a 13th century illuminated manuscript.
Days One and Three
I’m testing the performance of this medium on cloth. If I find that the pigment doesn’t bleed or fade, I will add this tool to my fabric painting practice. Now that all four images are finished, the cloth gets dipped in soapy water……
….swished gently, rinsed and dried. I’ll admit that I left the cloth to soak for less than a minute. There was a tiny bit of yellow and red pigment dissolved into the bath water. But as I blotted the rinsed cloth, I saw no pigment transferred to the white terry towel. Happy days! The pigment is colorfast.
The absolute final test is permanence. This one can’t be rushed. I just have to use the object and see what happens over time.
Because the muslin is so lightweight, I decided to cut out the circles and applique them to quilting cotton. In keeping with the “let there be light” theme, I chose a gold ombre fabric.
For the quilt, I’ll stick with the colors of the original painting – gold, dark blue, red and teal green. I have a silvery-gray solid to use as the background.
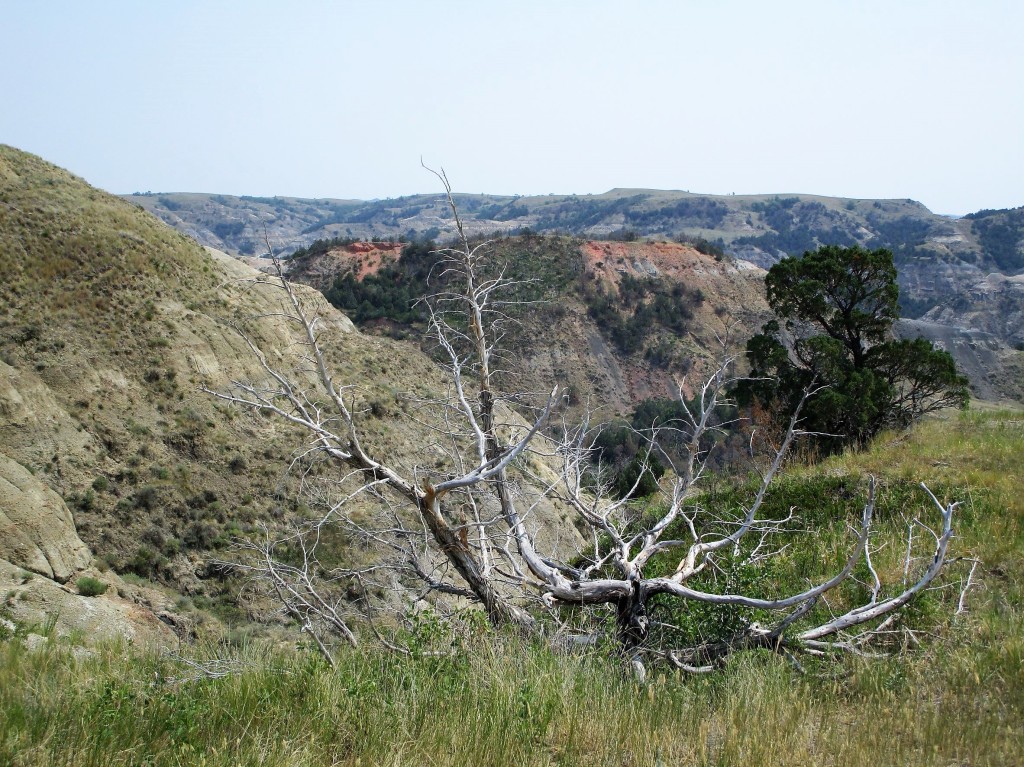
The inspiration for this art quilt came to me during our trip to Roosevelt National Park in July of 2021. I was captivated by the sandwich layering of rock, running in parallel lines that eroded down over thousands of years. It suggested to me a string pieced quilt. For the next several months I thought about my concept and puzzled over how I could bring it to life in fabric.
Our photographs were disappointing. It was high noon, and pervasive smoke dulled the light. No shadows were in evidence and the colors were muted. I decided to rely on an internet image for my working reference photo,
Photo from vangorentalmn.com
To get from concept to finished art is a long process. I started by making a value sketch. Next, I drew a pattern to scale, identifying major segments and eliminating excessive detail.
Here’s the part all fiber artists (including myself) find extremely creative: choosing fabrics. Since I like to use watercolor, I painted my swatches. After assigning a hue and value to each segment on my pattern, I picked out the fabrics to best achieve my color scheme of orange, blue-purple and blue-green.
Here’s an aside about the fabric I chose. Ultimately, I couldn’t find fabrics that had the colors and textures that I needed. To get there, I painted on printed fabric for most parts of the quilt. I also selected a few batik prints that were close enough, with only minor adjustments to color.
With the design decisions made and fabric selected, I began to assemble the quilt. All of the techniques that I used in making this quilt I learned from two fiber artists: Annette Kennedy and Gloria Loughman.
I thank these artists for giving me the skills I needed at the time I needed them.
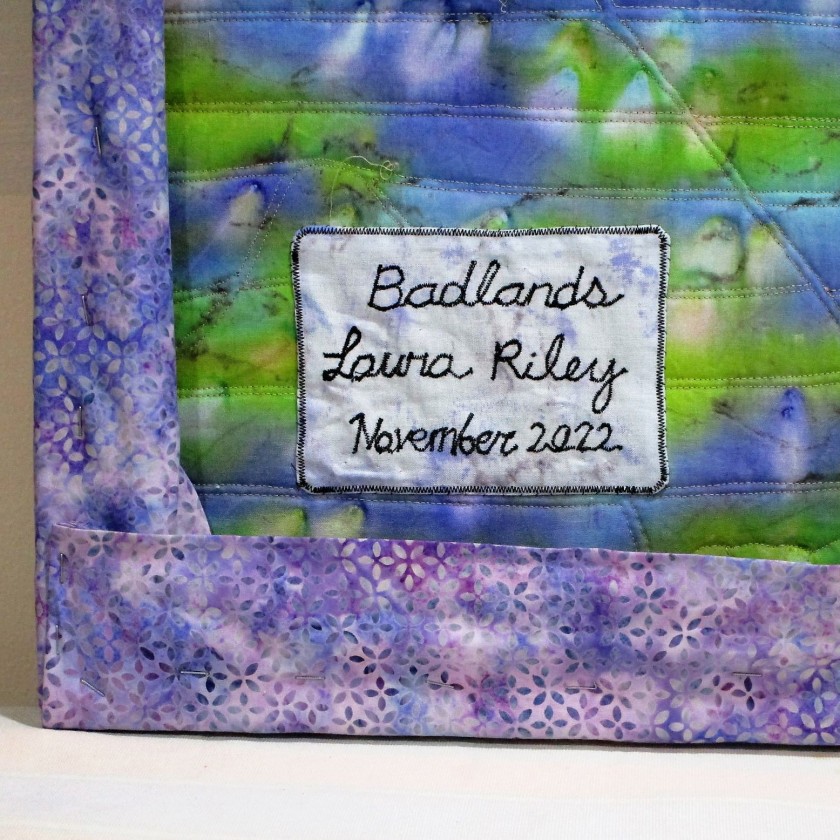
And here is Badlands in its final form:
The design is invigorated by lines running in parallel diagonally and horizontally. Where the diagonals meet, triangles are formed. These shapes lead the eye to the center where two focal points have a quiet conversation across the river valley.
As a final note, I want to acknowledge the influence on my style of pop artist David Hockney. A print of his painting, Garrowby Hill, hangs over our fireplace.
My imagination has traveled that blue road countless times over the past twenty years.