
To all men who devote precious time to their families, this day honors your efforts. Thank you for raising the next generation.
To all men who devote precious time to their families, this day honors your efforts. Thank you for raising the next generation.

One of the many fiber projects on my to-do list is the replacement of my kimono.
Many years ago, my mom made matching kimono robes for Bill and me. They were sewn in an Asian cotton print of cranes (his) and cherry blossoms (mine) on a black background. We wore them frequently in hot summers, and packed them to travel all the time. Now both are threadbare. I managed to sew a replacement for Bill’s about six years ago. Mine finally gave out this year.
Last winter my mom let me browse her fabric stash. There I found a light blue textured cotton piece with enough yardage for a kimono. I snagged it and smuggled it home in a box.
Recently I found a kimono pattern offered for free on Connection Threads.
Kimono Robe Small-Medium Pattern Download | ConnectingThreads.com
So I chose to get this project started yesterday. To line the kimono I bought this butterfly print at Hobby Lobby. At $3.00 per yard, it was hard to resist.

I made two modifications to the pattern. The first was a no-brainer, I just shortened the robe to knee length. That quick change saved me two yards of fabric. The second change was the addition of a side seam pocket. This type pocket was part of my first kimono. I just loved it for carrying around a set of eyeglasses and a tissue. It was so handy and yet so invisible. I couldn’t imagine my morning routine without it. (See my earlier post Who Needs Pockets? ‹ Daily Fiber ‹ Reader — WordPress.com )
The only difficulty is that I had no idea how to make a side-seam pocket.
Hah!, you say – This is a job for U-Tube. And you would be right. I found the perfect tutorial. Let me introduce you to Catherine Sews:
Sew a Topstitched Side Seam Pocket – YouTube

Having got that task out of the way, I moved on to sewing the robe fronts to the back.

……..and then the lining fronts to back.

Today I spent a good hour or so zig-zagging all the seam allowances to minimize the problem of fraying. Then I attached the neck band. It is sandwiched in between the outer fabric and the lining, which very neatly gets the lining sewn in to place.

Here is how the kimono looks at the end of today’s efforts.

I like how it looks so far. With any luck I will have the kimono finished by Friday.

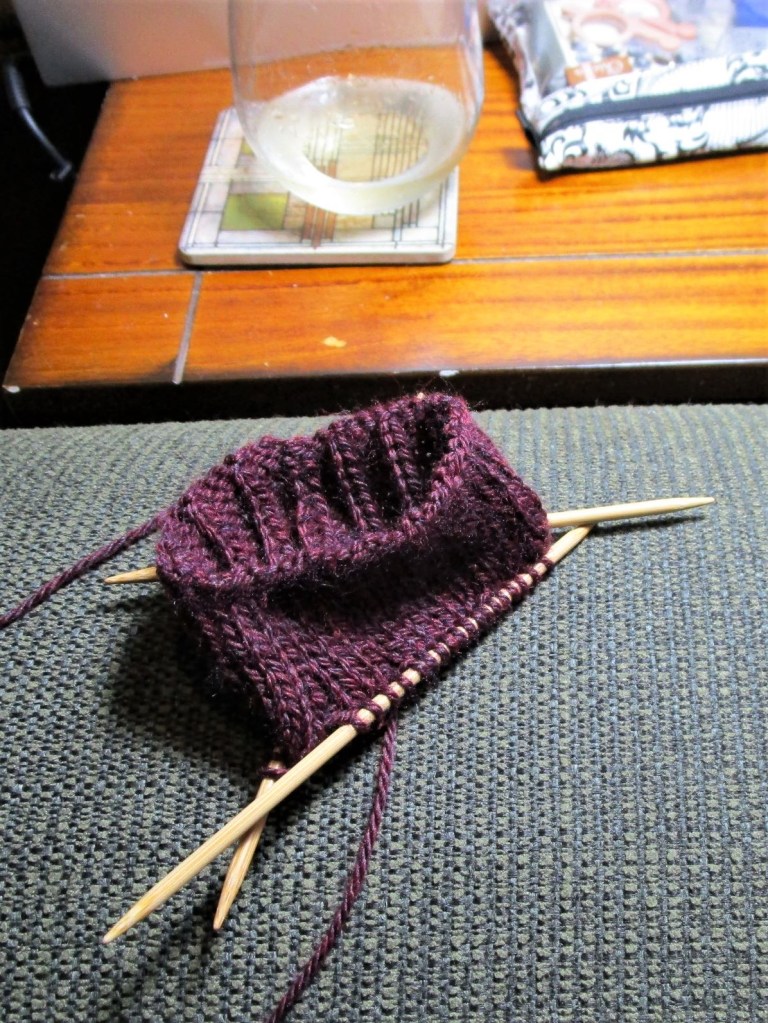
Moving on to smaller and better projects, let me introduce Elizabeth Zimmerman’s Woodsmans sock pattern. Here you see my cast on, accompanied by my evening libation. I am working my pair in a thinner yarn than what is called for in the pattern. It’s a Berroco blend called Vintage DK.

These skeins were purchased at Sunset Yarns in Madison, WI this past spring. I adore the softness, and have high hopes that the elements of acrylic and nylon will keep my socks from getting holey before their time.
EZ’s pattern was published in The Opinionated Knitter, and can also be had on a streaming DVD video with Zimmerman’s daughter Meg Swansen.
Ravelry: Woodsman’s Socks pattern by Elizabeth Zimmermann

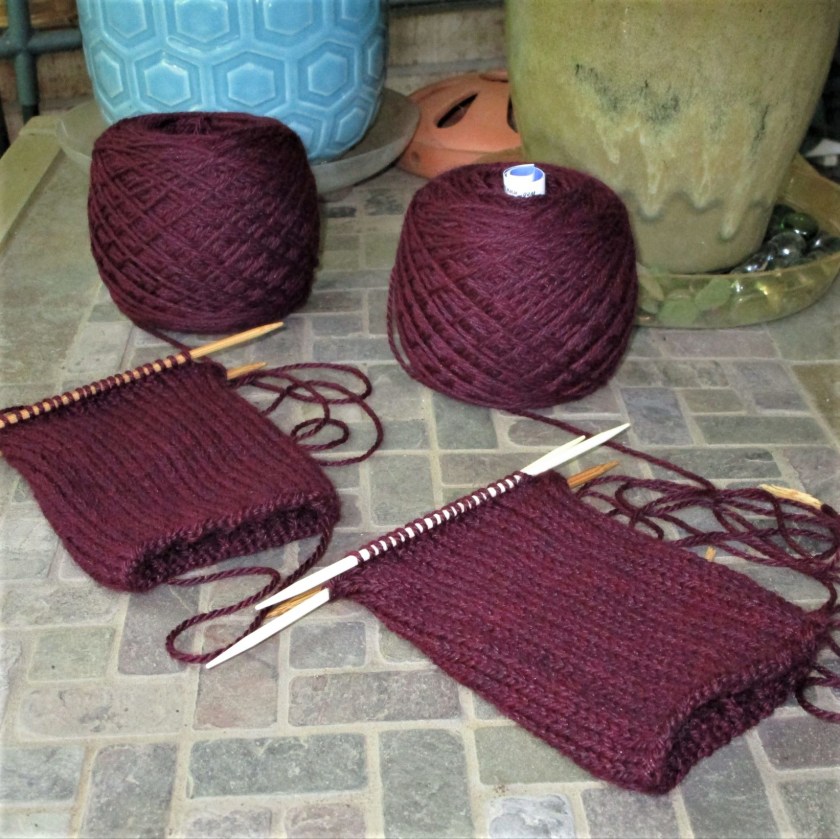
The only variation I will be making to the pattern is to knit a 3 by 1 rib instead of the typical 2 by 2 version. I find this rib to be every bit as stretchy but it results in a smoother texture.
I’ve also started both socks, not exactly as the same time, but in tandem. While I haven’t perfected the magic loop technique, I have many no. 5 sock needles, and I purchased two skeins of yarn. The plan is to knit in sections: working each leg down to the heel flap, then work each heel flap, then turn each heel, etc. This could help me avoid single sock syndrome.
If I don’t have these finished by the time we leave for vacation in July, they will be a perfect travel project.
What’s on your needles today?

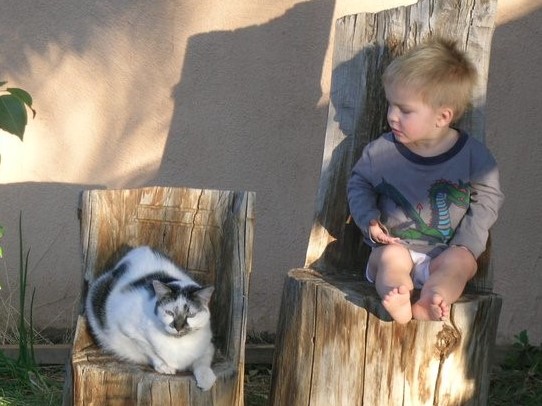
Anyone who is one knows that there are joyful opportunities and sacred privileges in being a grandparent. Over the years I have experienced more than a few of these special moments. Sometimes they is exist only in a shared photograph. That’s how I felt when I first saw this photograph of my grandson almost ten years ago.
Now as I begin to train myself in drawing and painting, I experience the profound pleasure of reproducing this moment in media.
My first sketch of Henry and Cat:

It warmed my heart to make this image. Thanks to my daughter and son-in-law for capturing the moment and sharing it.

Ever since I wove a small tapestry on a hand-made loom, I’ve mused about weaving threads over a water color painting. So today I am playing around with the idea.
I started with this 4 by 6 painting I did last December.

It’s an exercise from Kateri Ewing’s book Watercolor is for Everyone. After drawing two columns of randomly sized rectangles, the artist applies selected colors, reversing the order of application in the second column.
I thought this painting would be a good background for my proposed thread embellishment because of its rectilinear structure. To start, I poked holes at regular intervals along the outside vertical edges. Next I stitched a zigzag pattern across the painting with no. 3 cotton twist thread in a gold color.

Now what, I asked myself. How about creating points along the thread intersections by tying knots? Okay. For this step I chose a dark cool green shade.

To further reinforce the intersections, I painted shapes with a metallic paint.

Not a bad way to spend a quiet afternoon. It was soothing and meditative. It reminded me of those picture stitch cards that I worked as a girl when learning how to sew.
Now I have a brand new perspective on what is possible with paint and thread.
You can learn about Kateri Ewing’s work here:

