Hi friends! I have been absent for a few weeks while traveling around the country. A large chunk of our travel was in wintery Wisconsin. Despite the cold, snowy and windy weather, I found some inspiration in what we saw. I love the rolling countryside of the Driftless region. And the sand hill cranes. (More on the cranes coming soon.)
For today I will start with a rural landscape. My re-entry into art started with Wednesday’s Open Studio at the local art association. Every month on the first Wednesday, watercolor artist Cheryl Bryan provides a lesson. This week’s subject was buildings. I chose to paint a barn, in honor of all the lovely barns I saw in WI.
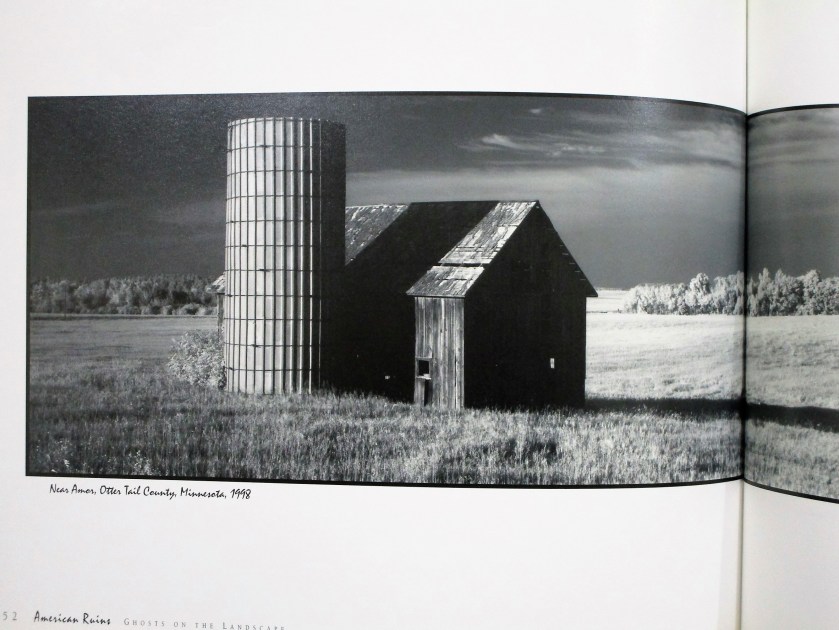
For my reference photo, I turned to American Ruins: Ghosts on the Landscape by Maxwell MacKenzie. A few years back I was blown away by MacKenzie’s formidable photographs of falling down farm buildings on the great plains. My first attempt at rendering one of these images was a few years back when I was learning to draw with pen and ink.
Today I picked this image to paint in watercolor.
The sketch took me almost no time. I didn’t need to re-scale it to fit my paper, so I did a tracing of the essential lines. I then transferred the tracing to my paper. Next I added masking fluid to retain some of the white spaces (especially those small holes in the old barn.

To keep things simple, I chose a limited palette: burnt sienna, cerulean blue, cobalt blue, carbazole voilet and Winsor yellow. Oh, and a little black.

Cheryl’s lesson focused on painting values. She asked us to decide where to use high, medium and low values, assigning one value to background, foreground and subject.
Using a black and white photo made this part easy. I wanted to retain the photographer’s focal point, which was the deep shadows thrown by the silo and barn. My background would be a medium tone and my foreground light. After painting the sky and adding a preliminary wash to the foreground, I painted my subject.
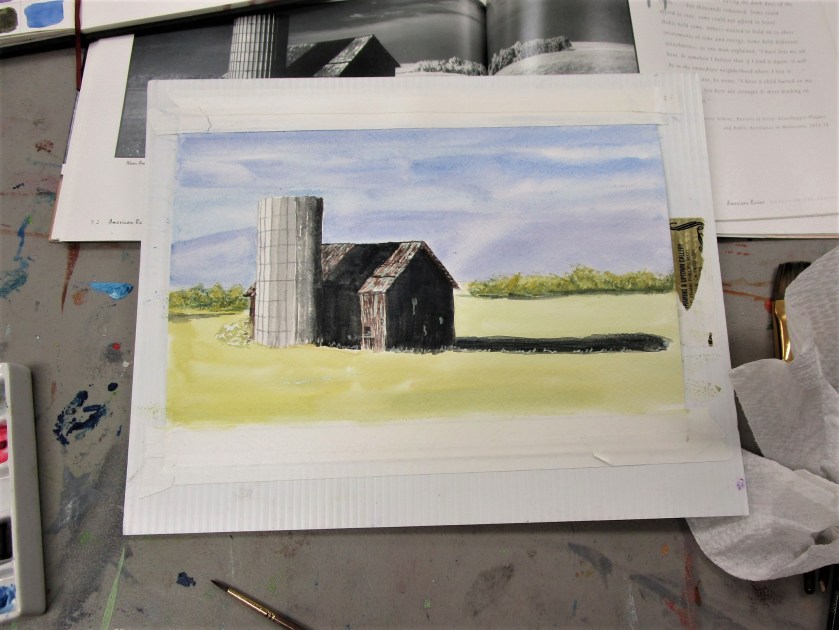
At this point I was stumped on how to proceed. So I showed my work to Cheryl, who gently scolded me for using black paint. Watercolor students are discouraged from using black paint. We are told that it deadens the painting.
I went home and proceeded to wash out as much of the black paint as I could.
Today I returned to the painting. First, I decided that the sky was too light. Masking the top of the silo and barn, I added a glaze of cobalt blue to the sky. Then I painted glazes over the three areas of black paint using blue, brown and yellow.
At this point I removed all the masking fluid and turned to the foreground. Now, I live on a prairie. I spend many, many hours traveling on roads that cross the prairie. You would imagine that it would be easy for me to fill my painting with prairie grasses. But that expansive area of yellow paint just sat there and mocked me.
To get over my artist’s block, I reviewed this tutorial on composition by Joseph Zbukvic
Forgetting everything I know about prairie grasses, I proceeded to fill my foreground and middle ground with Zzzzzzs…… okay, gently curving zzzs.
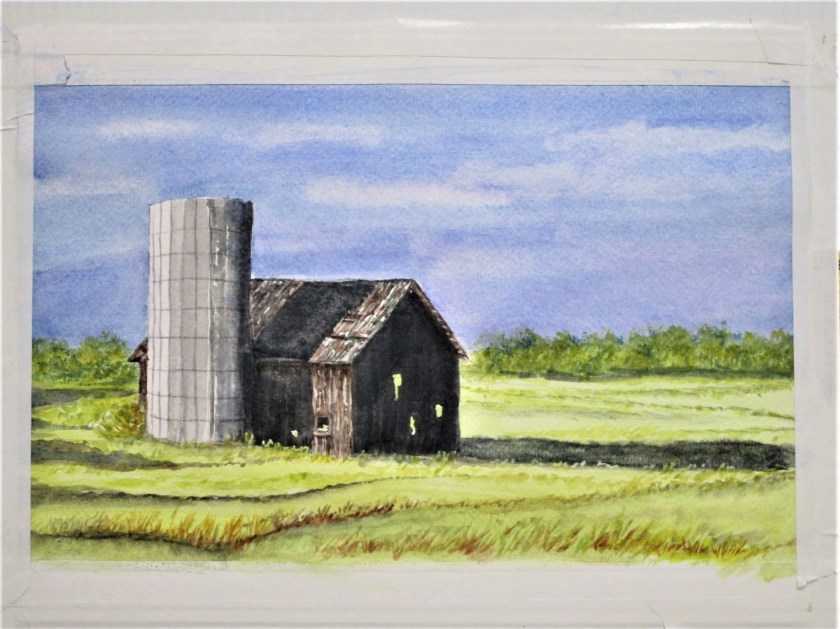
The only areas still bothering me were the trees and the little shrub behind the silo. I added more paint and some trunks on the tree line and repainted the shrub as a bare-twigged remnant in burnt sienna. This seemed to work.

I’m finally ready to call it done.
To learn more about Maxwell MacKenzie, you may visit his website.
http://maxwellmackenzie.com/americanruins.php