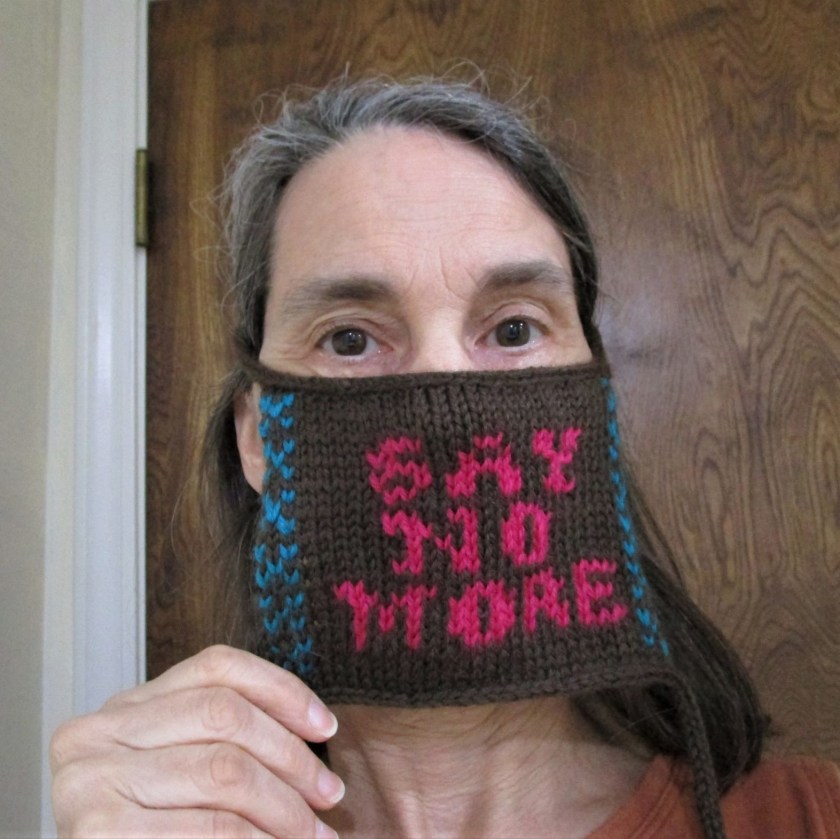
Today my fiber arts students finished up classes for the year. I can hardly believe that I taught children a fiber arts project every week for eight months! In the end, I feel that I gained just about as much as I gave. While the students tell me that they learned a lot and had fun, I also learned much about making things with fiber in the process of developing lesson plans. Our last class was the wrap-up on string quilt samplers. The quilt tops made in previous weeks had backings added, were quilted, and bound off. Here are some images at the end of today’s work:
Zion, Age 11Madelynne, Age 11Louis, Age 12Gianna, Age 13Ezekiel, Age 10Emma, Age 10
I love that the designs are all so different from each other. Some of the students incorporated the fabrics that they color washed. It took a lot of patience and perseverance for them to finish these quilt samplers. I’m very proud of their accomplishments.
Paper week continues with an exploration on turning paper into beads. I like the idea of taking a 2-D substance and making it into a 3-D object. Paper bead making started in Victorian times, after paper had become inexpensive and plentiful. There were so many well-bred ladies needing a large variety of well-bred activities to keep those hands busy. In the 1920s and 1930s the craft had a resurgence. At that time it became popular to use the beads in jewelry-making. I suspect it was the frugality of the craft in a time of scarcity that made it appealing during the Depression. Now in the 21st century, the technology and process of paper bead making has changed very little. All you need to get started is any kind of paper, scissors, all-purpose glue and a double-pointed knitting needle. Additional useful items include a cutting board, grid ruler and some masking or painter’s tape to wrap around the needle. (Check, check, check and check!)
The process seems simple enough – cut wedges of paper, roll around the knitting needle, glue down edge and repeat until you have enough beads. But just in case I’m missing something, I spend an hour viewing U-Tube videos. Would you have guessed that there are crafters making and actually selling these beads? Those folks use some tools and materials such as PC Hardener that I will not purchase for my little experiment. But I did buy a jar of Mod Podge. It is coated on the beads to give them more structure. I guess this acquisition places me firmly in the category of Crafter with a capital C. Here is my first round of beads:
The yellow beads are rolled-up magazines. The red beads are basic copy paper colored with a red Sharpie. The black and cream-color beads are made with copy paper and then a strip of narrower magazine paper. This is the style I like the best. It has a nice barrel shape and a slight shine from the black magazine paper. I made more beads of this style in prettier colors:
The blue paper is a print-out of one of my color wash fabrics. The magazine strips are from a photograph of blooming heather. I really like the color combination. I ended up making eighteen blue-purple beads. Here they are strung up on a silver chain with one of my turquoise pendants.
Some of the professional bead makers add silver spacers between each bead. It gives a much more polished appearance. I might be tempted to make more beads. But I won’t be making enough to use up ALL the Mod Podge.
Here is my little collage, inspired by the Kente cloth of West Africa. I learned about this form of weaving while doing research for my fiber classes. It has captured my imagination. The Asante weavers work in narrow bands on a horizontal loom. The finished weave is under five inches wide. To make the cloth, long strips are sewn together, giving the artist much scope for juxtaposition of colors and patterns. I had the naïve idea that I could learn to make this cloth for myself. Ha! After reading about the process and watching videos, it is clear that Kente can only be mastered by years of practice under the guidance of a master weaver. So I have confined my enjoyment of the medium to collaging (is that a word?) with photographs of Kente.
This cat appears to be floating in mid-air, but I assure you she is solidly on the ground. The jungle is dark, but shimmers with heat and light. A sassy bird perches above her head. To make this image I used photographs of my color wash fabrics, adding black and silver markers, and sequins for eyes. Here is a nice close-up:
Newspapers, and nearly all sorts of other papers, are made from fiber. So it is fair game for the Daily Fiber manipulations. The invention of paper can be described as one of the great technologic leaps forward for humankind. As far as I can tell, it was invented multiple times independently around the world. The ancient Egyptians made a sort of paper out of the sedge plant Cyperus papyrus. The type of wood-pulp paper we use today was invented by the Chinese around 2nd century BCE.
Thanks to fellow WordPress writer Jill Kuhn https://artjillkuhn.wordpress.com/ for encouraging me to explore stitching on paper. In no particular order, here are the objects out of paper I propose to make this week.
Paper weaving of portraits
Paper beads
Rice paper Bento Box collage
Collage with sheet music and old maps
Quilling with paper
Origami art installation
As a warm-up, I machine-stitched on some Sumi ink drawings that I did many years ago, when I had an interest in painting Chinese characters. The first is a bamboo image done on newsprint. I stitched the central veins on the leaves.
Wishy-washy looking.
It worked okay. The paper is quite brittle, and the beginnings and endings of the stitch lines tend to pull out of the paper. I’m considering reinforcing them with clear tape on the back of the paper. The next image is painted on rice paper. While this paper is quite thin, it seems a little more resilient than the newsprint paper.
This piece is better than the bamboo, but still a little tentative.
I have high hopes that the rest of the week will bring interesting results using paper.