Posted in quilting

Autumnal Equinox

I have been sewing like a mad woman, trying to finish the Oakleaf Hydrangea quilt. It’s very close to finish now – needing only the binding sewn on. I ran out of thread yesterday just as I was finishing quilting. So today, I am giving that project a rest to celebrate the change of seasons.

For the first day of autumn, I am making a block using a technique that I haven’t tried yet: reverse applique. My idea is to do a tree silhouette, with negative and positive images of each tree half. When describing this to my husband, he came up with the idea of making each side equal – to acknowledge that the first day of fall has day and night of equal length. I agreed and got to work on a sketch.

I chose a charcoal gray fabric to make the reverse portion of the image. Here is it, all cut up and smeared with glue.

My background fabric will be a gold print, to represent the forest in fall. Here is the positive image glued to the background and the final block with both images in place.

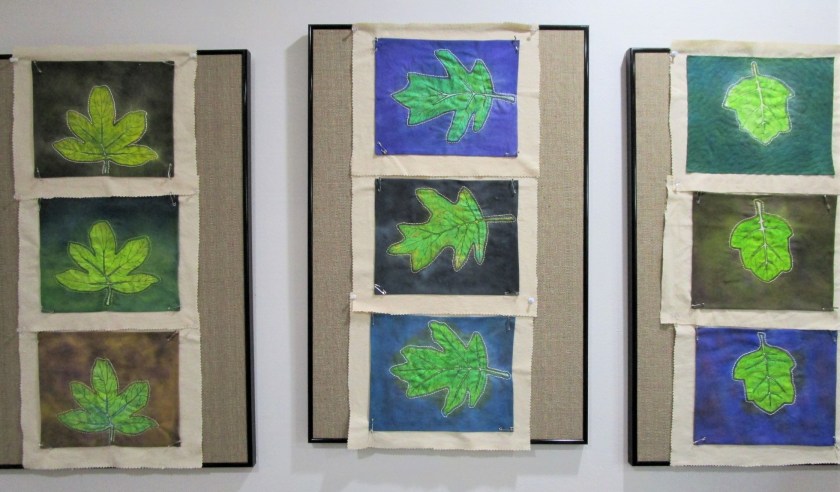
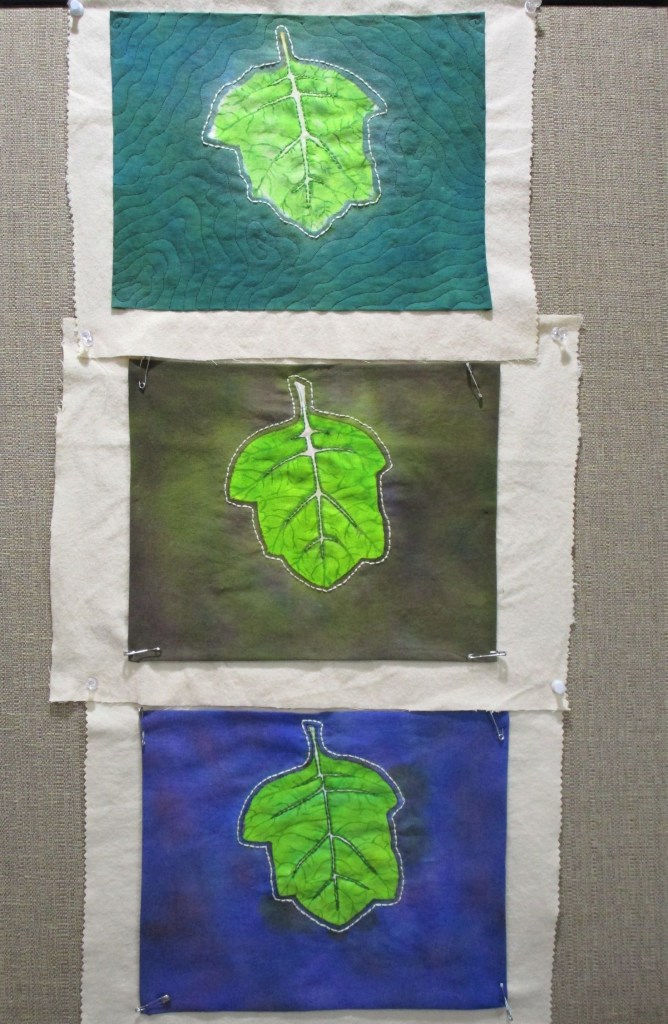
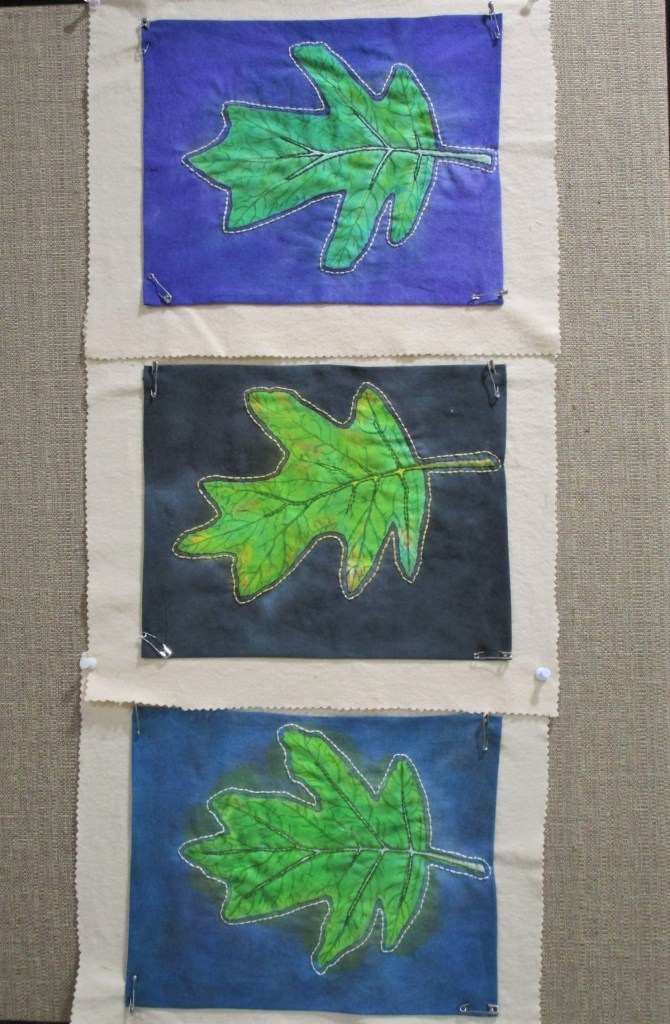
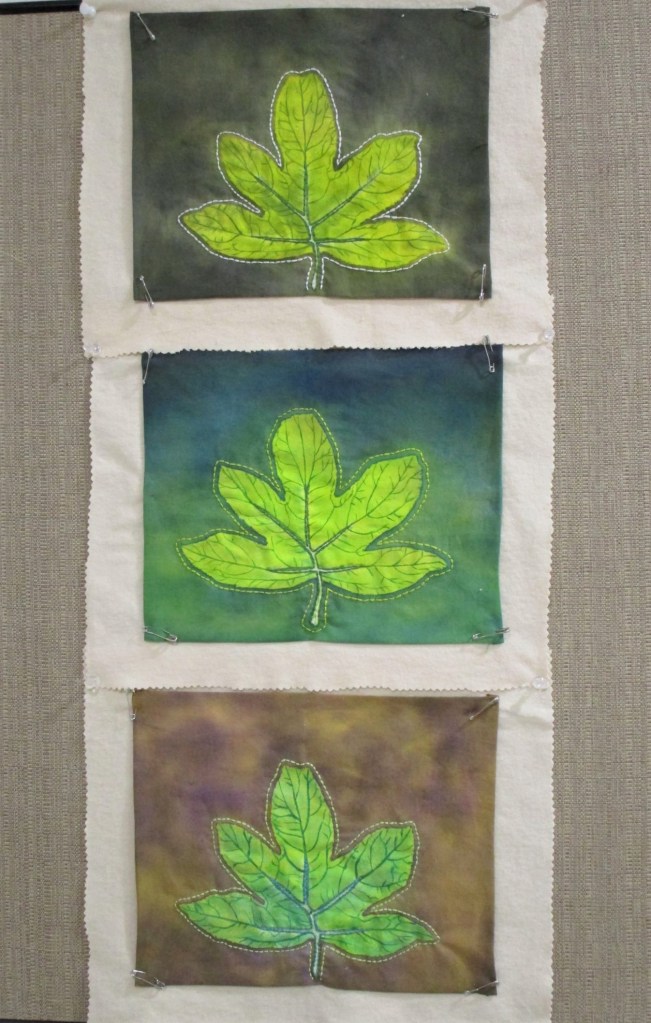
The other pattern I wanted to try is the Maple Leaf. I have seen really pretty quilts made in this pattern. I plan to use up left over hand painted fabric from the hydrangea quilt as the background color.

Green for the background and orange for the maple leaves.

I found instructions for this pattern on The Spruce Crafts website, by Janet Wickell. Maple Leaf is an exercise in half square triangle construction. Here are the stem pieces, made with one orange and two small green.

Okay, I didn’t takes pictures of every step in constructing the remaining squares. Basically, you make four half square triangles in the two different colors, then combine one solid background, three solid leaf color squares, the stem and four half triangles to make each block. I made two blocks. Here is the finished object.

I will add some stitching on the tree square, and perhaps quilt a bit on other parts of this work. But right now I am off to buy more thread.

Janet Wickell’s site and instructions for the maple leaf pattern are found here:

https://www.thesprucecrafts.com/maple-leaf-quilt-pattern-4145689

Posted in hand embroidery, painting, quilting

Milestone

Today I am writing my 100th post on Daily Fiber blog. I am pleased that this milestone arrives at the same time as another mini-achievement: the completion of my oakleaf hydrangea block series. After some consideration I determined that the final block count will be nine, as you see pinned to my wall boards in the photo above.

Decisions still need to be made on how to finish. After consulting with a few friends, I have settled on the arrangement of blocks and the decision to use a dark border around each block as if it were an individual painting. Also, I will add a border around the whole quilt – width and color yet to be determined.

Here are some close-ups of the groups;

As you can see, only the first block is quilted so far. I will finish the quilting after assembling each row.

Hand-painted cotton fabric , hand embroidered with a flannel background. Each block is 10 by 12, including flannel border.

Posted in hand embroidery, knitting, quilting, sewing

Old-Timey County Fair Fiber Fun

Who loves going to the fair? If today’s attendees are representative, I would say everybody! There’s a lot to see and a lot to do. Our county fair focuses on all things agriculture, but also includes some things that city folk enjoy, like growing flowers and taking photographs. Here is what I did at the fair today.

I checked out all the Fiber Providers:

Some chickens managed to get into the picture.

Oops, NOT fiber providers, just cluckers and layers.

And I got a good look at the various needle arts entries.

Sadly, there were not near as many needle arts entries as there were in past years. Achieving a couple of blue ribbons for my two was not that gratifying.

But I was very pleased to see that some of my fiber arts kids had entered items that they made during our class last year. Here is Gianna’s Blue-Ribbon strip quilt.

Going to the fair felt so nostalgic to me. It made me wonder: How many more years can the county fair tradition continue into the 21st century? Are needle arts as a craft doomed to die out? Or can they be revived in a brave new world?

Here is what my mom says about sewing with a Singer machine back in the 1960s.

I bought a new machine in 1962 as all I had was my Singer Featherweight that my parents had given me when I was 19. Mine looked something like this and had some decorative stitches. I don’t think mine was a Slantomatic. I bought mine right before the Slantomatic came out. I remember sewing you a dark striped dress with a white waistband. I used some of the decorative stitches around the waist and around a white sewn in collar. You liked that dress a lot. Do you remember it? I think you were about nine or ten at the time and I made all your clothes except for the ugly Holy Family uniforms you had to wear to school. I was really pleased with that dress and made a second one from the same pattern, in blue, for a girl who played a part in one of [the local theater groups] many plays.

Thanks to inkyarnandbeer for this blog. To visit go to
https://inkyarnandbeer.wordpress.com/2019/09/02/hotter-than-hell-so-im-gonna-sew/

-N-'s avatarInk, Yarn & Beer

I think it must be about 100F (38C) where I live, so the air conditioning is on and not going out until it is dark.  My dogs aren’t mad, nor am I a Brit, so I am staying indoors, drinking water, and prepping the Maggie Shirt . . . and I am sewing it on my vintage Singer 403a,

I think these machines (the Singer 400 series) date from the mid to late 1950s and into the early 60s.  Mine is like it was never used.  When I bought her, she needed some TLC, heat and oiling, as well as a bit of gear grease, before she was off and sewing.  Unused machines freeze up, but once they have been given the right attention, I think they are the best!  I’ve had my 403a for awhile, and as I cycle through my machines, she hasn’t been out for a spin…

View original post 503 more words

Hotter Than Hell, So I’m Gonna Sew!

Posted in hand embroidery, quilting

Mojo Mini Quilt no 2

Yesterday, during my daily browse of WordPress blogs, I came across Cindy Anderson’s post announcing her one-woman quilt show featuring her art quilts. These are exquisite little works – no wonder she was invited to display them. After viewing her blog I became energized to make another mojo mini in the same style as the one I made last month. But the inspiration for this quilt actually originated in last Wednesday’s yoga session.

The instructor ran a playlist of music that started with a mantra. After five minutes, those words lodged in my brain and wouldn’t let go. Arriving home later, I quickly wrote down the mantra as a potential inspiration for a fiber object.

So yesterday, when the energy took hold, I reached for the mantra, grabbed scraps of fabric with colors like those in my mind’s eye during yoga practice, and scribbled a quick sketch of interlocking arches.

The structure of this mini will be built up with raw edge appliques and it will also rest on a gray background. But to make things more interesting for me, I decided to start with a paper pieced object.

Okay, I’ve never done paper piecing before. But I’ve watched it! Thankfully, I only made two or three mistakes as I cut and sewed this little section. I had to rip out AND also re-cut a scrap that I had trimmed incorrectly. Here is the finished applique.

After mulling over the top half of the design, I sewed an arch from thin strips of fabric. Here is it.

And that is essentially the design of this mini quilt. After glue basting and stitching down the two appliques, I wrote the mantra on the white arch.

…..machine quilted the strips and hand embroidered the background.

I used a couple of my painted fabrics. The red-orange planet is from a printed fabric.

It was very satisfying to make this mini. Thank you to Cindy Anderson for motivating me to get started. You can see Cindy’s art quilts here. https://wordpress.com/read/feeds/2331528/posts/2396379576