Yesterday my Bernina and I spent some quality time together. I used my Autumnal Equinox square to practice free-motion quilting techniques.
One of the things that gave me more confidence is the discovery of the 1/2 speed button on the Bernina. So far, I have mastered wiggles, loops, lazy eights, dot-to-dot and circles. I still can’t do meander.
I had fun drawing with thread on my reverse applique picture. Oh, also a few birds and a squirrel were added by hand embroidery.
Well, not really. The morning started as sunny, breezy and temps in the 70s. But I am encouraged to think about cooler times with the arrival of the last day of September.
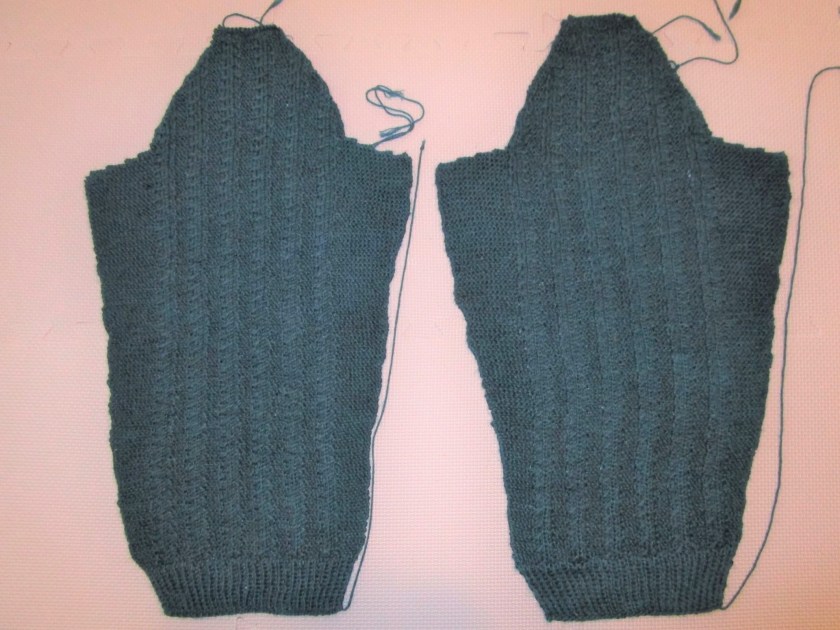
I’m also encouraged by the fact that I’ve moved to the blocking stage a cardigan that has been on my needles all summer long. Here she is, drying under a ceiling fan.
The pattern is called Passages and is from Knit Picks. I purchased it for my daughter over a year ago. She was unable to make a lot of progress on it with the new baby and all. So I thought I would try it.
The stitch pattern, called Gull and Garter, is an easy stockinette variable over five stitches and four rows. Row 1: Bring yarn to front, slip five stitches. Row 2: Purl. Row 3: Knit two stitches. Insert right needle under loose strand and into next stitch. Knit normally then bring the new stitch out from under the strand. The loose strand is caught up behind the third stitch. Row 4: Purl. This Gull pattern is interspersed with three garter stitches. Here is a link to the sweater pattern on KnitPicks.
The only adjustments I made to were to gauge for a thinner yarn and add some waist shaping. After sewing up the shoulder seams I will knit on a 2 inch button band-collar and sew on the sleeves. This WIP will be DONE.
Before I say farewell to my study of the oakleaf hydrangea plant, I want to share the little study I made of the blooms. Above is a reference photo for the plant. The “flowers” open pure white, changing over times into shades of rose, rust and green. I say flowers in quotes, because the part of plant that most people identify as a flower – it has petals, after all – is really a bract, or sterile flower. The real flowers are in the tight little buds that you see at the top of the panicle. Here is a specimen, much dried up, that I took from my hydrangea.
Interestingly, there are some bracts with four petals and some with five. I did a drawing in colored pencil before I started making the fiber object, which depicts the rusty pink color of late summer.
My first thought was to make corner blocks for my quilt with images of the flower panicles. But after I had assembled the quilt and laid out the border, I decided corner blocks would not improve the quilt at all and might even detract from the focus. By then I had already started a sample block.
It is a sweet little object, just 4 by 4 inches. Made with hand painted cotton, block printed and embroidered. Perhaps I can use it in another project.
As I knotted off the last thread of the binding’s slip stitch, I drew my quilt around me and snuggled down into its folds. It is wrong to be in love with one’s own work?
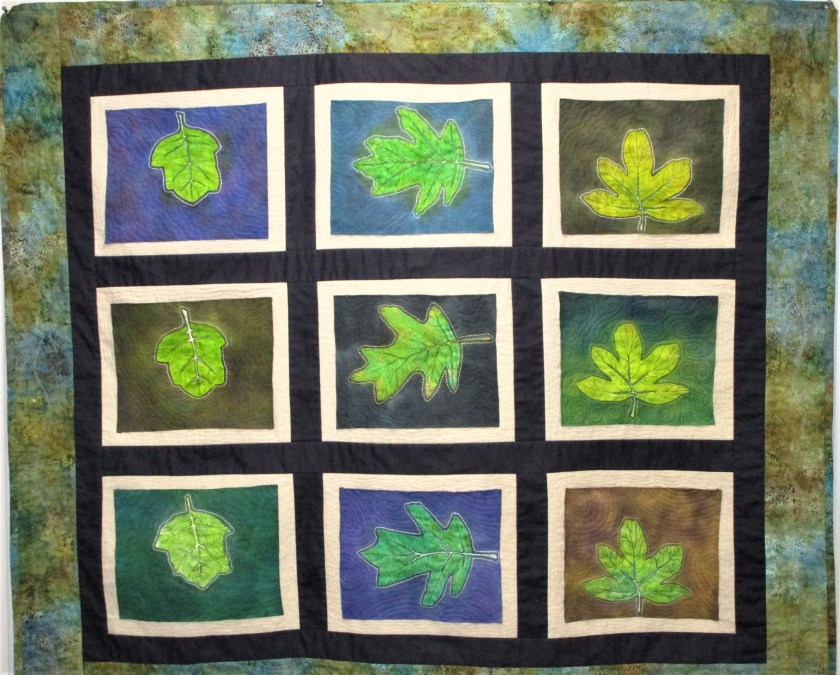
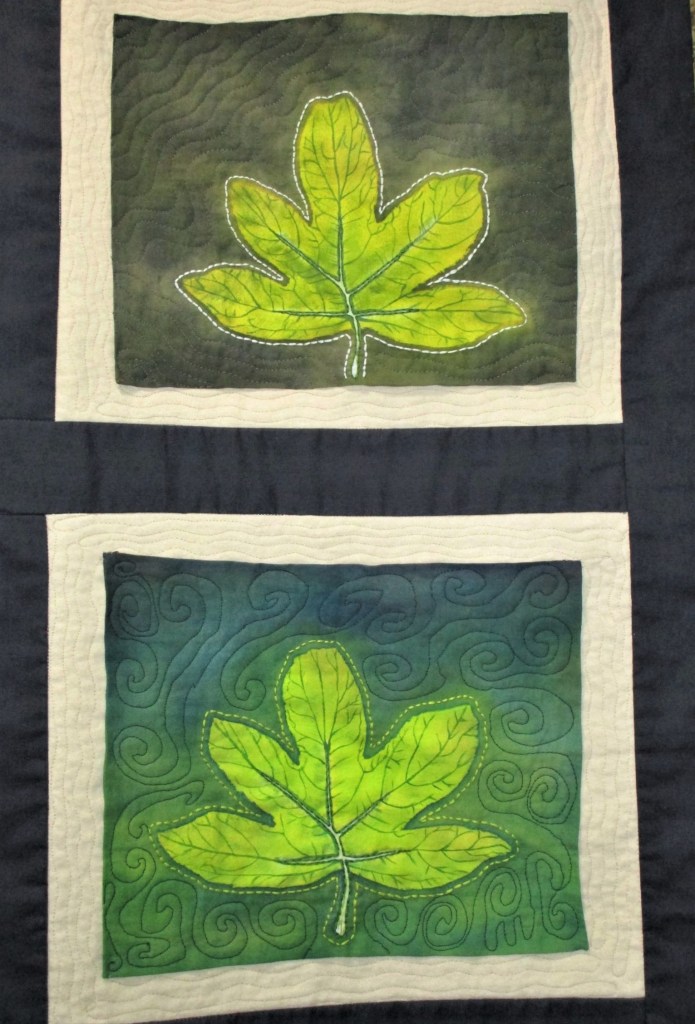
This little lap quilt turned out very much the way I had hoped it would. The dark sashing focuses one’ eye on the beautiful leaves, as if each was a boxed jewel. I loved quilting in free-motion over under and around the leaf shapes.
The batik fabric of the border matches many colors in the blocks. And the botanical pattern on it suggests the sort of wooded area where one might find an oakleaf hydrangea shrub in the wild.
“Oakleaf Hydrangea Study” Hand painted cotton, cotton flannel, and commercial printed fabric; hand embroidered and machine quilted free motion style.
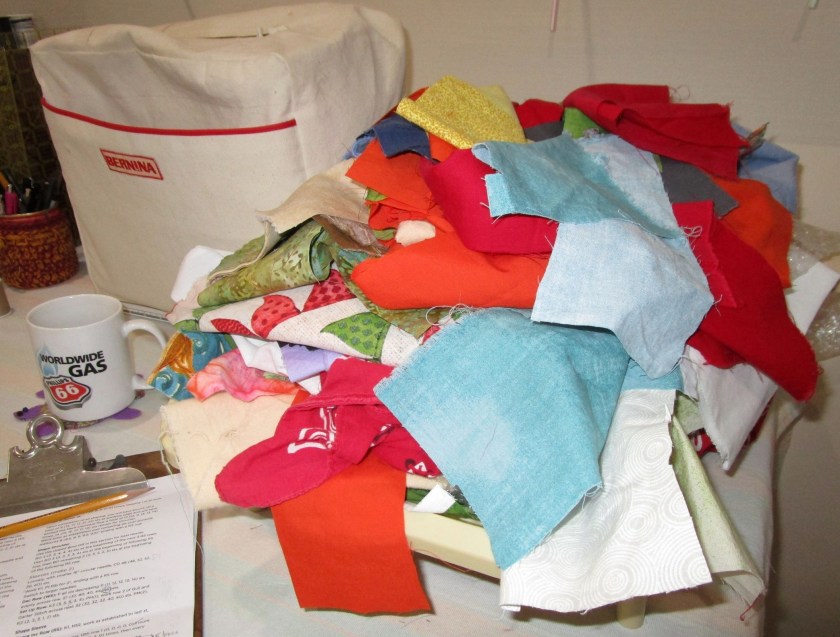
This past summer has been a wonderful time of learning for the fiber artist in me. I have viewed dozens of tutorials, focused primarily on quilting. “Don’t ever throw away your scraps,” is advice that I heard from an art quilter, early in my training. Well, I took her advice, and look where it has got me. I desperately need a system for managing these fabric pieces!
By nature I am not a messy person. I like to make my bed and wash the dishes. When I began my journey with fiber, I organized a space which I believed possessed ample work room and plenty of storage for tools and materials. It was great, as long as I stuck to yarn crafts. But once I ventured into fabric work, things went wonky. (FYI “wonky” is a technical term used by quilters.)
I share my closet with the family’s camping equipment. It also houses the ironing board, a small set of drawers and shelves for my yarn stash. The stash is relatively modest, but it now fills the shelves. My bookcases contain paint, books, tools, my fabric stash and sewing machine. But the scraps have proven recalcitrant. If left tossed in a basket, they are impossible to work with.
So this is my plea: Who of you has solved the Scraps Dilemma, and will you share your solution with me, a frustrated fiber artist?