Alright. Almost no fiber objects were created this week. I will share the one thing I did make with yarn for my crochet in the round workshop. It is a teaching aid.
The six stages of starting a round crochet object
Instead I spent multiple hours on sketching from the Inktober prompts.
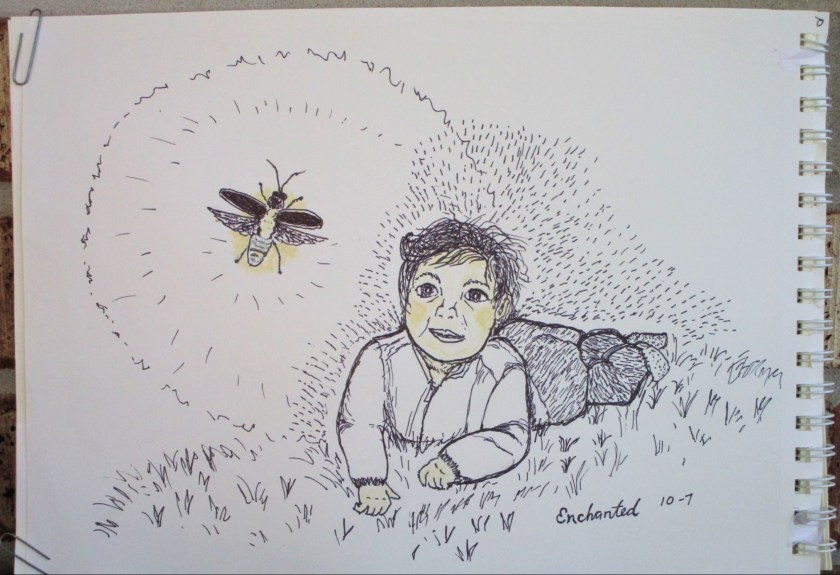
Day 7: Enchanted
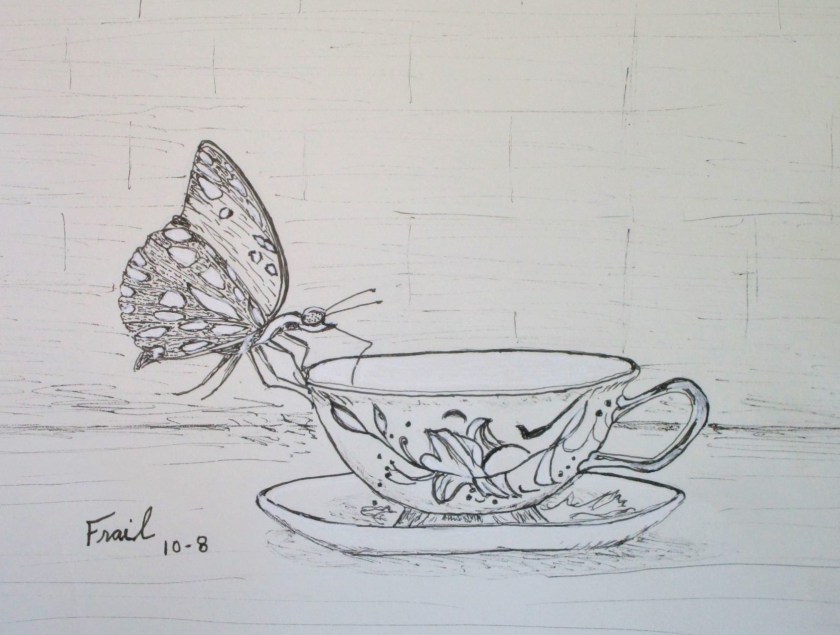
Day 8: Frail
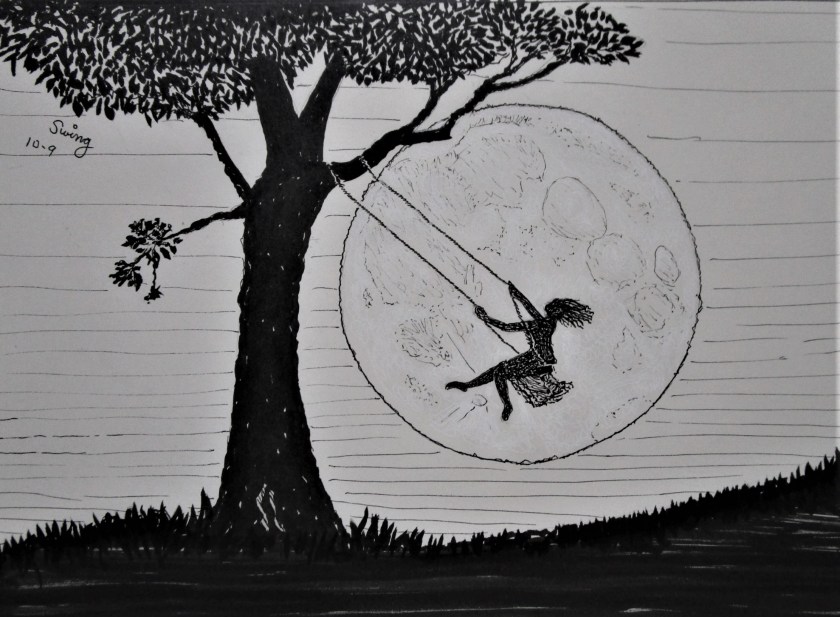
Day 9: Swing
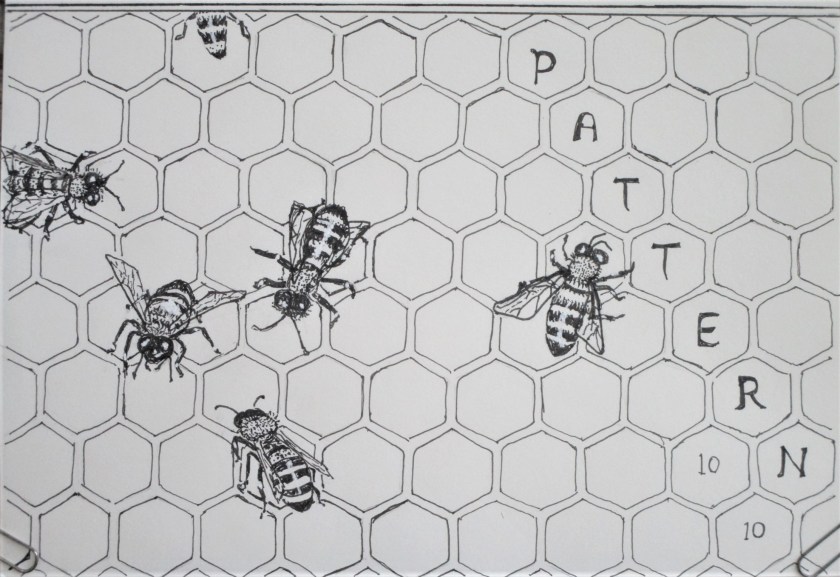
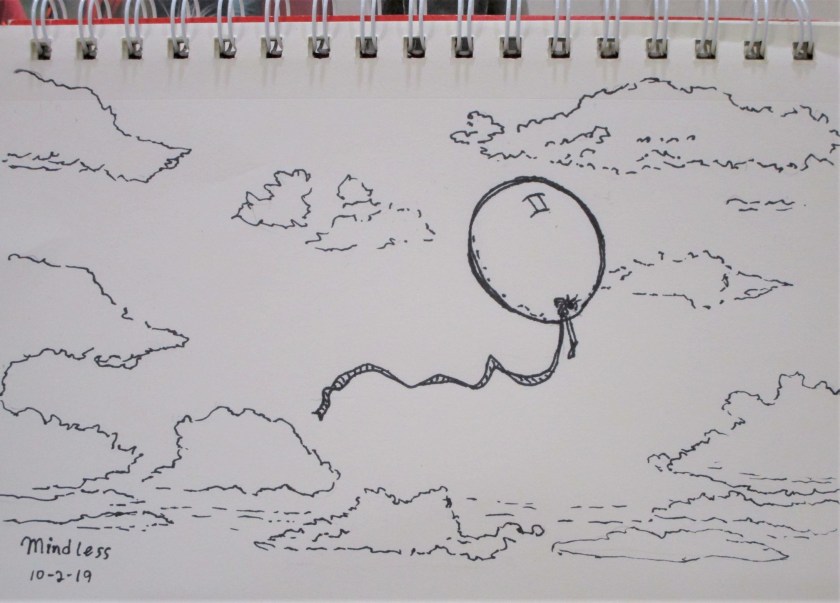
Day 10: Pattern
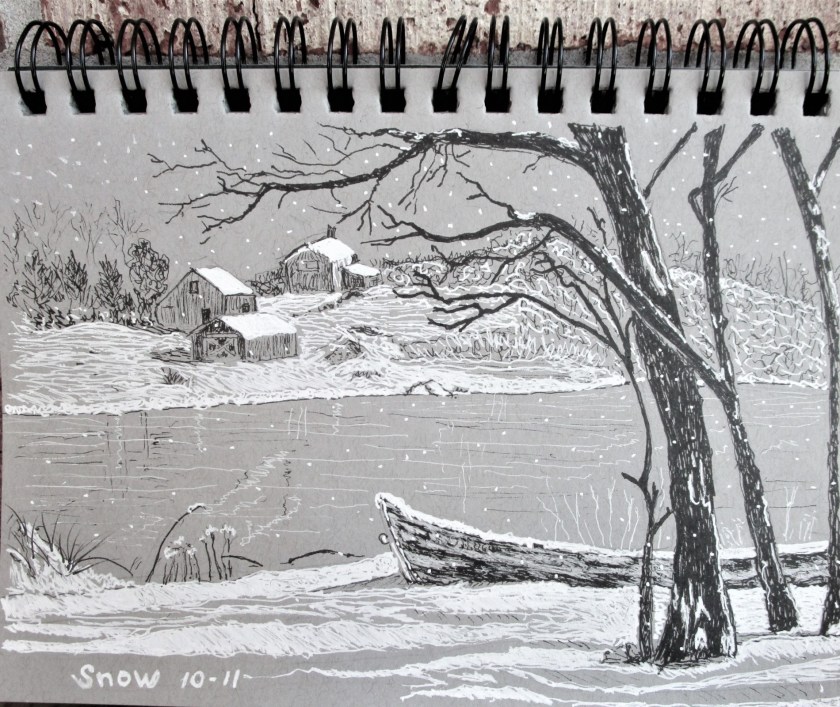
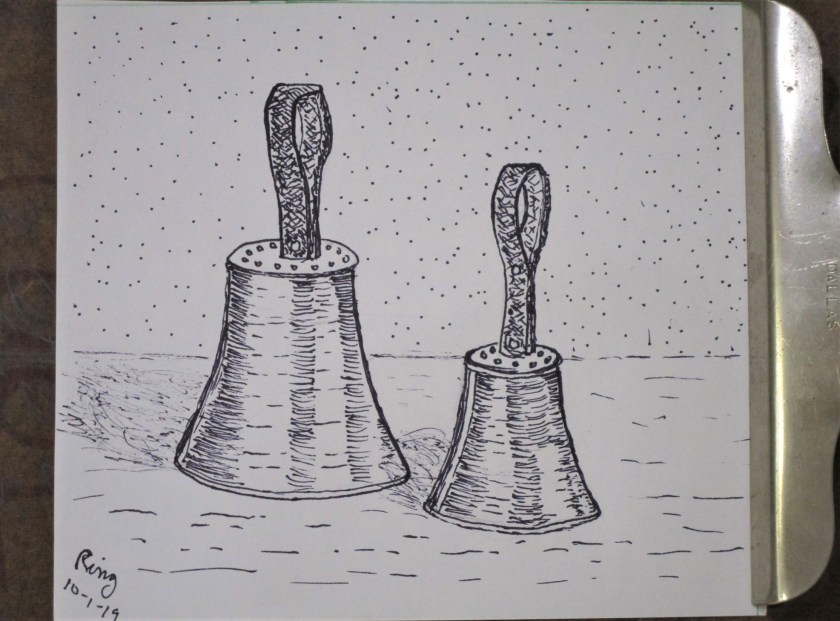
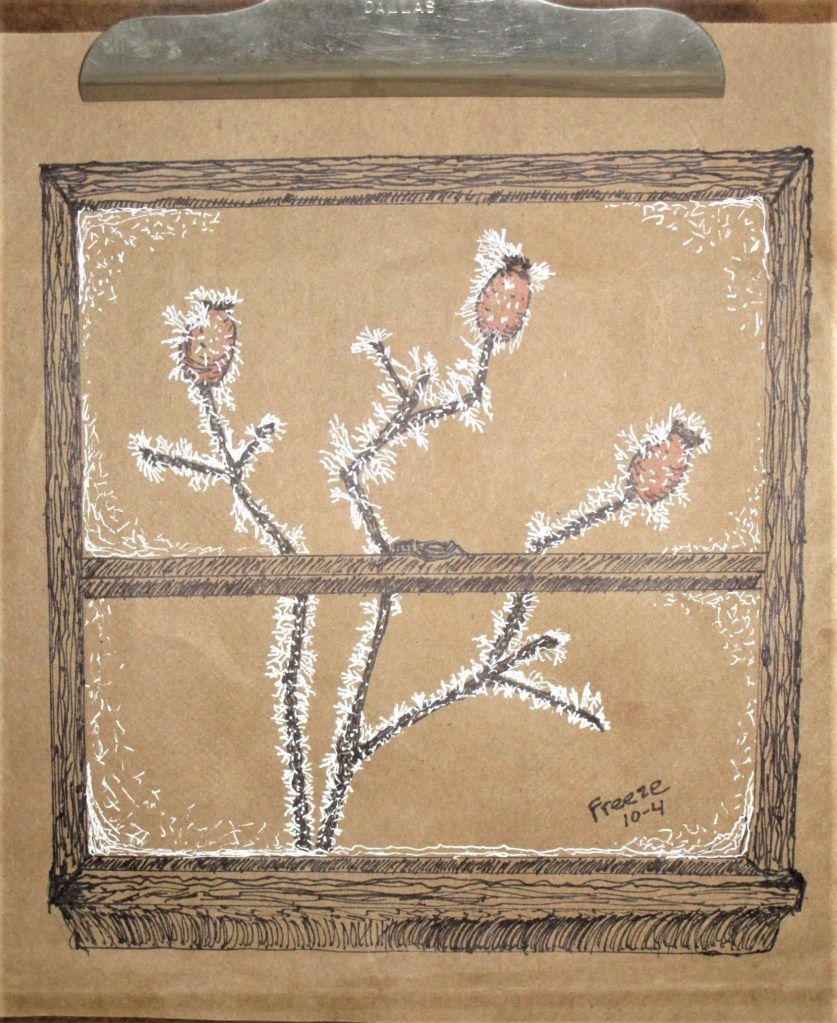
Day 11: Snow
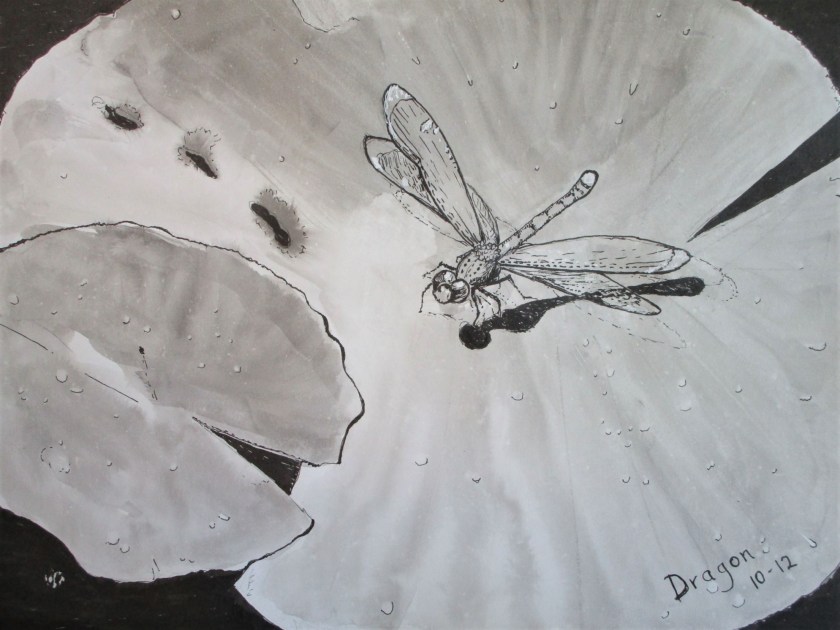
Day 12: Dragon (fly)
You may have noticed a few insects have shown up. I find them fun to draw.
And finally, this: why is the act of sketching on ink and paper so addictive?
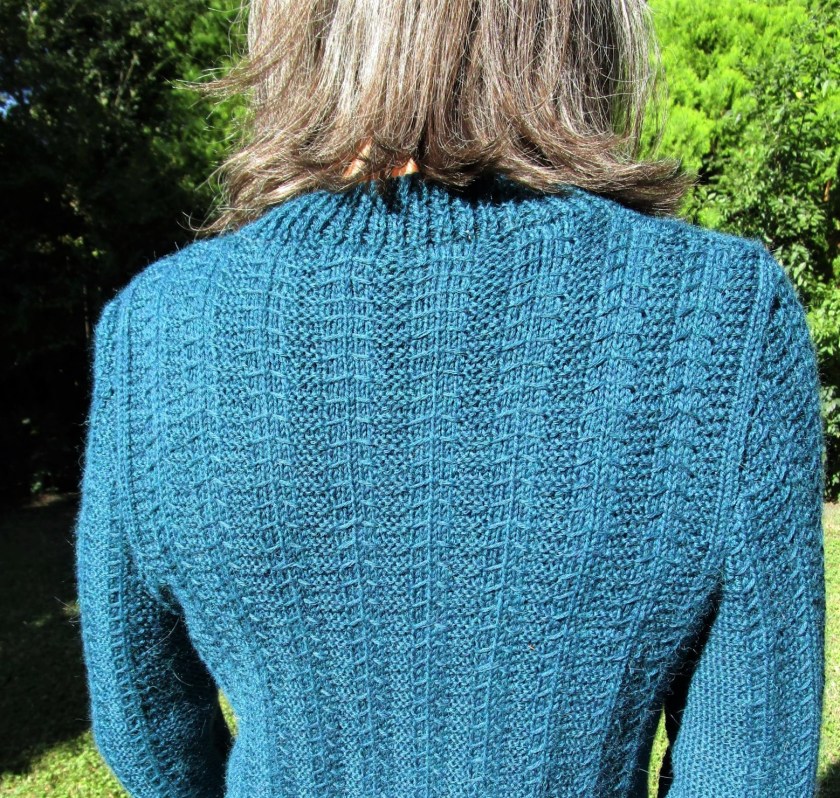
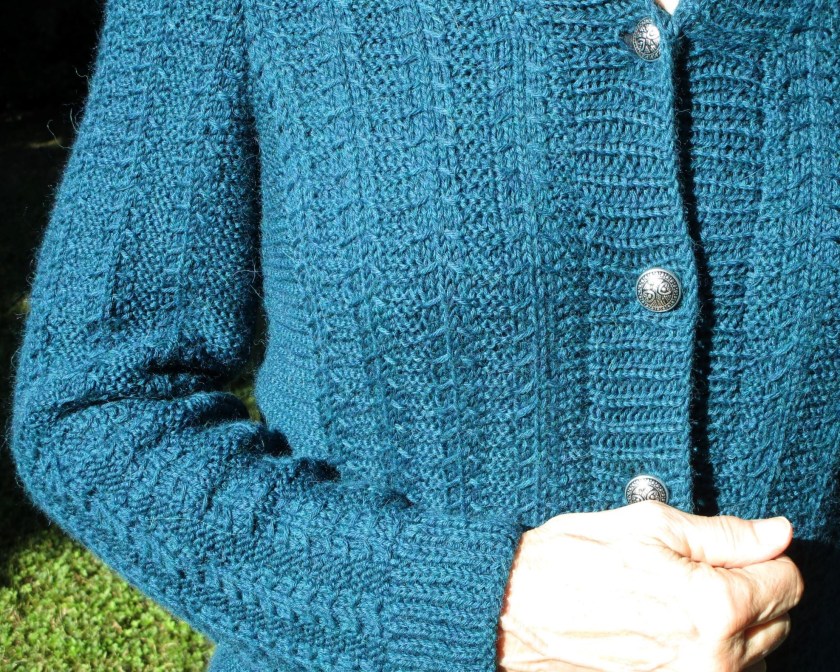
Despite the long gestation period, this cardigan came out pretty well. I went with silver buttons to add a little bling to this teal blue sweater.
And now if you will indulge me, I would like to share some tips on how to make a sweater that fits. These nuggets of learning were revealed to me the hard way – through many years of experience and the making of several ill-fitted sweaters.
1. Start with the right measurements. For a sweater, these include hip, bust, cross-back, neck to wrist, armhole depth, upper arm width, and length (shoulder to garment hem.) TIP: If you own a coat or sweater that fits you well, you can take these measurements from it. If you don’t, get a friend to measure you.
2. Consider ease. Different body areas require different amounts of ease. Also different styles and yarn weights require more or less ease – thick yarns should have more ease, thin yarns can have no ease, or even negative ease. You may want a lot of room in your hip area, but a close fit at your bust – or vice versa! For an average fit, allow 2 inches at bust and hips and at least 1 inch at upper arm. Then use the schematic of your pattern to choose the right width to match your measurements and desired ease. TIP: Never add ease to the cross-back measurement. This is the distance across your back at the top of your armpits. If your sweater is too loose here it will slide off your shoulders.
Photo shows the cross-back area.
3. Make a swatch. Or two or three. While EZ says to swatch in stockinette stitch, I like to swatch in the same stitch that I will be using for the garment. Always wet-block your swatch. I know, this seems like an extra step. But it’s important because certain yarns (superwash) and quite a few stitch patterns open up a lot with blocking. If you take your gauge from an unblocked swatch, your sweater will invariably end up too long and too wide.
4. If you are curvy, incorporate waist shaping. Adding a decrease section and then an increase section between hips and ribs eliminates bulkiness while making room for your breasts. You can also use short rows under the bust area to add more fabric where it is needed in the sweater front.
5. Block the finished pieces before assembling. It makes the sewing up much easier. For this sweater, I wet-blocked the body and sleeves. I then sewed the shoulder seams with back-stitch and the sleeve seams with mattress stitch. Next I knit on the button band. To set in the sleeves use yarn and back-stitch up from the underarm to the shoulder seam. Tie off yarn and sew up the other side.
I hope that you have found something of value in my long discourse. For those who are wondering, the pattern is called Passages from Knit-Picks.com and the yarn is Camino Alpaca Premium 6-ply from Bremont. It is a wool, alpaca and nylon blend.
Okay, I have been enticed by The Frugal Crafter into making some ink drawings in conjunction with #Inktober2019. While these efforts have nothing to do with fiber arts, I decided to share them in this space, since so many of my WordPress blogger friends are sharing their drawings. Here are the first five days.
Thank you for your patience. We now return to our regularly scheduled program.
Tomorrow is the first session of my Crochet in the Round workshop for children. I have eleven students registered, which is a lot to teach. Fortunately I recruited two of last year’s students to be teacher aides. Yesterday I met with my team so we could practice our stitches. I feel pretty ready.
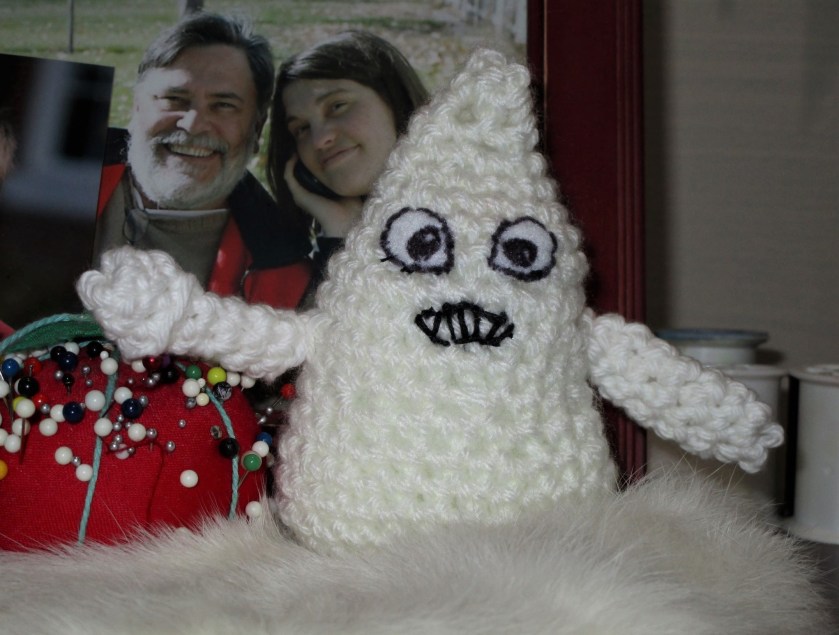
I’ve been having lots of fun crocheting assorted objects in the round that might be appealing to children. Mr. Ghost is awfully cute, and seasonally correct! It is begun like all circular crochet projects, with a group of stitches worked into one chain stitch or magic ring. Subsequent rounds are increased, and then decreased as the shaping requires. While I found this pattern not difficult, I am uncertain whether an eight-year old can manage it. The arms were the trickiest part, because they were so small to hold. The eyes are made of white felt, marked with a sharpie and sewn on with black embroidery floss. The mouth is also black floss.
If you want to try a ghost, the pattern is available free at Lion Brand yarn.
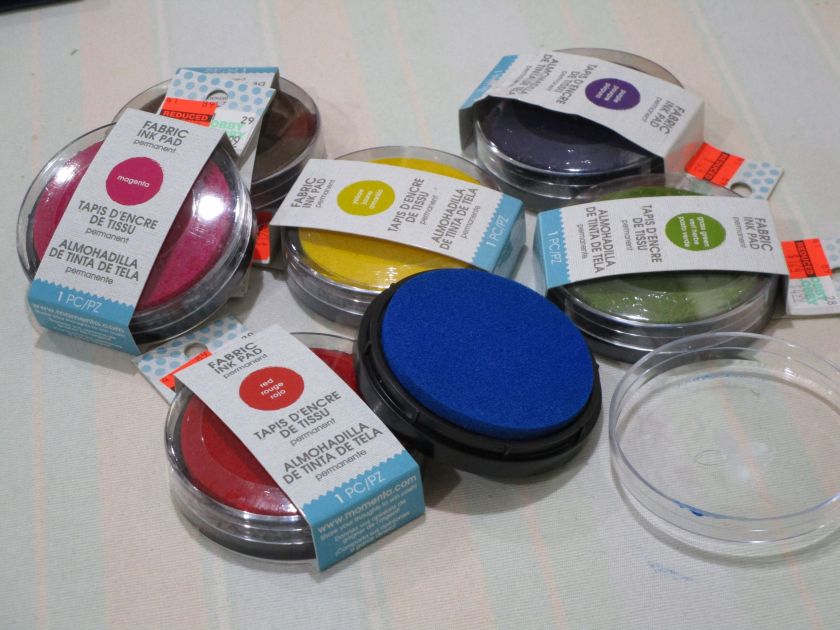
While shopping yesterday, I discovered some fabric ink pads seriously discounted.
This is something I have been wanting to try for some time. I have done a little bit of stamping/printing using fabric paints and homemade stamps. I’ve never been quite satisfied with the process and medium. The fabric paints start to dry and clump before I have finished my project. This results in a lot of wasted paint. So I am intrigued to try stamping with ink instead.
First I made a color swatch using some square stamps.
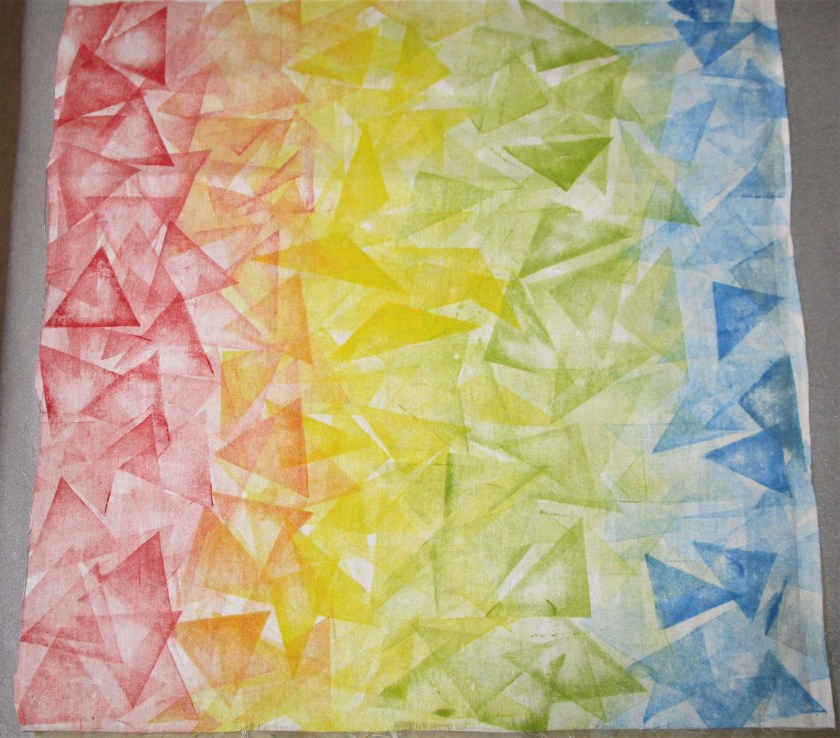
I like the red, blue, green and magenta the best. When stamping yellow over blue, I noticed that the inks blended – a desirable trait for my work.
The instructions say to let dry 24 hours and then press for 3-5 minutes to set the ink. This morning when I pressed the samples, I noticed that they weren’t quite dry. But by this afternoon they seemed okay. I quickly made up some triangle stamps out of foam pieces with the idea of stamping an angular rainbow on white fabric.
This was fun.
Next I tried the ink on a pale gray printed fabric. While my stamping technique was a little crude, I thought that the result was okay.
My verdict: I’m glad that I paid so little for these ink pads. It took a lot of color worked onto the stamp for each press, and the color intensity on the fabric was lacking. I’m also not thrilled that it takes so long to dry. Do any of my fiber arts friends have a product that you would recommend?