Here in the central time zone we are mere hours away from the winter solstice – the official start of winter. With all the busyness of Christmas preparations, I didn’t make a special fiber object to celebrate the change of season. Instead today I am recycling one of my Inktober drawings made on the prompt of Snow. The reference photo I used for this charming scene was taken in front of my brother’s home in Ohio. While I did use artistic liberties with the content of the background across the pond, the scene is essentially like reality. There is an air of nostalgia about it, not unlike the way I feel at this time of year.
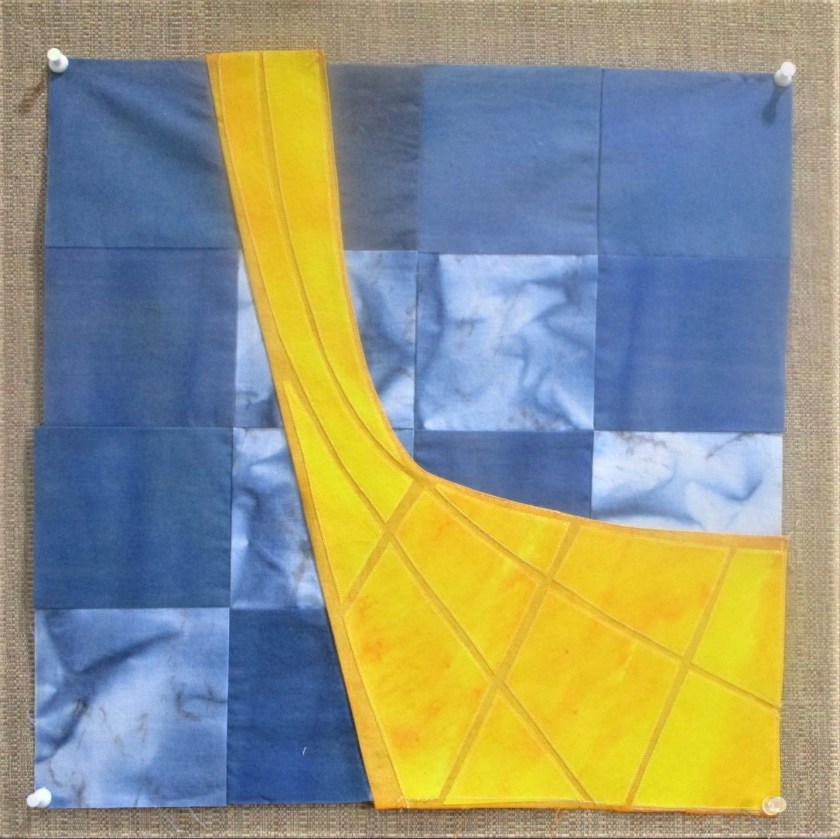
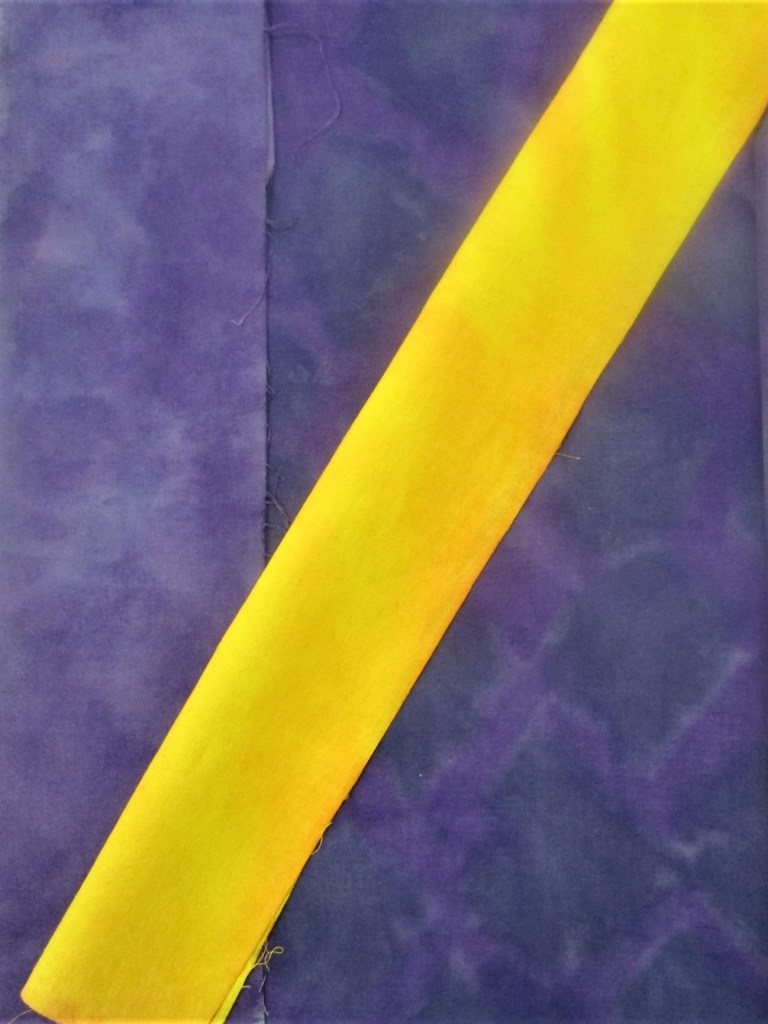
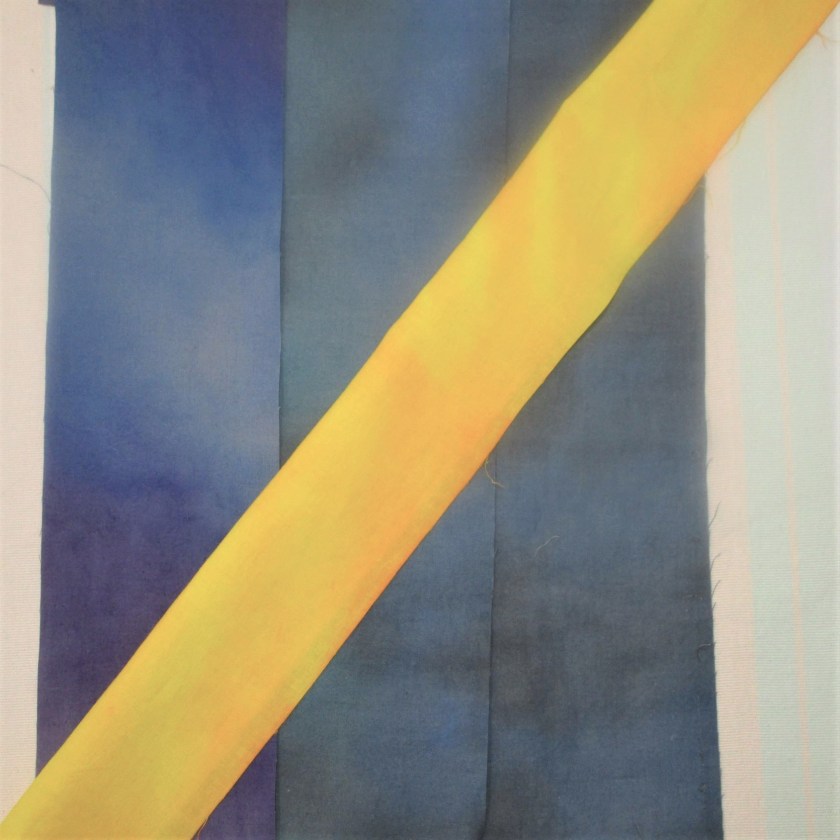
Work on the Arches quilt continues. I have solved some of the technical issues facing me in piecing the blocks together. The blocks on the right edge of the quilt have been pieced and pressed. Here are two.
As I finished stitching the lower right block, I started to feel a real sense of accomplishment. My idea is actually coming together, just the way I envisioned it.
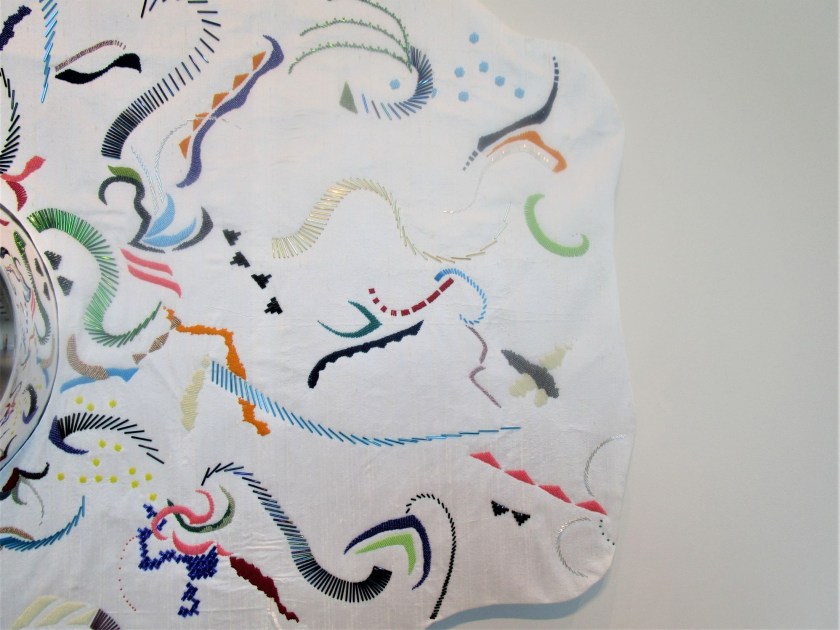
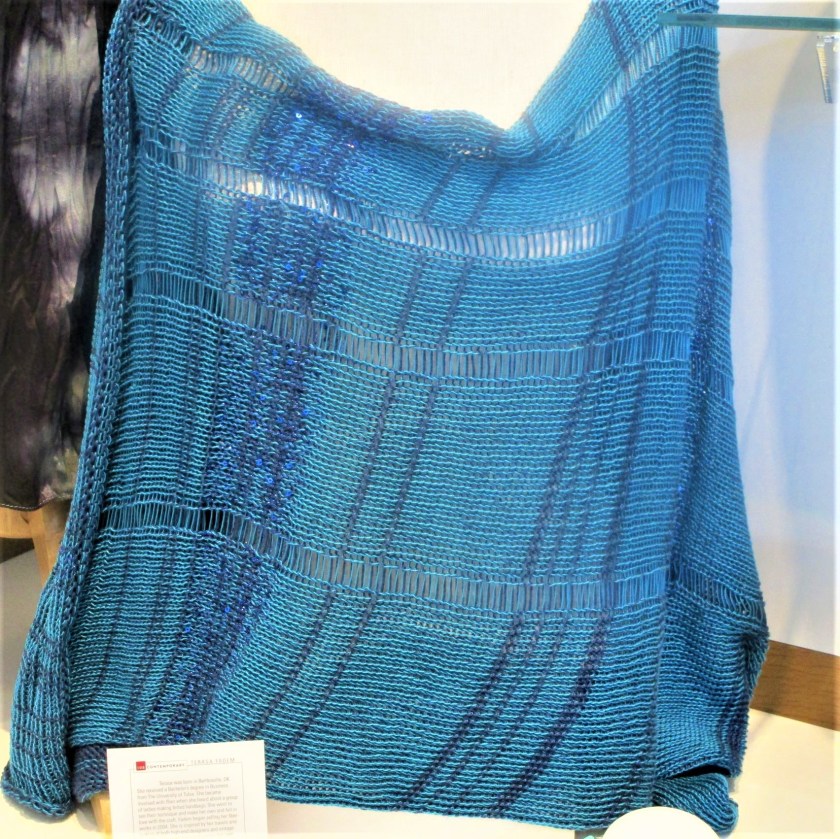
During a shopping excursion to Tulsa, we stopped by the 108 Contemporary Gallery to catch a new show – State of Craft. Works in various media, including fiber, were on display. I thought it would be good to check it out.
There were some large works such as this one by Whitney Fortsyth.
All Things New – Ceramic with oil patina
Interesting wood items like this one by Rusty Johnson.
If you could see the Wind, driftwood and colored pencil
And then there were fiber objects, mostly smaller but exquisite.
Let it Flow, Sheryl Landis, dyed silk, embroidery, paint and beads.
A large work with a fish-eye mirror in the center. White linen with beads.
I particularly like these bags by Rhonda Steiner, hand dyed, painted, and screen printed.
And finally, there were some yarn objects, felted, crocheted and knitted.
I last wrote about this project on November 16th – almost a month ago. In that post I made a list of next steps. While I have completed all but a few of those steps, I started to lose enthusiasm for the project while painting my fabric. It seems that all of my fabrics began to look alike. I told myself that the background fabrics SHOULD look alike, otherwise they wouldn’t retreat into the background. But I still wanted more texture and movement in the colors. So I decided to go back to Cindy Walter’s fabric painting class, to review my technique and discover what I’m missing.
That did the trick. I worked a few variations on color washing and finished painting the background fabric. I now have enough fabric to start building the quilt blocks.
Looking at all the difference in the fabrics, it’s clear to me that I need to organize them in a way that illustrates the scene I want to paint. The solution came to me while I was in the shower. (Why do I get my best ideas while washing my hair?) The Arch stretches itself across three different backdrops.
Water.
City.
And sky
I have my design, my structure, my fabric and my pattern. Now I can begin to sew.
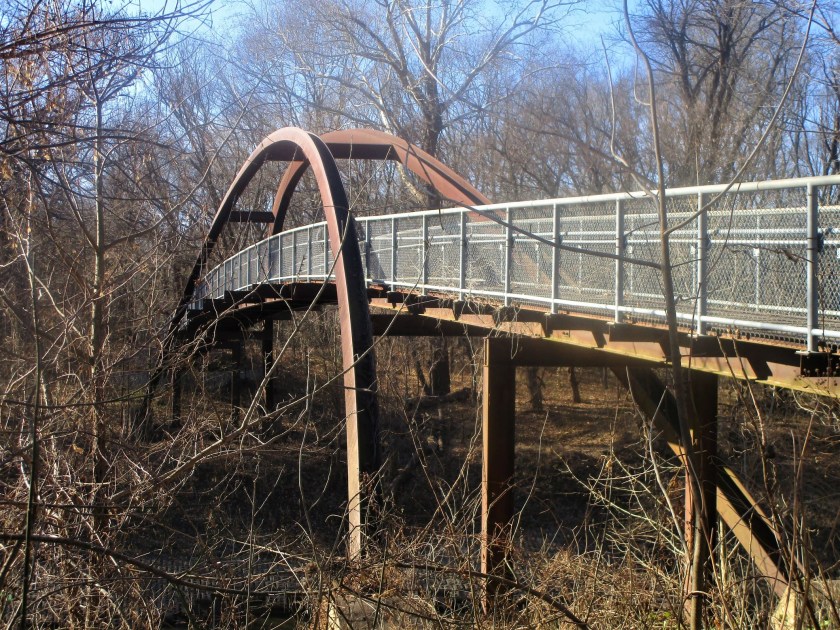
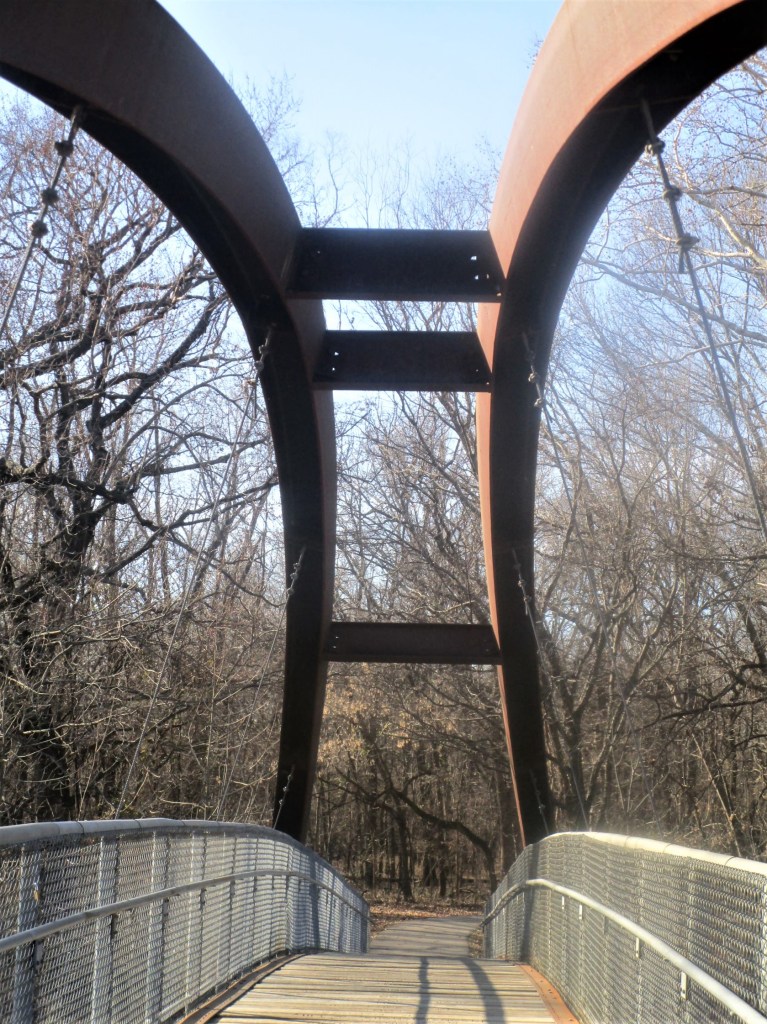
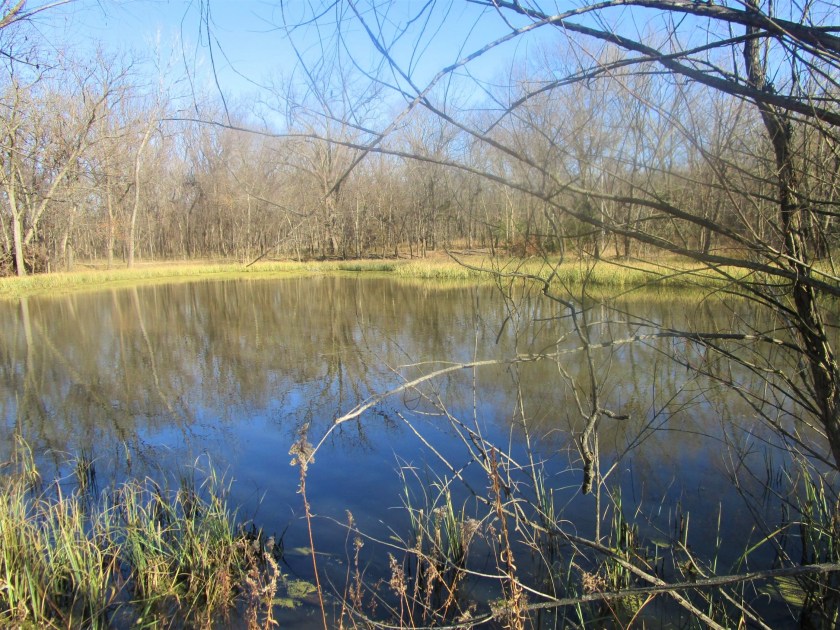
Stellar weather today. The temperatures are in the mid 50s, with sunshine and no wind. It was a perfect afternoon for walking. We went to the Pathfinder, which winds its way through the floodplain along the river. I brought my Canon camera and got a few shots that could serve as reference photos for future drawings.
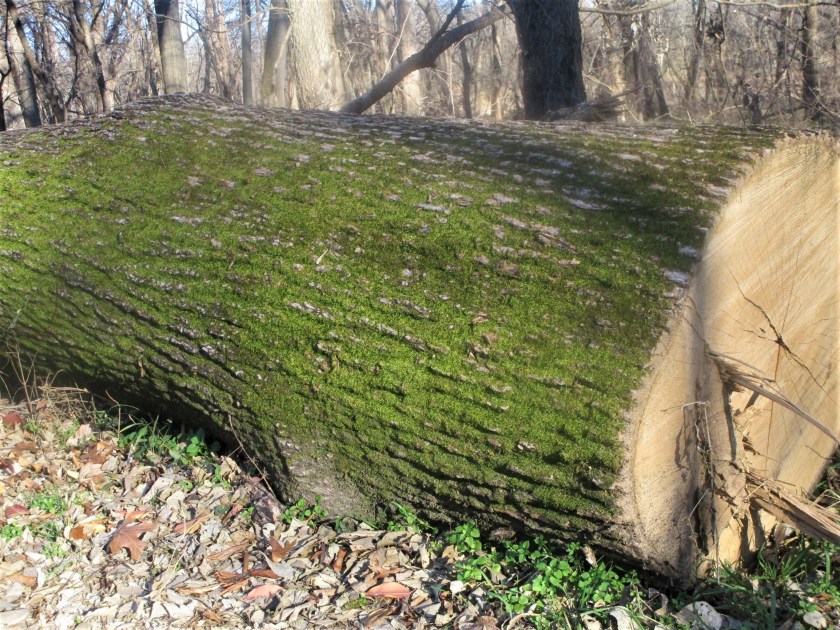
Over the river. Beautiful lines, shadows and colors.Interesting perspectiveGreat reflections on the pond and fine color contrast between banks and water. The trees in the foreground frame the shot.Really lovely bark texture and brilliant green moss.
Back home for a cup of tea with biscuits (also known as cookies to those of us who live in the States.) The number of days with gorgeous weather this year is about over.
You knitters who have made many a toe-up sock are encouraged to skip this little blog. But those who are new to knitting socks may find the following somewhat interesting. It’s time. After ten years of knitting I am finally making a pair of socks knitted from the toe up.
My inability to learn toe-up sock knitting is 100% the fault of Judy’s Magic Cast On.
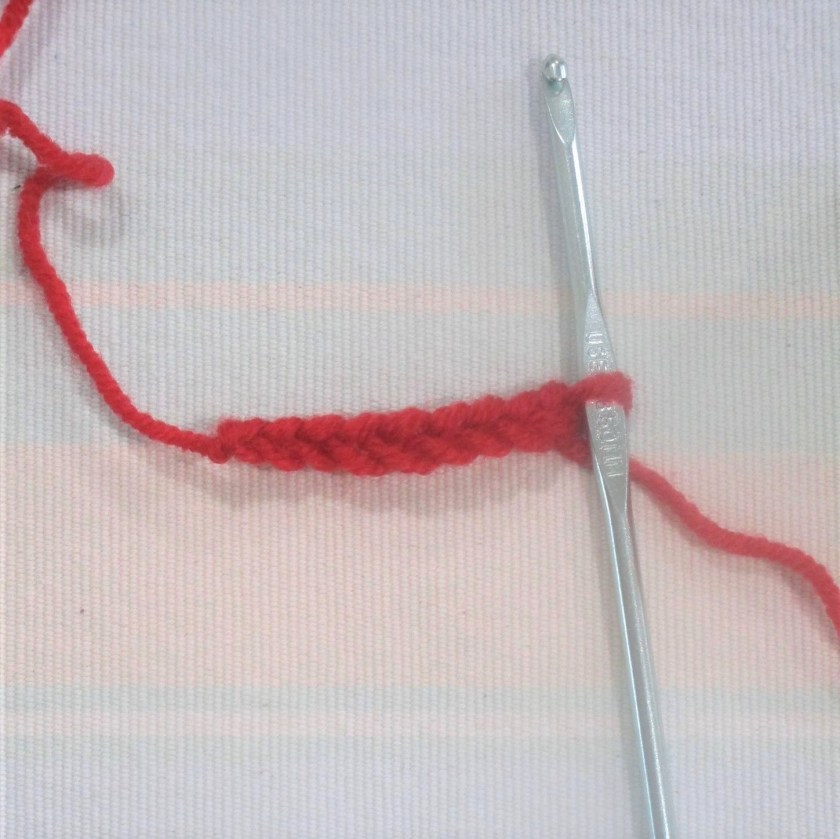
Judy, I am sure that you are a fabulous knitter and a wonderful person. But I just couldn’t get my head or my hands around this technique. All the talk of top and bottom needles, wrap the tail end of the yarn around the top and the ball end around the bottom, (being careful not to let go of your needles or wrap the yarn too tight or too loose) it was just awkward and more than a little confusing. So sorry about that. My fault entirely, I am sure. But I ask, why not start with a crochet chain?
Starting with a slip knot and using a hook close in size to your sock needles, chain the number of cast on stitches specified in your pattern plus one. In my example I chained nine stitches. If you study the image above, you will see a top set of loops and a bottom set of loops. Now replace the crochet hook with your first needle. Pick up the loop next to your needle and knit it, then pick up and knit all of the others loops along the upper edge. Rotate your work clockwise until the bottom loops are now on top and to the left of your working yarn. Using another needle, pick up and knit all of the bottom loops (Ignore the slip knot. It will be hidden inside the toe.) When you get to the end of the round your work will look like this.
Divide the stitches over four needles so that there are an equal number of stitches on each needle. Continue with your pattern.
After knitting the next round on four needles.
I know some of you are already pointing out that the toe seam created by this method seems to have purl bumps. I say have courage and knit on. Your seam will not look perfect, but it will smooth out somewhat.
After knitting all the increase rows.
And, by the way, the toe seam will be hidden inside the shoe during wearing, so no one will see. And I promise not to tell.