Completing the front of the vest didn’t take very long. I chose to use a 1 by 2 rib which matched the edge rib of the vest back. The front hem carries on the same stitch and colors of the back hem – brown with a purple stripe – to provide more unity to the garment. The neckline is a wide V and the button placket is garter stitch. The only hiccup I encountered was that the garter rows proved to be tighter than the rib rows, (naturally) and I had to throw in a few short rows to compensate. Here are the front pieces on the blocking mats.
And here is the finished vest.
I’m pleased with how it turned out. And here I am turned around.
The side seams were sewn with mattress stitch. I like that the vest shows both the serious side and the fun side of the wearer’s personality.
All yarn is from KnitPicks. Thank you to Kieran Foley and knit/lab for creating the Weaver’s Square design.
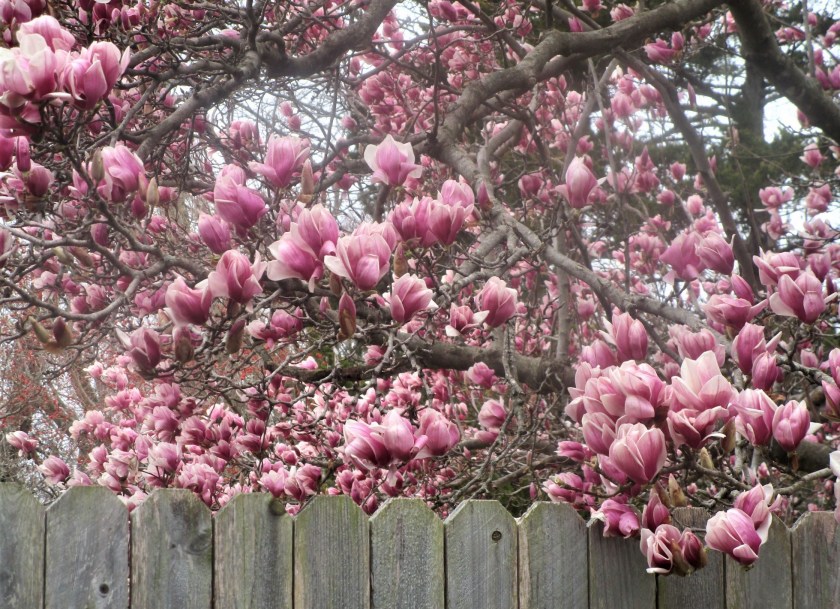
It’s a cold, drippy, soggy-ground day here. Even with the sun behind a cloud, one can revel in the beauty of Spring arriving. This is our neighbor’s tulip magnolia which overhangs the fence in our yard. It is robed in amazing color just a handful of days every year. So I put on shoes and went out into the wet to capture its moment of glory.
Yucky weather seems to give one full permission to huddle indoors and work on fiber objects. The Weaver’s Square vest is within three inches of being fully knitted. I should have a good image to post in a couple of more days.
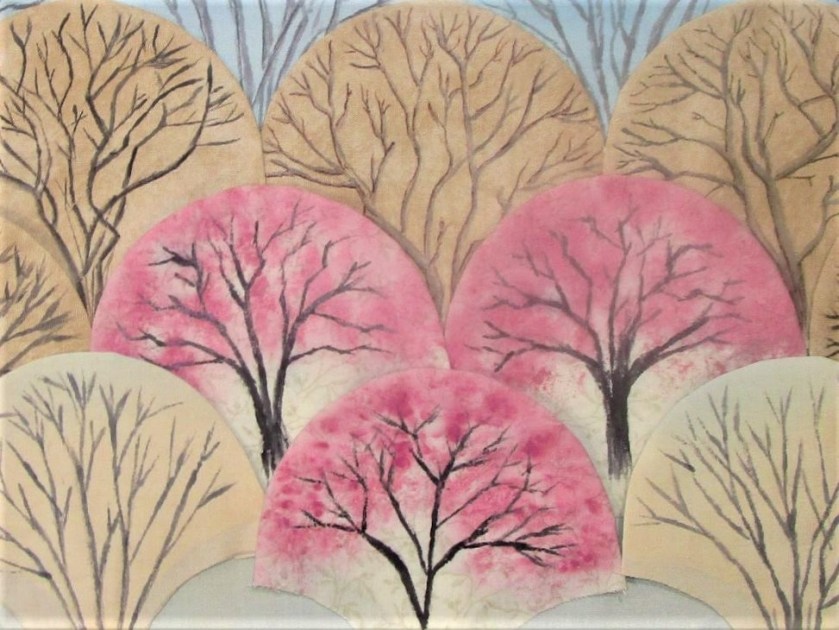
Here is a progress photo showing work on my latest fiber object, which I call “Just Trees.” I have cut and basted four rows of clam shell shapes, then painted each with a tree.
My original intent was to paint all trees without leaves. But hey, I can’t ignore the burst of color right outside my window. The three trees with black trunks and pink tops are meant to be redbuds. It is a native tree that puts on screaming pink to magenta blossoms in mid Spring – usually before any of the other hardwood trees have even leafed out.
I think three redbuds will be enough to create a nice focal point.
So far the top two rows of appliques have been stitched – by hand – into place. This step is only a little bit tricky. But patience and persistence always yield results.
With a continuation of rainy weather and the unceasing announcements of event cancellations, I may easily finish this object before next weekend.
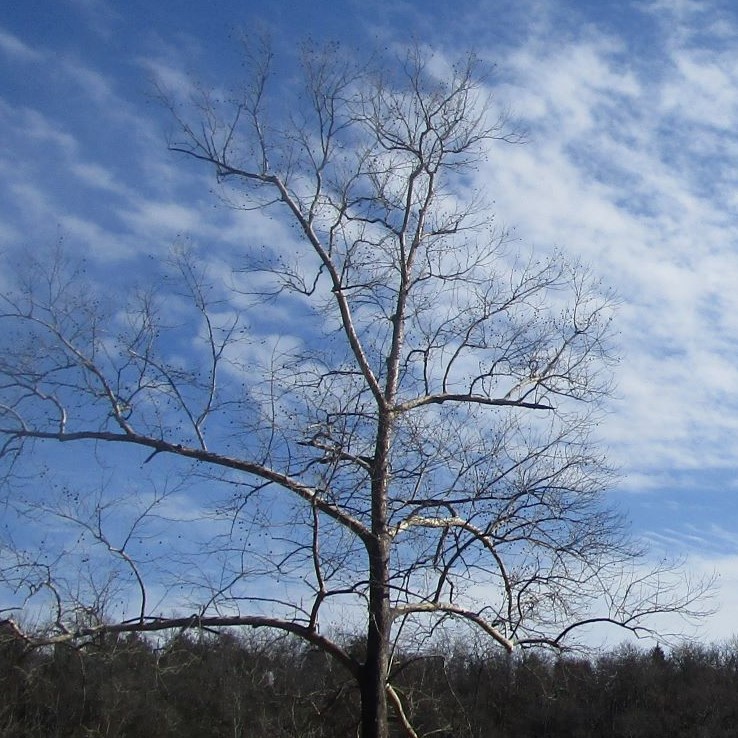
A few months ago, I had a phone conversation with my daughter while she was on a walk. As we chatted about sundry things, she said, “I just love trees. I could draw nothing but trees and never get tired of them.” I wholeheartedly agreed. In fact, I have been thinking about making a fiber object based on trees for months. To that end, I have been taking photos of the trees in their winter nakedness.
Finally I have come up with a plan and a design for the trees. And I owe it all to paper piecing with clamshells.
Non-quilters now have no clue about what I am trying to say. My apologies. But the quilters among us will recognize the context of “clamshell” and “paper piecing”. This applique shape is one of the classics. Rather than try to describe it, I direct you to Pinterest, with the instructions to search on “quilt clam shell pattern.”
Here is an example:
Cute, right? But for me, I can hardly look at this quilt WITHOUT thinking Tree Tops.
I decided to try paper piecing with clamshells after viewing a tutorial on BluPrint.com. The instructor uses the applique stitch to sew the clamshell shapes onto a tote bag.
To get started, I searched for an object with a 4 inch diameter, and then drew around it until I had several clamshells.
A roll of masking tape turned out to be the perfect size.
After photo copying this sheet four times on cardstock, I had enough pieces. Each applique will need one of these pieces of paper inserted to form the half-dome shape.
Here are four of them.
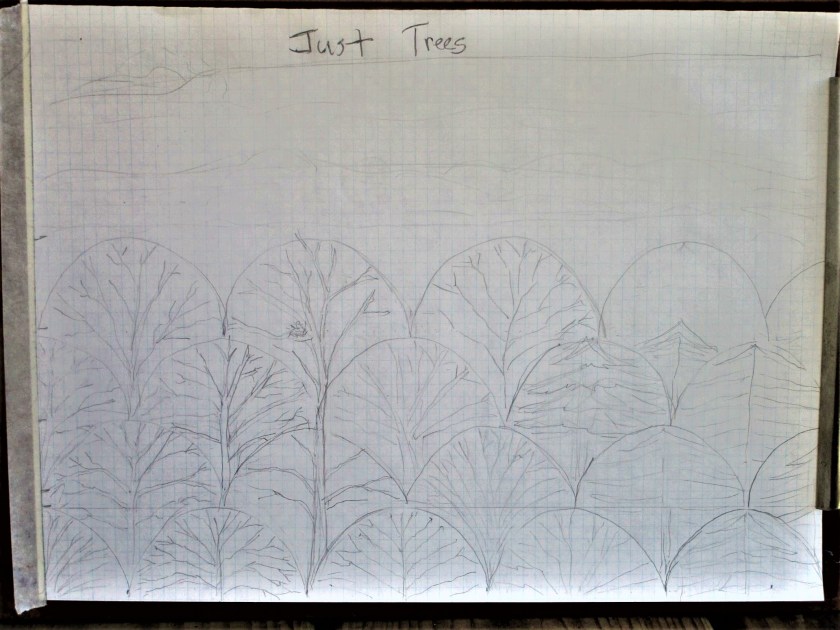
Next I made a thumbnail sketch to work out the size, applique placements and design.
Since I used pencil this image is a bit faint. So sorry.
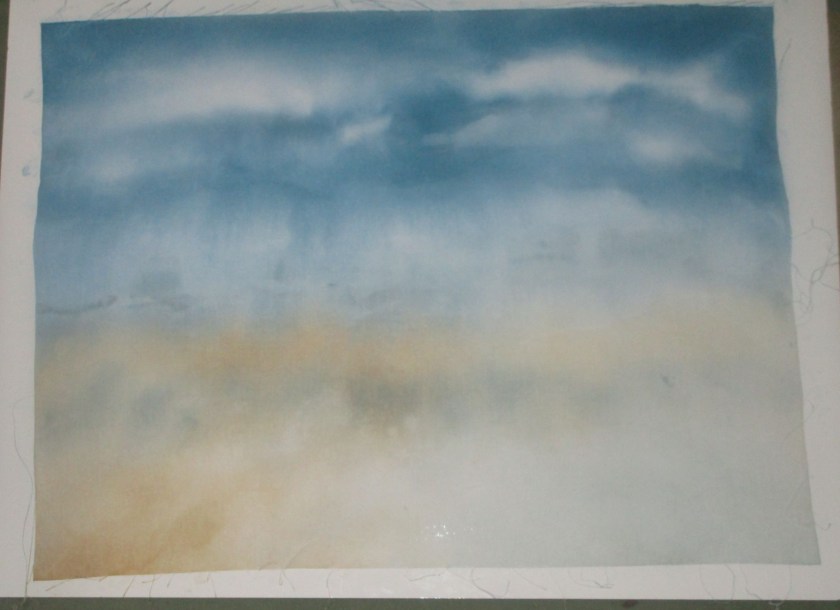
The next step was to paint the sky on white fabric. This will serve as a background and base fabric for my appliques. I used Dye-Na-Flow paint and lots of water.
At this point, I will need to practice painting the trees onto the appliques. But my mojo is flowing well, and I am excited to get this fiber object to its next stage.
Yes, friends, today marks one year since I started experimenting in the fiber arts and posting the results of my efforts. This mini quilt is my most recent object. It’s quite a fitting testimony to my adventures, because it showcases so many of the techniques that I have learned along the way. I have used fabric paint to tint the daisies, then mixed some of my hand painted fabrics with a few solids and prints to fashion the blocks. The whole thing was ditch stitched. I then hand quilted on top of the blocks with embroidery floss. Lastly, I painted enough fabric to border the whole piece. The completed work is sewn over a 16 inch square of artist canvas.
Let’s take a brief look back on how I got here.
Painting fabric with Dye-Na-Flow acrylic paint. Sun print using marbles and rice.
My enthusiasm for hand painting fabric actually started when I took a class on how to do this and then taught a class last spring. It was a big hit with all ages. I continue to experiment and now use this craft as a vital source of uniquely colored fabric.
Embroidered prayer flag.
As a girl, I embroidered my share of humdrum tea towels and pillowcase hems. But today – embroidery artists have moved this craft to new heights. I could never be that good. Or could I? I began to practice some basic stitches and decided that embroidery has a place in my work. For this project, I appliqued, embroidered and wrote with fabric markers to make five prayer flags. Here you see the Earth flag.
My first log cabin mini quilt, using hand-painted fabric
Quilting. Whoa. My mother is the most expert quilter that I know. She generously gave me her Bernina sewing machine. It seemed inevitable that I dip my toe into the venerable art of machine quilting. Any fiber artist worthy of the title needs to have some skill in putting together a quilt. And while I never expect to cover any beds with my quilts, I do see it as a robust art well suited for expressing my ideas.
Improv Mini Quilt with curved piecing.
So by mid July, I was experimenting with improvisational mini quilts. These small gems are fun to do and can be completed in a day. In this one, I have combined applique, machine quilting and embroidery. If the machine stitching looks a little bunched up, it’s because I had not found my machine’s walking foot yet. It’s now in active use.
That about sums up my thoughts on a year of fiber objects. When I began this blog, I expected to use the site simply as a personal diary. My goal was to record my work and my thoughts about the work. But then nearly 100 readers found my site. I have such gratitude to those who choose to read and to comment on my humble posts. Your interaction with me has enriched me and my craft in many ways. I thank you for your time and caring attention.
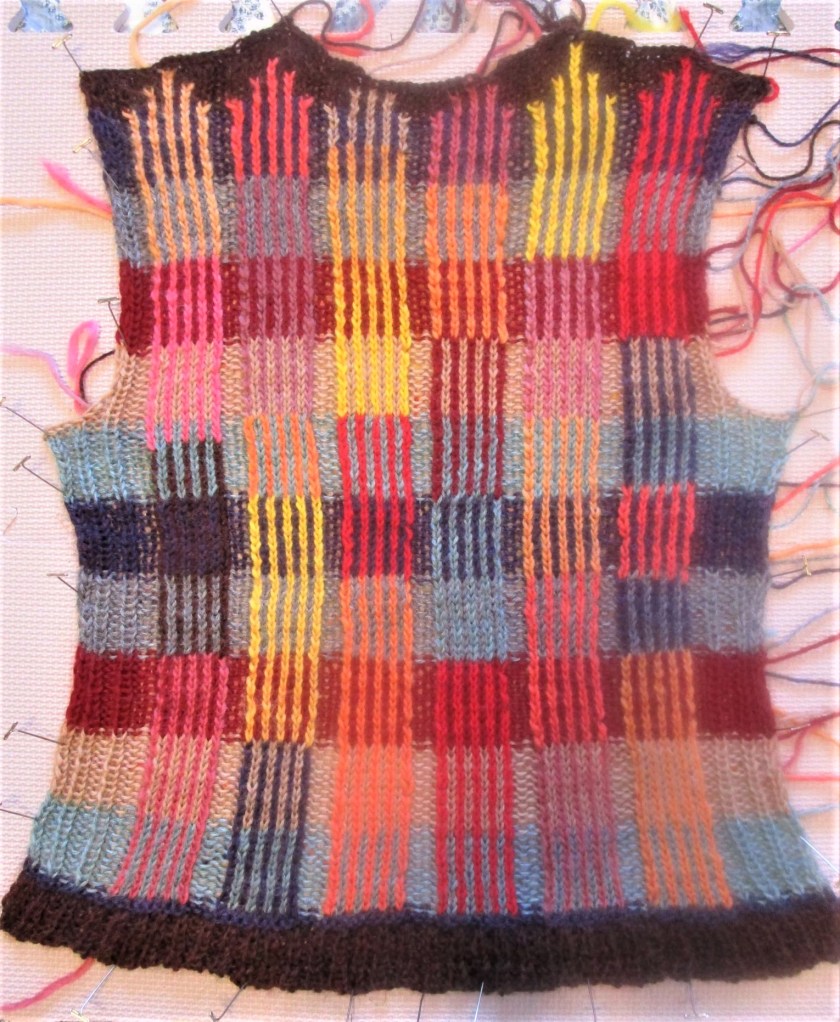
I bound off the back of the vest last night. Today it is drying on my blocking mat. Despite the fact that it looked Very Small and Narrow the whole time I was knitting, it turned out to match the gauge of my blocked swatch. Hooray! As all knitters will surmise by looking at the photo, there are a gazillion ends to weave in. That will occupy me for a few hours.
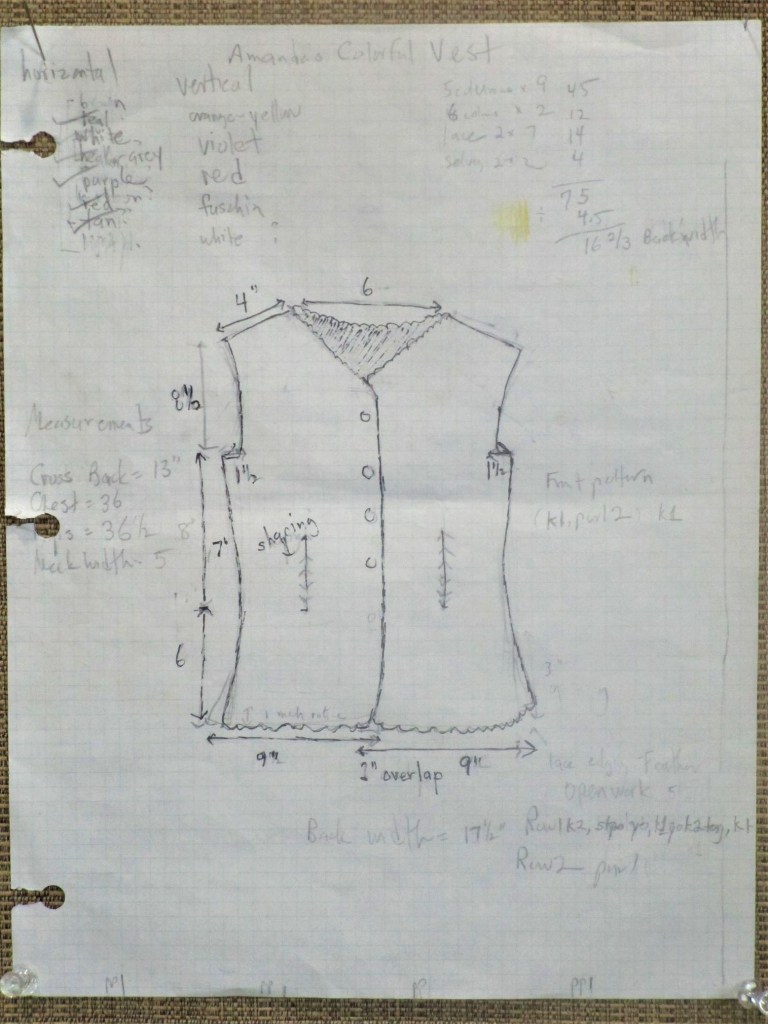
Here is the schematic I drew for the making the vest front.
I will be using a superwash Peruvian wool yarn from Knit Picks called Merlot Heather. To make the vest fit close to the body, the stitch pattern will be a broken rib stitch and there will be waist shaping decrease-increase stitches near the natural waist. Buttons?