This is the little weaving that I had started as an example for my fiber arts students. A few weeks ago, I was cataloging a list of my unfinished objects. Spying it lying around, I realized that I needed to count it as one of the dirty dozen UFOs.
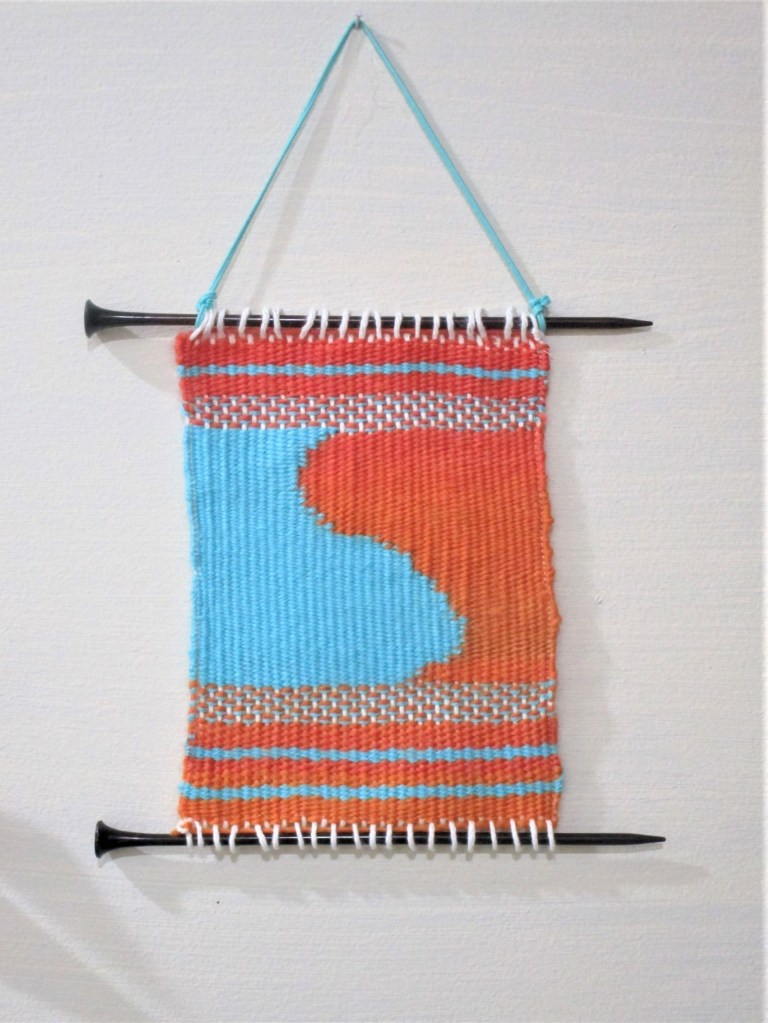
Today I can announce that this weaving has moved to the finished pile. After working to the top of the warp, I cut off the yarn and worked the loose ends into the back of the weaving. There was still a lot of looseness on all four edges of the piece. I decided to machine stitch around the sides. After that, I slipped the top and bottom loops onto a pair of knitting needles and considered it done.
I call it Blue-Orange Duet.
Image showing machine finished edges.
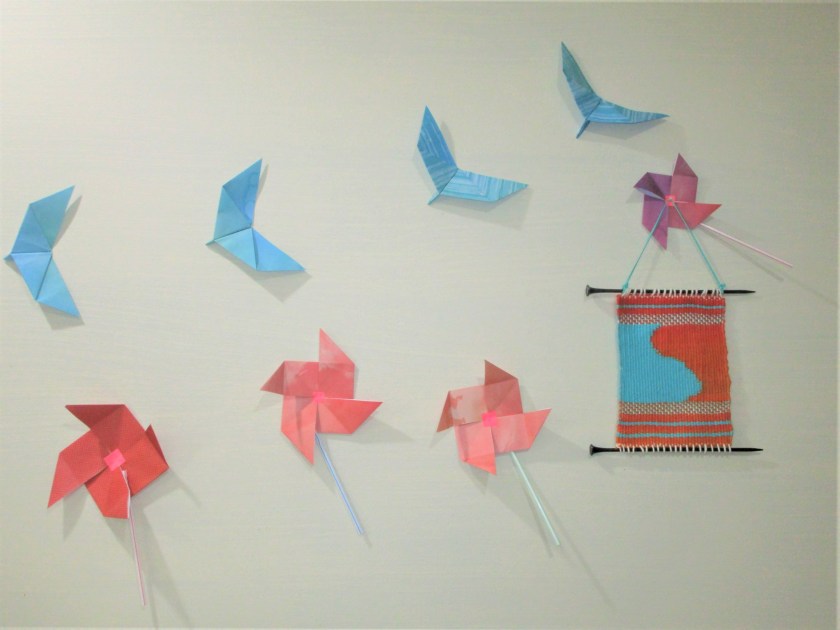
Mulling about what to do with it…….. Hm, I noticed that the weaving’s colors worked very nicely with my origami installation piece on the east wall of the studio.
It’s been a while since I wrote about the state of “stuckness” For me, this means that the project is not flowing very well. Over the last few days, I have been toying with a technique called “Stitch and Flip”. I learned it from a BluPrint.com class on how to piece improvisationally. The instructor is Jacquie Gering.
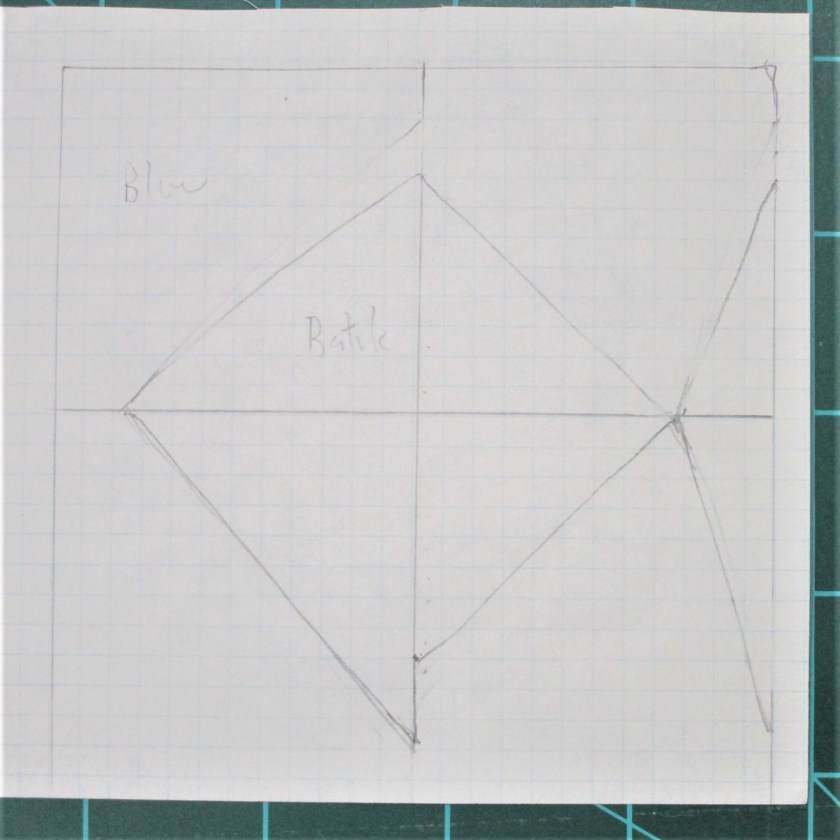
Basically, you sew a piece of contrasting fabric across the corner of a square, then flip the piece over to cover the corner. You can cover one, two, three or all four corners of the square. I was struck by how much the finished squares resembled little fish. This drove my desire to give it a try. Here is a sketch of what I envision:
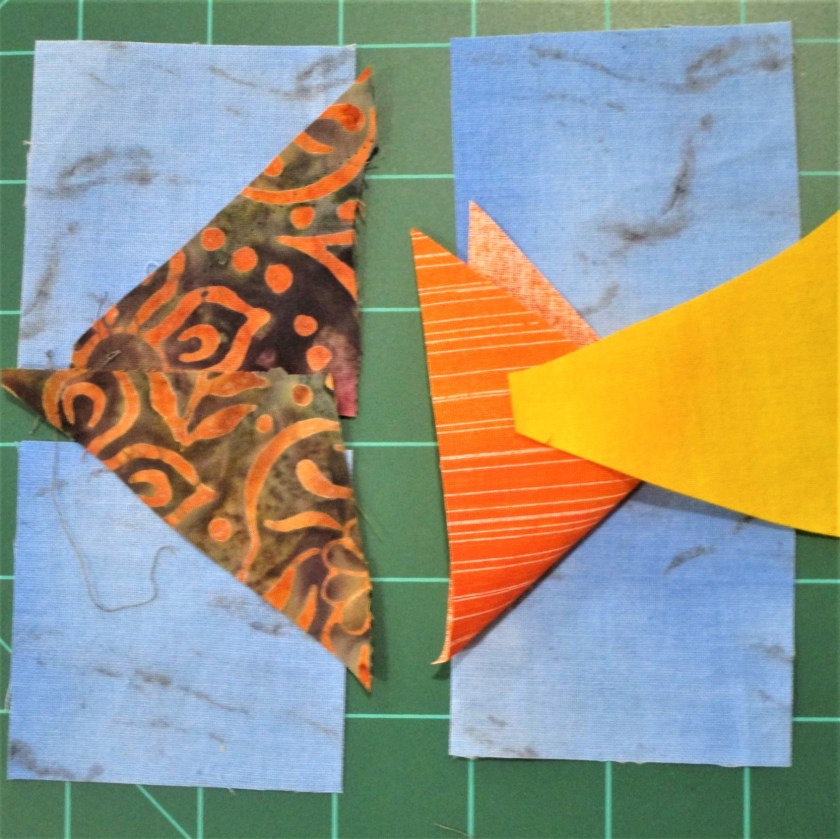
And here are the fabrics I have chosen. The batik is the front half of the fish sewn over corners of two squares. On two more squares I am sewing triangles to represent the belly and tail of the fish.
Then the whole block is assembled. A four by one inch rectangle finishes the block.
I had hoped to easily make a several “schools” of these little fishes, with five or six in each block, ultimately creating an underwater scene on a lap quilt. Cute, Fun – right? But somehow I kept screwing up the assembling. Much ripping, muttering and re-sewing ensued. My completed blocks are not lining up right! I can’t seem to square them properly! In addition, I don’t have enough background fabric to proceed! And of course, the fabric I need is in Hobby Lobby, which is closed indefinitely!!!
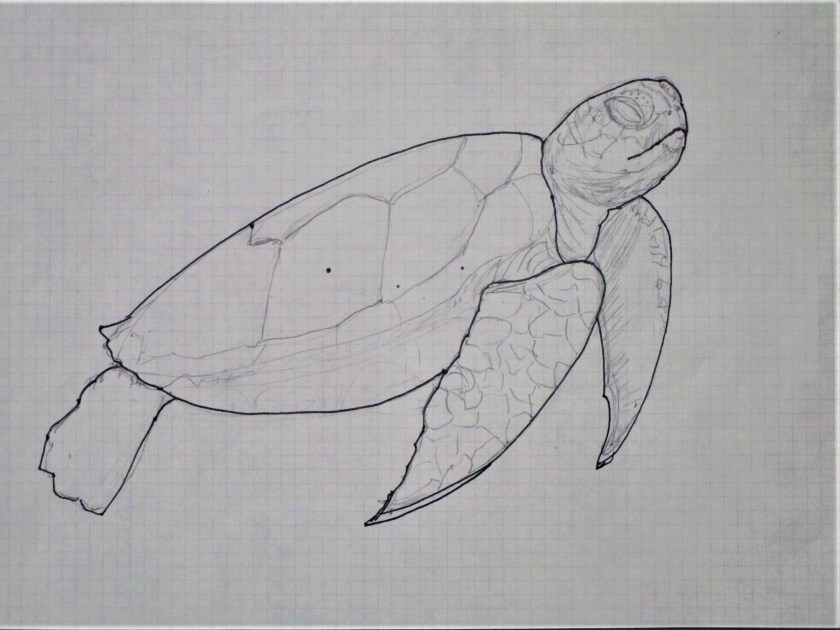
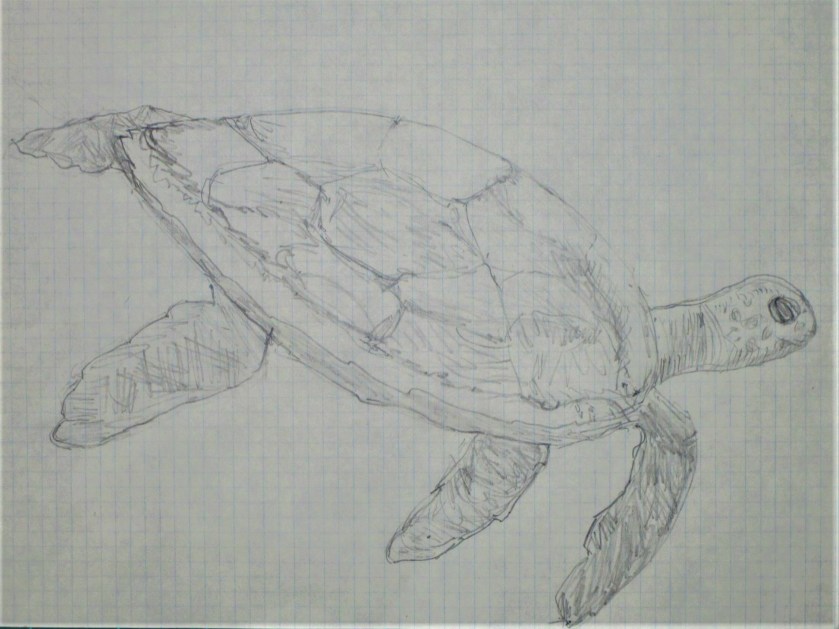
So this project is in limbo. I did sketch a few sea turtles, which might get included in this project, if I can figure out how to get them there.
So sadly, I will set the fish aside while I ruminate on the process. It won’t be the first or last time that I got stuck in the middle. Meanwhile my paint order from Dharma Trading has arrived. So I will play with paint until the lightbulb goes off in my brain.
Keeping with my self-imposed deadline, I managed to finish off another UFO. This is the be-ribboned and beaded water bottle carrier that I started over five years ago.
The part that had stumped me was how to finish out the top edge and strap. I found a solution by Melanie Smith on Ravelry. She simply divided the stitches in half, working each half in stockinette, gradually decreasing until five stitches remained. Then she worked I-cord about 15 inches each side and grafted the sides together.
I tried to make the strap long enough to sling it over a shoulder. Here I show it knotted so it can be carried over the wrist. The yarn is a bamboo blend purchased from the hobby store. Hopefully it will prove strong enough. I worked the middle section side-ways, knitting a metallic ribbon in. The top section is beaded.
This is a standard 16 oz. bottle. The piece is actually big enough to hold a taller bottle.
Sometimes Life sends you a gift. Late last week, my husband and I decided it was time to go camping. We needed the therapy of the great outdoors. He checked online and discovered that the fishing lakes in Kansas are still open to the public. After reviewing the weather forecast, we chose Tuesday, April 7 for our outing. The weather would be dry and the temperatures mild.
He is an avid fly fisherman and hadn’t dropped a fly in the water for ten months. I don’t care for fishing, preferring to sit at the lake’s edge and enjoy more passive activities. I brought a book, my sketching supplies and a pile of tangled yarn to straighten out.
We arrived around eleven a.m. at our favorite Kansas lake. At that time, there was almost no one else there. It was glorious – the sun glinting on the water, the fresh breeze blowing off the water and the trees just barely showing leaves. He was off like a shot in his float tube and I got out my sketch book.
Willow at Lake Montgomery April 2020Sycamore tree at water’s edgeBluebirds nesting in hollow branch
This is the first outdoor sketching I have done since getting interested in drawing last year. I found the experience very relaxing. The goal of the plein-air sketch is just to capture some basic information about what you see. It’s after you bring the sketches back to your studio that you can turn them into more detailed drawings. These bluebirds intrigued me. I had never seen a pair as such close range, and never seen them nesting in nature.
Here’s the yarn I untangled. It used to be a cabled glove in process. I decided to abandon the project completely and start over with the green wool.
After cooking and eating dinner, the sun was beginning to set. Eager to see it up close we strolled along the lakeshore toward the western part of the lake. Bill took still images and made a few videos of the gorgeous sky and its reflection in the water. Once the show was over, we turned and proceeded back along the shore, now looking east.
We were astonished at what happened next. The full moon, now rising just below tree tops, sliding up through the gathering mist of the lake, and soon in full view, was huge. With the fading of the sun, the sky turned from blue to indigo to deep purple. The moon changed from pink to orange to gold, and then paled out to white.
What a lucky surprise, we said to each other. We hadn’t been expecting a full moon, and certainly not one of such beauty. Returning to the campsite, he built up the fire and we sat quietly waiting for night to fall. By around nine o’clock, the light of the moon was so intense we could still discern colors. The moon shadows of not only our bodies but also of everything around us were crisply outlined on the ground.
We retired to bed. The moonlight’s glow penetrated the tent walls. It never did get dark that night. And it certainly never got quiet. It seems that the full moon in April is the time specified by Nature for every frog in the county to go a-courting. I have never heard such a raucous sound coming from the lake. It out-shouted the cattle lowing, the coyotes barking and the owls whooing. I called them laughing frogs, but really it sounded more like the din of a sports bar during the biggest game of the year.
Despite the noise, we slept. We woke just in time to see the sun rise over the still, glassy lake. Another moment that will be etched deeply into our collective memories.
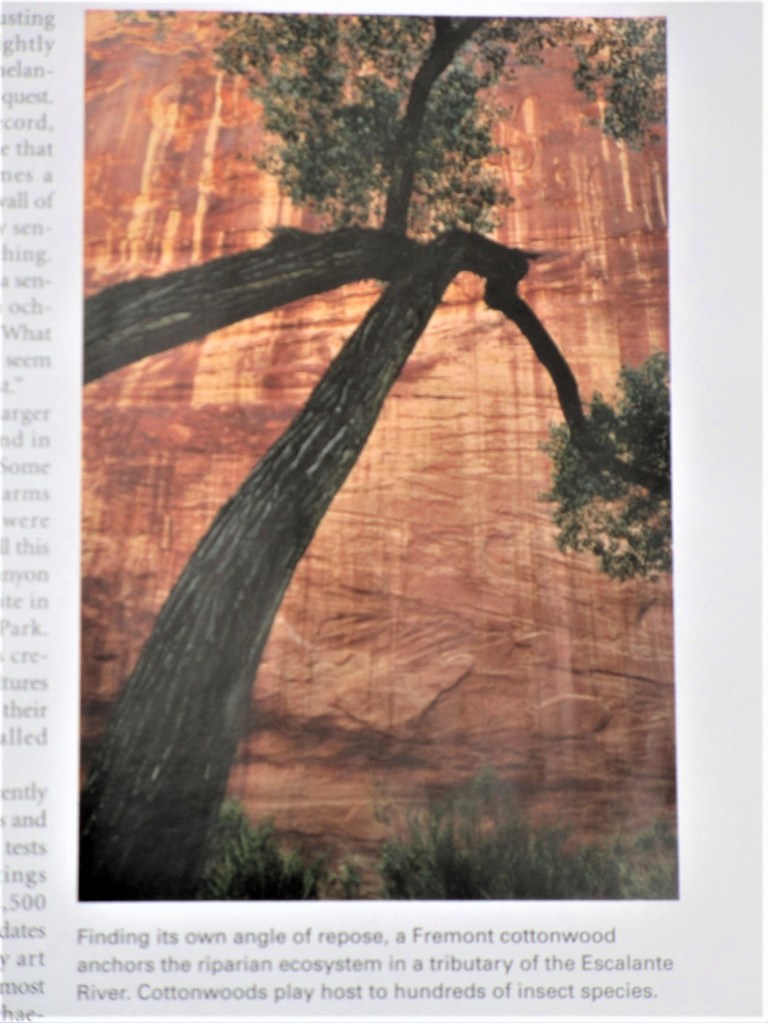
While organizing the reading material in my studio, I came across a National Geographic magazine from 2007 that I had saved for some reason. There were no bookmarks or post-it notes attached. So I asked myself: why did this issue end up here? The only thing to do is thumb through it and sees what jumps out. I stopped at page 147.
The photographer captured a tortured cottonwood on the Colorado Plateau, which is an area that sprawls across four states and contains a vast expanse of sedimentary rock. The plateau is carved by the Colorado and other rivers. This particular cottonwood is on the banks of the Escalante River in Utah. The dramatic sandstone cliff behind the tree forms a warm backdrop to the massive black branches. It’s as if the tree is embracing the cliff. I knew right away that I wanted to paint it.
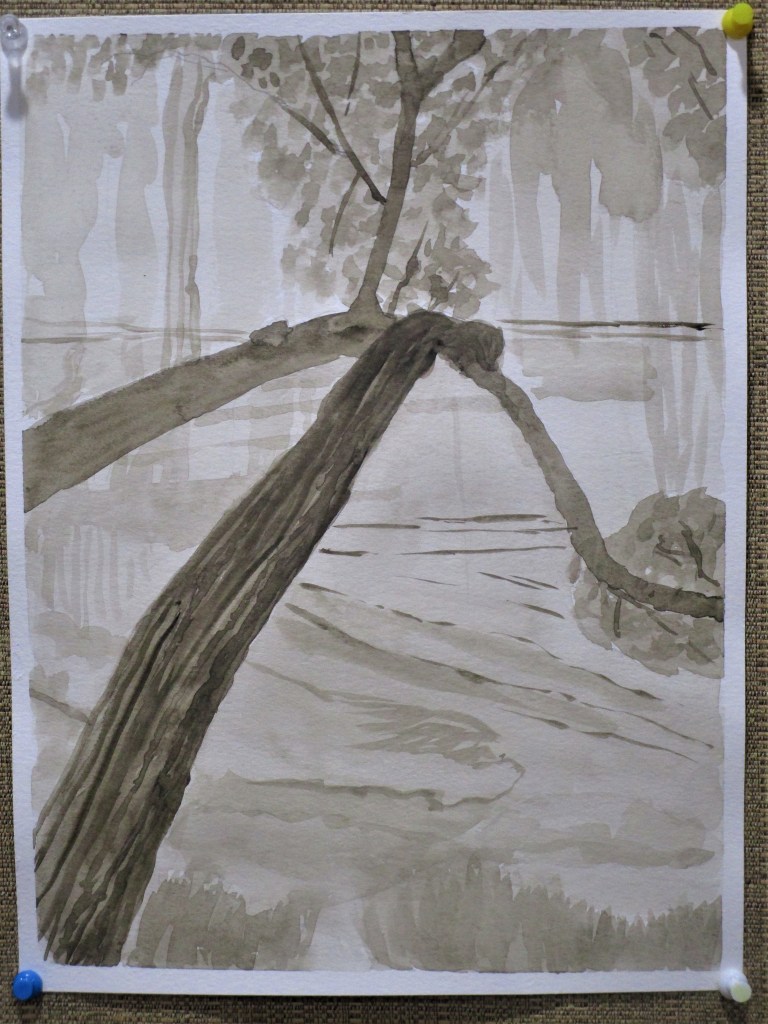
Instead of just jumping in and fooling around with paint and brushes, I studied the subject a little. Following the classic approach to painting, I first made a value study. This involves working out the light-to-dark areas of the image in a monotone. I had no gray paint, so I chose to paint the value study in sepia hues.
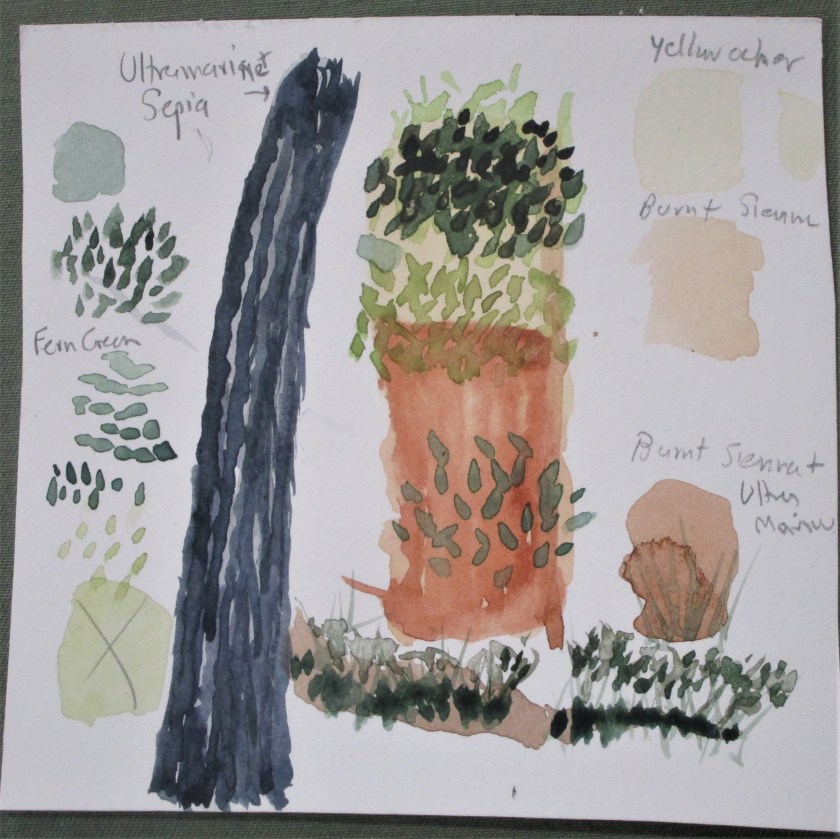
That seemed to go well. I was satisfied with this study. Next I worked out my palette. I had a little fun, making my paint swatches into parts and pieces of the image.
The palette will be yellow ocher, burnt sienna, sepia brown, ultramarine blue and fern green. My gestural study, using the selected palette, was next. I don’t have a photograph of this step. What I learned from that step was that the stone cliff is composed entirely of warm hues. So I chose to paint the tree in cool hues. As I worked through my studies, it became clear that this subject is all about the focal point. Having realized this, I knew it would be my task to eliminate any parts of the background that distracted.
After sketching in the outline of the tree branches, I applied an overall wash, and then laid down some burnt sienna on the cliff face.
The cottonwood looks ghostly. Focal point is where the branches intersect.
A landscape watercolor can take several steps to paint. I ended up painting four different layers, each of which needed drying time before I could proceed. Here is the painting after the second and third layers were complete.
I let it dry overnight. The next day I worked in the final details, adding another layer of darker leaves, some shading and shadows on the tree trunk, and some fine lines in burnt sienna on the cliff face. I tried to emphasize the detail lines that directed the eye to the focal point. After these parts dried, I glazed the whole background with a thin layer of yellow ocher and finally worked some textural lines onto the trunk.
Finished Painting. Cottonwood on the Escalante River
The finished painting is definitely better than I had expected it to be. The only fly in my ointment is that I didn’t use artists’ quality paper. So there is some buckling to deal with. Does anyone have recommendations on how to flatten the paper out?